Boat restoration 1989 Charger 1850

chevymaher

Commander
Joined
Mar 29, 2017
Messages
2,915
Tell your neighbor to put the crack pipe down and back away from the boat. Replace the transom and be done with it. Yea leave one of the most important parts out after doing all this work. The part that in a few years will be bad and all this work was for not. You got to do it again to do the transom. Or have a patch work POS boat. Just do it and have a new boat.

Take more measurements than nasa. Take a bajillion pictures. Measure it all the next day and write it all down. Day 3 measure it all and write it down. Now you think I am being funny. When you go to put it together you will even after 3 attempts need a measurement you forgot. But doing it 3 times you may be able to extrapolate it from other measurements you did take. And the white tabbing marks on the hull are your friend. They mark deck height stringer placement. You know things you forgot to measure.

Not trying to be a Richard Breath. Just psyching you up to get as much as you can. You will be thanking me in your mind when your putting it back together.

When the waves hit your bow it is all worth it. Like tomorrow for me. No rain finally.
 

ChargerMan1

Petty Officer 3rd Class
Joined
Jul 12, 2020
Messages
76
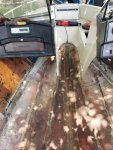
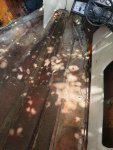
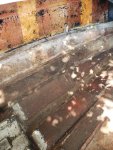
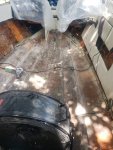
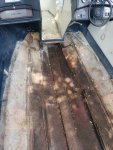
OK, so done cutting everything now I get to do the fun part of grinding and sanding. Can anyone give me pointers on doing this? What kind of setup to make this safe etc. What should I use to grind/sand etc. What I should wear. I found some rain gear from lowes because they didnt have what I was needing. So figured I would wear that. I have good cannister mask that I bought that I will use for this and when I'm doing the resin etc.
 

Attachments

  • 20200724_141339_resize_78.jpg
    20200724_141339_resize_78.jpg
    1.4 MB · Views: 0
  • 20200724_141334_resize_2.jpg
    20200724_141334_resize_2.jpg
    1.4 MB · Views: 0
  • 20200724_141330_resize_11.jpg
    20200724_141330_resize_11.jpg
    1.6 MB · Views: 0

Original Thor

Seaman
Joined
Jun 11, 2020
Messages
61
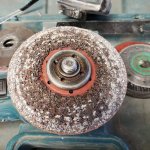
If you can find one of these they work awesome and will save you alot of money on flapper disks. There made by Hilti.

Tyvek suit a really good respirator vacuum air compressor and cold showers. When using the grinder set the vacuum up so it sucks up the dust. Will be a life saver. Air compressor and blow chuck to blow yourself off.
 

Attachments

  • photo335386.jpg
    photo335386.jpg
    312.7 KB · Views: 0
  • photo335387.jpg
    photo335387.jpg
    284 KB · Views: 0

buxmj

Petty Officer 1st Class
Joined
Jun 9, 2018
Messages
294
Good luck with the grinding, it sucks but is such a necessary step. If you look at my thread from today, 65 Lyn Craft Seabreeze, I wrote and posted a pic of what I wore and used for PPE, it worked well for me.
 

ChargerMan1

Petty Officer 3rd Class
Joined
Jul 12, 2020
Messages
76
OK, so grinding/sanding done. I left the edges for measurements. So, how do I do these measurements correctly?
 

Attachments

  • 20200730_145030_resize_91.jpg
    20200730_145030_resize_91.jpg
    1.4 MB · Views: 0

kcassells

Fleet Admiral
Joined
Oct 16, 2012
Messages
8,600
Stringers and bulkheads;
I used cardboard or foam for templates. kept them a little higher than floor. That way I could trim down to correct heights.
Then onto the Bulkheads. All above for fit. Then onto pb with spacers under all wood structure to keep the hard spots away.
 

ChargerMan1

Petty Officer 3rd Class
Joined
Jul 12, 2020
Messages
76
Stringers and bulkheads;
I used cardboard or foam for templates. kept them a little higher than floor. That way I could trim down to correct heights.
Then onto the Bulkheads. All above for fit. Then onto pb with spacers under all wood structure to keep the hard spots away.

Spacers? I thought you just put PL on floor then place the stringers on top because you don't want it to touch the floor because it flexes
 

kcassells

Fleet Admiral
Joined
Oct 16, 2012
Messages
8,600
To me pl blows but thats me. NO you need a 1/4" spacer at the least the length of the structure getting applied to the hull.It prohibits the "Hard" contact of the ply to the hull. There is tremendous amounts of boom and shake. Creates spider cracking etc.
As a note pl definitely has some great applications. When fiberglassing with pl you need to let the pl "GAS OFF" for a week or 2 before you apply glass. Or you will get more of your friends.....................BUBBLES from the gas.
On another note I glassed most of my stringers and bulkheads full height on a work table before I installed them then did the tabbing x2.
 

ChargerMan1

Petty Officer 3rd Class
Joined
Jul 12, 2020
Messages
76
To me pl blows but thats me. NO you need a 1/4" spacer at the least the length of the structure getting applied to the hull.It prohibits the "Hard" contact of the ply to the hull. There is tremendous amounts of boom and shake. Creates spider cracking etc.
As a note pl definitely has some great applications. When fiberglassing with pl you need to let the pl "GAS OFF" for a week or 2 before you apply glass. Or you will get more of your friends.....................BUBBLES from the gas.
On another note I glassed most of my stringers and bulkheads full height on a work table before I installed them then did the tabbing x2.

Do you have a picture or diagram of 2hat these spacers look like? Because note sure what you mean
 

ChargerMan1

Petty Officer 3rd Class
Joined
Jul 12, 2020
Messages
76
OK watched Friscoboater's video of putting stringers in. I understand now what you are talking about. But he used 1/2 inch spacers instead of 1/4
 

kcassells

Fleet Admiral
Joined
Oct 16, 2012
Messages
8,600
like I said.....this is not an earth shattering tech. But glad you did the research. It's a nightmare after al thehard work your doing if stress cracks show up down the line.
 

ChargerMan1

Petty Officer 3rd Class
Joined
Jul 12, 2020
Messages
76
So quick question as I'm contemplating where these stringers need to be in reference to the indent lines that run from bow to stern (sorry don't know actual term) but when I tore into the boat there was this board that ran from front of fuel tank bulkhead to bow. And the boards were cut about 2 1/2 feet in length all the way down. Do I need to put this back in? Or can I leave out like a normal boat?
 

Attachments

  • 20200730_145030_resize_91.jpg
    20200730_145030_resize_91.jpg
    1.4 MB · Views: 0
  • IMG_20200714_150840_02_resize_26.jpg
    IMG_20200714_150840_02_resize_26.jpg
    1.6 MB · Views: 0

kcassells

Fleet Admiral
Joined
Oct 16, 2012
Messages
8,600
Those ridges are called strakes. Some guys fill them with PB and set the stringers on that area. I did that. Less bs to lay stringer.
On another note I have no clue what your talking about to your second question. No pic no clue.
 

ChargerMan1

Petty Officer 3rd Class
Joined
Jul 12, 2020
Messages
76
Ok so working on the engine mount. It used to be 4x4s. And I was told on here to build it like it was. So my question is, I know I should put the foam between the stringers and hull. Do I do that same for the engine mount?
 
Top