Start of My Project. 1991 Starcraft Islander

JimbC

Chief Petty Officer
Joined
Jun 30, 2009
Messages
456
Re: Start of My Project. 1991 Starcraft Islander

timfives no need to cut or bend anything just remove enough rivets so it will lift out of the way. All that stuff is held on by regular rivets and can be easily replaced. Check the tips and tricks thread it's stickied in the Starcraft forum
http://forums.iboats.com/showthread.php?t=342521
 

timfives

Petty Officer 1st Class
Joined
Jul 30, 2009
Messages
382
Re: Start of My Project. 1991 Starcraft Islander

Hey Tim good to hear about the gas tank. Several people here have cut off the 1" piece of aluminum I believe the end cap should cover it.

If you look at my rest thread, I used a 10" ginsu knife to slide into the drainage crevise (?). I worked it back and forth..sprayed it out, back and forth..more sparaying. Alot of rivets and screws as well as debris like mulch came out.

Keep up the good work!

Cool, can you send me a link to your restore thread, that would be fantastic!

thanks

tim
 

timfives

Petty Officer 1st Class
Joined
Jul 30, 2009
Messages
382
Re: Start of My Project. 1991 Starcraft Islander

timfives no need to cut or bend anything just remove enough rivets so it will lift out of the way. All that stuff is held on by regular rivets and can be easily replaced. Check the tips and tricks thread it's stickied in the Starcraft forum
http://forums.iboats.com/showthread.php?t=342521

Thanks! now just to recharge the batteries on the drill and pop more rivets.

I appreciate the heads up on that!

Tim
 

PaulyV

Chief Petty Officer
Joined
Sep 7, 2008
Messages
525
Re: Start of My Project. 1991 Starcraft Islander

Tim see the thread at the bottom.
 

timfives

Petty Officer 1st Class
Joined
Jul 30, 2009
Messages
382
Re: Start of My Project. 1991 Starcraft Islander

Tim see the thread at the bottom.

thanks! the only difference is that your ribs have a little passage way through them. i think i may drill a hole to get the same effect.

I don't know why i'm being so anal about not wanting any water to sit in her? Perhaps its the fact that it is rotten to the core :D

Thanks for the note on the thread!

Now if only i could find a damn garage to work on this thing, i'd be all set.

T
 

Azonic

Petty Officer 1st Class
Joined
Aug 18, 2009
Messages
279
Re: Start of My Project. 1991 Starcraft Islander

I cut the tab off of that piece on the tansom to get mine out..

and the drainage issue..

just clean them out...

mine do not drain as expected on all of them...
some do great others are clogged..

Hanger, old broken hack saw blade, etc...
 

evildocrsx

Petty Officer 1st Class
Joined
Aug 1, 2009
Messages
244
Re: Start of My Project. 1991 Starcraft Islander

More Questions,

With regards to water draining to the bilge. It seems that my islander is designed to collect water versus shed it to the back of the boat.

IMG_0094.jpg


and

IMG_0093.jpg


Any thoughts on how to get a path for the water to the back of the boat?

Thanks

Tim

I just used a knife and poked around at the passages. Then I used compressed air and a shop vac to clean most of it.
 

timfives

Petty Officer 1st Class
Joined
Jul 30, 2009
Messages
382
Re: Start of My Project. 1991 Starcraft Islander

Well it is the first week of March and the snow is mostly gone here in PA. So with the ever motivating EZ as a neighbor I've started to make strides to get my project back on track, and ready for the water.

This week i had the engine and outdrive pulled so i can do the Transom. Wish me luck on that. I'll be posting some pictures later on my progress.

Also I need some advice on mounting a livewell. My original thought was to mount mine in the floor, but i've read some stories where they overflow if below the water line. Anyone have any experience with that?

Well Gentleman let the restoration start (or continue!)

T
 

timfives

Petty Officer 1st Class
Joined
Jul 30, 2009
Messages
382
Re: Start of My Project. 1991 Starcraft Islander

Pictures will be coming in the next post, So far this weekend, i've been able to get the following done.

  • Removed old transom
  • Templated New Transom
  • DriFit transom
  • Preping for epoxy

Tonight i'm going to try to get the first coat of epoxy on the transom.


Question, how have people sealed the screws that attach the transom to the aluminum hull?

Thanks

T
 

HopeSheFloats

Lieutenant Commander
Joined
Jun 12, 2009
Messages
1,674
Re: Start of My Project. 1991 Starcraft Islander

Hey Tim, just caught this thread, makes me wonder now if my ship ever came in and if so how'd I miss it as well...Cool boat and already some nice work gains being done...looking good! :cool:
 

timfives

Petty Officer 1st Class
Joined
Jul 30, 2009
Messages
382
Re: Start of My Project. 1991 Starcraft Islander

So here are some pics.

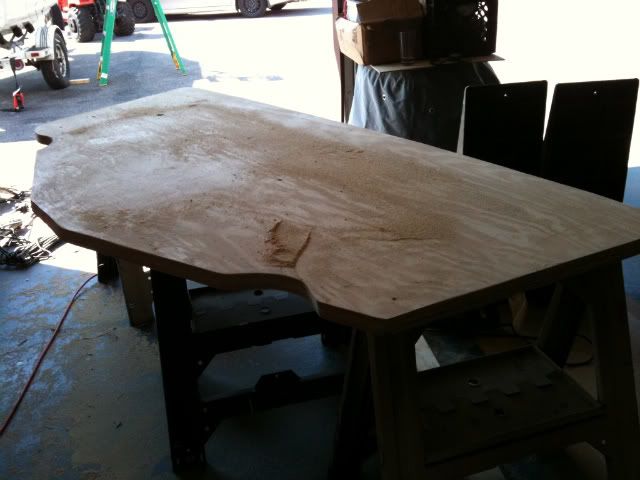
The hardest part was getting the old wood out. There was just enough poured in foam that kept it stuck. Since there wasn't alot of area to wrap a strap around, except for the middle, I took a bunch of wood screws and screwed my 2 inch wide tow strap to the right had side of the transom. Attached the strap to the bucket and yanked a couple of times.

After a couple of attempts where i lifted the boat off the trailer she finally came out with a bang. seems the boat is no worse for wear.


So after that was out, I set about fabricating the new one.

I took 2 pieces of plywood and screwed them together. I used regular deck screws around the edges to keep the pieces from moving while i cut them out. Laid the old transom on top and traced.

Then cut out the new one.

IMG_0269-1.jpg
"]


I transfered the screws to the transom to keep it one piece, then after a lot of sanding it was ready for a dry fit.

There is always a time where you wish you had a bigger machine, getting the old wood out was one of those times, and this was the other.

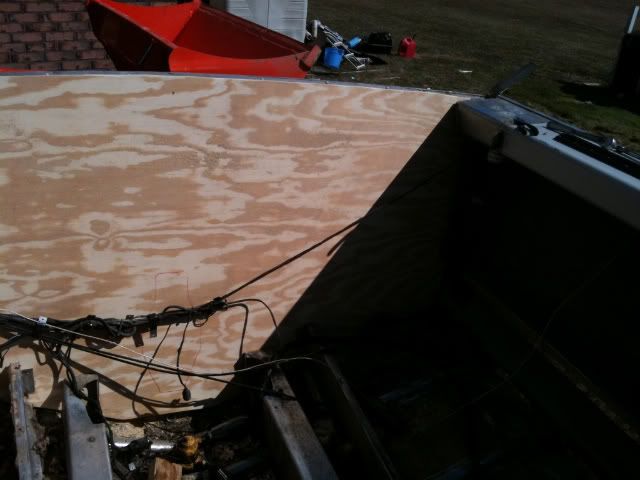
That being said, i got it in.

IMG_0273-1.jpg


I should have taken a better picture, but all I can say, is it fit like a GLOVE.

IMG_0276-1.jpg
"

So after looking at it for awhile and admiring my work. I drilled four holes and set in 4 screws through the transom to hold it all in place. ( Anybody have any thoughts on sealing the screws in the transom?)

With the 4 bolts in place I traced the outdrive cut out, and removed it from the boat.

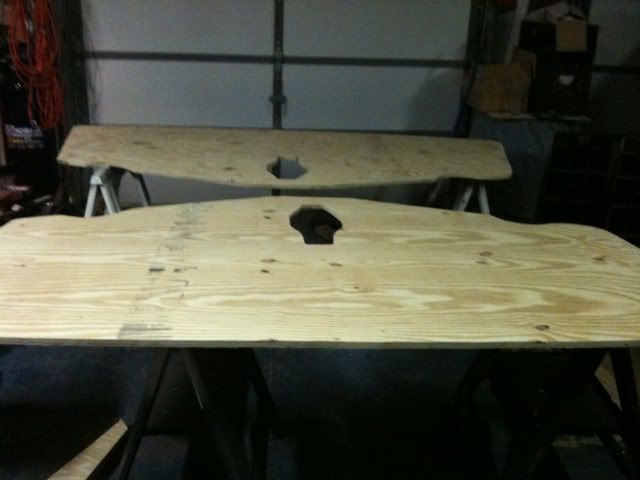
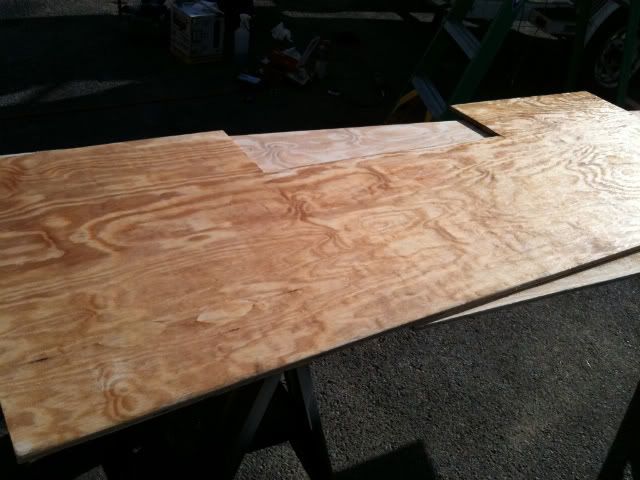
I cut out the outdrive, and then this evening separated the two pieces and put a coating of West Systems epoxy on the internal sides of the plywood. Once that cures, i'll slather on a second coat, and bring them together again. I figure a bunch of deck screws ought to be enough to bind it all together. Then i'll epoxy the outside.

I still need to cut out the wood for the inner transom plate, and i have the bright idea of adding an additional layer of plywood where my kicker mount is going to go, just to give it some more stability.


Here it is waiting for the epoxy

IMG_0277-1.jpg


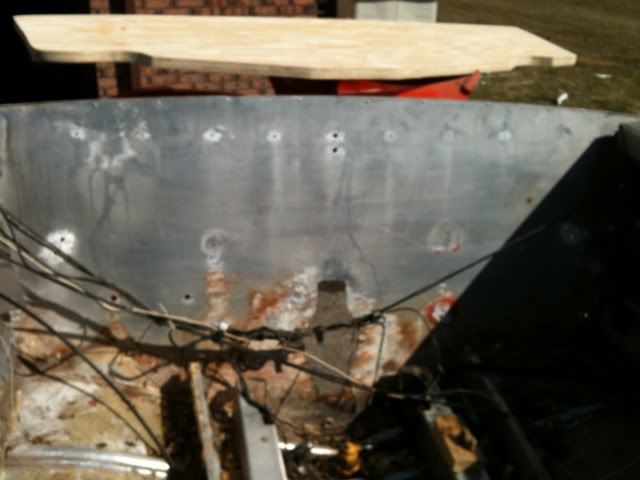
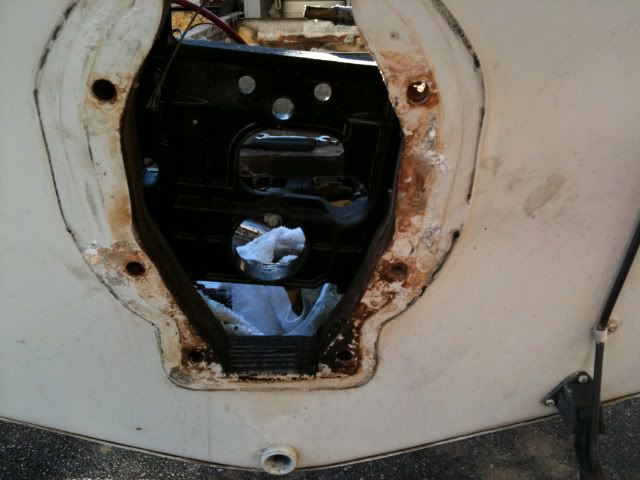
Tomorrow if i can work on it, i have to fix the corrosion on the transom. My plan is to clean it with a wire wheel, and then skim over it with JB-Weld, (other thoughts are welcome)

Then paint it.

IMG_0266-1.jpg
"]

IMG_0267.jpg
"]


The good news is, there is still a lot of metal, so there isn't any major reconstruction necessary, just some cleaning, minor filling, and paint. I'm also thinking of painting the inside of the aluminum, perhaps i'm being a bit anal, but the rot and the corrosion have irritated me to no end.

Tomorrow i'll take a picture of all the non-stainless hardware that was used in the transom. A wonder it floated at all.

cheers
T
 

sprintst

Commander
Joined
Apr 18, 2009
Messages
2,066
Re: Start of My Project. 1991 Starcraft Islander

Nice transom work. I'm thinking the same about adding an extra half inch sheet almost all the way across for extra support for the kicker bracket.

I'll check to see how long the bolts are :)
 

jasoutside

Supreme Mariner
Joined
Dec 20, 2009
Messages
13,269
Re: Start of My Project. 1991 Starcraft Islander

Awesome progress Tim, you cranked a bunch out in short order!!
 

ezmobee

Supreme Mariner
Joined
Mar 26, 2007
Messages
23,767
Re: Start of My Project. 1991 Starcraft Islander

Looks good Tim. I think now I know why you asked me if I had any extra paint :p I think some trusty-rusty would be fine for the inside of your transom, however you will need to prime it first with ZC primer. It's green, I think you can get it at Napa and you only need a light dusting of the stuff.
 

timfives

Petty Officer 1st Class
Joined
Jul 30, 2009
Messages
382
Re: Start of My Project. 1991 Starcraft Islander

Looks good Tim. I think now I know why you asked me if I had any extra paint :p I think some trusty-rusty would be fine for the inside of your transom, however you will need to prime it first with ZC primer. It's green, I think you can get it at Napa and you only need a light dusting of the stuff.

you hit the nail on the head. I have some POR 15, left over from another debacle restoration, i'm going to see if that will work on AL. If not i'll check Napa for that!

thanks

T
 

timfives

Petty Officer 1st Class
Joined
Jul 30, 2009
Messages
382
Re: Start of My Project. 1991 Starcraft Islander

made some modest progress today. Tough to get things rolling when i'm working. but alas some progress is better than no progress.

Here is the additional wood i'm adding to the transom. It may be total overkill but i figure it should add some life to the boat, especially given i'm gonna hang a 4 stroke merc off the back as my kicker.

IMG_0290-1.jpg


Here is the transom with one coat of epoxy

IMG_0292.jpg


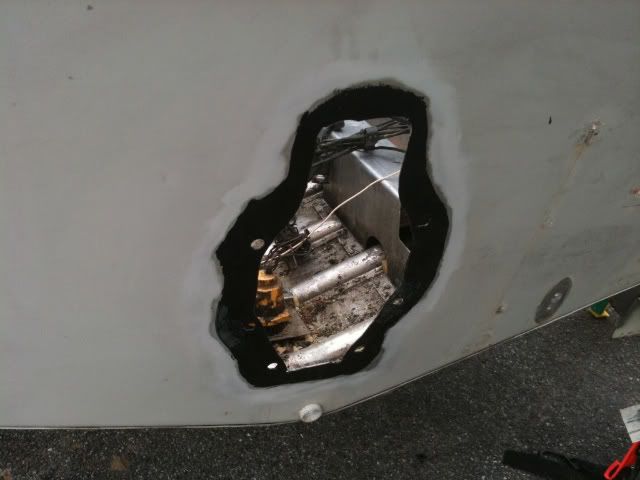
Tomorrow i've got to open up the transom opening a tad, I got me some 32 grit sandpaper for my sander, so that should be short work.

I also got to the boat itself, and started to clean up the corrosion. I did call POR 15 today, and they confirmed that i could use that on the bare metal.

I did get a coat of that on the bare metal, i'll have that pic tomorrow. Once the POR 15 is dry then i'm going to fill in the pitting with jb-weld.

IMG_0288.jpg


That is it for today.

T
 

timfives

Petty Officer 1st Class
Joined
Jul 30, 2009
Messages
382
Re: Start of My Project. 1991 Starcraft Islander

Here is the bare metal cover with POR 15, i was super impressed this morning looking at it.

IMG_0293-1.jpg


The trick to using this stuff, is that it needs to be on properly treated metal. Doesn't bond well with paint.

I also got my new motor mounts done last night.

today i plan on getting the wood for the transom completely sealed, and the inside of the boat ready to accept it.

T
 

timfives

Petty Officer 1st Class
Joined
Jul 30, 2009
Messages
382
Re: Start of My Project. 1991 Starcraft Islander

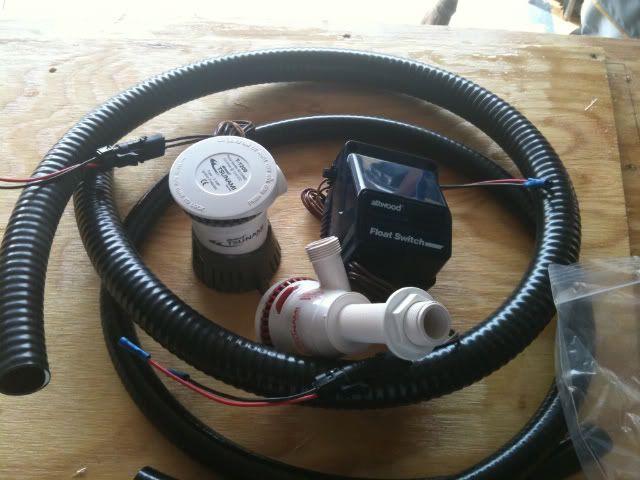
Got some parts in today, and some minor work done on the boat.

New bilge pump and auto switch, also a livewell pump.

IMG_0295-1.jpg


Livewell

IMG_0297.jpg


And finished up the final wood work on the transom.

It isn't a show piece but should be functional

IMG_0302.jpg


Tomorrow I want to get the inside cleaned and prepped for the wood.

t
 

jasoutside

Supreme Mariner
Joined
Dec 20, 2009
Messages
13,269
Re: Start of My Project. 1991 Starcraft Islander

Gear! Sweet! Where did you pick up that livewell?
 
Top