Start of My Project. 1991 Starcraft Islander

timfives

Petty Officer 1st Class
Joined
Jul 30, 2009
Messages
382
Re: Start of My Project. 1991 Starcraft Islander

Big thanks to EZ today, not only did he loan me his truck to get the mess out of my yard, he and i'm sure mostly his wife watched the kids so me and the Mrs could get a dinner to ourselves.

That EZ is one He!! of a guy!

So I may regret some of this, but all of the rotten wood is at the landfill. I did sketch out templates on the new wood, so i'll start cutting soon. I had really thought of keeping the original pieces, but then thought the crap was so rotten, it barely was useful as a template.

So I did get the yard cleaned up, and got the patio ready for BBQ season. And started to convert my side of the garage to my boat fabrication lounge.

Fingers are crossed that my man will have the engine and outdrive on sooner than expected, it would be ideal that it is done when i get back from abroad.

Cheers

T
 

PaulyV

Chief Petty Officer
Joined
Sep 7, 2008
Messages
525
Re: Start of My Project. 1991 Starcraft Islander

Hey Tim,
I just caught up on your progress. the nice weather we all wanted is here..and now some of us dont have the time to hit it hard..Keep at it little by little..I installed a stern light and 4 cleats yesteday..wooohoooo! Its something at least. Good luck moving forward.
 

timfives

Petty Officer 1st Class
Joined
Jul 30, 2009
Messages
382
Re: Start of My Project. 1991 Starcraft Islander

Looks like i'm back in business, got a call from the engine guy, and the engine and outdrive are reassembled. I'm going to get her in the morning!!

T
 

timfives

Petty Officer 1st Class
Joined
Jul 30, 2009
Messages
382
Re: Start of My Project. 1991 Starcraft Islander

So with out further a due here is where i'm at.

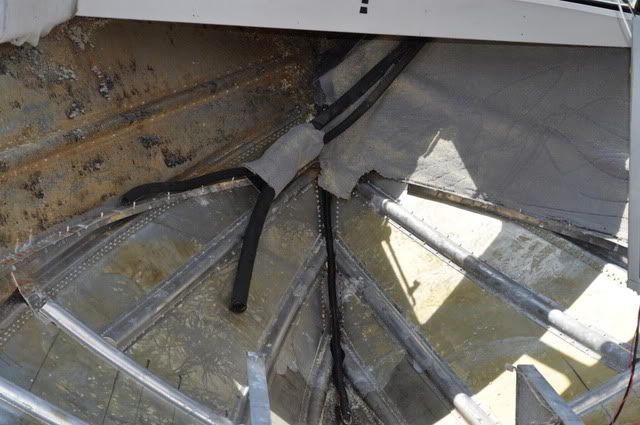
1 no more foam!!!!! I ended up using the pressure washer with the cutting tip to get the foam out of the bow. Made a colossal mess, but it is out. I then removed the entire bow area.

DSC_0612.jpg


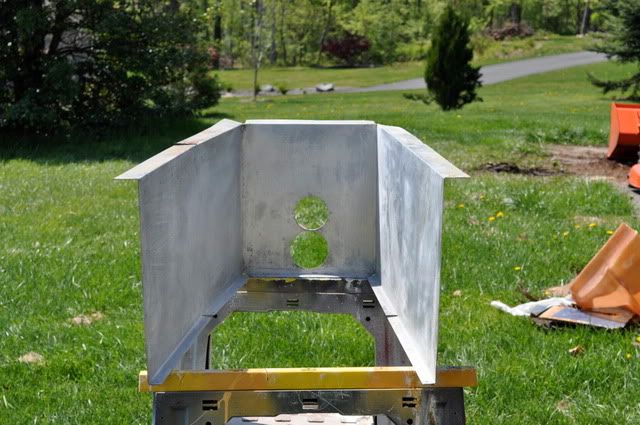
Once that was cleaned up, i moved to cleaning up the aluminum pieces that were covered with vinyl. Now i'm not a fan of vinyl, but for the sake of time i figured it would clean up nice. Yeah. well getting the multiple layer of bow flooring out, ripped the vinyl, so I removed it and started the process to clean up the glue.
DSC_0610.jpg


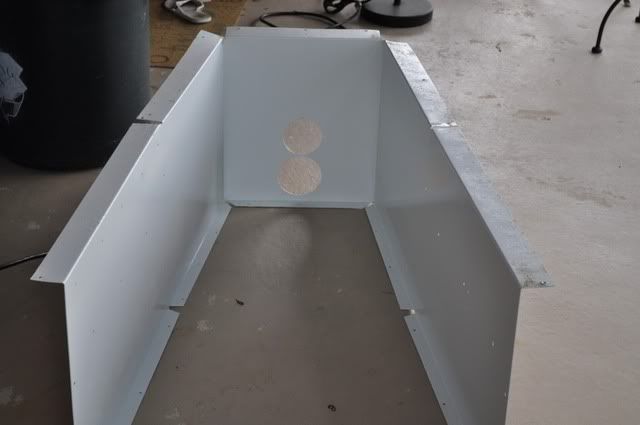
Then it was off to paint

DSC_0615.jpg


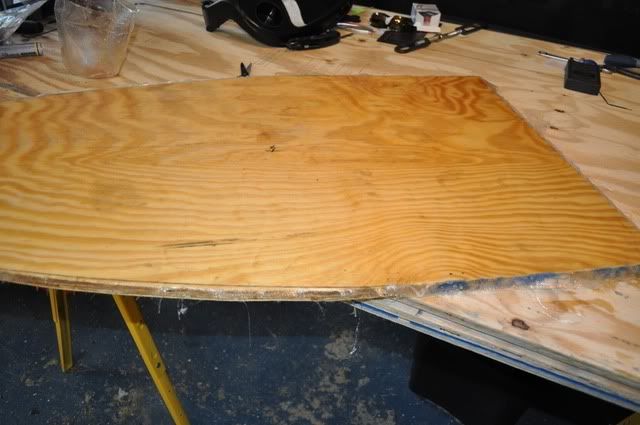
Then i shaped the floor and laid my first fiberglass cloth down. It was 6 oz, and that seems to be pretty beefy, so for the rest of the boat i'll probably just use 2 or 4 oz cloth.

DSC_0619.jpg


Today i need to make up my mind with respect to what i'm going to carpet the sides of the boat and sides of the cabin with, And keep some semblance of progress

T
 

ezmobee

Supreme Mariner
Joined
Mar 26, 2007
Messages
23,767
Re: Start of My Project. 1991 Starcraft Islander

Whoa you're glassin'? You're hard core. Looks like you've been busy.
 

jasoutside

Supreme Mariner
Joined
Dec 20, 2009
Messages
13,269
Re: Start of My Project. 1991 Starcraft Islander

Looks great Tim! Hey, tell me what your method of choice was for getting that glue off was, eh!
 

timfives

Petty Officer 1st Class
Joined
Jul 30, 2009
Messages
382
Re: Start of My Project. 1991 Starcraft Islander

Looks great Tim! Hey, tell me what your method of choice was for getting that glue off was, eh!

that was the biggest pain, so here is what i did,

step 1 : oven cleaner.. this worked on half, don't ask me why but it took 70% of the crap off. I used that, let it set for 10 minutes (don't let it dry) and then used a plastic scraper to get it off

step 2: getting the residual off, used paint thinner and a scrubby pad or scotch brite pad.

step 3: wiped down the entire thing with thinner and clean rags to get all the residual off.


If you find a better way, i'm all ears. Oh and be sure and wear latex / rubber gloves when you use the oven cleaner. It will jack your hands up something fierce. to the point your fingernails fall out!!

T
 

jasoutside

Supreme Mariner
Joined
Dec 20, 2009
Messages
13,269
Re: Start of My Project. 1991 Starcraft Islander

that was the biggest pain, so here is what i did,

step 1 : oven cleaner.. this worked on half, don't ask me why but it took 70% of the crap off. I used that, let it set for 10 minutes (don't let it dry) and then used a plastic scraper to get it off

step 2: getting the residual off, used paint thinner and a scrubby pad or scotch brite pad.

step 3: wiped down the entire thing with thinner and clean rags to get all the residual off.


If you find a better way, i'm all ears. Oh and be sure and wear latex / rubber gloves when you use the oven cleaner. It will jack your hands up something fierce. to the point your fingernails fall out!!

T


Thanks for the tips man!

At this point I am debating simply leaving that glue on there as I am thinking a textured painted surface, or, maybe carpet in those areas (decisions, decisions). For sure I'd clean it up nice if I were to straight up paint it.

Rock on man!
 

timfives

Petty Officer 1st Class
Joined
Jul 30, 2009
Messages
382
Re: Start of My Project. 1991 Starcraft Islander

Thanks for the tips man!

At this point I am debating simply leaving that glue on there as I am thinking a textured painted surface, or, maybe carpet in those areas (decisions, decisions). For sure I'd clean it up nice if I were to straight up paint it.

Rock on man!

I'd remove it even if painting it with textured paint. Alot of that stuff won't bond well to it, and will take for ever to dry with the glue still on. If your gonna recover, then it is fine to leave on.

it really doesn't take that long to clean up, just a pia
 

timfives

Petty Officer 1st Class
Joined
Jul 30, 2009
Messages
382
Re: Start of My Project. 1991 Starcraft Islander

Well today was another marathon building day.

here is what is done.

Items cut and dry fit /

  • Floor
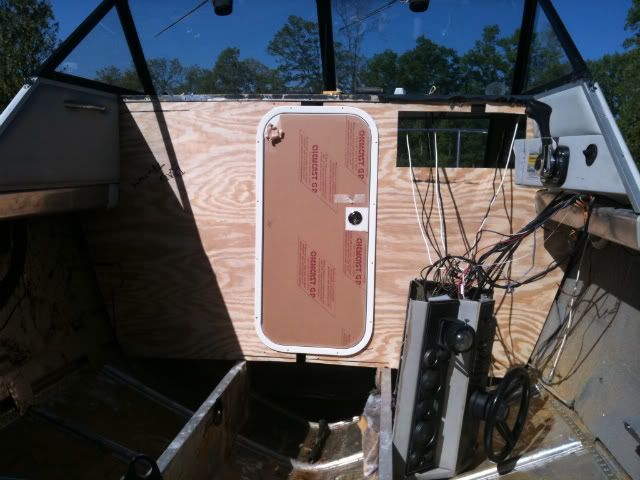
  • Cabin Bulkhead
  • Cabin Door
  • Rear Deck
  • Rear Transom Cover (needs to be redone)
  • Cleaned up aluminum transom cover
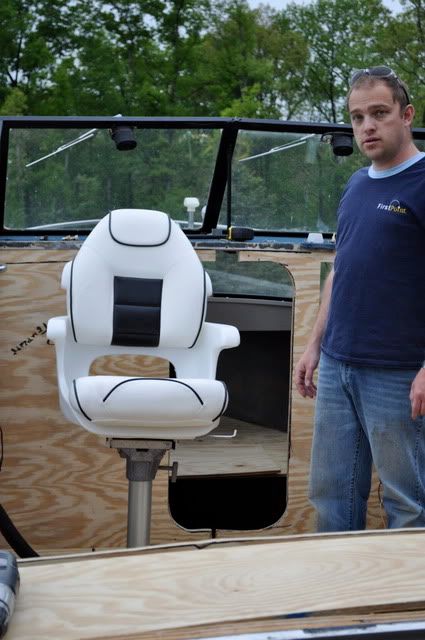
  • Dry Fit Seats

Door

IMG_0353-1.jpg


Now the issue with the wall here is that i had to cut it in half to get it to fit into place. while not ideal, it is fit. I'll have to fill the gaps above and below the door during final assembly

Here is a shot of the seat
DSC_0660.jpg


I wanted to take more pictures but given the rain that was on the way i was hell bent to get the wood dry fit and then out.

Next couple of days i'll be cleaning up the workshop, and coating the wood with epoxy.

My goal is to have the rear transom cover done and in place along with the seats by the end of the week, so that i can have my cockpit cover made while i'm in India.

Seems like every time i make progress, i get put off by how much is left. Details details details

T
 

HopeSheFloats

Lieutenant Commander
Joined
Jun 12, 2009
Messages
1,674
Re: Start of My Project. 1991 Starcraft Islander

Wow, you have been busy, was it that water trip with EZ & the kids that fired you up, or just EZ-R to get things done when he's not around {@ EZ - :p;) kiddin}
Dude that is a months worth of work at my pace...kudos!
 

Huron Angler

Admiral
Joined
Apr 7, 2009
Messages
6,025
Re: Start of My Project. 1991 Starcraft Islander

Great work there, the new plywood looks like a great fit. No big deal on using two pieces there...it is not really a load-bearing piece anyway and will be strong once epoxied.

Are you thinking two coats of epoxy on all the plywood?

That seat looks great by the way, can't wait to see the rig when she's all done.

India, eh? Sounds like a fun trip:)
 

sprintst

Commander
Joined
Apr 18, 2009
Messages
2,066
Re: Start of My Project. 1991 Starcraft Islander

That was a marathon day. You can kick back in India and enjoy no boat worries.

PS. I copied the extra meat on the transom for the kicker idea.
 

timfives

Petty Officer 1st Class
Joined
Jul 30, 2009
Messages
382
Re: Start of My Project. 1991 Starcraft Islander

guys,

Thanks, I'm going to attempt to get the wood epoxied and glassed. Then install the fuel tank, the live well, clean up the wiring, wire in the circulating pumps for the live well, blower, floor drains, swim platform, install the kicker, controls, jackplate... on and on it goes.

I'm having some difficulty deciding where to put the batteries. I'm thinking at the moment that i'm going to build a battery box right in front of the engine, and then build in a step to the dog house. Where have you guys located your batteries?? Thoughts would be appreciated.

The weather here has yet again turned to crap, i had high hopes that i'd have this week to work on her. but alas, i'll be doing only the work that can be done in the garage.. ( which is plenty)

thanks for the encouragement!

Tim
 

ts

Petty Officer 1st Class
Joined
Mar 30, 2010
Messages
204
Re: Start of My Project. 1991 Starcraft Islander

Hey Tim, I'm hoping to put a battery under each seat box (helm and the other side) to move some weight forward.

It looks like your seats don't have boxes under the posts? How tall are your posts?
 

jasoutside

Supreme Mariner
Joined
Dec 20, 2009
Messages
13,269
Re: Start of My Project. 1991 Starcraft Islander

Nice work Tim, man you put is some big days! Your seats look sharp and your cabin door should come out pretty cool. Are you planning to paint the cabin wall/door?

You are way further ahead than I am but for my batteries I was thinking that I'd place mine in the port side cabin storage box. Port side as there will always be a driver at the helm and help balance the weight. I'm also going to have my fuel tank up in front so I'll have as much weight as possible towards the bow.

Way premature yet as I may change my mind a half a dozen times till I actually install them.

Cheers buddy!
 

timfives

Petty Officer 1st Class
Joined
Jul 30, 2009
Messages
382
Re: Start of My Project. 1991 Starcraft Islander

Nice work Tim, man you put is some big days! Your seats look sharp and your cabin door should come out pretty cool. Are you planning to paint the cabin wall/door?

You are way further ahead than I am but for my batteries I was thinking that I'd place mine in the port side cabin storage box. Port side as there will always be a driver at the helm and help balance the weight. I'm also going to have my fuel tank up in front so I'll have as much weight as possible towards the bow.

Way premature yet as I may change my mind a half a dozen times till I actually install them.

Cheers buddy!

Yeap, everything is going to get a coat of epoxy, or 2, maybe even some cloth, then painted..

Thats what i'll be working on for the next couple of rainy days

T
 

ezmobee

Supreme Mariner
Joined
Mar 26, 2007
Messages
23,767
Re: Start of My Project. 1991 Starcraft Islander

Looking good! Yeah our weather is not looking good for most of this week. Are you going to add thickness to the floor boards under where the seats are mounted?
 

timfives

Petty Officer 1st Class
Joined
Jul 30, 2009
Messages
382
Re: Start of My Project. 1991 Starcraft Islander

Today i'm working inside,

So I figured i fit my floor drains.

As anal as i am, i figured i would countersink them so they are flush with the floor.

Step 1. Locate the desired Position
IMG_0365.jpg


Step 2. Drill out the larger diameter first

IMG_0366.jpg

Note that you only need to drill this out so that what your mounting will be flush

Step 3. Drill out smaller hole

IMG_0367.jpg


Step 4. Chisel out media

IMG_0369.jpg


Step 5. Fit Drain

IMG_0370.jpg


Four more to do

Tim
 

timfives

Petty Officer 1st Class
Joined
Jul 30, 2009
Messages
382
Re: Start of My Project. 1991 Starcraft Islander

okay, So i was dying to try out my floor paint, and see how this is all going to come together. so much like the drain, i'm treating my cabin floor as a guinea pig.

I'm using Quick Grip floor paint, it has the consistency of Mayonnaise which through me off at first. However, it did lay down a pretty nice covering.

IMG_0371.jpg


coverage:

IMG_0372.jpg


With Drain

IMG_0373.jpg


Not thrilled about the color difference between the floor and the drain, but it will have to do.

T
 
Top