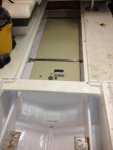
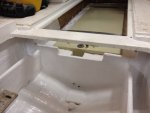
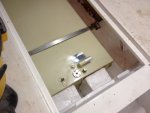
1991 Formula 242 Stringer & Bulkhead Repairs w/ Many Pics

tpenfield

Moderator
Staff member
Joined
Jul 18, 2011
Messages
18,039
Re: 1991 Formula 242 Stringer & Bulkhead Repairs

Re: 1991 Formula 242 Stringer & Bulkhead Repairs

I did a bit of wood work today, cutting and shaping the main stringer replacement sections.

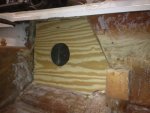
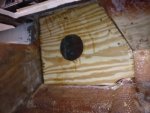
First I installed the thru-hull in the bulkhead . . .

IMG_0429.jpg

Then I made lots of saw dust on the back deck, as I cut the pieces for the stringer repair.
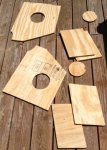
IMG_0418.jpg

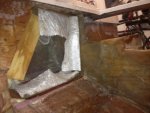
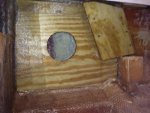
Then I installed the first piece of the lap joint on each stringer . . .
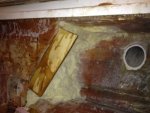
IMG_0431.jpg

I used VE resin and a layer of saturated CSM in the joint so it would take up any gaps in the mating surfaces. I also used SS screws to hold the pieces firmly in place while curing. My plan is to just leave the screws there.
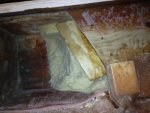
IMG_0424.jpg

Once these lap pieces cure, I'll be installing the stringer section and then the outer lap pieces.
 
Last edited:

tpenfield

Moderator
Staff member
Joined
Jul 18, 2011
Messages
18,039
Re: 1991 Formula 242 Stringer & Bulkhead Repairs

Re: 1991 Formula 242 Stringer & Bulkhead Repairs

Main Stringer Installation:

One of the trickier parts of this repair is the installation of the main stringer sections, because access is limited to fuel tank bay. Access from the top would have required separating the deck/console liner from the hull - which is a massive project in itself. So, I had to figure a way to lap-joint about 18 inches of new stringer and then bond it to the adjoining structural components.

After some thought, I came up with a plan . . .

- I would put a 4" hole in the stringer sections to allow internal access

- Install the internal tabbing on the 3 mating sides - top, bottom, bulkhead

- Install the stringer section

- Using the access hole, I could then smooth out the tabbing pieces.

- Then I could apply the external tabbing and the outside lap joint.

So here is the stringer section set in place to check the fit.

IMG_0433.jpg

Then there was the internal tabbing pieces using 1708 cloth . . .
IMG_0435.jpg


Here is the stringer section installed with the internal tabbing wetted out. I used a mechanic's mirror and a flash light to check my workmanship inside the chamber, since I could only feel my way around in there.
IMG_0438.jpg


The final step was to do the outside tabbing and lap joint. I considered just going with 1708 cloth on the outside joint, but decided to add the wood piece as well. The cockpit floor sits on top of the stringer box, so I was able to prop it up about an inch so that I could tab the stringer to the top portion of the stringer box. That should give it its original strength, if not more.
IMG_0441.jpg


So, at this point the stringers are now whole again and I can replace the cutouts before I add the foam flotation to the chambers.

I have found that working with the VE resin is Soooo much better with a project like this, because it gives you about 30 minutes of working time; much more than polyester resin.

I am letting everything set up and then I have a bit more fiberglassing to do on the bulkhead and the main stringers.. the project it starting to feel like it is on the downhill side of things with the end in sight. :)
 
Last edited:

tpenfield

Moderator
Staff member
Joined
Jul 18, 2011
Messages
18,039
Re: 1991 Formula 242 Stringer & Bulkhead Repairs

Re: 1991 Formula 242 Stringer & Bulkhead Repairs

A couple more pictures of the Main Stringer:

I put a second layer of tabbing on the base of the stringers. It looks like the original tabbing is 24 oz. roving and the 1708 cloth looked a little pale in comparison. I also did some finish work on the bulkhead where all the stringers join and added stiffeners on both sides.

IMG_0445.jpg

IMG_0447.jpg

I still have to do the following things according to 'the plan' :

- Install fuel line duct in starboard stringer

- Face the main stringers with a layer of 18 oz roving

- Fill the 2 stringer 'chambers' with foam

- Install the fuel tank

- Install the Deck Hatch

- Re-coat the bilge

- Re-install the wiring and various components

- Install the second bilge pump.

- Install the engine

even though I am on the 'down sdie' of the project, there is still lots to do. :rolleyes:
 
Last edited:

tpenfield

Moderator
Staff member
Joined
Jul 18, 2011
Messages
18,039
Re: 1991 Formula 242 Stringer & Bulkhead Repairs

Re: 1991 Formula 242 Stringer & Bulkhead Repairs

A bit more progress during the week . . .

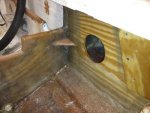
Installed the fuel line conduit in the Starboard stringer

IMG_0453.jpg

I added a few more layers to the Bulkhead 'stiffeners' and installed the cut-out in the port stringer

IMG_0456.jpg

Next up is filling the stringer chambers will foam and then facing the main stringers with a layer of roving. . .
 
Last edited:
tpenfield

Moderator
Staff member
Joined
Jul 18, 2011
Messages
18,039
Re: 1991 Formula 242 Stringer & Bulkhead Repairs

Re: 1991 Formula 242 Stringer & Bulkhead Repairs

Wednesday night update:

It's hump day !!! :D

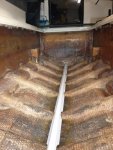
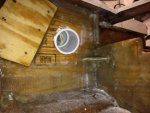
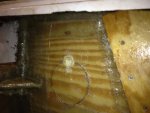
I put a layer of 18 oz roving over the main stringers to seal things up and add a bit of strength. Here are a few pics . . . of course the roving is a little tough to see in these pictures since it is just wetted out.

Starboard stringer looking forward.

IMG_0459.jpg

Starboard Stringer where fuel line conduit exits

IMG_0465.jpg

Here is the port side aft portion of the main stringer where that cut-out has been replaced

IMG_0466.jpg

So, that is pretty much it for the fiberglassing. Next steps are to fill the chambers with foam and then move onto the fuel tank installation.
 
Last edited:
Tthomp3

Petty Officer 1st Class
Joined
Feb 13, 2012
Messages
208
Re: 1991 Formula 242 Stringer & Bulkhead Repairs

Re: 1991 Formula 242 Stringer & Bulkhead Repairs

i like the conduit idea! i dont think ive seen that idea before
 

tpenfield

Moderator
Staff member
Joined
Jul 18, 2011
Messages
18,039
Re: 1991 Formula 242 Stringer & Bulkhead Repairs

Re: 1991 Formula 242 Stringer & Bulkhead Repairs

i like the conduit idea! i dont think ive seen that idea before

Yes, it is something that is original to the boat, except the manufacturer (Formula) used a smaller pipe (probably 3"). I used 4" just to fill the larger hole that I had made in the stringer for assembly purposes. I think it will also be a bit easier to feed the fuel fill and vent lines through.
 

tpenfield

Moderator
Staff member
Joined
Jul 18, 2011
Messages
18,039
Re: 1991 Formula 242 Stringer & Bulkhead Repairs

Re: 1991 Formula 242 Stringer & Bulkhead Repairs

Deck-to-Stringer Box Bond ???

I have been wondering about something during this project, and I thought that I would 'float' my idea out here for some comments . . .

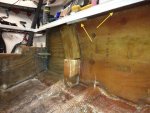
See the picture below where the arrows are pointing . . .

IMG_0461A.jpg

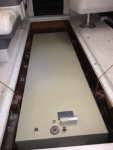
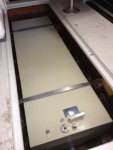
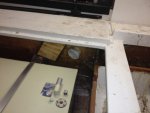
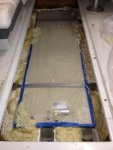
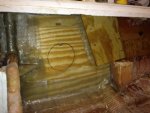
The cockpit sole (deck) sits loosely on top of the stringer assembly. I have propped up the deck about 3/4" while doing the glassing with a block of plywood (see the yellow arrows showing the block of wood that I stuffed in there giving the 3/4" gap between floor and stringer). Normally the floor rests right on top of the stringer. The boat is the same way on both starboard and port sides. The best that I can tell, there is really nothing attaching the floor to the stringers for the entire length of the cockpit liner/sole. The only area where the 2 halves of the boat seem to join is up near the cuddy cabin . . .

This appears to be 'by design' that the floor/deck just rests on top of the stringer box.

So, my question . . . I was thinking of using some urethane foam to adhere the floor to the stringer box along its length. My thoughts are that it would make the boat a bit more solid and alleviate the 'slapping' sound that you often get when coming down off a bigger wave, as these 2 pieces of the boat tend to quickly flex and slap together.

If I use urethane foam as an adhesive, it will allow very minor movement of these 2 'pieces' (floor & stringers), versus a more solid bond like PL adhesive, and I could always cut the bond apart if ever need be.

Thoughts/comments about doing this ??? TIA
 
Last edited:
tpenfield

Moderator
Staff member
Joined
Jul 18, 2011
Messages
18,039
Re: 1991 Formula 242 Stringer & Bulkhead Repairs

Re: 1991 Formula 242 Stringer & Bulkhead Repairs

OK, no takers so far on my question about adhering the cockpit sole to the stringers . . .
Thus far the votes are "1 in favor" / "0 opposed" :D

A quick update. . .

I filled the stringer chambers with foam last night. This is the first time I have used the pour-in foam which was interesting. I happened to catch a YouTube video on mixing and pouring foam a while back, and I actually read the instructions that came with the foam (well at least I skimmed through them :p ).

I drilled a 1" hole in each stringer and hooked up a funnel and hose to pour the activated foam into the chambers. It was a little bit of guess work as to how much foam, but I figured the cavities were going to need about 1 Cubic Foot of foam, the starboard side a little less because of the fuel line conduit.

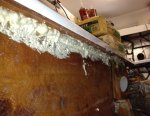
Here are a couple of pictures on the results after curing . . .

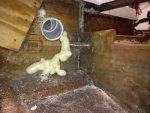
Starboard side

IMG_0469.jpg

and the Port Side

IMG_0468.jpg

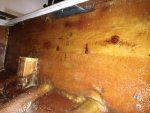
Looks like the Starboard side is full as the foam had to find an escape. The port side seems to be almost full . . . hopefully, good enough. Now I just have to clean up the excess foam and seal up the holes.

Next steps are to:

clean things up on the boat, sand some sharp edges, etc

Adhere the cockpit sole to the stringers

Install the fuel tank

Re-install the deck hatch/ski locker

start working on the engine bay . . .

I was thinking that I might fire up the engine this weekend to wake it up from its winter nap . . . then I can run a leak test on the cylinders, which I did not do last Fall.
 
Last edited:
tpenfield

Moderator
Staff member
Joined
Jul 18, 2011
Messages
18,039
Re: 1991 Formula 242 Stringer & Bulkhead Repairs

Re: 1991 Formula 242 Stringer & Bulkhead Repairs

Saturday May 26th Update:

Well usually, I am launching my boat on Memorial Day weekend. Not this year, but I am shooting for a Father's Day weekend launch :D

I started cleaning things up on the boat and getting ready to install the fuel tank. Fiberglass repair work sure is messy, or maybe it is just me who is messy :rolleyes: . . .

Anyway, I figured that I would use this corner bead stock (pic below) underneath the tank to provide some drainage. It is a special type of corner stock, used for rounded corners. I am hoping that the foam that I pour around the tank will stop at the mesh in the corner stock and provide a duct underneath the tank.

IMG_0472.jpg

So I have it all cut to shape, etc and I'll secure it with some PL adhesive . . .

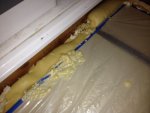
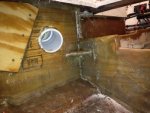
I did my thing with adhering the cockpit sole to the stringers. I used the regular "Great Stuff" foam and weighted the deck halves down with some bags of concrete that I had lying around. Here is a picture of how that looks . . . you can see the cement bags on top of the deck.

IMG_0487.jpg

It is not pretty, but it is functional; and it will barely see the light of day once this is all put back together. . . . There is about a 1/4" gap that the foam filled adhering the cockpit sole to the stringer assembly. We shall see how that makes the boat feel out on the water.

The foam did serve an additional purpose as the woven roving cloth left some sharp barbs along the top of the stringer and I already caught a finger or two on some of them. So, they are hidden in the foam now. The 18 oz. Woven Roving cloth did not work so well on the stringers and I wished I had used just CSM or even the 1708 cloth.

So, now it is onto the preparations for the fuel tank installation. I am figuring to use about 6 cubic feet of foam to secure the tank, similar to how Formula installed it originally, except with some drainage below it and drainage thru the bulkhead.

I hope everyone has a safe and enjoyable Memorial Day weekend . . . my thanks and thoughts go out to those who serve and have served in the United States armed forces. You keep us free and make us proud. :cool:

TTFN.
 
Last edited:
tpenfield

Moderator
Staff member
Joined
Jul 18, 2011
Messages
18,039
Re: 1991 Formula 242 Stringer & Bulkhead Repairs

Re: 1991 Formula 242 Stringer & Bulkhead Repairs

Sunday update . . . making progress by leaps and bounds (so it seems) :D

I got things prepped for the fuel tank and put it in this morning. . .

IMG_0499.jpg

Lowered it into place and then strapped it down . . . .

IMG_0505.jpg

IMG_0511.jpg

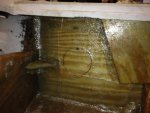
Here is a picture of the fuel line conduit as it meets up with the fuel fill fittings. The vent is at the front of the tank, so I have to route the vent line forward along the starboard stringer.

IMG_0515.jpg

I did some prep work on foaming in the tank and will probably do the actual foaming on Monday morning. I hope 5-6 cubic feet of foam will do it :confused:

The tow vehicle (The Admiral's daily driver) has been pissed about all the attention that the boat has been getting lately. So, it decided to have an idler wheel crap out on the serpentine belt, which made a heck of a whining noise. I took an hour or two out of the day to fix that.
 
Last edited:
tpenfield

Moderator
Staff member
Joined
Jul 18, 2011
Messages
18,039
Re: 1991 Formula 242 Stringer & Bulkhead Repairs

Re: 1991 Formula 242 Stringer & Bulkhead Repairs

Foaming in the Fuel Tank . . .

"Foaming in" fuel tanks is somewhat controversial, as it can lead to problems in the future if the foam gets wet. The folks at Formula Boats recommended that I use pour-in foam to install and secure the fuel tank as the best overall method in terms of support for the tank and structural strength.

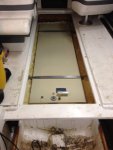
So I prepped the tank by masking the top surface and installed some partitions at the rear of the tank for drainage access and to install a depth sounder. Then I poured the foam in along the sides of the tank, allowing it to run down underneath the tank, etc. Here are a few pictures below. There were a couple of low spots, which I went back and leveled off a bit.

IMG_0533.jpg

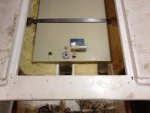
There are 2 openings at the rear of the tank one where the thru-hull drainage is located . . . and the other where I plan on locating a depth sounder.

IMG_0537.jpg

Here is a close up of the access areas at the rear of the tank. I also installed drainage between the 2 access holes.

IMG_0535.jpg

I plan on finishing off these 'holes' with epoxy to make the walls a bit more durable.

Next steps are to let the foam cure and then trim off the excess/high spots. The trim will slope away from the tank, as per the original factory installation.

After having used pour in foam for the stringer chambers and now the fuel tank, it looks like the expansion rate is more in the ball park of 20X rather than 25-30X. I think you have to live in a very warm climate to get the higher expansion rates. I was pouring in 75 degree weather and the expansion was a little on the low side.

So, for future planning, or to advise others, you should probably plan to use about 30-50% more foam than what you might calculate or estimate. I calculated a total of 8 cubic feet for both tank and stringers and it looks like I could have used a kit for about 12 cubic feet.
 
Last edited:
Westport

Seaman Apprentice
Joined
Jul 16, 2010
Messages
37
Re: 1991 Formula 242 Stringer & Bulkhead Repairs

Re: 1991 Formula 242 Stringer & Bulkhead Repairs

This is really great. I'm learning a lot for a future rebuild myself. Keep it going dude!
 

tpenfield

Moderator
Staff member
Joined
Jul 18, 2011
Messages
18,039
Re: 1991 Formula 242 Stringer & Bulkhead Repairs

Re: 1991 Formula 242 Stringer & Bulkhead Repairs

This is really great. I'm learning a lot for a future rebuild myself. Keep it going dude!

Thanks for your good words. What kind of boat are you rebuilding?

A quick update:

I'm letting the boat sit for a while as I plan out the next step, which is trimming off the foam. I think I made a bit more work for myself in the way that I masked off the top of the tank. Not only did I mask the top, but also 1" down the sides. What I am trying to avoid is a grove right along the top where water (condensation) could collect along the top edge of the tank.

Trimming the foam right off even with the top of the tank would be fairly easy, although the foam seems to be quite hard. Trimming the foam to a level that is 1" down from the top of the tank is going to be a bit trickier. So, I'm going to have to give this some though as to how to approach this without making a mess or scratching the tank :confused: :rolleyes: :facepalm:
 

tpenfield

Moderator
Staff member
Joined
Jul 18, 2011
Messages
18,039
Re: 1991 Formula 242 Stringer & Bulkhead Repairs

Re: 1991 Formula 242 Stringer & Bulkhead Repairs

I came up with an idea for trimming the foam around the tank . . .

Thinking back to my R/C modelling days, I could use a 'hot wire' to cut the foam. So, I think that I will get a high powered soldering iron from Radio Shack ('cuz my old one seemed to have died) and make a tip in the shape of the foam contour that I would like. It should be able to trim out the excess foam without too much hassle, and the hot wire should leave a nice 'sealed' surface to the foam. :)

I probably won't get a chance to try it for another day or so, but hopefully it should work out fine.
 

tpenfield

Moderator
Staff member
Joined
Jul 18, 2011
Messages
18,039
Re: 1991 Formula 242 Stringer & Bulkhead Repairs

Re: 1991 Formula 242 Stringer & Bulkhead Repairs

Yea, the 'hot wire' thing did not work so well . . . more toxic smoke than cutting progress. So, I think it will be a more conventional method of cutting . . .

At least I have a new soldering iron now :D
 

garry454

Cadet
Joined
Jul 5, 2007
Messages
23
Re: 1991 Formula 242 Stringer & Bulkhead Repairs w/ Many Pics

Great thread Ted! I have a punky bulkhead just like yours in my 230 Searay....was trying to figure out how to do the repair without damaging my fiberglass liner.... You answered all of my concerns along the way!!
 

tpenfield

Moderator
Staff member
Joined
Jul 18, 2011
Messages
18,039
Re: 1991 Formula 242 Stringer & Bulkhead Repairs w/ Many Pics

Great thread Ted! I have a punky bulkhead just like yours in my 230 Searay....was trying to figure out how to do the repair without damaging my fiberglass liner.... You answered all of my concerns along the way!!

Hey Garry,

What year Searay? I take it that your boat is of the current day - '2-piece' construction era of boat design where you cannot/don't want to cut the floor out? Over the next few years 'we' are going to start to see lots of boats with 1 piece cockpit/deck liners coming along in the 'rot parade'. I have seen maybe 1 or 2 so far, but most of them have been the type with a plywood floor that you can cut out and replace.

With boats of the '2-piece' design, you want to catch rot in the early stages. I wish that I had been paying more attention to the structure of my boat several years ago. I think that I could have caught it in the earlier stages. Anyone that has major rot with a modern boat is going to have to separate the hull and deck to do a full restore, though. There is really no way around it once things progress too far.

Start a thread about your Searay 230 and post some pictures. It would be interesting to see what you are dealing with in terms of a repair.
 

tpenfield

Moderator
Staff member
Joined
Jul 18, 2011
Messages
18,039
Re: 1991 Formula 242 Stringer & Bulkhead Repairs w/ Many Pics

Trimming the excess foam around the tank. . . .

Well, after much trial and re-trial, I was able to trim the foam around the tank and peel the masking tape off, etc. I had to 'convert' one of my 3/4" drill bits into a router bit and then used my high speed drill to route the foam down about 1" from the top of the tank.

Here are a couple of pictures:

IMG_0580.jpg

Here are the 2 access holes at the stern end of the tank.

IMG_0581.jpg

I still need to do a bit of epoxy work on the sides of the access holes. Also, I was thinking of applying a thick coat of polyurethane to the 'cut' surfaces of the foam to deter water migration into the foam, from the daily condensation cycle. That seemed to have been the major issue of the original tank installation.

Just examining some of the larger 'chunks' of excess foam that I cut away from the tank, I will say that you could almost build a boat out of the foam :eek:. It seems to have great structural characteristics . . . very solid and rigid . . . more so than the foam that I removed from the boat during the demolition stages of the project.
 
Last edited:
tpenfield

Moderator
Staff member
Joined
Jul 18, 2011
Messages
18,039
Re: 1991 Formula 242 Stringer & Bulkhead Repairs w/ Many Pics

Fuel Tank Finish Work & Bilge Re-Painting . . .

A big day with the paint brush today . . .

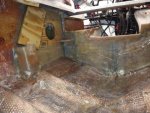
I finished off the access holes at the rear of the tank. Then, I applied a heavy coat of polyurethane around the tank to provide a moisture barrier. The bilge area was also re-coated, as that got really trashed during the project.

Here are a few pictures from the day . . .

IMG_0599.jpg

IMG_0595.jpg

IMG_0593.jpg

So, I am pretty much back to where I started last December with the engine out and the bilge re-finished. Tomorrow, I plan on connecting the fuel lines and re-installing the wiring in the engine compartment. Next weekend, I plan on installing the engine . . . I should test run it before I put it in the boat. :D
 
Last edited:
Top