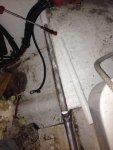
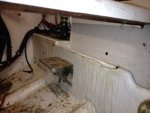
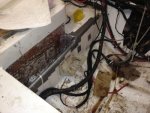
1991 Formula 242 Stringer & Bulkhead Repairs w/ Many Pics

tpenfield

Moderator
Staff member
Joined
Jul 18, 2011
Messages
18,040
Re: 1991 Formula 242 Stringer & Bulkhead Repairs

Re: 1991 Formula 242 Stringer & Bulkhead Repairs

I am now starting to do some of the preliminary fiberglassing . . . getting things ready to install the new bulkhead. I'm noticing that the Vinyl Ester resin does not seem to like cooler temperatures versus Polyester resin.

I don't mind working in the cooler temperatures, because the open time of the resin is a lot longer. Usually, I can get poly resin to kick with a little heat applied to the area once everything is wetted out. The VE resin does not seem to kick as easily, and I have to apply lots of heat.

I tried upping the catalyst to 1.5%, versus the standard 1%, of course I don't want it to set up too quickly.

Any tips for working in cooler weather (50 - 55 degrees F)?
 

Woodonglass

Supreme Mariner
Joined
Dec 29, 2009
Messages
25,927
Re: 1991 Formula 242 Stringer & Bulkhead Repairs

Re: 1991 Formula 242 Stringer & Bulkhead Repairs

You can increase to 2% with VE
 

tpenfield

Moderator
Staff member
Joined
Jul 18, 2011
Messages
18,040
Re: 1991 Formula 242 Stringer & Bulkhead Repairs

Re: 1991 Formula 242 Stringer & Bulkhead Repairs

You can increase to 2% with VE

It looks like 1.5% (MEKP) is doing the trick . . . I tend to not mix it quite long enough. So, I am making sure to mix it a bit longer, and it is also getting a bit warmer in the garage, which helps.

I have roughed in the new bulkhead and will probably finish it tonight or tomorrow. I'll post picture updates soon.
 

tpenfield

Moderator
Staff member
Joined
Jul 18, 2011
Messages
18,040
Re: 1991 Formula 242 Stringer & Bulkhead Repairs

Re: 1991 Formula 242 Stringer & Bulkhead Repairs

Fiberglass Work Update:

OK, I finally got the boat dried out and have made some progress on the fiberglass work:

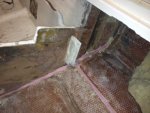
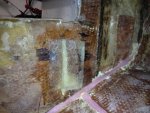
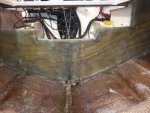
I installed some "internal tabbing" to give greater attachment of the engine mount stringers to the bulkhead

IMG_0347.jpg

IMG_0361.jpg

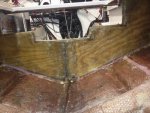
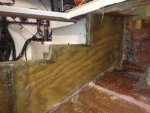
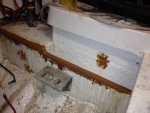
Then I installed the bulkhead with CSM and VE resin on both sides. Showing in the pictures below is the forward face of the bulkhead. There are 2 layers of 2 oz. CSM rolled onto the plywood core. The other side had 2 layers of csm/VE resin and was clamped to the existing bulkhead 'skin'.

IMG_0371.jpg

IMG_0372.jpg

I glassed in a drain opening, so that I can provide drainage to the fuel tank bay. This is my first time working with VE resin. The odor is quite potent, I've noticed. Chemical respirator is a must.

I'll probably tab the forward face to the hull tomorrow.
 
Last edited:

tpenfield

Moderator
Staff member
Joined
Jul 18, 2011
Messages
18,040
Re: 1991 Formula 242 Stringer & Bulkhead Repairs

Re: 1991 Formula 242 Stringer & Bulkhead Repairs

Engine Mount Stringers:

After I had the bulkhead in place I could proceed onto the engine mount stringers. My plan was to make these solid fiberglass. So, I filled the cavities with CSM and poured a thinned resin into the stringer. Here are a couple of pictures . . .

IMG_0376.jpg

I saved the 'caps' for the stringers that I cut off when I opened them up originally. Then I re-used the 'caps' to close up the stringer once it was filled. I put the engine mounts in place once I had the fiberglass mat inserted, but before the resin fill. I just did not want to have to deal with drilling a bunch of 3/4" holes in solid fiberglass and dealing with the proper positioning of the engine mount, etc.

IMG_0385.jpg

I usually find a use for duct tape in my projects, and this was no exception, as I taped the 'caps' in place for the last bit of resin fill.

IMG_0386.jpg
 
Last edited:

Friscoboater

Captain
Joined
Jul 3, 2009
Messages
3,095
Re: 1991 Formula 242 Stringer & Bulkhead Repairs

Re: 1991 Formula 242 Stringer & Bulkhead Repairs

Ok... did I miss something? Are you using plain resin to fill rotten stringers?
 

tpenfield

Moderator
Staff member
Joined
Jul 18, 2011
Messages
18,040
Re: 1991 Formula 242 Stringer & Bulkhead Repairs

Re: 1991 Formula 242 Stringer & Bulkhead Repairs

Ok... did I miss something? Are you using plain resin to fill rotten stringers?

Hello Jay:

Actually it is CSM plus Resin, so it becomes a solid fiberglass stringer. Not exactly out of the text book, but it did the trick.
 

Friscoboater

Captain
Joined
Jul 3, 2009
Messages
3,095
Re: 1991 Formula 242 Stringer & Bulkhead Repairs

Re: 1991 Formula 242 Stringer & Bulkhead Repairs

Good, so it is at least thickend.
 

tpenfield

Moderator
Staff member
Joined
Jul 18, 2011
Messages
18,040
Re: 1991 Formula 242 Stringer & Bulkhead Repairs

Re: 1991 Formula 242 Stringer & Bulkhead Repairs

Mother's Day Update. . .

Well the Mrs. went out to CA to help our youngest pack up and come home from college for the summer. They are heading back today (Mother's Day), but the flight got delayed and it looks like they will end up spending the night in Chicago. Not much of a Mother's Day, but hopefully they will be home in the morning.

Meanwhile me and the dog have been working on the boat . . . here are a few updates from today:

Painted the new fuel tank. Rustoleum self-etching primer . . . of course the directions said to scrub the surface with mineral spirits and then sand with 400 grit. So, I'm thinking, "well self-etching primer, if I'm roughing up the surface, what are you going to be doing?" I need to find some epoxy paint to give it a good hard finish.

IMG_0388.jpg

I also tabbed in the bulkhead using the 1708 cloth and VE resin. Here is a picture of the bulkhead with the tabbing.

IMG_0389.jpg

The VE resin has me scratching my head a bit though . . . It has been 80 degrees this weekend. So, I have cut back to the recommended 1% catalyst (MEKP) instead of the 1.5% that I was using when it was colder. However, it does not seem to be enough catalyst as the resin stays open for hours, unless i apply some heat. So, maybe I'll have to use 1.5 - 2.0% regardless of the temperature.

I used poly resin on the engine mount stringers and that seems to harden pretty quickly with either some heat or 1.5% catalyst. The VE resin is much slower :confused:
 
Last edited:

TheLucille

Cadet
Joined
Jun 16, 2009
Messages
25
Re: 1991 Formula 242 Stringer & Bulkhead Repairs

Re: 1991 Formula 242 Stringer & Bulkhead Repairs

Painted the new fuel tank. Rustoleum self-etching primer . . . of course the directions said to scrub the surface with mineral spirits and then sand with 400 grit. So, I'm thinking, "well self-etching primer, if I'm roughing up the surface, what are you going to be doing?" I need to find some epoxy paint to give it a good hard finish.

Removing contaminants and the protective aluminum oxide layer that aluminum develops? :) Paints/finishes/etc. are just like cleaning supplies - no matter how awesome they say they are, you'll still be disappointed if you don't put some elbow grease in.

I also tabbed in the bulkhead using the 1708 cloth and VE resin. Here is a picture of the bulkhead with the tabbing.

The VE resin has me scratching my head a bit though . . . It has been 80 degrees this weekend. So, I have cut back to the recommended 1% catalyst (MEKP) instead of the 1.5% that I was using when it was colder. However, it does not seem to be enough catalyst as the resin stays open for hours, unless i apply some heat. So, maybe I'll have to use 1.5 - 2.0% regardless of the temperature.

I used poly resin on the engine mount stringers and that seems to harden pretty quickly with either some heat or 1.5% catalyst. The VE resin is much slower :confused:

Looks like that bulkhead should have a bit wider tabbing, hard to tell from that view though. You want to distribute the forces across a larger section of hull if possible.

Figuring out exactly how the polyester reacts is going to be a learning process. I've mixed many batches for repairs/fixes/etc. and every once and a while I still get a surprise... too much catalyst in too large of a quantity and suddenly you have a container full of already solidifying resin that's hot as hell :)

Keep up the good work!
 

Woodonglass

Supreme Mariner
Joined
Dec 29, 2009
Messages
25,927
Re: 1991 Formula 242 Stringer & Bulkhead Repairs

Re: 1991 Formula 242 Stringer & Bulkhead Repairs

VE Resin usually requires a 2% MEKP ratio
 

tpenfield

Moderator
Staff member
Joined
Jul 18, 2011
Messages
18,040
Re: 1991 Formula 242 Stringer & Bulkhead Repairs

Re: 1991 Formula 242 Stringer & Bulkhead Repairs

Looks like that bulkhead should have a bit wider tabbing, hard to tell from that view though. You want to distribute the forces across a larger section of hull if possible.

Figuring out exactly how the polyester reacts is going to be a learning process. I've mixed many batches for repairs/fixes/etc. and every once and a while I still get a surprise... too much catalyst in too large of a quantity and suddenly you have a container full of already solidifying resin that's hot as hell :)

Keep up the good work!


Thanks for your comments . . .

That photo does not show the tabbing too well . . . it does go all the way up towards the chine. There is a break at the point where the stringer repair is going to meet the bulkhead. so, that is probably why it looks like there is too little.


It looks like the Vinyl Ester resin is wanting at least 50% more MEKP than the regular polyester resin. It took the tabbing about 2 hours to cure . . . more like the speed of epoxy than 'ester. Anyway, I'm no longer following the directions on the can, (which say 1%).

By contrast, at about the same time, I mixed a bit of poly resin to do some touch up in another area, and used about 1.75% MEKP, and it turned to jello in about 5 minutes . . . :rolleyes:
 

tpenfield

Moderator
Staff member
Joined
Jul 18, 2011
Messages
18,040
Re: 1991 Formula 242 Stringer & Bulkhead Repairs

Re: 1991 Formula 242 Stringer & Bulkhead Repairs

Plan Status Check:

Here is my original plan . . .

Here is my hand at drawing the basic reinforcement structure and highlighting the affected areas: The yellow arrows show the rotted areas and the general direction of progression. It looks like the bulkhead rotted first and shared the joy with its adjointing members. It is time to break up this party.

The biggest challenge in fixing the structure is that the boat is of the 'modern 2-piece design' . . . i. e., it is pretty much a clamshell and does not have a cockpit floor that can be removed seperatley. So, access to the stringers under the cockpit is restricted.

stringerlayout1.png


Here is the plan for repairing this mess:

1. Remove about 18" of the 2 main stringers and some of the foam flotation behind them.

2. Remove the rot remains from the bulkhead and the rotted portions of the outside stringers in the engine compartment.

3. Repair the outside stringers with fiberglass and penetrating epoxy.

4. Replace the bulkhead.

5. Open the top of the inboard stringers in the engine compartment and remove rot remains.

6. Load up the inboard stringer cores with fiberglass, then pour in penetrating epoxy.

7. 'Sister joint' in 2 new pieces of the main stringers (as per Woodonglass's recommendation). Refill the chamber behind the stringers with foam.

8. Glass over the main stringers to repair the tear in the fiberglass mat on the port side and to add some strength.

9. Expose early stage rot area in forward bulkhead and apply penetrating epxoy, cover with fiberglass mat.


That's "Plan A" . . . we will see how it goes, and if a "Plan B" is needed.


As I progress through the project and become immersed in the 'heat of battle' with the repairs, I thought that I should take a look back at my original plan (quoted above) and see how things are comparing, and if I am still on track with "Plan A" . . .

Of the 9 steps outlined in my original plan, I have 1-6 & 9 completed, leaving #7 & #8 yet to go. I also came across a 'surprise' along the way, that being the fuel tank replacement. So, that is step #10 and will go after #7 & #8, which are repairing and strengthening the main stringers.

One other thing that I plan on doing is adding some fiberglass reinforcement on the aft side of the bulkhead where the main stringer joins to the 2 rear stringers. This area cracked on both sides (port & starboard) when the bulkhead was rotted, showing the amount of 'flex' that is there during normal operation, etc. So that is "step #11".

I'll still be left with some finish & cosmetic work, as I have managed to trash the bilge paint pretty good . . .
 
Last edited:

tpenfield

Moderator
Staff member
Joined
Jul 18, 2011
Messages
18,040
Re: 1991 Formula 242 Stringer & Bulkhead Repairs

Re: 1991 Formula 242 Stringer & Bulkhead Repairs

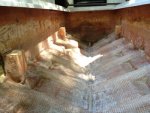
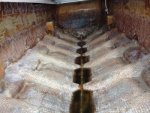
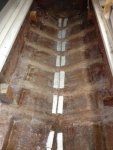
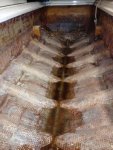
Oh yea, another thing . . . I also decided to fill in along the keel of the fuel tank bay.

IMG_0318.jpg

The ribs that are formed into the hull trap water and do not allow drainage. The foam was farly wet underneath the fuel tank, when I removed it.

So, if I add a bit of fiberglass & resin to level out the area, water should be able to drain out through the bulkhead.

That will be item #12 on my 'plan' . . . ;)
 
Last edited:

tpenfield

Moderator
Staff member
Joined
Jul 18, 2011
Messages
18,040
Re: 1991 Formula 242 Stringer & Bulkhead Repairs

Re: 1991 Formula 242 Stringer & Bulkhead Repairs

May 17th update:

A bit more work during the week . . . I got a few things done in preparation for stringer work this weekend.

I mixed up some fairing compound and smoothed out the engine mount stringer caps and the various test holes that I drilled in the engine compartment way back at the beginning of the project.

IMG_0398.jpg

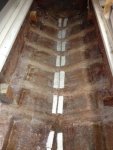
I also did my "#12" item, which was to fill in along the keel in the fuel bay. I put down several layers of CSM pieces and then poured poly resin over it and let it soak in and level. Of course, I needed to make sure that the boat was 'level' to begin with.

Here are the CSM pieces set in place

IMG_0404.jpg

Here is the end result after the poly resin was poured in to the 'V' of the keel.

IMG_0411.jpg

I think that I will add a layer of roving over each 'fill' section for a bit more surface strength. The poly resin was setting up too quickly for me to add any right then.

I should have the main stringers repaired this weekend. Then, I'll be filling the foam areas and getting the fuel tank ready for installation.
 

Attachments

  • IMG_0404.jpg
    IMG_0404.jpg
    55.4 KB · Views: 11
Last edited:

tpenfield

Moderator
Staff member
Joined
Jul 18, 2011
Messages
18,040
Re: 1991 Formula 242 Stringer & Bulkhead Repairs

Re: 1991 Formula 242 Stringer & Bulkhead Repairs

Happy Friday . . . :cool:

I put some 18 oz roving over the "keel fill" sections to finish them off. Here is a picture of the stuff wetted out and starting to cure. I had to make sure to back off a bit on the MEKP, as the poly resin seems to need about 1/2 as much as the VE resin.

IMG_0413.jpg

This weekend will be the stringers and then the additional glassing on the bulkhead/stringer joint, if there is time. Otherwise, it will be something for next week.

The kids are now home from college for a couple of weeks, before they go off and do their 'summer thing' in far off places. So, in my "spare" time I have been fixing smartphones, laptops, etc. :rolleyes: . . . at least I get to back up their data, since they don't . . .

TTFN
 
Last edited:

Tthomp3

Petty Officer 1st Class
Joined
Feb 13, 2012
Messages
208
Re: 1991 Formula 242 Stringer & Bulkhead Repairs

Re: 1991 Formula 242 Stringer & Bulkhead Repairs

Pb might have been easier to fill the keel, but it still looks good;)
 

bear_69cuda

Commander
Joined
Oct 10, 2008
Messages
2,109
Re: 1991 Formula 242 Stringer & Bulkhead Repairs

Re: 1991 Formula 242 Stringer & Bulkhead Repairs

Hey Ted,

Great work! Things are coming along nicely my brutha!
 

tpenfield

Moderator
Staff member
Joined
Jul 18, 2011
Messages
18,040
Re: 1991 Formula 242 Stringer & Bulkhead Repairs

Re: 1991 Formula 242 Stringer & Bulkhead Repairs

Thanks for the good words, Bear.

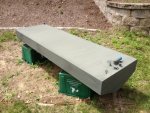
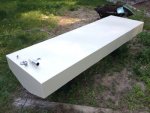
I painted the tank today with a top coat of epoxy enamel. Hopefully that will do well. Here are a couple of pictures . . .

The tank painted

IMG_0426.jpg

A close up of the fittings, etc.

IMG_0432.jpg

I also started on the main stringers, which I'll detail in the next post. . . . :)
 
Last edited:
Top