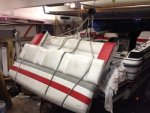
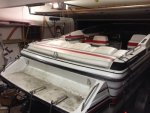
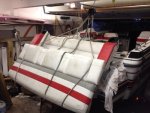
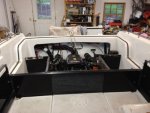
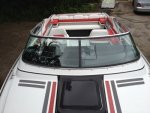
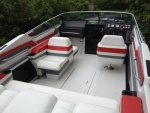
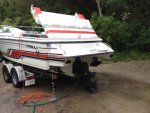
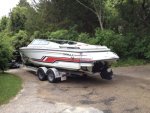
1991 Formula 242 Stringer & Bulkhead Repairs w/ Many Pics

garry454

Cadet
Joined
Jul 5, 2007
Messages
23
Re: 1991 Formula 242 Stringer & Bulkhead Repairs w/ Many Pics

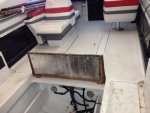
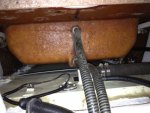
1986 Ted. I will start my own thread when the work starts, but I am going to hold off a Year. I want to coordinate the job with my install of the Ls3 that's going in the boat... It's only right behind the fuel tank with solid wood on each side. SeaRay didn't feel the need to glass this bulkhead and simply painted it.....grrr....

We'll get it though and she'll be good as new.
 

tpenfield

Moderator
Staff member
Joined
Jul 18, 2011
Messages
18,039
Re: 1991 Formula 242 Stringer & Bulkhead Repairs w/ Many Pics

1986 Ted. I will start my own thread when the work starts, but I am going to hold off a Year. I want to coordinate the job with my install of the Ls3 that's going in the boat... It's only right behind the fuel tank with solid wood on each side. SeaRay didn't feel the need to glass this bulkhead and simply painted it.....grrr....

We'll get it though and she'll be good as new.

You might want to start feeding that bulkhead some Ethylene Glycol (antifreeze) since you will not be repairing it for a year. The rot will progress over the next year, it is difficult to say how much, but it could be too much.

The antifreeze will absorb through the wood and kill the rot.
 

garry454

Cadet
Joined
Jul 5, 2007
Messages
23
Re: 1991 Formula 242 Stringer & Bulkhead Repairs w/ Many Pics

I have sprayed it quite a few times so far... I try to give a good squirt a couple times a week for that reason. That was one of the few things I was aware of..... :)
 

tpenfield

Moderator
Staff member
Joined
Jul 18, 2011
Messages
18,039
Re: 1991 Formula 242 Stringer & Bulkhead Repairs w/ Many Pics

Fuel Lines Installed . . .

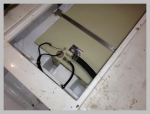
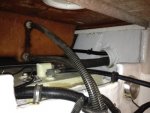
Today I installed the fuel lines, which was a bit tricky in terms of feeding the lines through the conduit and attaching them to the fuel fittings up inside the boat near the rub rail.

Here are a couple of pictures . . .

The vent line needed to be attached to the forward portion of the tank. So, I secured the line to the stringer with some stainless steel wire hangers that I had left over from the engine compartment re-refurbishment. Of course as I was doing this, my thoughts were about that issues with drilling fastener holes into the stringer. So, I filled them with epoxy then put the screws in.

My original tank had an internal vent line that attached to the vent hose at the rear of the tank. So, this aspect of the re-install is a bit different than the original.
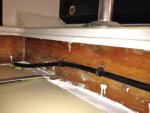
IMG_0606.jpg

Here is a picture of the fuel fill and vent lines as they route through the conduit.
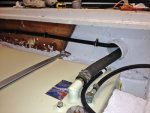
IMG_0604.jpg

I tried swapping the fuel gauge sender that came with the tank for the OEM sender that I have (VDO brand). Not so good. The sender (tube type) would not quite fit in the opening . . . it was about 1/16" shy. So, I left well enough alone in hopes that the new sender would be compatible with my VDO fuel gauge.

The fuel line from the tank is waiting for the engine to be installed as it needs to be cut-to-fit, based on the new tank and the slightly more forward location of the tank/fittings.

I was also thinking that the new tank, being a few inches shorter and more forward in the fuel bay, will move the balance point of the boat a bit more forward, depending on how much fuel there is, etc. I wonder if it will be noticeable?

Anyway, I am letting the bilge paint dry some more before I tend to the engine compartment wiring. Pretty soon, I'll be onto my regular seasonal prep work . . . like bottom painting and outdrive painting, etc. :cool:
 
Last edited:

tpenfield

Moderator
Staff member
Joined
Jul 18, 2011
Messages
18,039
Re: 1991 Formula 242 Stringer & Bulkhead Repairs w/ Many Pics

Electrical Wiring . . .

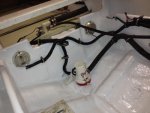
Boy, do I like electrical wiring (not) . . . I spent the past couple of days re-installing all of the wiring and various components in the engine bay.

The fuel tank needed some wiring modifications based on the new tank and adjusted location. . .

shapeimage_1.png

Then there was the main bilge pump and the engine bay lights . . .

IMG_0621.jpg

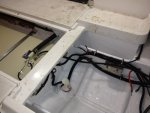
Along the starboard stringer there is the wiring for the MerCathode and the Fume Detector

IMG_0623.jpg

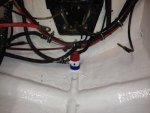
I also installed the secondary bilge pump. This pump is located near the transom, where usually the water is more prevalent, as the boat sits with its stern low in the water. According to my moderately precise measurements, this mini pump will fit underneath the engine, where as the regular pump would not.

IMG_0620.jpg

I made a second thru-hull, just forward of the existing thru-hull, and installed the discharge hose. . . .

IMG_0616.jpg

I also cleaned up some of the wiring that needed some attention. My new soldering iron came in handy, as I solder all the connectors, etc rather than crimp them.

I will probably re-install the deck hatch/ski locker in the next few days in preparation for installing the engine this weekend.
 
Last edited:

tpenfield

Moderator
Staff member
Joined
Jul 18, 2011
Messages
18,039
Re: 1991 Formula 242 Stringer & Bulkhead Repairs w/ Many Pics

Thanks, RR.

After a bit more cleaning up on the boat, I re-installed the deck hatch today. The Deck Hatch was the first major piece to be removed from the boat at the start of the project. So re-installation is marking the end of the project, with the exception of the engine installation, which it happened to be out for re-build anyway.

Here is the deck hatch assembly getting cleaned up and prepped for installation. It is about 8 feet long and a little more than 2 feet wide, and is held to the deck with a combination of adhesive sealant and screws.

IMG_0685.jpg

Here are a couple pictures after the deck hatch was installed in the boat.

IMG_0686.jpg

It is starting to look like a boat again . . .

IMG_0689.jpg

The ski locker, which is and integral part of the deck hatch assembly sits down really close to the fuel tank. The clearance looks to be about the same as before.

IMG_0691.jpg

IMG_0692.jpg

Tomorrow, I plan on installing the engine and the rear seat/engine hatch assembly . . . and maybe even the outdrive, if time permits.

Then, I'll really be done and ready for some general testing of engine and systems to make sure nothing 'broke' during the repair process.
 
Last edited:

tpenfield

Moderator
Staff member
Joined
Jul 18, 2011
Messages
18,039
Re: 1991 Formula 242 Stringer & Bulkhead Repairs w/ Many Pics

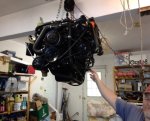
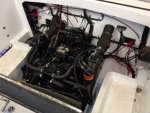
I installed the engine today with the help of my brother-in-law. Connecting everything back up was a bit tedious and there are still a few things left to go.

Here are a couple of pictures from the day . . . and I also took a time lapse video of the process.

Engine hoisted and ready to move the boat under it. . . .

IMG_0702.jpg

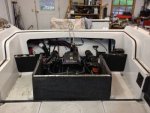
The engine set in the boat and the mounts secured . . .

IMG_0703.jpg

Here is a YouTube video of the process, which was filmed using time lapse at about 2 frames per second. It runs about 3 1/2 minutes . . .


There are a few loose ends to take care of, but basically, it is DONE !!! :D
 
Last edited:

tpenfield

Moderator
Staff member
Joined
Jul 18, 2011
Messages
18,039
Re: 1991 Formula 242 Stringer & Bulkhead Repairs w/ Many Pics

My post from last night was a bit brief, as it was a long day yesterday. It seems that I started prepping the engine for installation at around 7:30AM and did not finish up until about 9:00 PM. A few trips to the hardware store and Marine store in between to get new hardware etc.

I have a nice toolbox with 2 full hardware trays . . . what I have come to realize is that all the stuff in there is what I don't need. Anyway, I came up a few fasteners short during the installation, which made a long day even longer. Putting the engine in itself was fairly easy and probably took no more than 1/2 hour. Hooking everything back up and getting the engine aligned, etc. is what took the time.

I'll post some more pics once everything is back together, as I still have the 'rear seat/sunpad assembly' to install over the engine once the side panels, etc. are in place. The seat/sunpad is fairly heavy, so I probably will be using the hoist again.


My Thanks to this Forum:

I got to hand it to this iBoats forum and all the folks who contribute their expertise and experience here. It has been a valuable resource for me, not only in understanding that my boat had some structural issues, but more importantly in performing the repairs. I have learned a lot about the support structures of boats in the past few months, and I know that knowledge will come in handy on my 'next' boat (whenever that is). Until now, my experience had been more in the mechanical areas (i.e. engines, drives and electrical systems). The structural aspect was like a whole new world.

I will say . . . if I ever have to do a full restore on a boat, I would not use wood in the structure. Seeing what happens to wood after 15-20 years in a fiberglass boat is disturbing. I would be more apt to use synthetic materials on a full restore. Particularly, with the way that I use my boat . . . it sits in the water for 4-5 months at a time . . . rain water and sea water collect in the bilge . . . it never fully drains. So, there is always a source of water/moisture for the wood to enjoy. The water just needs to permeate through the polyester or find a void somewhere, and there you have it.

So, thanks again to the iboats community and the wealth of information that is here. I hope to help out others with what I have learned.
 

tpenfield

Moderator
Staff member
Joined
Jul 18, 2011
Messages
18,039
Re: 1991 Formula 242 Stringer & Bulkhead Repairs w/ Many Pics

Well, the second bilge pump that I just installed - a 'mini' pump is the automatic kind . . . Little did I know that the way it is automatic is to cycle for a second every 2 minutes or so. If it senses water pressure, it keeps going, if not, it just goes for the 1 second.

Initially, I thought the thing was broken, but then I read through the detail of the instructions, and sure enough, it said what it was doing. So, I am thinking this will run the battery down pretty good if I am away from the boat for a few weeks. so, I gotta re-wire the thing so that it is off when I turn the main battery switch off. The primary bilge pump is of the float switch kind, so that can take care of matters when the batteries are "off"
 

tpenfield

Moderator
Staff member
Joined
Jul 18, 2011
Messages
18,039
Re: 1991 Formula 242 Stringer & Bulkhead Repairs w/ Many Pics

A quick update:

Bilge Pump Wiring -

I re-wired the secondary bilge pump so now it works only when that batteries are turned on. Much better.

Rear Seat Assembly-

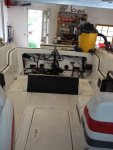
I installed the rear storage partitions and the rear seat assembly. Here are a few pictures:

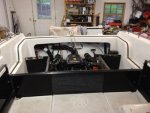
Storage compartment partitions

IMG_0708.jpg

Sliding doors installed

IMG_0711.jpg

Hoisting the rear seat assembly up onto the stern

IMG_0716.jpg

Rear Seat in place

IMG_0720.jpg

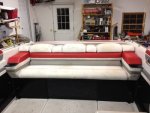
View of the sun pad

IMG_0723.jpg

Everything is pretty dirty and dusty from the winter and all the restoration work, but at least it is back together.
 

Attachments

  • IMG_0716.jpg
    IMG_0716.jpg
    49.2 KB · Views: 4
  • IMG_0711.jpg
    IMG_0711.jpg
    44.4 KB · Views: 5
Last edited:

ezmobee

Supreme Mariner
Joined
Mar 26, 2007
Messages
23,767
Re: 1991 Formula 242 Stringer & Bulkhead Repairs w/ Many Pics

Looks great. A friend has this same boat and it's an awesome one. Certainly well worth the effort to rebuild. Looking forward to seeing this one cleaned up and back on the water!
 

tpenfield

Moderator
Staff member
Joined
Jul 18, 2011
Messages
18,039
Re: 1991 Formula 242 Stringer & Bulkhead Repairs w/ Many Pics

Looks great. A friend has this same boat and it's an awesome one. Certainly well worth the effort to rebuild. Looking forward to seeing this one cleaned up and back on the water!

Thanks for the kind words. Last year, I was thinking of selling the boat and moving up to a 30 foot, twin engine of some sort. That was before I ran into the engine repairs of last Fall and the stringer/bulkhead repairs just now.

Since I have put all sorts of work into it, I think that I will keep it indefinitiely, yet still look to get a 30 something footer. . . . that is if I can shake the money tree hard enough :rolleyes:.
 

bear_69cuda

Commander
Joined
Oct 10, 2008
Messages
2,109
Re: 1991 Formula 242 Stringer & Bulkhead Repairs w/ Many Pics

Hey brutha Ted,

Great job man... super pro work!

Good call on extra bilge pump, I added one on the Cobalt also... I agree she's a keeper! Can't wait to see her all cleaned up!
 

tpenfield

Moderator
Staff member
Joined
Jul 18, 2011
Messages
18,039
Re: 1991 Formula 242 Stringer & Bulkhead Repairs w/ Many Pics

Hey brutha Ted,

Great job man... super pro work!

Good call on extra bilge pump, I added one on the Cobalt also... I agree she's a keeper! Can't wait to see her all cleaned up!

Thanks, Bear.

I think I will be getting to take it out on a 'shake down' cruise for Father's Day. :D
 

tpenfield

Moderator
Staff member
Joined
Jul 18, 2011
Messages
18,039
Re: 1991 Formula 242 Stringer & Bulkhead Repairs w/ Many Pics

Splash !!!

I launched the boat today . . . a couple of hours ago. I had to wait for the correct tide, so it was around dinner time. I spent the day doing some final preparations and testing of things.

Here are a few pictures of the day:

Boat all cleaned up . . . I used a fair amount of bleach.

IMG_0738.jpg

IMG_0743.jpg

I ran the boat on the muffs for a while and checked everything out

http://www.tpenfield.com/Formula242/Final_Prep_and_Launching_files/IMG_0746.jpgIMG_0746.jpg

About 6:00 PM EDT we headed to the launch ramp.

IMG_0747.jpg

Nobody at the launch ramp, so it was quick work. The tide was high enough that the boat went right in. Here it is tied up at the dock getting ready to head out to the mooring.

IMG_0750.jpg

A few 'minor' issues . . .

- The gas gauge reads empty, where it should read about 1/2, so the new sender is not compatible with the gauge. Looks like I'll be running out of gas (again). I'll have to see if the gauge has any options for sender matching, etc.
- The engine has a low-level 'knocking' sound that I do not recall before the valve job. I made a youtube video, so I'll start another thread so see what folks think about it etc.
 
Last edited:

tpenfield

Moderator
Staff member
Joined
Jul 18, 2011
Messages
18,039
Re: 1991 Formula 242 Stringer & Bulkhead Repairs w/ Many Pics

Father's Day Update:

It Works !!!

We took the boat out for a short cruise and anchored for a bit today.
IMG_0754.jpg

Things seemed to work OK . . .

I think the exhaust tubes need to be replaced, because they are not in very good shape internally and the engine seemed to struggle up around 4K RPM.

The fuel gauge seems to be off by about 1/2 a tank. I filled the tank about 1/2 way and the gauge read around '0' or 'Empty'. Coming up on plane as the boat is at an upward angle, the gauge went up to about 1/2. So, I'll have to see about getting a new sender or something.

The speedometer does not work . . . I cleaned out the pitot tube pretty good last year, but it usually gets clogged towards the end of the season. I cannot find my special tool for cleaning out the hole, so that will have to wait.

So, still a few odds & ends, but the boat is in the water and operational :cool:
 
Last edited:

tpenfield

Moderator
Staff member
Joined
Jul 18, 2011
Messages
18,039
Re: 1991 Formula 242 Stringer & Bulkhead Repairs w/ Many Pics

I ordered 5 feet of exhaust tube and some new OEM style riser/elbow gaskets so that I can replace the exhaust pipes next weekend. The inner liner of the 'old' ones have torn, and I believe that is causing restriction at the higher RPM's. I may need to remove the elbows the get the exhaust tubes installed, as they are a straight shot through the transom and into the swim platform. So, new gaskets are just in case.
 

Struc

Chief Petty Officer
Joined
Jul 27, 2011
Messages
409
Re: 1991 Formula 242 Stringer & Bulkhead Repairs w/ Many Pics

Looks fantastic, and glad to hear it's running good for you! Hopefully fixing up the exhaut will make it run GREAT!

Really a beautiful boat.
 

tpenfield

Moderator
Staff member
Joined
Jul 18, 2011
Messages
18,039
Re: 1991 Formula 242 Stringer & Bulkhead Repairs w/ Many Pics

Looks fantastic, and glad to hear it's running good for you! Hopefully fixing up the exhaut will make it run GREAT!

Really a beautiful boat.

Thanks, Curt . . . I am hoping to get out on it a few times over the next couple of weeks. Each time, I'll do a little fixing until it is all good. :)
 
Top