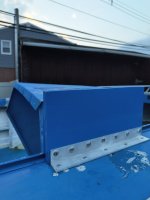
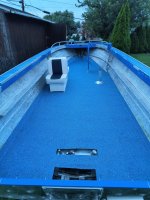
1976 22' SUS O/B "Hydration Break"

Moserkr

Chief Officer + Starmada Splash Of The Year 2021
Joined
Nov 23, 2020
Messages
869
Looks great! I like the idea of coat-it on the transom. Should absolutely prevent corrosion and add some integrity. That stuff is so tough. You should have a leak free boat when you’re done.
 

DWbaseball

Petty Officer 2nd Class
Joined
Aug 25, 2020
Messages
125
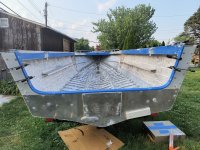
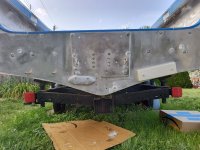
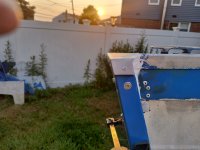
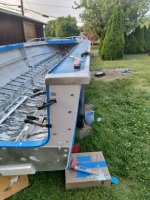
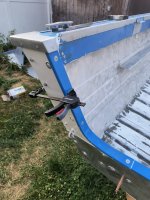
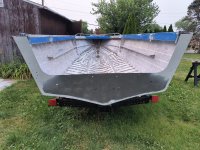
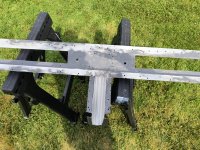
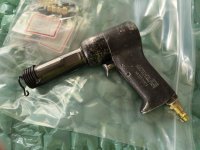
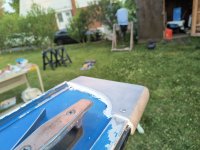
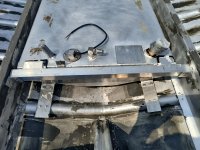
We have a transom! Got some help on Saturday and made a few mistakes but it is rock solid. A friend that works for Boeing pitched in for a hour or so on the air hammer to do the solid riveting for the knee brace. Used all new 316 stainless steel bolts and still have 5200 stuck to me everywhere.
IMG_20230610_184620874.jpg
Don't know what I was thinking when I put the anode in that spot before checking clearances but worked around it.
IMG_20230610_184638424_HDR.jpg
IMG_20230610_193511731_HDR.jpg
IMG_20230610_193537698_HDR.jpg
IMG_20230610_193749292.jpg

Here are some pics from the last few weeks of prep. IMG_20230606_200812746.jpgIMG_20230529_161646123.jpg
IMG_20230603_125450618.jpg
IMG_20230525_211440364_HDR.jpg

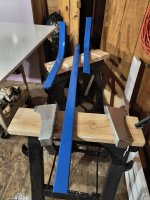
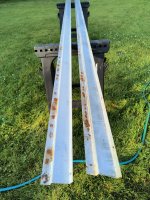
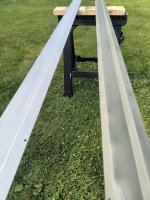
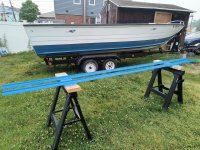
These are the side board metal feet that I was thinking about not using but I cleaned them up instead. PO used steel staples.IMG_20230531_072411885.jpg
IMG_20230603_091444019.jpgIMG_20230607_194126265.jpg

Did some touch up paint on the white sides too and you can't even see the spots where i did it. Feeling really good and looking forward to gas tank, foam and floor next weekend.
 

Attachments

  • IMG_20230610_193503757.jpg
    IMG_20230610_193503757.jpg
    2.8 MB · Views: 8

SHSU

Lieutenant Junior+Starmada Splash Of The Year 2019
Joined
Mar 8, 2017
Messages
1,741
That anode will last you years. lol

SHSU
 

DWbaseball

Petty Officer 2nd Class
Joined
Aug 25, 2020
Messages
125
Haha I hope the anode lasts a long time too! Are you saying it's big for the size of the boat? I was actually thinking that I should buy an extra or two of the same size in case I need one down the line and I can't get one that fits the holes in drilled.
 

DWbaseball

Petty Officer 2nd Class
Joined
Aug 25, 2020
Messages
125
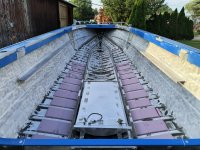
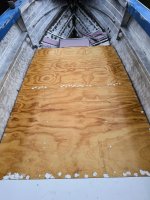
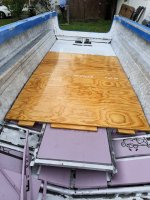
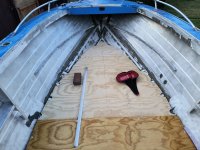
Attaching some update pics. Got the gas tank installed and been working on foam and floor this weekend and thru the fourth.
IMG_20230617_153613692.jpg


IMG_20230617_153605445_HDR.jpg
IMG_20230628_192616582.jpg


IMG_20230628_192629920.jpg
Missed getting a good one with the foam before I dropped the deck on.IMG_20230701_185425227.jpg
IMG_20230701_181015974.jpg
 

SHSU

Lieutenant Junior+Starmada Splash Of The Year 2019
Joined
Mar 8, 2017
Messages
1,741
5200 is our best friend. lol

Also, the anode I have on my boat ~2 inches circular. Its been going for 4 years, mostly in saltwater. Starting to look ratty but still has life in it and will look to replace after this year. Do a couple checks a year to make sure I still have continuity to the hull and its doing its job with a multimeter.

SHSU
 

DWbaseball

Petty Officer 2nd Class
Joined
Aug 25, 2020
Messages
125
Happy Fourth of July everyone. Thanks for the thumbs ups

I've been doing much better with 5200 management for the floor install vs the transom (lol). Keeping a tube in the freezer in a bag has been keeping it ready to go for me.

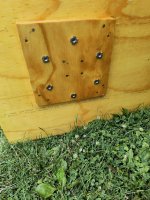
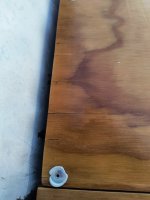
T nuts for the Captains chair on this piece of floor.IMG_20230704_134333815.jpg
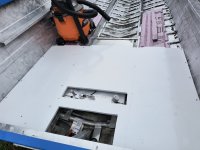
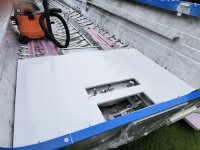
More foam and another floor piece in. IMG_20230704_153036168.jpgIMG_20230704_180343316.jpgIMG_20230704_180359493.jpg

I had a moment yesterday when I realized I wasn't going to be seeing the inside of the hull again after years of working on it. Onward.

Still holding a boat surprise up my sleeve for the finale of this build that I haven't leaked to this to thread yet. Need to get her on the water this year.
 

SHSU

Lieutenant Junior+Starmada Splash Of The Year 2019
Joined
Mar 8, 2017
Messages
1,741
Never thought of it like that. If I do I start worrying if I missed something and I need to fix something... lol I am a worry wart.

SHSU
 

BWR1953

Admiral
Joined
Jan 23, 2009
Messages
6,195
T nuts for the Captains chair on this piece of floor.View attachment 383395
I strongly urge you to move those t-nuts to between the backing plate and the main deck piece so that they're securely sandwiched into place between the pieces.

I had the ones in my Kingfisher set up the same way as you do now, and when I went to actually install the chair bolts, the t-nuts got pushed out and fell down inside below the deck! Trust me, ya don't want that to happen! 😬😵‍💫
 

Moserkr

Chief Officer + Starmada Splash Of The Year 2021
Joined
Nov 23, 2020
Messages
869
Foam and deck look great! Will keep sending you some thumbs up as you get on to the fun part of the interior. Looking forward to the surprise.
 

DWbaseball

Petty Officer 2nd Class
Joined
Aug 25, 2020
Messages
125
Never thought of it like that. If I do I start worrying if I missed something and I need to fix something... lol I am a worry wart.

SHSU

I immediately started worrying about if I should have hit the drain openings under the middle of the ribs one more time with the butter knife! Then I thought... Good enough need to get on the water! Onwards
 

DWbaseball

Petty Officer 2nd Class
Joined
Aug 25, 2020
Messages
125
I strongly urge you to move those t-nuts to between the backing plate and the main deck piece so that they're securely sandwiched into place between the pieces.

I had the ones in my Kingfisher set up the same way as you do now, and when I went to actually install the chair bolts, the t-nuts got pushed out and fell down inside below the deck! Trust me, ya don't want that to happen! 😬😵‍💫

Floor piece shown is already installed so I just checked the threading on the t-nuts, and they gripped the bolts perfectly. I will note to be delicate when I am threading these bolts though. Thanks for the heads up.

Here's how I did it that seemed to work great. Note I am not an expert or a pro just sharing how I got it done for someone maybe reading this in the next bunch of years. Without me reading a bunch of good threads like this I would have never known how to even attempt this project.

1. Redrilled the holes that were thick full of dried Spar varnish. I'm using 5/16-20 bolts - 316 stainless. I also drilled a small 3/8 opening from behind for space to countersink the center of the t nut.
2. Pushed a bolt through a hole (snug fit) and then threaded a t nut on the bolt after it was pushed through.
3. Pulled back on the bolt as hard as i could to set the spikes into the back of the board.
4. Whacked the t nut a bunch of times with a rubber mallet from behind to really seat it. I made sure I wasn't hitting on any of my bolt threads and only on the t nut. Try not to whack the sealed finish with the hammer.
5. A few more rubber mallet whacks after it's already seated for fun/good measure. I was leaning/bracing the deck board against my left knee from behind and swinging the rubber hammer with my right. OSHA approved.
6. Remove the bolt by unscrewing / unthreading.
7. Repeat for each bolt.
Note- I had one that didn't want to unscrew after it seated so I knocked it back out and used a different t nut.

Pic reposted
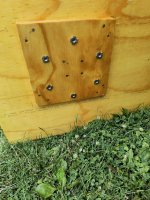
IMG_20230704_134333815.jpg
 

DWbaseball

Petty Officer 2nd Class
Joined
Aug 25, 2020
Messages
125
Putting up some new pics I have been hard at work.Still trying to splash in 2023.
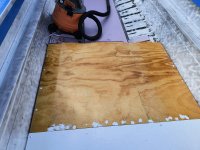
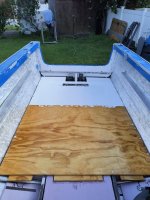
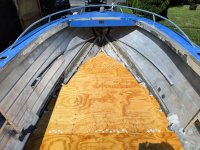
Last piece of Deck cut. Not perfect symmetry but it stands on solid.
IMG_20230711_200730245.jpg
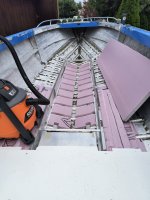
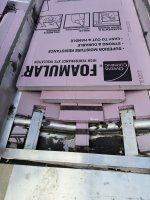
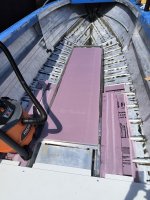
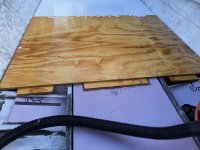
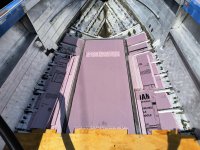
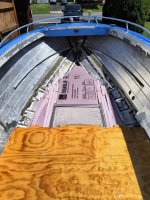
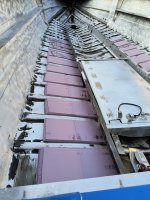
I described doing the pink foam under the floor to my wife as: "A big puzzle where you have to fit rectangular boards into a triangular space with obstacles, with the goal to fill as much of the space as possible using the least amount of cuts and time."
IMG_20230730_120321490.jpg
And once you are done with the foam puzzle you'll never see it again!
IMG_20230730_150811028.jpg
IMG_20230730_150713977.jpg

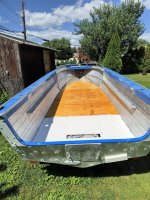
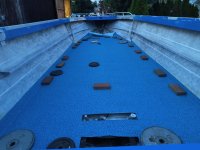
And I got the Nautolex put down just last night. Ran out of adhesive so need to get another can to finish just the tip of the bow.

IMG_20230802_203426311.jpg

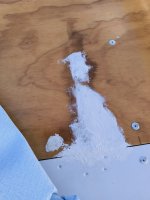
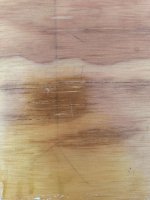
And the Bad: I don't recommend using minwax spar for a final coat in any way. Was planning on the wood finish look using the spar for side boards and the dash but No way now. Going to use rusto enamel instead.

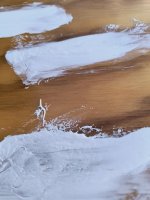
I have had this deck installed and outside on the weather for less than a month and I had some finish cracking and water intrusion that I tried to seal with a little bit of 5200. I decided to stop trying to chase the issue and just get the nautolex down on top of it.
IMG_20230802_182727620.jpg

IMG_20230802_182805259.jpgIMG_20230802_182835531.jpg
I always end up finger painting when the 5200 comes out.
IMG_20230802_182746300.jpg

Free free to ask me any questions. I have a bunch of stuff I am trying to plan and figure out and I'm sure I'll be asking a bunch soon.
 

junkman306

Petty Officer 3rd Class
Joined
Sep 26, 2011
Messages
92
I seemed to have missed it reading through, but how thick is your plywood for the floor? Your runners are laid out like mine and I have been paranoid about support and not stressing the floor with weight.
 

DWbaseball

Petty Officer 2nd Class
Joined
Aug 25, 2020
Messages
125
I am using 3/4 ACX plywood for the floor. I am a big guy and it's solid.

They say the factory used 1/2 and it can have some spring to it which I did not want.
 

SHSU

Lieutenant Junior+Starmada Splash Of The Year 2019
Joined
Mar 8, 2017
Messages
1,741
Agree with 3/4 being the way to go. Much sturdier then 1/2. As for the end grain sucking in water, its really hard to seal those areas. Don't know how effective the Rustoleom will be, but with the Nautolex covering it should help prevent additional.

SHSU
 

DWbaseball

Petty Officer 2nd Class
Joined
Aug 25, 2020
Messages
125
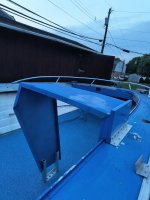
Getting started on putting together the captains console.
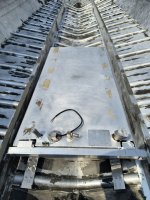
IMG_20230806_200104739.jpg

IMG_20230806_200120070.jpg

Any tips on how to clean up my windshield? I was thinking about masking off the glass and spraying the frame with self etching primer then a white spray paint. And, does anyone have a source for the T bolts? And, I think I lost the nut that goes on the threaded windshield support arm. Does anyone know the threading specs? Lastly, would an automotive headlight restore kit work to make the windshield clear again?

Also picked up a like new back to back seat on FB marketplace for cheap. I had bought another one when I started the project IMG_20230806_200139006.jpgbut the seated height was so low that I was thinking about buying new before I grabbed this steal.
 

junkman306

Petty Officer 3rd Class
Joined
Sep 26, 2011
Messages
92
That looks good! What metal is that console made of? How wide? Post #166 pics #2 and #3, do you think that water will flow through there well enough with the foam all the way down to the ribs like that? I guess, in my mind, I will always have a river running down the length of my boat and I am paranoid that water will get trapped and the humidity will cause the plywood to deteriorate.
 
Last edited:

DWbaseball

Petty Officer 2nd Class
Joined
Aug 25, 2020
Messages
125
Yes I am also paranoid about a lot of things going wrong and ruining the project. But you also need to balance that with having a good plan and executing the best you can.

I also thought about what you are commenting on and my rationale was that the foam boards that are laying flat on the sides are not resting flat on metal but are suspended just enough by sitting on the side of either rib plus the rivet tails of the chine rivets. I figured that would be just enough space to let it drain and dry. Hope I am right but can't go back now.


As far as the windshield I assume it is aluminum but really not sure it's just stock for this era SuperSport.

I'm actually also planning to cut off the long windshield side arm and bolt through the side window to my riser to support it
 
Top