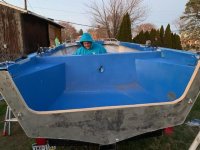
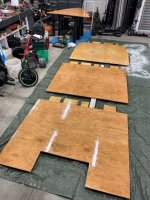
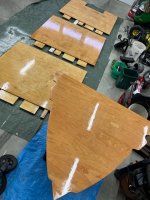
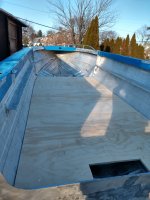
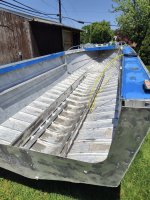
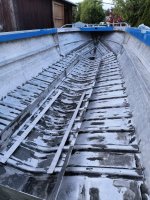
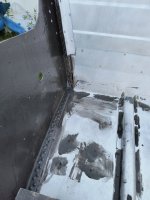
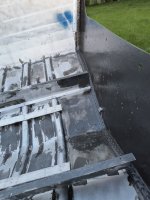
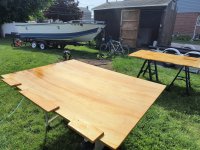
1976 22' SUS O/B "Hydration Break"

Sharpie223

Petty Officer 2nd Class
Joined
May 24, 2021
Messages
173
I'm trying to figure out a way to support the board transitions as well. The original aluminum strips in mine were marginally better than foil, and I would like to avoid extra wood at the joints to make it easier to pack foam below. If you happen to try a method that is different, please let us know how it works out. If it works well I may just steal your idea!
 

MNhunter1

Lieutenant Junior Grade
Joined
May 12, 2014
Messages
1,058
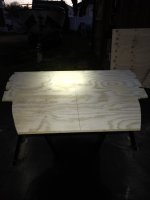
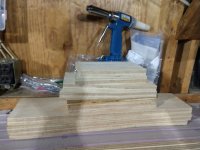
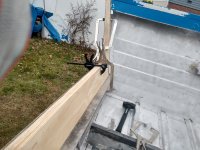
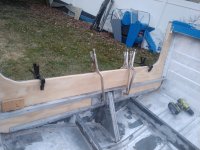
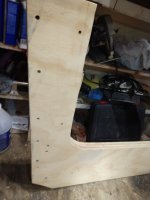
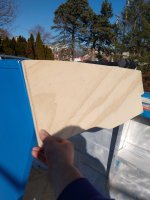
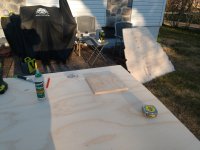
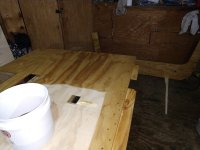
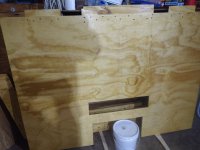
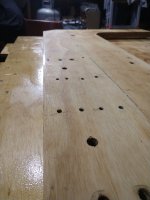
I've used the wood joiners on all three of my builds, and the same process of doubling the deck with an extra piece of 3/4" ply wherever seat pedestals get mounted. Glued and screwed, and sealed with spar. Make sure to account for the stringer placement if you go this route. Depending on how you lay your foam, it's pretty easy just to cut out/remove the 3/4" sections where needed, which you'd likely need to do for any plug-in pedestal bases as well. Those factory strips are pretty much useless and I found the wood gives me much more purchase and support.
Spar1.jpgSpar2.jpg
 

SHSU

Lieutenant Junior+Starmada Splash Of The Year 2019
Joined
Mar 8, 2017
Messages
1,741
Wood joiners are the way to go in my opinion.

SHSU
 

DWbaseball

Petty Officer 2nd Class
Joined
Aug 25, 2020
Messages
125
Sounds like I will be using wood joiners then. Thanks for the tips.

Another floor question. What is everyone doing with the edges of the boards where it sits on the ribs? I think my factory boards had some type of bevel on the edges there, but I dont think I can easily get a similar angled cut using my jigsaw or circular saws. Do I need to be doing something special here or can I just rivet into the ribs with square plywood edges?

Thanks. Got section 2 of floor cut last night and its looking like another clear and warm enough weekend here so hoping to keep powering this project ahead.
 

SHSU

Lieutenant Junior+Starmada Splash Of The Year 2019
Joined
Mar 8, 2017
Messages
1,741
I can't remember if I beveled my edges or not on the square boards. I did on the front section though. I used a jigsaw to cut my bevels.

SHSU
 

Sharpie223

Petty Officer 2nd Class
Joined
May 24, 2021
Messages
173
I just cut my deck boards. My back sections will have aluminum angle on the sides that they will set in, so no beveling there. My front sections I used a table saw set at 45 degrees to bevel, I set up a rip fence with a 2x3 lumber spacer just touching the blade to prevent me from doing anything more than beveling the edge. I then used a belt sander in the curves where I couldn't get the table saw.

If you are just talking about cutting a curved relief to fit over the ribs, and not a full chamfered edge, I would recommend marking where ribs touch and use course grit on a belt sander to grind the relief. Use the plies on the edge as indicators of depth.
 

MNhunter1

Lieutenant Junior Grade
Joined
May 12, 2014
Messages
1,058
I set my circular saw at an angle using the old deck angle to set my blade for the long runs. Angled my jig saw in the same manner for the notches around the ribs in the bow.
 

DWbaseball

Petty Officer 2nd Class
Joined
Aug 25, 2020
Messages
125
Here are some progress pics. I also ordered lots of boat parts online and they have been showing up while my wife works from home! Haha. Lastly I will say that there are going to be a few other surprises up my sleeve as this project comes together but I am going to stay close to the chest with those for now.

IMG_20230130_160348160_HDR.jpg
IMG_20230130_174749211.jpg

Making more progress on the floor pieces. My measuring and cutting aren't perfect, but I know they don't need to be and I have been good enough so far I think.
IMG_20230131_183156158.jpgUsed some scrap pieces to make some floor joiners, they aren't square but it doesn't matter. One of my purchases was 316 Stainless Steel wood screws.

IMG_20230130_160424768.jpg

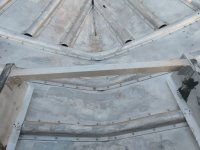
I riveted this brace piece accross the front of the stringers, planning to do two more wedged on either end of my gas tank installation when that time comes

IMG_20230128_145804439_BURST002.jpgIMG_20230128_145835016_HDR.jpgIMG_20230128_171337726.jpgIMG_20230131_183144087.jpg

Drilled a bunch of holes in my transom, including through the knee brace and my new piece of transom sheet. This is where I really tried to take my time and I was using a drill block to do straight holes. I am going to reuse a bunch of the 1/4 bolts that the PO used thru the transom when he worked on the knee brace.
 

DWbaseball

Petty Officer 2nd Class
Joined
Aug 25, 2020
Messages
125
Worked again this weekend. Loving the nice weather this winter. Failed again to take good pics.

I drilled the holes for the drain tubes in the same spot as they were before. I forgot the starboard one was a little low vs where the PO splash well knee brace was. Hoping I'll have clearance to be able to get the tube in and use the flaring tool but we will figure it out.

Also worked on the bow seating metal piece which was all bent up before. I had to remove PO L brackets with non ss hardware that were used with the new floor over the original rotted/dryrotted floor..... Also worked to flex it back into a better shape and I am going to eventually sure this up with some angles and square stock and rivets. Citristrip is next for this piece, and I also hope to cut in holes in for speakers

IMG_20230205_153620420.jpg
Lastly I rough cut and drilled holes for where I will mount my two bilge pumps, I did them on pieces of sheet aluminum and they will rivet to the last stinger.
 

DWbaseball

Petty Officer 2nd Class
Joined
Aug 25, 2020
Messages
125
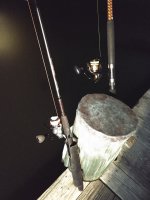
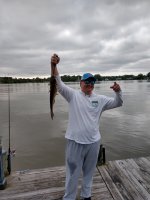
This latest update is coming from my Uncle's dock where it is 43 degrees and I have caught zero catfish tonight on a last minute trip.

IMG_20230207_230117877.jpg
I'm really going to push for have this hull built here in 2023 and lets just say I am not planning to be delayed by any issues with the Merc that I teased in an earlier update. More to come.
To close out, i hope that everyone is rooting for the Philadelphia Eagles to win the Super Bowl this weekend. Go Birds.
 

Moserkr

Chief Officer + Starmada Splash Of The Year 2021
Joined
Nov 23, 2020
Messages
869
Glad you’re having decent weather to work this winter! I rebuilt my boat during a mild winter and glad I did cause this years bad! But that means water in the lakes…. All caught up, keep up the good work!
 

DWbaseball

Petty Officer 2nd Class
Joined
Aug 25, 2020
Messages
125
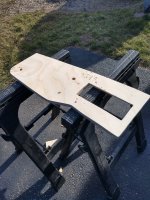
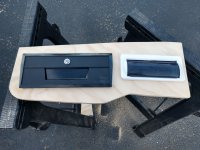
Just a little bit of boat work this weekend. Got my passenger console holes cut for a glove box and radio housing. Also applied some stripper to my bow seating aluminum not shown.
IMG_20230211_144421366_HDR.jpgIMG_20230211_161608782_HDR.jpg

Next I took the day off on Monday and traveled to a metal supplier in New Jersey. Got some more angle and square stock for whatever I'll need it for. I had them bend a piece into a C channel for me to replace the cracked parts of my transom cap.

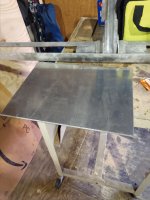
Then I got a big piece of plate aluminum that will essentially be my motor mount pad. The key for this piece is that I will have some bolt heads thru my knee brace and transom where the motor needs to mount flush. This piece will be thicker than those heads to allow that and I will over-drill out where those heads fall.
IMG_20230213_173519038.jpg

Lastly I got some aluminum bar stock that will suit to mount my under floor gas tank. I am going to get some neoprene rubber that the tank will sit on and it has tabs that I will rivet to these. Got home and the weather was great so wasted no time and got them riveted in.IMG_20230213_173000462.jpg

Weather is looking very warm again for the three day weekend coming up. Might even be able to try out the old timers formula as a test run.
 

DWbaseball

Petty Officer 2nd Class
Joined
Aug 25, 2020
Messages
125
Looking for some planning advice on my side panels. The originals have a z style piece of aluminum running the length of the bottom, and for me that was then screwed into the floor. I was thinking that I could do away with those pieces in favor of a piece of L angle that is riveted to the floor. My sideboards would then sit on those and I would rivet the boards to the upright part of the L. Note that since I have the 22' boat they need to be longer than one 96' length of plywood.

This seems more sturdy to me but I would like thoughts from others too.

i eventually might like to do some rod storage pvc tubes in this space under the gunnels trays too. But I probably am going to install straightforward side boards this year to get on the water. So I also think that my way is more flexible for the future.
 

SHSU

Lieutenant Junior+Starmada Splash Of The Year 2019
Joined
Mar 8, 2017
Messages
1,741
I didn't have a z but an L bracket for mine. I didn't reinstall as I was securing it to my splashwell which was more structural after my redesign. I think the L would work just fine with the rivets and 5200.

SHSU
 

DWbaseball

Petty Officer 2nd Class
Joined
Aug 25, 2020
Messages
125
Sharing some new pics from the last few weeks.

Here is a good one that shows my gas tank set in place and I cut a hole in the floor for the fittings which will fall under the splashwell. IMG_20230220_134703316.jpg

Next I have been working on my transom. I have all my holes drilled that will go through my transom wood, so that wood is now ready for old timers formula and then oil paint. You can see how I have some bolts thru my knee brace and then i have the thicker plate so that I will have a flush surface to mount my motor. Took it on the trailer down to my outboard dealer and had them drill the motor holes for me with their jig. IMG_20230306_125746083.jpg
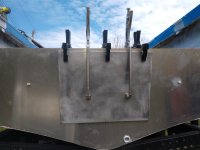
Still drilled a few more after this one
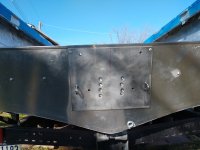
IMG_20230307_152908794.jpgThis one has the transom cap that I had made for the middle part that was cracked and then I am keeping my sides. I plan to just 4300 the transom cap on.
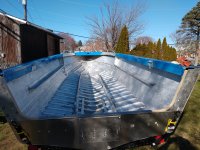

IMG_20230307_152924495.jpg
Then I had my brother helping for a few hours so we test fit the splashwell in place. I had a lip across the bottom that I decided to cut off rather than squeeze back in place. This works for me better because the bottom lip of the splash well sits securely right in the L angle top of my 3x modified knee brace. I'll then rivet it in through that L and it will be much more removable in the future if needed rather than bolted in a long the front lip.63472.jpeg

Lastly I am on a road trip today to pick up a barely used aluminum trailer to put this big boy behind. Really pushing to make this thing float this year.

Thanks everyone for the tips and knowledge so far.
 

DWbaseball

Petty Officer 2nd Class
Joined
Aug 25, 2020
Messages
125
Realized that a pics update is overdue!

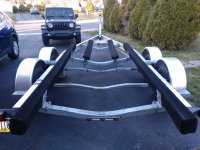
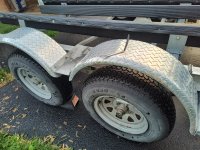
Here's the new trailer, and I have rubber slides on the bunks now so the carpet doesn't hold water against the aluminum IMG_20230322_183544955.jpg

Then I mocked up the console, and added a doubler under the floor where my console post will be. IMG_20230326_144226323.jpgIMG_20230326_165845410.jpgIMG_20230326_165900945.jpgIMG_20230326_170103878.jpg
IMG_20230326_182807256.jpg

Then just last night I got started with the Old Timers Formula wood sealer. Transom and the aft deck piece are done. Might hit the transom again one more time though.IMG_20230411_210037632.jpgIMG_20230411_222528616.jpgIMG_20230411_211933429.jpg
 

Watermann

Starmada Splash of the Year 2014
Joined
Jan 12, 2013
Messages
13,794
Looking great, it really comes together quick after the deck goes in.
 

DWbaseball

Petty Officer 2nd Class
Joined
Aug 25, 2020
Messages
125
Waterman's quote that it all goes together fast at the end has been top of mind and is keeping me going! I saw the pic of his 18 SS on the forum this week and hope that mine is going to last and look good for a bunch of years like that.

I have reconfigured my trailer from before to make the middle bunks full length to quell my fear about putting the bow right into the axles on a ramp. Also got the plastic bunk covers all done. Then just today I hit it with the aluminum brightener to clean up some pollen and grime. All I need is to bolt down the outer bunks and I will be ready to change trailers. Once on the new trailer, I am planning then to tighten the inner bunks to be touching the hull with only light pressure.
IMG_20230424_200110723.jpg
IMG_20230512_194422080_HDR.jpg
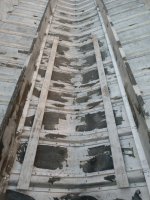
In this pic you can also see the butter knife tool I have been using to clean the water troughs under the middle of the ribs. The boat has gotten a power wash recently and hopefully this weekend I am going to get the Coat-it treatment done on the hull inner rivets.

Lastly I have been moving forward on sealing the three deck boards and transom. Transom and aft deck board have gotten old timers, oil based primer, and rusto oil enamel. Deck 2 and 3 have gotten old timers and one coat spar. All pieces still need a final coat.
IMG_20230413_215720788.jpg IMG_20230511_184515320.jpg
IMG_20230512_173447062.jpg

Deck 4 is still raw since I need to cut out a good deck board joiner that rides the hull on either side since it floats a little on the port side cut, oops.

Best wishes all!
IMG_20230429_155358589_HDR.jpg
 

SHSU

Lieutenant Junior+Starmada Splash Of The Year 2019
Joined
Mar 8, 2017
Messages
1,741
I like your idea for increasing the console height. That is one thing I wish I had done differently. The original height is way to short for my 6' 2" frame.

SHSU
 

DWbaseball

Petty Officer 2nd Class
Joined
Aug 25, 2020
Messages
125
Thanks SHSU. The low height console steering was uncomfortable for me on my shakedown runs with the Chrysler so I made up that way to raise the it and hopefully I will be able to both sit and stand with the captains chair I have. That said, I've already realized that I should have made my riser longer in length and then trimmed to fit exactly between my console fronts and steering dashboard. As is Im going to need to add in some spacer pieces to seal out spray from my wiring. I will for sure include more pics of this as it comes together.

Mom excused me to work on the boat because of the great weather this Sunday, and I got the coat-it rivet sealing done. Here are before, after power washing, and after pics. I had some extra at the end so I costed the whole inside of the transom. In hindsight I probably could have skipped my jb weld step in favor of just putting coat it over everything. Still happy with how it turned out.

IMG_20230514_132313149.jpg
IMG_20230514_200259324.jpg
IMG_20230515_200830568.jpg
IMG_20230515_200845372.jpg

Also got the final coat of Spar on both sides of deck boards 2 and 3. These are now ready to install..
 

Attachments

  • IMG_20230514_155447809.jpg
    IMG_20230514_155447809.jpg
    5.7 MB · Views: 1
Top