1967 Starcraft Jet Rebuilding

catbones

Petty Officer 1st Class
Joined
Jul 15, 2012
Messages
319
Re: 1967 Starcraft Jet Rebuilding

Actually JB that's exactly how you do it. I covered all this in my resto thread. All you need to do is slice the dash anywhere from top to bottom and it will fall right out if you have all the bolts out. Then you just make the end cuts on the new one straight up and down in line with the bottom edge of the old one and it will fit back in. There is a peice of angle on each end that you bolt the new dash back into.

OK Catbones I just read thru the entire restore thread and need to add a few things. First Don't believe all those horror stories about the gluvit. That stuff is amazing! If you follow mixing instructions it will outlast you. I've used it on three boats. The liquid limo was done in 09 and the gluvit is just fine still.

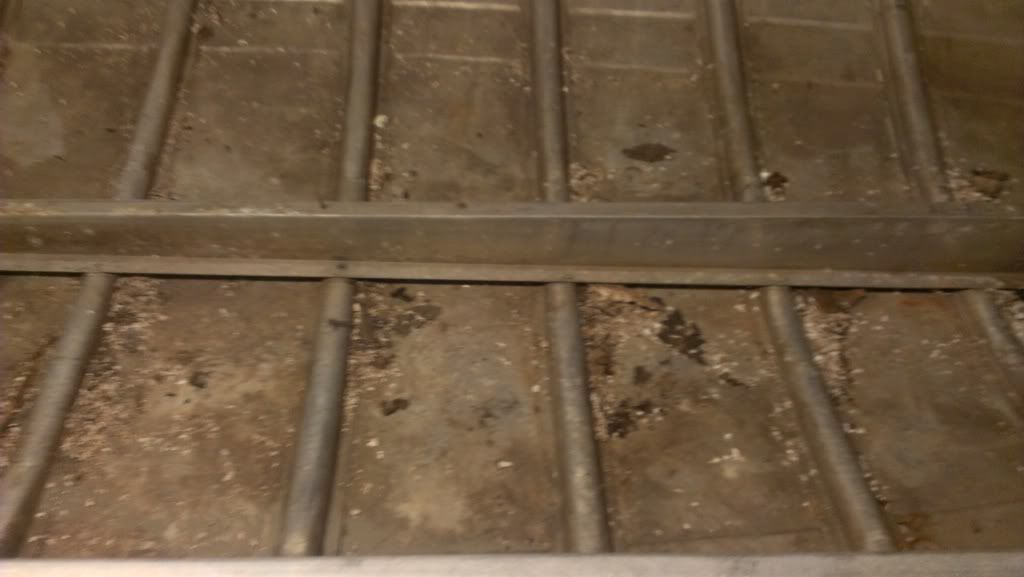
On the hull of your boat where you are missing rivets you can drill out the hole to size and add these. Make sure the head is on the outside of the boat, it is set in a good glob of 5200 and put a small flat washer, a lock washer and nut on the inside of the boat. This is a two man operation. On the inside and outside wipe off all excess 5200. Then using a small dremel or grinder cut off the excess bolt on the inside of the boat. Make sure bolt, washer, and nut are stainless.
machine-screw-slotted-round.gif


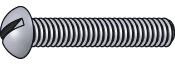
On the dash- running all around the inside of your gunwale and accross the top of the dash is an inside trim peice (aluminum, with a rubber/vinyl center just like a rub rail). First you take a cotter key extractor, or a screwdriver at the end near the stern and remove all of the vinyl. save for re-use or you can buy new really cheap on ebay. Once you get the vinyl out you should see bolts like these. They have to come out before the dash will.
WW10.jpg


This is a quote from my resto thread with some additional pics.
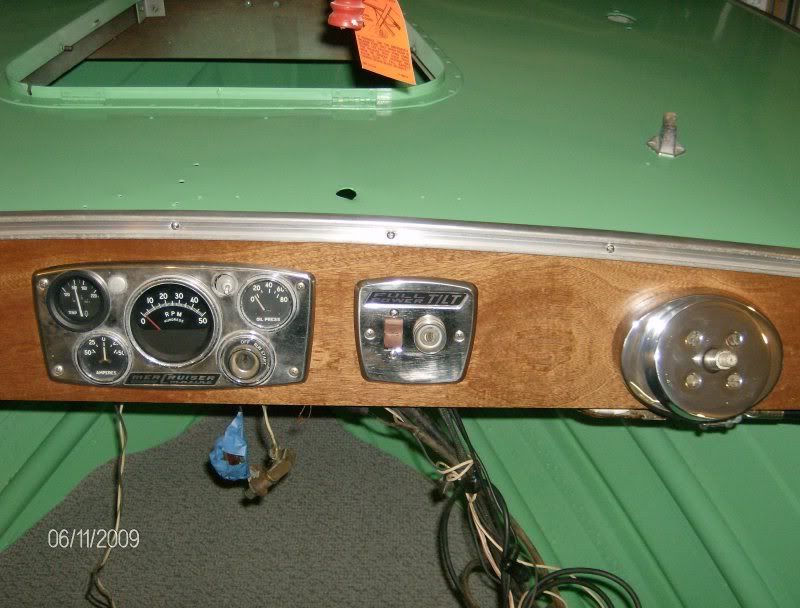
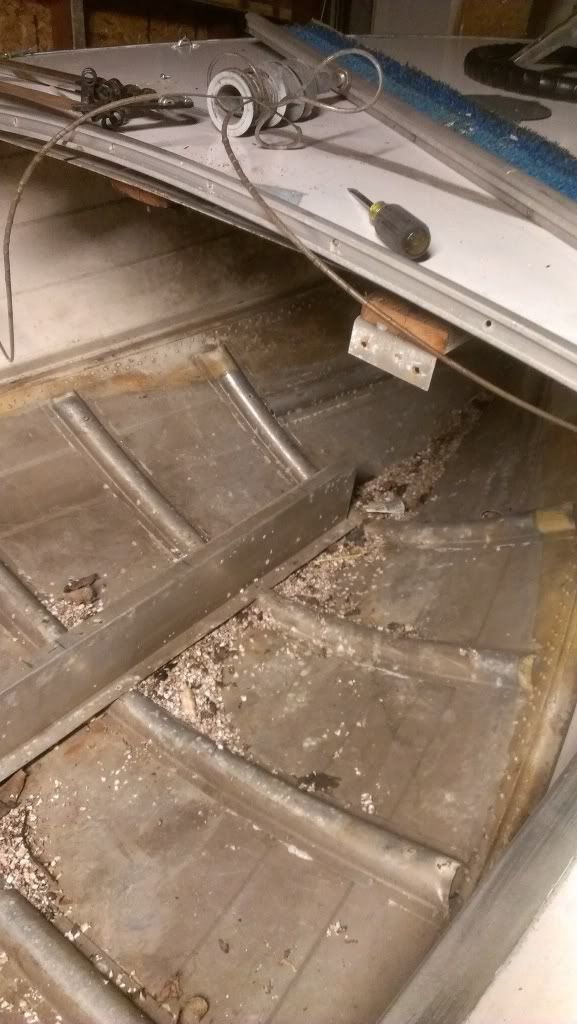
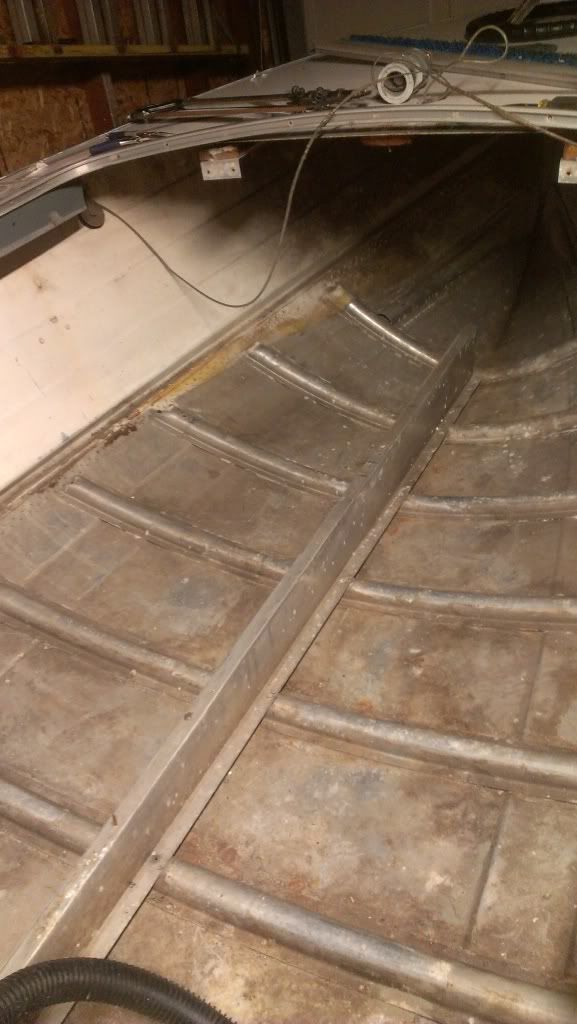
We want to replace the old decrepid, full of holes dash with a new spankin peice of mahogany. Problem is, the danged edges are cut on an angle with the sides of the boat. Guess they were put in before the deck skin was installed and I don't want to detach all the deck stringers in the bow and remove the deck. So first I had to remove all the hardware, controls, and the gunwale rubrail receiver. This came up in the Starcraft forums a few months ago. After you remove the rubrail insert, the receiver is screwed to the dash and rivited along the gunwale. Also there's about 16 thru bolts into metal brackets that also tie into the deck stringers. Removing this dash is not a fun project!!!!
rroff.jpg

hodgepodge.jpg

Then you remove the tray attached to the bottom and peel the old canvas off so you can get to the bolt heads counter-sunk in the wood, There are also four bolts on each side up under the gunwale.
dashready.jpg

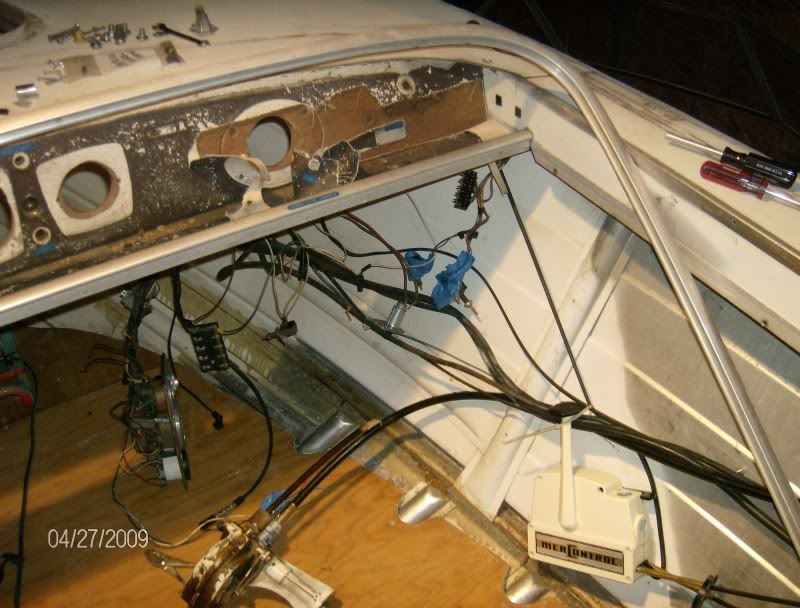
Now we've got it all ready to come out. Tomorrow evening, I'll saw it right up the middle and it should drop right out.

I forgot to mention there's a ton of stuff mounted to the back side of the dash-several fuse blocks, etc. and I also marked all the switches with masking tape so I wouldn't be trying to figure out which wires went to what when we re-wire.

Both of the fuse blocks had been totally bypassed by previous repairs except for one. But instead of a fuse, someone had installed a small spring, sort of like the ones you used to see in an old ball point pen???

It's gonna be nice to get all that cleaned up with this re-build.

If you have a bunch of bolts going into small aluminum angle braces tied into the front bow deck stringers (wood) you can install the angles with stainless screws from underneath. My new dash was 1" thick so I used 3/4" ss Screws from underneath. Starcraft used bolts because it's a little easier and they were gonna cover with vinyl.
I know your boat is a 16 footer and mine is a 22 but they were made one year apart and there are many similarities. Go thru my resto thread and look for pics and then the descriptions of things we did. It's provided to help folks out.

And I'm guessing your transom is bowed because your wood is in two peices. Once you replace it the bow should go away....

how hard was it to put the vinyl back in?
 

North Beach

Commander
Joined
Sep 29, 2008
Messages
2,022
Re: 1967 Starcraft Jet Rebuilding

Yes but the product in the link has the same profile once installed.
 

North Beach

Commander
Joined
Sep 29, 2008
Messages
2,022
Re: 1967 Starcraft Jet Rebuilding

No that was a tru rubrail insert material vs the inside peice which is more asthetic and was much thicker and stiffer. More of a solid type material. It's made by Taco Metals and one of the guys over on the Starcraft forums has the part number. It's also a tad expensive.
 

catbones

Petty Officer 1st Class
Joined
Jul 15, 2012
Messages
319
Re: 1967 Starcraft Jet Rebuilding

Hi,

NorthBeach: Thanks, yeah that main one I do have to replace since it is cut, mangled on one side but that will depend on the price. Might wait a little for that. The interior one, for $9 not a problem replacing thank you for the suggestions.

Now for the good part, I've had a lot of time during the weekend thanks to my great wife for biting her tongue and letting me do this while she took care of the stinkies for a while. So far I've got the following done;

1.) Took the dashboard out, thanks to Northbeach and Lake.

2.) Stripped her down to bare, took out the joke of a foam, any other crap and vacuumed.

3.) Washed her belly and interior as much as I could with the power washer.

She still needs a scrub though since all the junk is stuck on, so a degrease will help. I'm looking at the good miracle goo remover stuff, but will engine degrease for a car work?? got some of that laying around.

BTW, any other very good stuff but lower in costs compare to gluvit ? just asking.

Here are some photos too;

IMAG0247_zps3f716a8c.jpg


IMAG0248_zps757142cb.jpg


IMAG0255_zpscdf5e73d.jpg


Plenty of these around and I don't think a rivet will fix the hole left after the bolt;
IMAG0253_zps1589c2ab.jpg


IMAG0251_zps06a39fb7.jpg


There are many spots at the back where you will see nice rust working itself on the bolts some dummy put in replacing the rivets that fell out or were leaking. So, I gotta rip the caulking off them, cut the bolts and sand them down. Then, nicely, put new rivets in and hopefully the holes are not too big now for rivets as I hate having bolts in, but either rivets or bolts with 5200 will do.

Then gluvit or unless I find something cheaper but just as good since my kids have made a hole in my pocket recently with the school
 

catbones

Petty Officer 1st Class
Joined
Jul 15, 2012
Messages
319
Re: 1967 Starcraft Jet Rebuilding

Hey guys, any suggestion on the types of rivets I should use, length and thickness? would I be good with 3/16 inch by 1/2 inch?
 

jbcurt00

Moderator
Staff member
Joined
Oct 25, 2011
Messages
24,993
Re: 1967 Starcraft Jet Rebuilding

Using 3/16" by 1/2" rivets for what? Rivets are sized by grip range, it'll depend on what you want to rivet together. Riveting down the 1/2" deck plywood will require a different grip range then riveting the transom corner caps back on to the aluminum gunwale & transom skin.

If you're talking about replacing the bolts the PO used that are covered w/ caulking, the pix you referred to didn't attach, but it will depend on the thickness of the 2 materials, and be prepared to try 1 or 2 different grip range rivets to get the best possible size match.

Seems like the iboats servers are having some trouble w/ pix in some posts. I had trouble yesterday w/ pix too....
 

catbones

Petty Officer 1st Class
Joined
Jul 15, 2012
Messages
319
Re: 1967 Starcraft Jet Rebuilding

JB,

Yeah I'm going to re-upload those pictures, seems they disappeared some where :)

As for the rivets, I'm not to much of an expert on them. I know I will have to replace the bolts on the very bottom of the hull where the "tongue" thing runs along in the middle? also some on the sides too.

I'm just going to buy a box of random ones that HD sells. I've seen some of you guys filled the little holes after the rivet is in with 5200 then sand it clean ?
 

lakelover

Rear Admiral
Joined
Mar 26, 2003
Messages
4,386
Re: 1967 Starcraft Jet Rebuilding

I'm just going to buy a box of random ones that HD sells. I've seen some of you guys filled the little holes after the rivet is in with 5200 then sand it clean ?

For through the hull riveting, you should use solid head rivets. HD might have them, not sure though. I think I'd feel more secure with those instead of regular ones filled in with 5200. A lot less work, too....5200 doesn't sand too well.

If you have a lot of stainless fasteners to buy, the prices here are quite good compared to HD or any of the big box stores, even after shipping is added. Not for small quantities though. They have rivets too.


Boltdepot.com - http://www.boltdepot.com/Catalog.aspx
 

catbones

Petty Officer 1st Class
Joined
Jul 15, 2012
Messages
319
Re: 1967 Starcraft Jet Rebuilding

Lake,

Can I still use the arrow rivet gun or any other rivet tool for the solid rivets or rivets from the Bolt Depot ?
 

lakelover

Rear Admiral
Joined
Mar 26, 2003
Messages
4,386
Re: 1967 Starcraft Jet Rebuilding

Yes, no problem, that's what I used.
 

catbones

Petty Officer 1st Class
Joined
Jul 15, 2012
Messages
319
Re: 1967 Starcraft Jet Rebuilding

The arrow rivet tool that HD has? I thought solid rivets had to be pounded on one side to flatten and blind rivets were pushed in by arrow rivet tool that made the rivet expand?

Sorry little confused her as to what to use for the tool on solid rivets and how the procedure of putting one works in an aluminum boat since I can't be on the other side of the hull but just on one side.
 

lakelover

Rear Admiral
Joined
Mar 26, 2003
Messages
4,386
Re: 1967 Starcraft Jet Rebuilding

They make solid head blind rivets to use in the Arrow or whatever brand guns.

Boltdepot doesn't have a huge selection of solid head rivets, but check here for info: - http://www.boltdepot.com/Blind_rivets_Closed_end_%28sealed%29_Dome_head_Aluminum_-_Aluminum_mandrel.aspx

This is also interesting. I'm not an expert on rivets by any means, I'd never used any before my project, but it ended up being less confusing than it seemed in the beginning.

Using Blind Rivets - http://www.boltdepot.com/fastener-information/rivets/Using%20Blind%20Rivets.aspx
 

catbones

Petty Officer 1st Class
Joined
Jul 15, 2012
Messages
319
Top