1967 Starcraft Jet Rebuilding

North Beach

Commander
Joined
Sep 29, 2008
Messages
2,022
Re: 1967 Starcraft Jet Rebuilding

Catbones, you really should get that splashwell dismantled so you can see what's going on inside. Go to this link and check out pages 4 and 5.

http://forums.iboats.com/showthread.php?t=361561

It's probably not exactly like yours but it will give you an idea of whats going on. Things like the tru transom drains from the splashwell, etc.
 

catbones

Petty Officer 1st Class
Joined
Jul 15, 2012
Messages
319
Re: 1967 Starcraft Jet Rebuilding

Catbones, you really should get that splashwell dismantled so you can see what's going on inside. Go to this link and check out pages 4 and 5.

http://forums.iboats.com/showthread.php?t=361561

It's probably not exactly like yours but it will give you an idea of whats going on. Things like the tru transom drains from the splashwell, etc.

hey thanks, I don't see any crack where there could be a rivet or bolt or screw. I'm sure I got everything out and she's just swollen up. I'm going to try an pry the round stick that is banged into the side where the new little piece of transom wood was replaced. then if that doesn't help, I will see and try to take the splashwell apart and see what I can do with that. I was hoping to save time and not take it out but if I have to just for extra work room well she gotta get out.

thanks again :)
 

catbones

Petty Officer 1st Class
Joined
Jul 15, 2012
Messages
319
Re: 1967 Starcraft Jet Rebuilding

Hey guys,

So with the wife at work and kids down for a nap, walking by the garage to do some design work at the office I could simply couldn't resist and take another hack at the transom wood to get its thing out. So after five minutes I decided to go ahead and take the splashwell out. Drilling out the wrong rivets, solid rivets which I now will have to replace, I took out the rivets that I thought the aluminum trip was holding down, and found two more under that. Just did enough to slide it aside for taking the splashwell out.

IMAG0284_zps3d801790.jpg


Here she is without the splashwell and crazy transom wood still in;
IMAG0285_zps0f46ddc3.jpg


Then after some hassle and her starting to break apart again now on the bottom of the transom, well good part is she let go finally. Here is just the transom wood, out and on the side saying its goodbyes;
IMAG0291_zpsbdabb949.jpg


Now, remember how I mentioned that it was in two pieces set in there, well take a look at this other piece that someone planted there for the time being;
IMAG0290_zps98bdfc6f.jpg

IMAG0289_zpsd6545716.jpg

Seriously??? three pieces and it looks like treated wood too... come on! its not that hard to use Google and find iBoats forum with all the tips and tricks on transom replacement
 

catbones

Petty Officer 1st Class
Joined
Jul 15, 2012
Messages
319
Re: 1967 Starcraft Jet Rebuilding

Don't seem to be able to post more the 6 photos at a time!

In any case, here is the rest of her;
IMAG0286_zpscbde2b41.jpg

IMAG0287_zps0eb17b5e.jpg


Time to clean her up real good maybe some time this weekend.
IMAG0292_zps9b20e4b9.jpg


Looks like a lot of crap was going here, ohh yeah is this bad or can I just use some JB Weld on her to patch stuff like this up, sand it and then prime it ? (I'm referring to that little hole, not through the whole thing at all just corroded and rotted. Nice big bite out of it.)
IMAG0294_zps54588812.jpg

I will clean her up and see how many like this are there.

Next up, is clean up of all the garbage that fell off her, clean up and degrease of her as much as possible. Then using a grinder cutting off the bolts in the hull and grinding it a little to see how that looks. Stay tuned! Hope the temperatures keep up for the next few weeks still around 60 - 70 during the day, might have to hurry with the gluvit stuff!
 

catbones

Petty Officer 1st Class
Joined
Jul 15, 2012
Messages
319
Re: 1967 Starcraft Jet Rebuilding

By the way, I think my kids are more excited then me of getting this thing out lol!

IMAG0283_zps4a9774d9.jpg
 

kfa4303

Banned
Joined
Sep 17, 2010
Messages
6,094
Re: 1967 Starcraft Jet Rebuilding

Glad you got the old wood out Catbones. Not to worry, the old transom will clean up surprisingly well. Use a Scotch Brite pad and a bit of Acetone and it'll be shiny again in no time. If there are any pinholes, or pitting you can spread a thin layer of JB Weld, or MarineTex epoxy over the them prior to re-installing the transom. Glad to see the crew is jumping for joy!
 

North Beach

Commander
Joined
Sep 29, 2008
Messages
2,022
Re: 1967 Starcraft Jet Rebuilding

Glad to see you got it out bud!!!! You never know what you'll find in these old boats and remember it was just a couple years ago there wasn't even any info here on tin boat restorations. Most of what we now know was gleaned via trial and error by the very people who are commenting on recent threads.

Good Job!
 

catbones

Petty Officer 1st Class
Joined
Jul 15, 2012
Messages
319
Re: 1967 Starcraft Jet Rebuilding

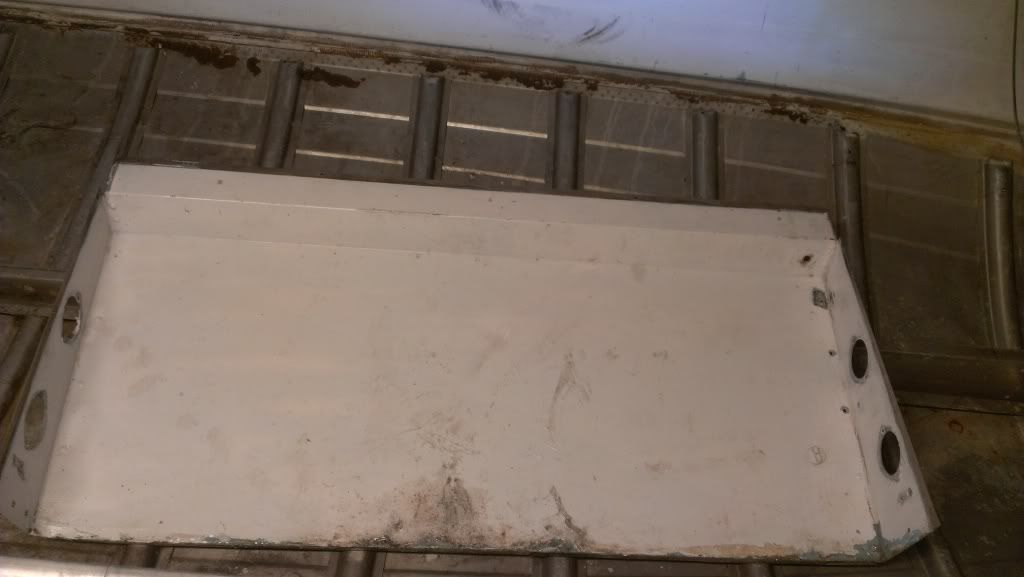
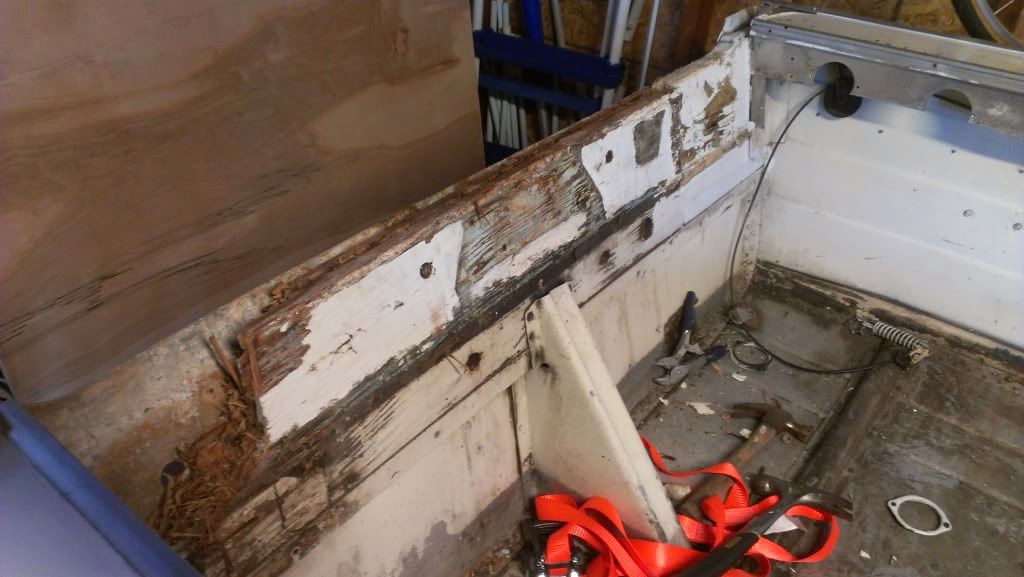
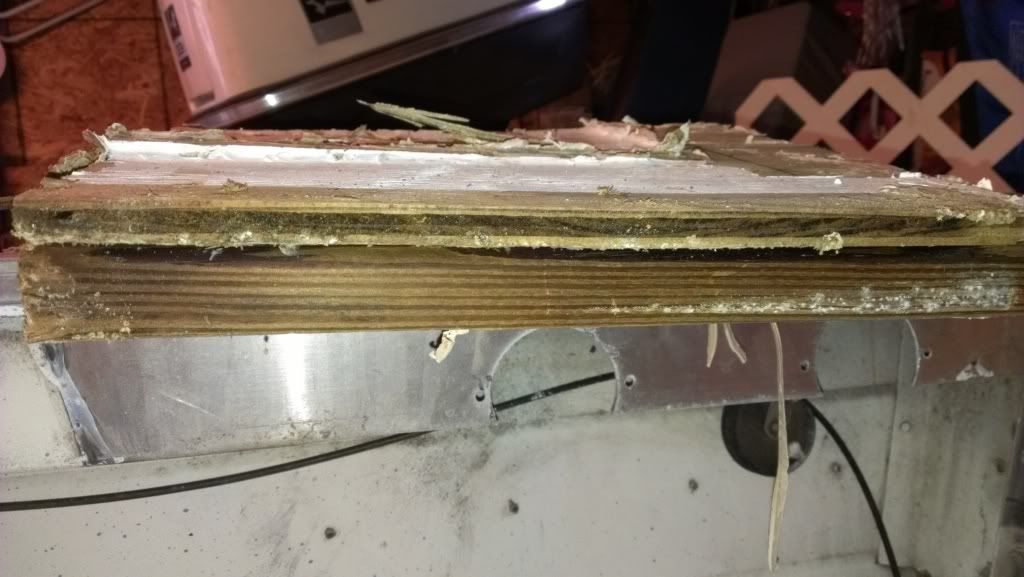
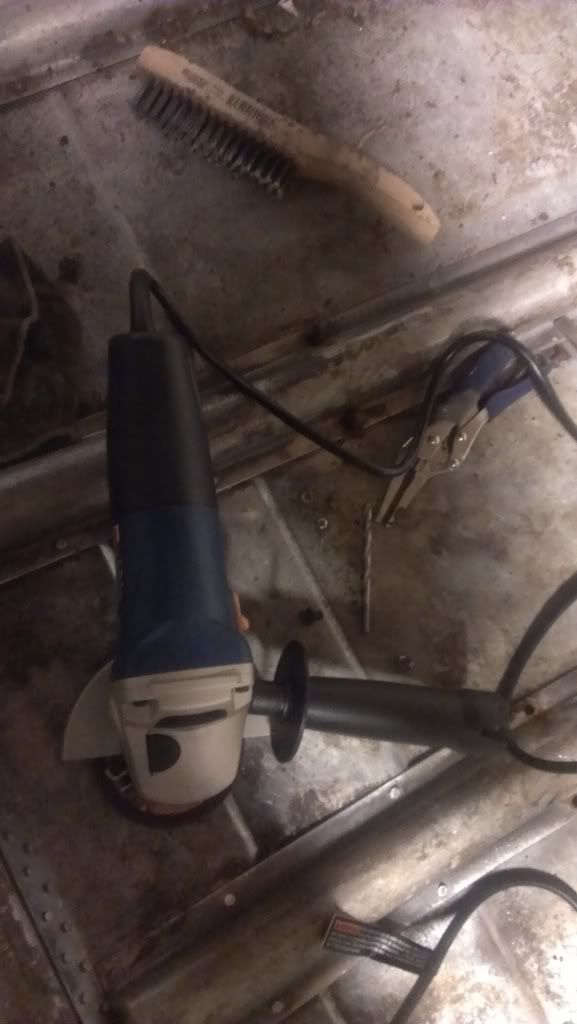
So, first is first, I had just a little bit time each day to start taking out the rusty impossible to take out bolts that hold my ribs and the main middle rib or whatever its called running across the bottom of the boat hull. Grinder and disc cut came very useful to removing these.
IMAG0309_zps236c6ed8.jpg


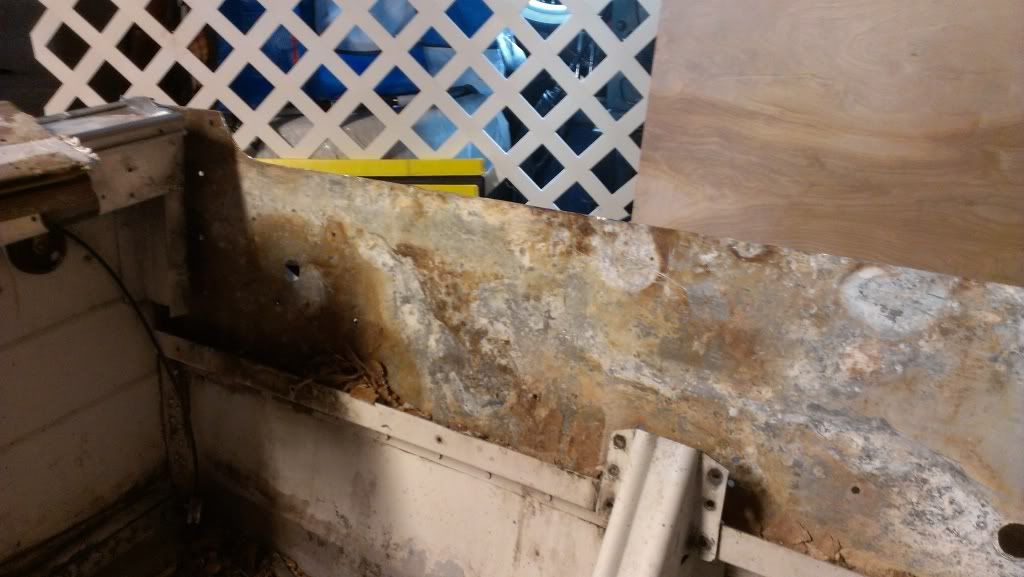
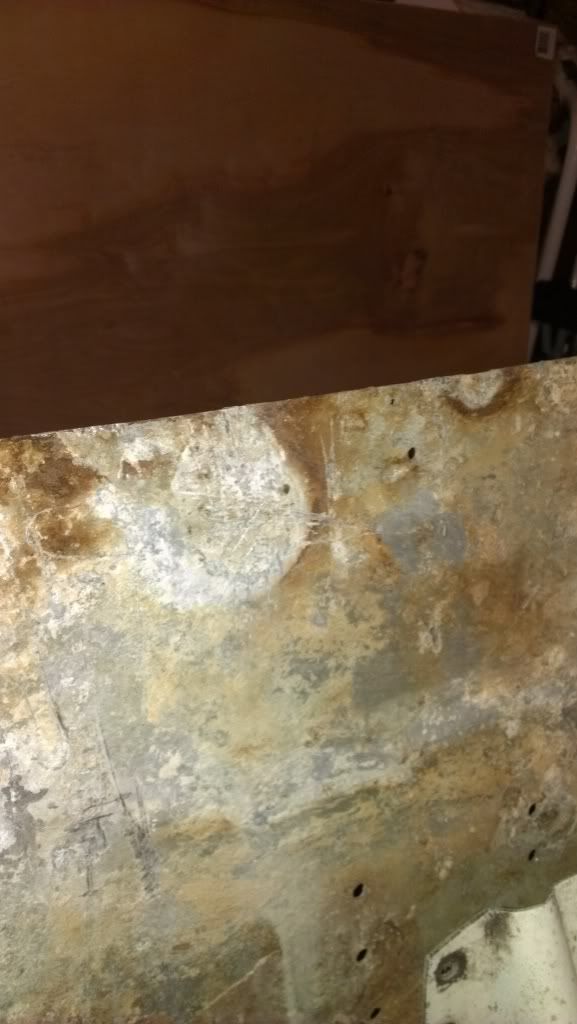
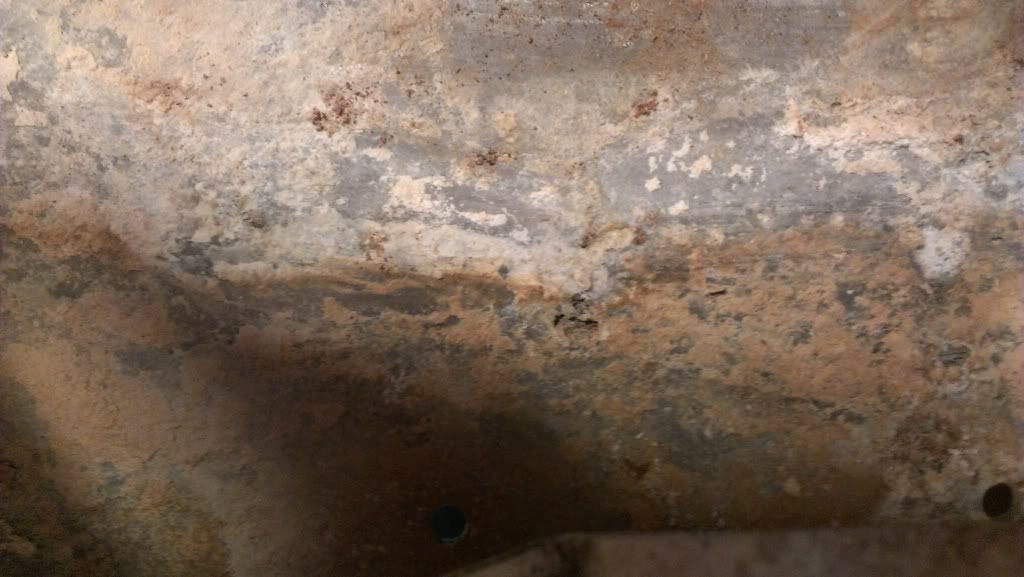
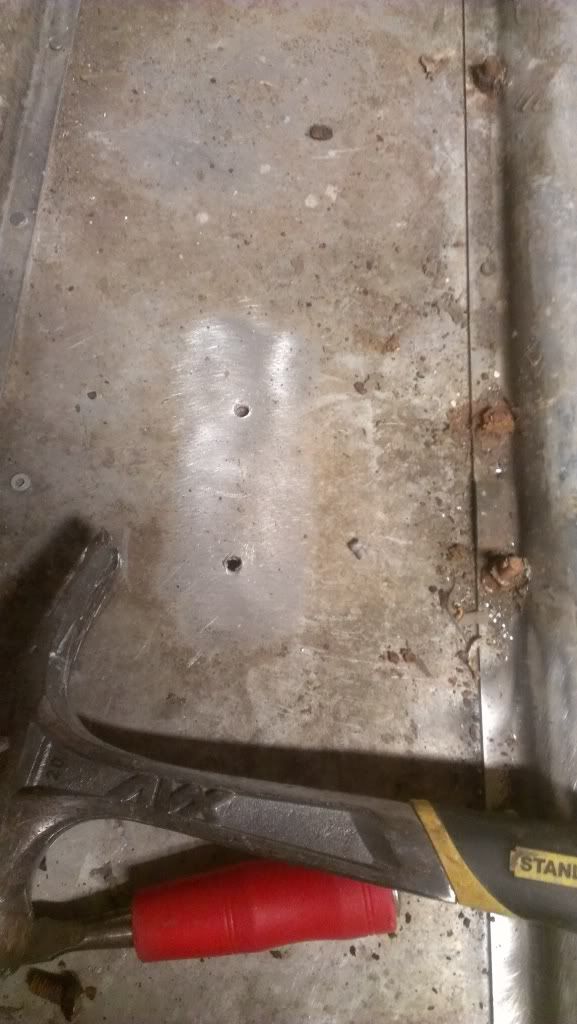
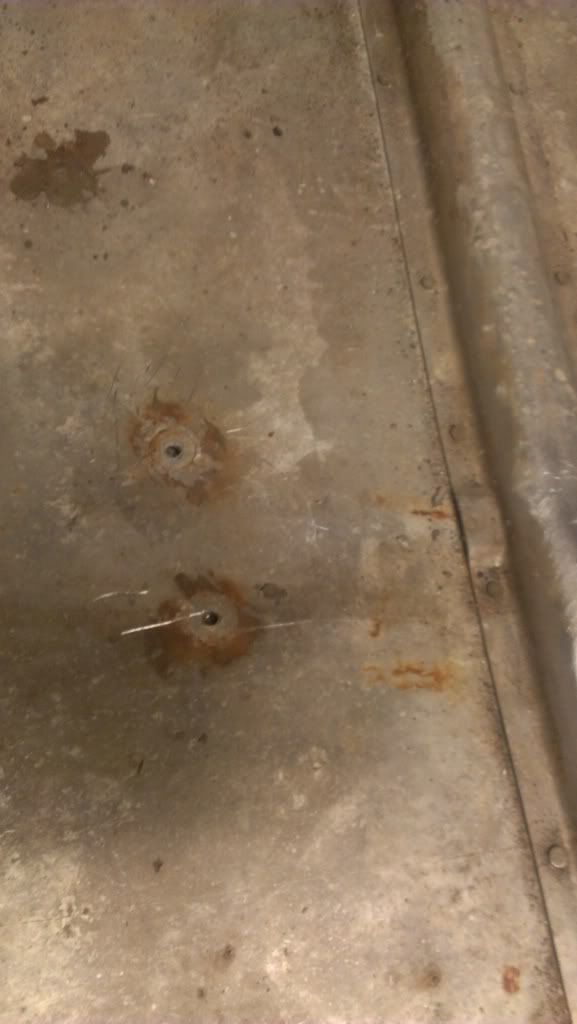
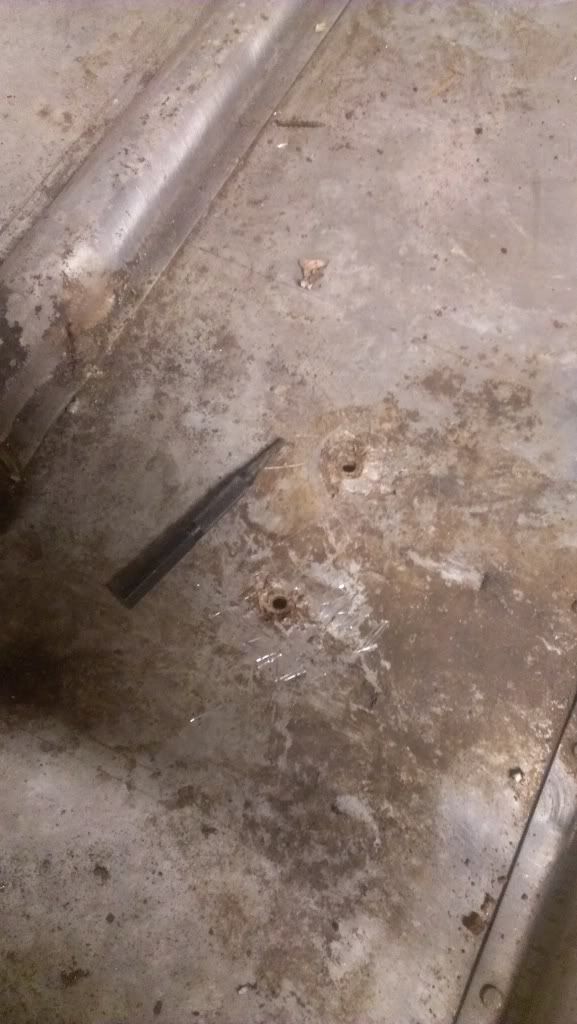
Now as you can see some holes after the bolts are gone, look pretty good and some are just rusty, banged up and doubled. So, cleaning and fixing will need to be done.

IMAG0310_zps860eef3c.jpg

IMAG0311_zps7953c846.jpg

IMAG0312_zps2a571b71.jpg

IMAG0313_zpsea614dff.jpg


Not the easiest as there is a bunch of these, probably around 15 bolts all together. Anyways, at this time I'm waiting for two things.

1.) My Gluvit to come in so I can seal her up when I'm done replacing the rivets.

2.) Rivets, and this one I really need help. I hate to ask as I should be showing more of my learning then asking but don't want to buy a billion of rivets :)

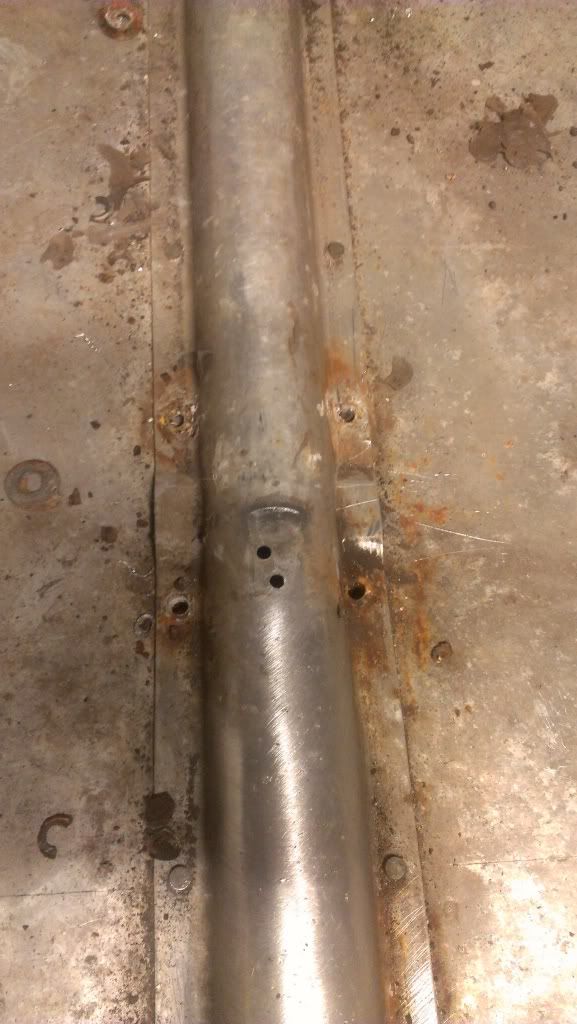
So, that said, if I have a hole after a bolt that is double, meaning one hole next to each other makes it look two wholes connected together, is this possible to fill in with two rivets? or do I have to use JB weld and some aluminum then drill hole and pop a rivet?

Now, when it comes to rivets I will need your help guys, majorly. Any suggestions to what size of rivets (standard) size, grip, etc.. I should get. I know, diameter of the hole of the drill bit. I think it's 3/16 but what about grip and head diameter dome size, etc.. any suggestion from anyone here that has a finished project to what I should purchase.

I was looking at the following;

3/16: http://www.rivetsonline.com/closed-end-blind-rivet-pr68asph.html (just going to use this for all purposes rather then switch between 1/8 and so on, one for all jobs and things) <---- Would this work?

1/4: http://www.rivetsonline.com/closed-end-blind-rivet-pr86asph.html <---- waste of money or should I get some.

Sorry, I just been looking at rivets for a week and can't wrap my head around all the diagrams and stuff neither are my holes the greatest quality or round size to measure. :p
 

jasoutside

Supreme Mariner
Joined
Dec 20, 2009
Messages
13,269
Re: 1967 Starcraft Jet Rebuilding

3/16" is kind of the standard for rivets. I have found that I always go through way more than I think and am always buying another box. I'm also find that having a variety of grip lengths on hand is a good thing for the variety of jobs that need to be done. Your mileage may very though.
 

lakelover

Rear Admiral
Joined
Mar 26, 2003
Messages
4,386
Re: 1967 Starcraft Jet Rebuilding

You're making good progress there, catbones. And thanks for the pcitures, it makes it a lot easier to understand what you are dealing with.

On the double holes, I think what I would do is put 2 rivets in, gooping up with JB Weld just before you insert them, and then after that cures, more JB until you have any remaining areas filled so it can't leak. Maybe somebody else has a better idea. For regular holes in good shape, I'd dab with 5200 before inserting the rivet.

Those 3/16" rivets you linked above have a grip range of 3/8 - 1/2", might that be a little long for your situation there? You'll need to get as close a measurement as you can of the thickness to see. 3/16" is a good general rivet diameter size for this sort of project as jas mentioned. Also agree about getting more than you think you'll need, especially if you have to buy online & pay shipping.

If that company doesn't have the length/grip length combination you need, you might have to look around a little more at other suppliers, 3/16 dia. x 1/8 to 1/4" grip are available.

Have you checked out Boltdepot.com? http://www.boltdepot.com/Blind_rivets_Closed_end_%28sealed%29_Dome_head_Aluminum_-_Aluminum_mandrel.aspx The #15395 for example, have a grip range of 3/16 - 1/4".

The 1/4" ones you linked above would also be OK, and have a grip range of 1/4 - 3/8", again depends on your thickness, but I would go with 3/16" as a general size to use.
 

catbones

Petty Officer 1st Class
Joined
Jul 15, 2012
Messages
319
Re: 1967 Starcraft Jet Rebuilding

I appreciate the response from both of you guys. I thought the 3/8 to 1/2" might be little long, how about 0.188" - 0.250". I would of followed the old rivets but since everything is rusted I not only have to cut them off but drill out some also. I guess it doesn't hurt to have something longer since in most situations you don't see it but I also don't want to lose the strength of the grip with something too long compare to a grip with something that's short.
 

lakelover

Rear Admiral
Joined
Mar 26, 2003
Messages
4,386
Re: 1967 Starcraft Jet Rebuilding

how about 0.188" - 0.250"

Looking at your photos, it seems that would be more in the ballpark. It looks like you're dealing with the rivets that come through where the keel and attaches to the hull, I think you'd be well within that range for that application. But like I said, best to measure to be 100% sure. Once you get riveting, you'll be surprised how fast that goes.
 

Grandad

Lieutenant Commander
Joined
Jun 7, 2011
Messages
1,504
Re: 1967 Starcraft Jet Rebuilding

You have a choice between solid rivets or "pop" style which has been debated quite a bit. My opinion is that since you have access to both sides of the hull, with a friend's help you can do a "bang-up" job of installing solid rivets like the original manufacturer chose to use. Closed end blind pop rivets would be my choice if I needed to replace one without tearing out the floor to do it. Others might choose these for all their rivet needs because they are simple to install with the right tool and may be adequately strong. I haven't used them yet, so I dunno.

Someone suggested that there is a higher copper content to the stronger aluminum rivets. That may or may not be the case, but when I installed mine, I was unaware of this and still don't know if it's accurate. The only evidence of previous corrosion on my boat is on the centre of the heads of the original Starcraft rivets below the water line. So, if anything, perhaps the original rivets should have had a more noble alloy in them. Except for a few days every summer, my boat sits high and dry on its trailer, so I'm not concerned.

Where bolts have been used, you'll likely need larger rivets than the usual 3/16". Perhaps you'll have to replace them with stainless bolts, but I would try to use only aluminum materials if possible. In regard to the double holes or where the hole is ovalled larger than a standard size rivet, you could try a stainless steel carriage head bolt along with some JB Weld. Perhaps there is a broad headed (solid end) aluminum pop rivet that could be installed. Short of a welding repair, there's probably no perfect solution.

What rivets I used & how:
http://forums.iboats.com/showthread....64#post3642364

Starcraft's different rib end reinforcements:
http://forums.iboats.com/showthread....26#post3584726

Rivet types and hull cleaner:
http://forums.iboats.com/showthread....03#post3516303

An interesting discussion on corrosion when you get past the sarcasm:
http://forums.iboats.com/showthread....39#post3676839

A couple of websites that have a lot of helpful info:
http://www.youtube.com/watch?v=1hB3rIECtxM

http://dad.walterfamily.org/rv/TonyBingelis/Rivet Gun Notes and Riveting Tips.html

- Grandad
 

catbones

Petty Officer 1st Class
Joined
Jul 15, 2012
Messages
319
Re: 1967 Starcraft Jet Rebuilding

Bolts might have to be put back in again. After further investigation of what looked like the biggest whole not even looking at the double one I have, the biggest one and there is plenty of those from the current rusted bolts, the biggest one is 9/32 or tiny little less, like a hair line. Then the rest is about 1/4 ... in general things are looking like between 3/16 to 9/32 of holes. :) Great, that should be fun trying to figure out.

So I'm thinking of going with 3/8" bolts on the ones that are 1/4" and tad big. I know, I'm going to have to drill bigger to get those bolts in with 5200 on em. Sounds like a plan?
 

jasoutside

Supreme Mariner
Joined
Dec 20, 2009
Messages
13,269
Re: 1967 Starcraft Jet Rebuilding

So I'm thinking of going with 3/8" bolts on the ones that are 1/4" and tad big. I know, I'm going to have to drill bigger to get those bolts in with 5200 on em. Sounds like a plan?

3/8" carriage bolt, nylon lock nut, washer, all gooped up with 5200 will never leak, go for it:)
 

jasoutside

Supreme Mariner
Joined
Dec 20, 2009
Messages
13,269
Re: 1967 Starcraft Jet Rebuilding

Correction, use 1/4", that square top will just smoosh into the alum. You might even be able to go smaller.
 

catbones

Petty Officer 1st Class
Joined
Jul 15, 2012
Messages
319
Re: 1967 Starcraft Jet Rebuilding

Jas, but my holes are like 1/4" and tad ... You think that square will do justice with a 1/4" or smaller for the 1/4 and tad? Or is the nylon nut and 5200 gonna do the sealing of the tad :)
 

jasoutside

Supreme Mariner
Joined
Dec 20, 2009
Messages
13,269
Re: 1967 Starcraft Jet Rebuilding

You'll just want to dry fit a couple of sizes and see what would be the best sizing to seal it up.
 
Top