Starcraft Jet Star 15 Restore

boatbeginner1

Petty Officer 1st Class
Joined
Jun 17, 2012
Messages
311
Re: Starcraft Jet Star 15 Restore

I got a fiend helping me every other weekend so I'm gonna try!
 

boatbeginner1

Petty Officer 1st Class
Joined
Jun 17, 2012
Messages
311
Re: Starcraft Jet Star 15 Restore

Im not able to post the to-do list tonight as I'm still working on it but I will try my best to get it done early tommorow!
 

jigngrub

Fleet Admiral
Joined
Mar 19, 2011
Messages
8,155
Re: Starcraft Jet Star 15 Restore

Putting your work on a schedue and deadline only increases pressure and stress, do do as much as you can to it as often as you can and it'll get done.

If you'll take the time to do it right, it'll last and bring you pleasure and satisfaction for many many years.
 

boatbeginner1

Petty Officer 1st Class
Joined
Jun 17, 2012
Messages
311
Re: Starcraft Jet Star 15 Restore

It wast supposed to be a time line as I previously stated but a list to help me keep track o the basics. Like a basic outline if that makes sense? It'll help me know what general things needs to happen
 

boatbeginner1

Petty Officer 1st Class
Joined
Jun 17, 2012
Messages
311
Re: Starcraft Jet Star 15 Restore

It's been raining all day so il try to get the splash well off tommorow. Then comes the rotted transom wood!

Have a good day!
 

boatbeginner1

Petty Officer 1st Class
Joined
Jun 17, 2012
Messages
311
Re: Starcraft Jet Star 15 Restore

I was just reading through the threads about the expoxy To waterproof the wood. I need to do te transom wood as well
So should I get the gallon for the floor and 1/4 gallon for transom wood?
 

lakelover

Rear Admiral
Joined
Mar 26, 2003
Messages
4,386
Re: Starcraft Jet Star 15 Restore

I only used 1/2 gallon total of the US Composites stuff mixed 3:1 on my Jet Star, and I still had a little left over, and I did: Floor, seat boards, control board and transom.

However, I only put on 2 coats of epoxy, followed by a coat of Rustoleum primer, then 3 coats of Rustoleum paint. So if you plan to do 4 coats of resin, I'd think a gallon would cover it.
 

Woodonglass

Supreme Mariner
Joined
Dec 29, 2009
Messages
25,927
Re: Starcraft Jet Star 15 Restore

I agree. Lakelover is Spot ON. A gallon should be Plenty for 4 Coats.
 

boatbeginner1

Petty Officer 1st Class
Joined
Jun 17, 2012
Messages
311
Re: Starcraft Jet Star 15 Restore

I will order a gallon this week!

Today:
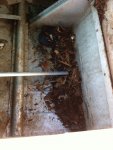
Got the splash well as well as the rotted (extremly rotted) transom wood out.
IMG_0001.jpg
As you can tell, the wood was rotted!

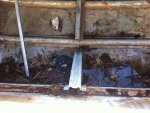
Under the splash well, near the holes for the bilge to drain, they were higher up then the floor, so water pooled up even with a build pump. I am thinking about maybe sloping that area with waterproof silicone, so water will flow out and less will collect. Also, I was thinking of putting another drain hole on the other side of the support as well as putting in a bilge pump on that side. Ideas? --Pictures to follow

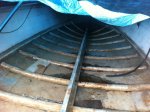
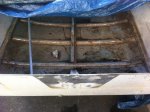
As I mentioned earlier, it rained this past weekend so water collected in the boat. The boat is sitting bow high so in theory, it should drain out, however; it was collecting in the aluminum cross beam (pictures will be posted at the end). How can I get the water to flow under the center like I think its supposed to?

IMG_0004.jpg
IMG_0003.jpg
IMG_0002.jpg

Have a good evening!
 

boatbeginner1

Petty Officer 1st Class
Joined
Jun 17, 2012
Messages
311
Re: Starcraft Jet Star 15 Restore

Forgot to mention one thing, I am planning on 2 batteies (will upgrade from one to two), and two gas tanks. I was thinking one gas tank on each side of the aluminum support that you see in the post above (metal, triangular, goes from hull bottom to transom), and then one battery right up against that metal. I Havent test fitted it yet though. There would then be a wooden panel with an access hatch that would spread from side to side of the transom, but it would be flush with eh front of the splash well. What are your ideas?

Have a good week! I will give an update tommorow!
 

lakelover

Rear Admiral
Joined
Mar 26, 2003
Messages
4,386
Re: Starcraft Jet Star 15 Restore

How can I get the water to flow under the center like I think its supposed to?
There are small passageways for the water to drain in the center of the "ribs" that are clogged.


You need to take a hose and a narrow thin piece of metal and try to clean out as much gunk & debris as you can out from under there. Spray the hose into the center and also in from each end to flush the junk out best you can. I spent time a couple days ago doing just that, it's amazing how much stuff can collect under there over time.
 

boatbeginner1

Petty Officer 1st Class
Joined
Jun 17, 2012
Messages
311
Re: Starcraft Jet Star 15 Restore

Alright, I will do that tomorrow when I take the steering system out! Thank you!
 

boatbeginner1

Petty Officer 1st Class
Joined
Jun 17, 2012
Messages
311
Re: Starcraft Jet Star 15 Restore

Good Evening guys,

I was working on the boat again today! The goal was to take off the steering system (wheel and cables). It ended up being a journey of taking the rub rail off. I got the Port Side Rub Rail off, the Starboard side rub rail has many screws rusted in, so I will get a solution that helps loosen rusted screws.

While working on the rub rail under the bow, I looked at the dash wood. It looks like it is only held in by screws up both sides of the dash, then 2 sets of screws held up by wood, extending under the bow cap. In theory, I should be able to unscrew the screws, slide the board out, the replace it - Remember, in theory!

I'll clean the boat out this week, then Saturday, I'll try to finish getting the rub rail off. If anyone has a trick on getting rusted nuts and screws out, PLEASE TELL ME!!! :)

The paint on the boat is smooth, no chipping except for a few spots along the rivets on the center of the boat along the bottom. I still need to use the JB Weld to fill the tiny hole (Which I can barely locate now...). I also need to order some gulvit to put along the rivets on the inside.

I may have asked this earlier but I'm asking again. The plan is to extend the flooring into the transom, under the splash well, where the bilge is. That way I would have the ability to place gas tanks and batteries on an even surface. the only flaw with this is I won't have a bilge with the clearance to put a bilge pump. If Anyone has any ideas on how I can do this, I would really appreciate it!

Thanks Guys,

BoatBeginner
 

lakelover

Rear Admiral
Joined
Mar 26, 2003
Messages
4,386
Re: Starcraft Jet Star 15 Restore

While working on the rub rail under the bow, I looked at the dash wood. It looks like it is only held in by screws up both sides of the dash, then 2 sets of screws held up by wood, extending under the bow cap. In theory, I should be able to unscrew the screws, slide the board out, the replace it - Remember, in theory!

I'll clean the boat out this week, then Saturday, I'll try to finish getting the rub rail off. If anyone has a trick on getting rusted nuts and screws out, PLEASE TELL ME!!! :)

That's what I thought about my dash too. But.....I found out that in order to get it out in one piece I'd have to remove the front top deck, and I wasn't going to do that, so I ended up just laminating a piece of oak plywood over the existing dash. Someone else here got theirs out by cutting the dash in half and then putting it back together to get it reinstalled. I think someone else made a new one...it has complex angles on the ends.

As far as the rusted nuts & bolts, I had to use many methods depending on how stubborn they were. Some I could muscle off, some needed a good soaking with PB Blaster, and some I had to cut off with a dremel tool. It was an interesting sometimes frustrating process, just keep at it! :) But once it was over and things started going back together, then I felt like I was making real progress!
 

boatbeginner1

Petty Officer 1st Class
Joined
Jun 17, 2012
Messages
311
Re: Starcraft Jet Star 15 Restore

Hmm..what to do, what to do... I like the idea of putting wood over it however, There are pre-existing holes in the dash, that I wasn't going to use. Could I fill the holes and then put the new piece over?

I used PB Blaster before for rusted nuts, but seemed to have misplaced it...:rolleyes: A trip to the store will fix that!

I just returned some engine wire since it was the wrong gauge, but I bought some others; however, I needed a black and white stripe but they only had black. Can I just use white electrical tape to make it black with the white stripe?

I think that sums it up for tonight!

Have a good night fellas!
 

lakelover

Rear Admiral
Joined
Mar 26, 2003
Messages
4,386
Re: Starcraft Jet Star 15 Restore

I filled some old holes on my dash with wooden dowel plugs, and in the old larger speedo hole, I cut out a circle from 3/4" ply and glued it in the hole before gluing on the facing.

I don't see any reason not to code you wire as you plan, just not sure how long the white tape will stay on. I'm sure there are a lot of older outboard around with non-stock color wiring!
 

GA_Boater

Honorary Moderator Emeritus
Joined
May 24, 2011
Messages
49,038
Re: Starcraft Jet Star 15 Restore

I don't see any reason not to code you wire as you plan, just not sure how long the white tape will stay on. I'm sure there are a lot of older outboard around with non-stock color wiring!

There are? I used black, green, white, red and yellow. :dispirited::culpability::doh: I used the wrong colors, but it was still better the stock Merc wires after almost 50 years.

Hey BB - I hate to be the bearer of bad news, but here goes. Starcraft hangs the dash from the ceiling and builds the boat around it. It is just about impossible to get it without cutting the dash wood or removing the bow cap. Many have tried but I can't remember anyone being able to get it out without doing the cut or peel.
 

GA_Boater

Honorary Moderator Emeritus
Joined
May 24, 2011
Messages
49,038
Re: Starcraft Jet Star 15 Restore

Thanks for confirming my weakening memory!!! :joyous::facepalm:

I laid on my back staring at the dash and kept saying there has to be a way. Finally gave up and had a beer. :)
 

Woodonglass

Supreme Mariner
Joined
Dec 29, 2009
Messages
25,927
Re: Starcraft Jet Star 15 Restore

2 ways to plug your holes, as LL did using dowels or tape some hardboard/waxpaper over the front of the dash and use Hairy Peanutbutter to fill the holes. If you're gunna re-drill and the new holes will intersect the old ones, then LL's method will make it easier to drill/cut the new ones, especially for larger holes. I'd use Hairy PB or Gorilla Glue to glue in the plugs and still tape of the front of the dash to keep it smooth.
 
Top