Orlando Clipper Customization/Restoration

jbcurt00

Moderator
Staff member
Joined
Oct 25, 2011
Messages
24,993
Re: Orlando Clipper Customization/Restoration

Poly resin needs 60F+ to kick properly....

Poly resin w/out the wax additive, stays slightly tacky for quite a long time.....

1-2% MEKP is recommended... In cooler temps, towards the 2% may have helped.....
 

coolguy147

Commander
Joined
Jul 14, 2008
Messages
2,817
Re: Orlando Clipper Customization/Restoration

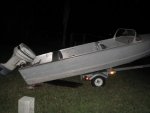
It's dry by now. High of 66 today. I left the transom in the sun all day. I'm going to let the stuff cure one more night and mount the engine tomorrow.

My control cables are too short D: Looks like I need 16ft cables and they're 10ft ATM. I needed a 14ft steering cables. Ordered them already.
 

coolguy147

Commander
Joined
Jul 14, 2008
Messages
2,817
Re: Orlando Clipper Customization/Restoration

IMG_4978 (640x480).jpg

Yesterday lol. Haven't mounted the engine yet lol. The resin is dry but i'm giving it one more day to cure.
 

Willyclay

Captain
Joined
Sep 8, 2006
Messages
3,252
Re: Orlando Clipper Customization/Restoration

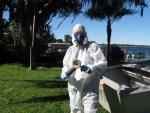
Congratulations on your "promotion" to the rank of Glass Grinder First Class with your obligatory bunny suit and respirator! TD is ROFLOL.
 

coolguy147

Commander
Joined
Jul 14, 2008
Messages
2,817
Re: Orlando Clipper Customization/Restoration

Got the motor centered and clamped on. Haven't drilled or bolted anything up yet.

As the motor sits directly on the transom, it sits about 1 inch below the bottom of the boat. Can i drill in the top hole and move up the 4th hole and most the engine up approximately 2.25 inches since each hole moves the boat up 3/4 of an inch. Correct me if i'm wrong.

Just ordered 15ft control cables (15ft would be better). steering helm and 14ft cable is on its way.

Going to work on it again on the 26th.

MERRY CHRISTMAS, EVERYONE! YOU'VE BEEN SUCH A HELP TOWARDS ME!
 

coolguy147

Commander
Joined
Jul 14, 2008
Messages
2,817
Re: Orlando Clipper Customization/Restoration

IMG_4984 (640x480).jpgIMG_4985 (640x480).jpgIMG_4986 (640x480).jpgIMG_4987 (640x480).jpgIMG_4989 (640x480).jpg

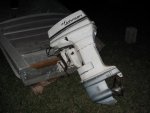
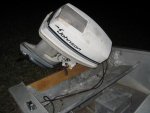
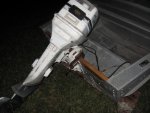
Motor is just clamped on. Centered and ready to be drilled.
 

Willyclay

Captain
Joined
Sep 8, 2006
Messages
3,252
Re: Orlando Clipper Customization/Restoration

As the motor sits directly on the transom, it sits about 1 inch below the bottom of the boat. Can i drill in the top hole and move up the 4th hole and most the engine up approximately 2.25 inches since each hole moves the boat up 3/4 of an inch. Correct me if i'm wrong.

You are correct! Drill the top hole and also at the top of the lower bolt slot for maximum height adjustment. Looks good!
 

coolguy147

Commander
Joined
Jul 14, 2008
Messages
2,817
Re: Orlando Clipper Customization/Restoration

Septic problems today D: Had the thing drained and it needs to be replaced...caving in very soon. old 50s style tank. lol

Anyways, drilled the top two bolts to the outboard. Got dark so i called it quits for today. Drilling the bottom holes tomorrow or Friday most likely.
 

coolguy147

Commander
Joined
Jul 14, 2008
Messages
2,817
Re: Orlando Clipper Customization/Restoration

IMG_4990 (640x480).jpgIMG_4991 (640x480).jpgIMG_4992 (640x480).jpgIMG_4993 (640x480).jpg

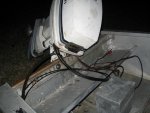
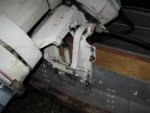
I hate nylon locknuts. So, basically the stainless steel locknuts are one time use only....I decided to just double nut with regular nuts and use the second nut as a jam nut. Sound good?

Motor is installed. Cables are installed (all).

The only thing left is to mount the steering helm. The cable is the right length. The hole in the dash right now is not nearly big enough to mount the helm bracket. Any ideas of making a large 3-4 hole? I'm thinking about using a jigsaw to outline the bracket.

Do my control cables look long enough? They make a nice loop and nothing binds when the motor is turned.
 

Willyclay

Captain
Joined
Sep 8, 2006
Messages
3,252
Re: Orlando Clipper Customization/Restoration

It all looks good! Steering cable has a big radius bend on the motor end. Just make sure you don't bind it on the helm end. Motor control cables look good and should not be a problem. Jam nut plan should be okay on mounting bolts. I am not very good with a jigsaw but the $$$ spent on a holesaw needed for this one project may not be worth it to you. Try the jigsaw if you feel comfortable. Good luck!
 

coolguy147

Commander
Joined
Jul 14, 2008
Messages
2,817
Re: Orlando Clipper Customization/Restoration

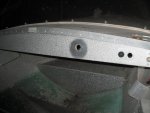
I'll get some pictures tomorrow. Huge leak in the boat. Forgot to plug up previous motor holes. Any ideas? I'm thinking about quick jb weld to flush the hole up and then fiberglass it over with some mat? Motor has some problems but I haven't diag anything yet. Steering is awesome!
 

kfa4303

Banned
Joined
Sep 17, 2010
Messages
6,094
Re: Orlando Clipper Customization/Restoration

JB weld and/or a 5200 sandwich made from two pieces of aluminum fastened to either side of the hull should work. If you go the JB route, you'll probably want/need to paint over it, or seal it in some way to prevent water from leaching in. You could always take it to an aluminum welder, who could probably patch up for pretty cheap too.
 

coolguy147

Commander
Joined
Jul 14, 2008
Messages
2,817
Re: Orlando Clipper Customization/Restoration

JBweld or 5200 should fix that okay.

I'm worried about the jbweld not expanding and contracting with the aluminum and therefore cracking? idk if these things are permanent enough?
 

coolguy147

Commander
Joined
Jul 14, 2008
Messages
2,817
Re: Orlando Clipper Customization/Restoration

JB weld and/or a 5200 sandwich made from two pieces of aluminum fastened to either side of the hull should work. If you go the JB route, you'll probably want/need to paint over it, or seal it in some way to prevent water from leaching in. You could always take it to an aluminum welder, who could probably patch up for pretty cheap too.

The transom wood is already in D: It's basically a hole in the outer skin aluminum but not the wood. The water leaking around it because of the flex in the aluminum.
 

kfa4303

Banned
Joined
Sep 17, 2010
Messages
6,094
Re: Orlando Clipper Customization/Restoration

In that case, I would use JB marine weld, which is made for underwater applications. If you apply it properly, fair out the edges and sand it smooth it should be ok, but you could always zap it with a layer or two of paint for good measure. I have a JB patch on the bow on my aluminum boat and I've never had any issues with it aside from the fact that it's kind of ugly.
 

coolguy147

Commander
Joined
Jul 14, 2008
Messages
2,817
Re: Orlando Clipper Customization/Restoration

In that case, I would use JB marine weld, which is made for underwater applications. If you apply it properly, fair out the edges and sand it smooth it should be ok, but you could always zap it with a layer or two of paint for good measure. I have a JB patch on the bow on my aluminum boat and I've never had any issues with it aside from the fact that it's kind of ugly.


J-B Weld? White Epoxy Putty Underwater Petro Chemical Acid Resistant Water Weld, 2 oz Stick | Staples?

I used that stuff to initially plug the stuff up. Going to resin it in with fiberglass mat when i can dry dock the boat.
 

coolguy147

Commander
Joined
Jul 14, 2008
Messages
2,817
Re: Orlando Clipper Customization/Restoration

SeaSense? Bow or Stern Eye Bolt | Bass Pro Shops

Picked that up so i can put my boat in the lift. The jetski trailer i'm using is too small and I don't have enough tongue weight to pull the thing out of lake D: I can lift the back of my atv up!!

Should i mount the new stern eyes vertically or horizontally? I'm thinking horizontal so I can thread it through the reinforcement bar.
 
Top