Orlando Clipper Customization/Restoration

jbcurt00

Moderator
Staff member
Joined
Oct 25, 2011
Messages
24,992
Re: Orlando Clipper Customization/Restoration

2 coats is just a start. If you can still 'see' the grain printing thru the spar, lightly sand & re-apply until you can't.

How many coats should i do then? What grit sandpaper between coats?

At least enough to not 'see' the grain print thru the spar. Multiple thinner coats is better then a few heavy coats.

It'll probably take at least 4 on the flat surfaces, and every coat you apply to a flat side, coat the edges. That way the edges have twice as much. The end grain on the edges is where you'll have the most movement in the wood during seasonal changes, they will soak up more spar & is the most likely site for water intrusion.

The more coats now, the longer it will be between touch ups & before you'll need to do heavy maintenance.

I'd probably use a maroon 3M pad:

trm-7447_w.jpg


All you need to do is slightly scuff the surface & clean it well so the next coat can adhere really well. The more you sand off, the more coats you'll need to apply, as you're taking mil thickness off as you sand..
 

coolguy147

Commander
Joined
Jul 14, 2008
Messages
2,817
Re: Orlando Clipper Customization/Restoration

I got the clear satin stuff so I don't know how long it will take to not be able to see the wood grain print on the wood lol...

I have the clear satin spar stuff so it's pretty clear lol...
 

jbcurt00

Moderator
Staff member
Joined
Oct 25, 2011
Messages
24,992
Re: Orlando Clipper Customization/Restoration

Not see the actual grain of the wood like you're trying to make a window opaque (less clear).

'See' the grain as in it's texture. After the 1st coat or 2 there is less grain showing thru the spar & the spar starts to be smooth & flat like a mirror.

No little rivers & 'cracks' of the grain telegraphing thru the spar. It's a smooth, flat surface. May be I should have said feel the grain thru the spar.....

Make more sense?

BTW: If you find a use for the satin on an interior project around the house to use it up, try to do so. Satin is satin because it has flattening agents in it, Gloss is preferred. Semi-gloss is an OK compromise, but gloss will have more longevity in exterior environments.

If it's a look you prefer, use the gloss to build the surface and after 3 or 4 coats, as the grain is covered, add a coat or 2 of satin.

Yes, after multiple coats of satin, it will eventually obscure the grain as you originally asked.
 

coolguy147

Commander
Joined
Jul 14, 2008
Messages
2,817
Re: Orlando Clipper Customization/Restoration

Not see the actual grain of the wood like you're trying to make a window opaque (less clear).

'See' the grain as in it's texture. After the 1st coat or 2 there is less grain showing thru the spar & the spar starts to be smooth & flat like a mirror.

No little rivers & 'cracks' of the grain telegraphing thru the spar. It's a smooth, flat surface. May be I should have said feel the grain thru the spar.....

Make more sense?

BTW: If you find a use for the satin on an interior project around the house to use it up, try to do so. Satin is satin because it has flattening agents in it, Gloss is preferred. Semi-gloss is an OK compromise, but gloss will have more longevity in exterior environments.

If it's a look you prefer, use the gloss to build the surface and after 3 or 4 coats, as the grain is covered, add a coat or 2 of satin.

Yes, after multiple coats of satin, it will eventually obscure the grain as you originally asked.

LOL I defiantly can't feel the grain anymore.

I didn't know there was a difference between the other spars except looks lol.

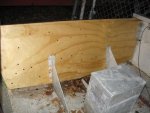
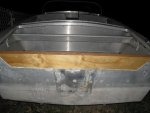
I got the wood in the boat now. Got the two side brackets in. I have 1 screw in for the knee brace but it a bit harder to do. I need to take more time on it.
 

Willyclay

Captain
Joined
Sep 8, 2006
Messages
3,252
Re: Orlando Clipper Customization/Restoration

Looks great! TD would be proud of you.
 

coolguy147

Commander
Joined
Jul 14, 2008
Messages
2,817
Re: Orlando Clipper Customization/Restoration

Ok, got all the holes drilled and everything fits! Well...sort of. I didn't realize it till now but the inner plate needs to be touched up because the holes don't exactly line up with the new holes. Only problem is that I can't get anything lined up initially because the plate can't be in with any of the screw being in...Do you guys understand what I mean? SO CLOSE.....:eek::faint2::grumpy::blue:
 

Willyclay

Captain
Joined
Sep 8, 2006
Messages
3,252
Re: Orlando Clipper Customization/Restoration

I didn't realize it till now but the inner plate needs to be touched up because the holes don't exactly line up with the new holes.

Are you referring to the holes for the knee braces?
 

coolguy147

Commander
Joined
Jul 14, 2008
Messages
2,817
Re: Orlando Clipper Customization/Restoration

Are you referring to the holes for the knee braces?

I'm referring to the plate that goes between the knee braces and the wood. Essentially covering the inside part of the wood. I'm not worried about it fitting...so far.

Let me try to explain again, All of the holes have been drilled, I hooked everything up without the plate being there. When I went to put the plate in, I realized that some of the old holes in the plate don't line up with the new ones in the wood, knee braces, splash well, brackets. Only problem is that I don't know how to line up the plate, wood, all the hardware without using screws initially. I'll look into it next week. Got it?
 

Willyclay

Captain
Joined
Sep 8, 2006
Messages
3,252
Re: Orlando Clipper Customization/Restoration

Gotcha! I am a "hands-on person" so my old geezer brain is having trouble processing what the problem is without seeing a picture and/or drawing. If the inner plate, splashwell, knee braces and side brackets have not been altered or moved, how can the holes not match? The only thought I have in response to that question is possibly your hull has flexed during this project and is causing the missalignment. Any chance the boat has shifted while you have been working on it?

The holes in your new plywood transom core should have been drilled using these same parts/pieces as templates, so where's the problem? Also, a 50 year-old boat probably has a few "extra" holes in places that are no longer needed. Any specifics you can provide will help!
 

coolguy147

Commander
Joined
Jul 14, 2008
Messages
2,817
Re: Orlando Clipper Customization/Restoration

Gotcha! I am a "hands-on person" so my old geezer brain is having trouble processing what the problem is without seeing a picture and/or drawing. If the inner plate, splashwell, knee braces and side brackets have not been altered or moved, how can the holes not match? The only thought I have in response to that question is possibly your hull has flexed during this project and is causing the missalignment. Any chance the boat has shifted while you have been working on it?

The holes in your new plywood transom core should have been drilled using these same parts/pieces as templates, so where's the problem? Also, a 50 year-old boat probably has a few "extra" holes in places that are no longer needed. Any specifics you can provide will help!

If you look at the pictures in post #2 you can see where the plate is. post #94 has the plate primed up. The plate goes between the knee braces, brackets, splashwell and the wood.

http://forums.iboats.com/boat-restoration-building-hull-repair/transom-repair-268432.html

in that restoration, the boat is almost identical to mine. You can see the plate in post #9. It looks like he decided not to put in the plate back in.
 

Willyclay

Captain
Joined
Sep 8, 2006
Messages
3,252
Re: Orlando Clipper Customization/Restoration

It looks like he decided not to put in the plate back in.

Thanks for the link to forum member Tim Frank's thread. That's a great reference for your project, however, he cut and modified his boat's knee braces to fit the installed new transom core so leaving out the "plate" did not have any negative effects when the fasteners were tightened. IMHO if you leave out your plate, the gap will cause something like your transom or probably the hull bottom to be flexed, bent or bowed when you install all the fasteners. You made the second new core so the plate would fit! I think you should stick it in there as intended and drill new holes where necessary. The only other alternative I can think of if you leave the plate out would be to cut small aluminum spacer plates to fill the gap at all the attachment points. Wish I could be more help. Why don't you PM Tim Frank and see if he can help?
 

coolguy147

Commander
Joined
Jul 14, 2008
Messages
2,817
Re: Orlando Clipper Customization/Restoration

Thanks for the link to forum member Tim Frank's thread. That's a great reference for your project, however, he cut and modified his boat's knee braces to fit the installed new transom core so leaving out the "plate" did not have any negative effects when the fasteners were tightened. IMHO if you leave out your plate, the gap will cause something like your transom or probably the hull bottom to be flexed, bent or bowed when you install all the fasteners. You made the second new core so the plate would fit! I think you should stick it in there as intended and drill new holes where necessary. The only other alternative I can think of if you leave the plate out would be to cut small aluminum spacer plates to fill the gap at all the attachment points. Wish I could be more help. Why don't you PM Tim Frank and see if he can help?

I'll wait on bugging the guy :D Honestly, leaving the plate out wouldn't really make a difference at all. I want to leave it in for protection from the sun....physical damage etc...and aesthetics reasons. I'll look into it more over the weekend. It was dark, and I usually get mad at myself when I can't see anything and screw something up...so I stopped and complained here :p
 

Willyclay

Captain
Joined
Sep 8, 2006
Messages
3,252
Re: Orlando Clipper Customization/Restoration

I'll wait on bugging the guy :D

Tim is a very knowledgeable guy and helps lots of members with his postings so I believe he would be happy to help you. Couple more thoughts popped out of the empty space between my ears that you might consider when you tackle the project again. If you saved the original transom core, it could be used to determine which holes are not lining up. Also, any chance you reversed sides when you re-installed the plate which could account for the alignment problem. Good luck!
 

coolguy147

Commander
Joined
Jul 14, 2008
Messages
2,817
Re: Orlando Clipper Customization/Restoration

Tim is a very knowledgeable guy and helps lots of members with his postings so I believe he would be happy to help you. Couple more thoughts popped out of the empty space between my ears that you might consider when you tackle the project again. If you saved the original transom core, it could be used to determine which holes are not lining up. Also, any chance you reversed sides when you re-installed the plate which could account for the alignment problem. Good luck!

That's the problem. The holes are totally brand new, different from anything else. I'll look into this Saturday. Thanks for you help you all! :D
 

coolguy147

Commander
Joined
Jul 14, 2008
Messages
2,817
Re: Orlando Clipper Customization/Restoration

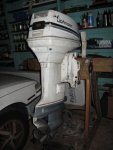
Picked up SS hardware for mounting the motor today. I got 3.5 inch long bolts. Is that an ok length?
 

Willyclay

Captain
Joined
Sep 8, 2006
Messages
3,252
Re: Orlando Clipper Customization/Restoration

I got 3.5 inch long bolts. Is that an ok length?


I believe so since your new transom core is only 1.5 inches thick plus an inner and outter aluminum skin. You just want to be certain NOT to run out of threads before the motor is properly secured.
 
Last edited:

coolguy147

Commander
Joined
Jul 14, 2008
Messages
2,817
Re: Orlando Clipper Customization/Restoration

I believe so since your new transom core is only 1.5 inches thick plus an inner and outter aluminum skin. You just want to be certain NOT to run out of threads before the motor is properly secured.

Sorry for your fat fingers lol. :p

PLUS the aluminum bar that I'm going to be using as reinforcement for the top bolts. There's a picture of it in post #34.
 

coolguy147

Commander
Joined
Jul 14, 2008
Messages
2,817
Re: Orlando Clipper Customization/Restoration

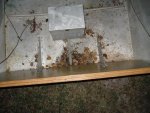
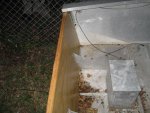
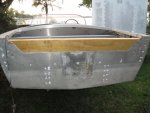
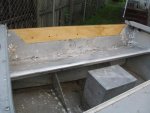
The transom is in!IMG_4972 (640x480).jpgIMG_4973 (640x480).jpg

Tomorrow, I'm going to be mounting the motor. I'll also be measuring to see what length of steering cable I need. Any tips on getting the correct length steering cable? I have a teleflex 10ft cable on hand, can I put that in and measure the distance needed? I used the A+B+C+6 method and got around 14.3 of needed cable. Rough estimate.

Any ideas on getting my 5200 finger prints off of the aluminum?
 
Top