New Boat For Christmas

wooky30014

Petty Officer 1st Class
Joined
Jun 8, 2012
Messages
288
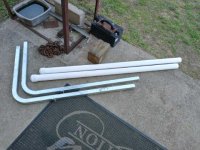
Has been a wee bit nippily and breezy out last couple of days but here is what I scored on a roadtrip earlier today, yes, some assembly required
Some Assembly Required.jpg
 

wooky30014

Petty Officer 1st Class
Joined
Jun 8, 2012
Messages
288
Well boyz an' gurlz, the day has come, Riff Raft is running under her own power. I took a video but the quality isn't so hot (lost some in the transfer ???) dunno, this technology stuff is beyond me, BUT she IS running. I've got a few more 'justments to be made but those will need to be done in the water, according to the manual (unless I can find a big enough bucket), make sure the mixture is right. I need to get life jackets now in order to be legal, even if I'm juss floating at the dock or on the hook

I did have to replace a short piece of fuel line, I think it had a mud-dauber nest in it, changed and a filter added
Battery charger isn't hooked up at the moment 😁 And pollen is coating EVERYTHING LOL
View attachment 20220329_171231(1)[1].mp4
 
Last edited:

wooky30014

Petty Officer 1st Class
Joined
Jun 8, 2012
Messages
288
First let's try this video, nope 76% and then a "problem" with the upload, oh well

I got the Admiral to operate the throttle so's I could watch the gizmos on the engine, I believe she's ready for a dunking to set the mixtures on the 3 carbs (not an official splash though). I do hope that I'm not boring the s . . . . . . . . oup out of everyone here reading the play-by-play of me tinkering here. I don't believe there is ever a truly "water ready" or "road ready" anything when it comes to used items. I'm doing all of this partly from OCD and mostly peace of mind, less chance of any surprises in the middle of the lake.

I got the guide poles cut, mounted, AND wired so's they can be seen in the dark. The metal was just above the gunnels and I cut a length off the PVC, height works for me.
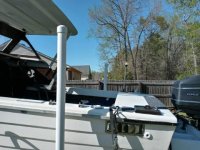
Guide Poles.jpg
And the beacon, there is a weep hole to allow air to escape, not that it's going anywhere
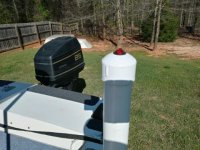
Guide Light.jpg
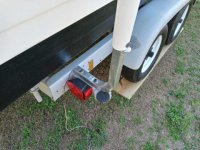
Bolted in place, not bad for 50 bucks and a drive through the woods
Bolted.jpg

I've also started with the trailer light replacement, granted they all worked and might have been the submersible type BUT when a right-side light is on the left with the drain hole on top . . . . . . neh, plus once again I've found wire nuts and some sort of wonky plug-ins. I've got new submersible LED tails and have submersible amber and red markers along with a triple LED light bar for the rear of the trailer on the way (remember, OCD here LOL). New harness already here and all connections will be soldered and shrink tubed with a dab of "liquid tape" to seal it all up

OH, 'afore I fergit, I also pulled the bottom engine mounting bolts, the very bottom of the "ear" was riding on part of the bracket bar and I was afraid that the ear might bend or break off so I located a couple of thick fender washers from my stainless stash and used them as spacers between the ear and the bracket face. Hard to get a pic as the gap taken up by the washers was only a couple of millimeters, but now there is a solid base under there and no worries. On down the road I may get a new, more modern bracket with flotation and a swim platform, we'll see
 
Last edited:

briangcc

Commander
Joined
Jul 10, 2012
Messages
2,382
Looking good. Jealous you can splash as I'm still a few weeks away - snow in the forecast for me.
 

wooky30014

Petty Officer 1st Class
Joined
Jun 8, 2012
Messages
288
I've got all the lights here and ready to install, did that while the gullies were being washed out the air dried by Nature. The new harness is actually 2 harnesses. I took one and split it for left side, white, brown, and yellow. The other was split also for the right side using the green and adding the white and brown. I also made pigtails for each light to connect to the respective harness. I've scraped most all of the rust off the trailer and have applied Eastwoods Rust Encapsulator to roughly 1/3 of it, I'll get pics in the morning before I continue painting. I wanted the trailer painted for the rust before installing the new wiring (OCD again wanting it to not look amateurish with paint slopped all over the wiring LOL). I also bought a pair of life jackets, I'm guessing they need to be aboard even if just tied up to the dock. ALMOST THERE in regards to the shakedown dunking, oh I can't wait to be cruising again
 

wooky30014

Petty Officer 1st Class
Joined
Jun 8, 2012
Messages
288
Here are the promised pics. Still not completely painted but it's where I can get the lights hung. The "open paint can in the plastic bag" trick worked, it was ready for a stir this morning
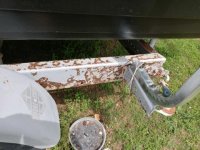
Here is the crusty rear, now covered in paint, it did have grey paint with outlines of rusty seeping through but not anymore.
Crusty.jpg
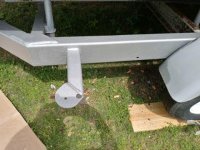
And forward of the fender painted
Painted.jpg
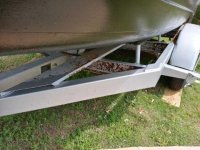
And farther forward, any crusty areas seen are now covered.
Painted Too.jpg
Now to start hanging lights and applying reflective tapes
 

wooky30014

Petty Officer 1st Class
Joined
Jun 8, 2012
Messages
288
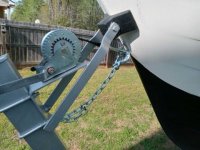
I got a late start today, ahh the retired life, get to sleep in :sleep: if ya have no place ya have to be. I did get the winch backup bow eye safety chain rigged, she won't be going but maybe an inch or so should the winch or strap fail while on the road
Chained.jpg
 

cptbill

Senior Chief Petty Officer
Joined
Oct 6, 2012
Messages
762
Yea, bring on the splash! Haven't started on mine yet been to busy with the R.V.
 

wooky30014

Petty Officer 1st Class
Joined
Jun 8, 2012
Messages
288
I haven't done the splash yet, update here. I've had to take a break due to some ongoing health issues here, Clutzy me keeps bumping my leg on something (used to not be any issue UNTIL 'betes reared its head) Leg is better now and not weeping after a round of antibiotics meds for infection. The trailer wiring and lights are finished (and work LOL), rust encapsulator paint is applied to all I can reach with the boat aboard, mainly between the axles that I can't get to. I've also been prowling the Interwebs for a tilt and trim unit, specifically been looking at CMCs PT-130, new ones are over $1100 and don't come with the needed brackets or gauge, used ones are hard to find that they will ship, "cash when you pick it up". I'll find one eventually. Anyway, leg is healing up and the Admiral has my truck as hostage for her front yard project (and to mention again she's not too keen about Riff Raft as she'd rather have a 'toon to ride on). We'll (or I'LL) splash soon, having to rig this as a one-man operation all around
 

Willyclay

Captain
Joined
Sep 8, 2006
Messages
3,258
Sorry to heaar about your health challenges. No pressure, you just had a bunch of us ready for the splash. When the time is right for you, we will be here. Take care of yourself first!
 

Willyclay

Captain
Joined
Sep 8, 2006
Messages
3,258
Check for a Private Message (old guy) in your Conversations folder by licking the "envelope" thingie in the header line by your forum name.
 

wooky30014

Petty Officer 1st Class
Joined
Jun 8, 2012
Messages
288
Almost to the splash point, I'll have me truck back (LOL) in a day or so, leg is healing up fine (partly due to gittin' old, not in the mind though). I'll be sure to take plenty of pics of everything and since it'll likely be on a weekday there shouldn't be much traffic at the two ramp marina. Maybe even take her for a quicky around the lake (I've been on and about this pond since my early teens)

An update of sorts, I was prowling marketplace online (the same place I found Riff Raft) and happened across a CMC tilt / trim unit. I've got a mechanism for it on order and will overhaul this one and keep as a spare, something about the motor brushes shot. I'll get it ready and install it later after the initial splash here
 

wooky30014

Petty Officer 1st Class
Joined
Jun 8, 2012
Messages
288
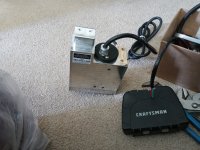
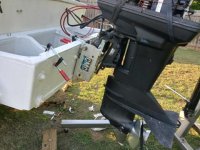
One more postponement but I think yall will understand this one for sure. Since there was no tilt or trim function on this outboard motor (they were available) so I sourced an aftermarket unit and also sourced a brand new pump / lift unit and figured I'd go ahead and install this now or I'd likely make all sorts of excuses later for not. I've got it mounted but need to get some different nuts as these I've got won't tighten, lock nuts of some sort. Anyways, I'll have it ready to go in a few days and will be a one person launch / retrieve boat with electric tilt for the engine. Patience my friends, I'm itching to get the hull wet too

Brand new lift gizmo for
Gizmoid.jpg
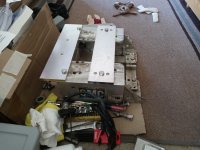
Tilt and trim unit with mounting brackets, oh and for added strength I have two aluminum backing bars (one can be seen in the box above pic) to help keep the bolts from pulling through the transom bracket
Tiltomatic.jpg
Transom part in place
Bracketed.jpg
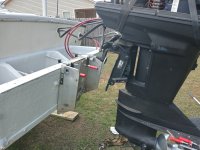
Hanging but not permanent yet
Tilted.jpg
Some day in the future, after enjoying for a while, I'll look into getting a different bracket installed, one with some flotation and a swim platform
 
Last edited:

wooky30014

Petty Officer 1st Class
Joined
Jun 8, 2012
Messages
288
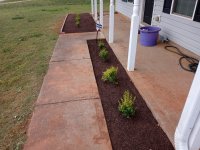
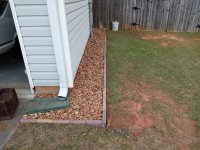
Thanks Willy. The Admiral gave me a shocker today (well, yesterday) we were out finishing up her project of new bushes across the front of the house, a Gardenia transplant in a stone circle in the front yard and flowers around the mail box post, removing the river stone in these areas and replacing with potting soil / mulch and removing the now rotten landscape timbers I placed after buying the house and setting brick pavers in place.
20220507_172444.jpg
Oh and those are new posts we had installed last year
20220507_172500.jpg
One of our neighbors had rolled up and we were talking about how close we were to getting the hull wet and going for a ride. I almost fell over when she said something about "if we have time to ride then we have time to fish" :oops::eek:o_O and that coming from someone who has been saying all along "you shoulda gotten a pontoon" and "I'm afraid you'll throw me overboard when you give it the gas" LOL, I think I'm a wee bit more careful than that
 

cptbill

Senior Chief Petty Officer
Joined
Oct 6, 2012
Messages
762
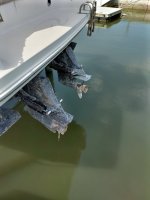
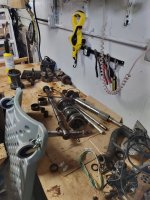
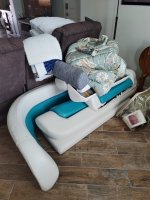
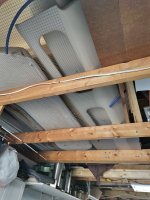
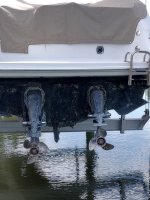
She does good work, can't wait for the launch. Finally got mine off the lift and onto the trailer so I can start getting things done, port engine shut down on the way to the ramp, docked at the ramp then went to start it to load it but the starboard engine wouldn't go into N but thankfully the port engine decided to start. Anyway single handed retrieval(getting off the lift doesn't count )went smooth and now it's on the trailer and ready to be started on. New to me DP-sm 1.95 drives I already started on, Deck upholstery done and waiting, Interior is in the rafters waiting
 

Attachments

  • IMG_20220429_111320_hdr.jpg
    IMG_20220429_111320_hdr.jpg
    1.5 MB · Views: 5
  • IMG_20220429_111402 (1).jpg
    IMG_20220429_111402 (1).jpg
    2 MB · Views: 5
  • IMG_20220429_111229_hdr.jpg
    IMG_20220429_111229_hdr.jpg
    2 MB · Views: 4
  • IMG_20220429_111246_hdr (1).jpg
    IMG_20220429_111246_hdr (1).jpg
    2.1 MB · Views: 3
  • IMG_20220429_111454_hdr.jpg
    IMG_20220429_111454_hdr.jpg
    1.9 MB · Views: 3
  • IMG_20220429_111439_hdr.jpg
    IMG_20220429_111439_hdr.jpg
    2.3 MB · Views: 5
Top