New Boat For Christmas

wooky30014

Petty Officer 1st Class
Joined
Jun 8, 2012
Messages
288
I assume those are plastic, hardware store caps. Are you aware that thru hulls use a special straight thread (NPS)?

Done on purpose so you cant use “plumbing” hardware with them.

And as you noted in prior post, no “plastic” below the water line, especially PVC fittings
Yeah, I have a bronze cap for one and a bronze cap for the other OTW, both from marine supply outfits so they should know about the threads. I did some more reading since getting the plastic cap. They will be sealed on with 5200. The thru hulls are curing, should be set by now with fast cure 5200, I doubt they will ever loosen up or leak

I now have both bronze caps, the mail just ran
 
Last edited:

wooky30014

Petty Officer 1st Class
Joined
Jun 8, 2012
Messages
288
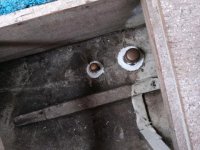
WELL a boy howdy, yippee-aye-ay, and a WOO HOO here, finally done with the critical wiring. The only thing left are the cockpit courtesy lights, can't even get a stubby drewscriver up in betwixt where I was wanting to install them. I got the bronze caps glued and screwed in place
Capped.jpg
Yeah I know, the bilge is filthy, its cleanup is on the short list and I can get back to the engine adjustments. Another thing I've been tinkering with is sleeving / sealing up the cable passthroughs(?) in the stern. I measured 77mm and 53mm and have a couple of empty meds bottles that are a perfect fit also to be glued in with 5200. Pics to come when I get them in place
 

wooky30014

Petty Officer 1st Class
Joined
Jun 8, 2012
Messages
288
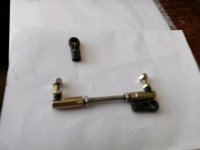
Started back on the adjustments today, had to go get a pair of linkage ends, one of the plastic fittings was cracked, these are same size and will work
New Linkages.jpg
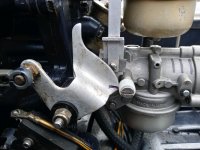
Throttle cam lined up as it should be but I've got some more fiddling to do to get WOT setting correct, all part of the tune-up and adjustments. I remember doing a Monkey Wards SeaKing / Chrysler 45hp, set the timing with a plastic school protractor, that engine ran like a champ and hated selling it but I needed a car a little worse
Cam Lined Up.jpg
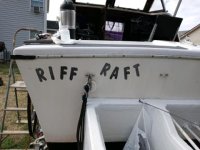
She's now Officially "Riff Raft". I plan on add Memorials on either side of the cabin for my Veteran Parents
Riff Raft Lives.jpg
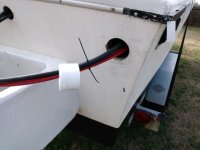
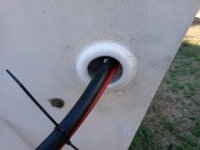
I also capped the hole in the stern where the steering and throttle / gear cables come through, as I previously said this is the bottom half of a medicine bottle glued in place and tomorrow I'll run a bead around the outside joint to seal it up
Before
Bare Hole.jpg
And after
Capped Hole.jpg
Yeah it sticks out a little but is not a problem with me, zip ties are temporary. OH, and I'll cut a notch in the bottom where the joint is to drain any water that might get up in there. 5200 went all around the inside of the opening and the plastic goes through with a lip on the inside
 
Last edited:
wooky30014

Petty Officer 1st Class
Joined
Jun 8, 2012
Messages
288
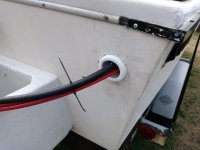
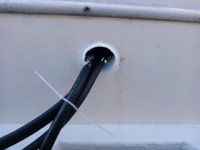
I was busy today after the rain yesterday, found a leak in the roof that I took care of hopefully. Finished sealing up the two cable holes in the stern, I don't know where the little bubbles came from but just who is gonna notice it ? Got a little blop ON the cable but again who is gonna notice
Steer Hole Finished.jpg
Cable Hole Finished.jpg
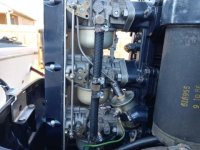
The choke plunger is degreased from where I applied too much dielectric grease and it was binding, not anymore. I also reinstalled the air baffle
Choke Set.jpg
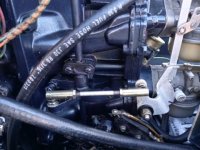
The new throttle linkage ends are on and WOT has been set to specs thanks to the manual and YouTube, the adjustment was a bit fiddly with having to unscrew the left fitting to make the adjustment, why the rod didn't have left and right handed threads I don't know, THAT would have made the setting much easier
Throttle Linkage Set.jpg
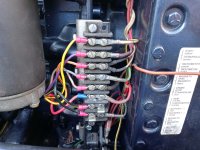
I had a "while I was in there" moment and in keeping with my self imposed "all splices and connections to be soldered" mandate, the engine electrical control cable had crimped connectors and one looked to be loose and in fact the crimp was barely holding the wire so now all new soldered on connectors and I also dove into my stainless screw and bolt bucket and bolted down a dangling circuit breaker below the buss bar.
Engine Control Cable Soldered.jpg
Now she's about ready to be fired up and check the adjustments
 

wooky30014

Petty Officer 1st Class
Joined
Jun 8, 2012
Messages
288
I got a late start today so I just installed the courtesy lights, had to wait 'til dark to get pics and port side pic was out of focus so I deleted it
Starboard Courtesy Lights.jpg
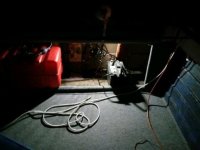
I also snapped one of the battery compartment light. This will beat having to hold a flashlight, I might get a second one
Battery Compartment.jpg
 

wooky30014

Petty Officer 1st Class
Joined
Jun 8, 2012
Messages
288
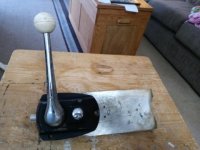
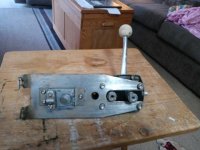
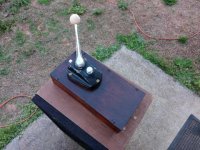
It's been a couple of days, I'm in the middle of improvising and adapting my known good throttle and shifter. I don't know about the one that came with her but by watching the two shafts, the throttle is halfway before it's in gear all the way and the knob for fast idle in neutral slips in and out with no detent (found out it's missing its ball). My Morse MV-1 slips into gear completely just as it hits the idle in gear detent (if that makes any sense). I also found out by searching the interwebs that this MV-1 is a rare critter from the late 60's-early 70's, more common are MV-2 with the interlock under the shift handle knob
Morse Front.jpg
Morse Back.jpg
And yes I DO have the arms for this Morse unit. Gonna find an "8 Ball" knob
 

wooky30014

Petty Officer 1st Class
Joined
Jun 8, 2012
Messages
288
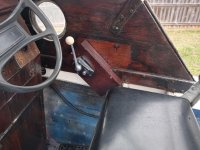
Quick update here, I've got the new shifter / throttle control box finished but have to cut a couple of angles in the wood to fit the box over the cabin trim piece. This will facilitate me being able to route the control cables directly into the gunnel channel instead of the hard angled and tight bends they had (IMHO) in the pic
Cable Routing.jpg
New box and the Morse will be in basically the same location but the cables will be less strained
 

wooky30014

Petty Officer 1st Class
Joined
Jun 8, 2012
Messages
288
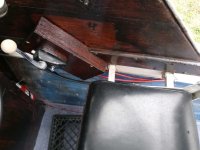
I've now got the new shift / throttle control box installed, gotta wait until the rain stops and it warms up a bit to finish the engine adjustments. There is no binding or interference of the mechanism and the cables now run a lot straighter than before, thinking of running a length of conduit for them
The box, yeah, that is an old speaker cabinet turned sawhorse
Morse Shifter Box.jpg
Mounted in place, lever was moved to straight up / neutral, need one more notch
Throttled.jpg
And much less strained cables, I've got 2 low hour cables to replace these if needed
Cabled.jpg
New shifter ball and kill switch OTW
 

wooky30014

Petty Officer 1st Class
Joined
Jun 8, 2012
Messages
288
I've got a question on bottom paint, is there anything out there that is for below the waterline but isn't chock full of anti-algae or anti-fowling since she won't be in the water for more than a weekend or less and will continue to reside on the trailer ? I'll search again but so far, no joy
 

cptbill

Senior Chief Petty Officer
Joined
Oct 6, 2012
Messages
744
You know what I like about it the best, It still looks like a great old boat!
 

wooky30014

Petty Officer 1st Class
Joined
Jun 8, 2012
Messages
288
Yeah, cptbill, the more I do (which means the closer I get to different parts and areas) the more that this vessel amazes me, mainly her reported age and no rot that I can find. Original woodwork of a species I still don't know. Stringers, deck, transom all are solid with original looking glass work on their surfaces. She looks like she's cruising right along while sitting on the trailer in the backyard, can't wait to "splash" her and go for a long awaited ride on the lake
 

wooky30014

Petty Officer 1st Class
Joined
Jun 8, 2012
Messages
288
Well, I've been HAVING to take a break the last few days due to drizzling rain, a gully washer last night, and quite breezy and 35F today. I've got the kill switch ready to install. I took the break yesterday by finally replacing the power cord on my soldering iron (using the old cheap WallyWorld one was an adventure, but I made it work) Now I have 8ft of reach and an iron that won't shut off when the cord gets moved. I also lubed up the spare cables with Lucas ATF juice using a lube syringe I use on my car's throttle link joints
 

wooky30014

Petty Officer 1st Class
Joined
Jun 8, 2012
Messages
288
Having to slow down here a bit, Mother Nature sez so 🌧️ 🌩️ ⛈️ so's I will. Doing all what I did the last few days to the shift / throttle cables was for naught, while having little to no play in one that I had here and had covered cracks in the sheathing with shrink tubing there were new crack that developed while installing. Oh well, new cables have been ordered, again this will end up being a brand new watercraft when I finally get to splash her, THEN I shouldn't have any problems from a mechanical or electrical aspect
 

wooky30014

Petty Officer 1st Class
Joined
Jun 8, 2012
Messages
288
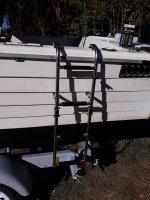
Been sitting here listening to the rain fall and the thunder booming pondering 🤔 what to do about the reboarding ladder hanging off the side, EUREKA 💡I'll get a couple of those quick-disconnect pins and hang it inside while on the trailer so it won't interfere with the guide poles I am going to install
264614425_4859029660813937_4089790332926839265_n.jpg

Just got the notice, FEDEX says my cables will be here tomorrow (LOL we'll see how that one goes) and last night I fashioned conduits for each cable (an OCD thing here)
 
Last edited:
wooky30014

Petty Officer 1st Class
Joined
Jun 8, 2012
Messages
288
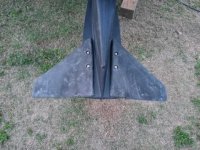
I've got the new cables installed and set-up (I think 🤔) I went to spin her over and would go about a third of a turn and stop, hit again and another third turn and stop, plugs out she'd spin freely. Gonna go clean all the engine connections while the battery charges up again (did a charge up last night). While killing some time I installed the Doel-Fins I took off a Volvo 270 drive (does anyone need a late 60s- early 70s Volvo 270 drive ? works good but now needs all seals, gaskets, and O-rings replaced)
Here's a pic of the installed Doel-Fins, they should help get her up on plane a bit easier. I was looking the other day from down the hill behind Riff Raft and saw that she has a relatively flat bottom at the stern, I thought she had a little more ov a "V" back there. Something else I noticed a while back is that she has 2 drain holes in the transom, port-side appears to be a brass or bronze screw in with the starboard being a removeable standard drain plug (which I have no less than three hanging around to insert from either inside or out)
Doel-Fin.jpg
 

cptbill

Senior Chief Petty Officer
Joined
Oct 6, 2012
Messages
744
Getting closer, I got no comment on the fin as I have never used one but then again I haven't had a single engine since 1999. Let us know how it works, looking forward to the splash down
 

wooky30014

Petty Officer 1st Class
Joined
Jun 8, 2012
Messages
288
Yeah Capbill, it seems though that every time I get something done or fixed something ELSE pops up, no worries though, at least I'll have the peace of mind that it's ALL good, like the choke pot. Pushing in on the key when on does nothing, jumping it with a wire caused the wire to weld to the screw. I'll get it taken care of. I found a set of trailer guides I'm going to look into going to get, make it MUCH easier for a one-person launch-retrieve.

The Doel-Fin I used years ago with the BatBoat ('57 LoneStar) with the 45 SeaKing/Chrysler, it popped right up on plane just by cracking the throttle, it had a two-lever throttle/shift box.

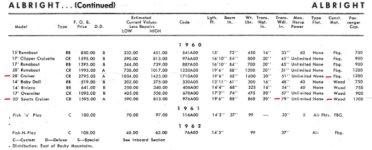
Oh, and I was looking at the little bit of info I have on her, kinda confusing as to what she actually is, perhaps a 1960 instead of a '61 but also the construction materials, wood vs 'glass. The measurement I took was 80 inches at the rub rail across the stern

Albrightbb005.jpg
 

wooky30014

Petty Officer 1st Class
Joined
Jun 8, 2012
Messages
288
I've got the gagger (choke) working now with a new pot installed. I think I've got a weak battery or (hopefully not) a weak starter, sometimes the engine doesn't want to spin over like it should. I've cleaned all the connections and applied some dielectric grease, that helped a little bit.

Next new issue is fuel delivery, specifically the primer squeeze bulb (a brand new one) that won't pump. I've got the one that came with the boat that has the metal valves, works good but the rubber is cracked and dry rotted. I'm working on trying to fit these metal valves in a new bulb. Does anyone know who makes a quality fuel bulb these days, I've got two newer ones that don't pump (EPA compliant / spec), OH if we were still back before goobernment intervention
 

wooky30014

Petty Officer 1st Class
Joined
Jun 8, 2012
Messages
288
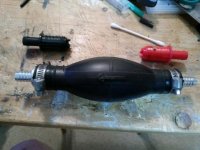
I believe I've come up with a Redneck Engineered fix that will work on the fuel delivery issue. I took the metal valves along with the rubber sleeves that were around them (about the only part of the rubber that was any good and not cracked) and force fit them into one of the new and non-functional bulbs. Even though there will be little to no pressure on these fittings I still installed hose clamps. I'll give it a go tomorrow and get the engine running again and do the fine tuning of the carbs, throttle settings and shifter settings. Here is what I've come up with
Primer Valved.jpg
On Sunday, if the contact message comes in I'll be making a road trip to get a pair of trailer guide poles, seller said he's out of town till Saturday
 
Top