New Boat For Christmas

wooky30014

Petty Officer 1st Class
Joined
Jun 8, 2012
Messages
288
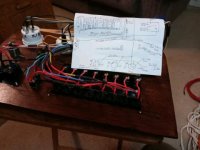
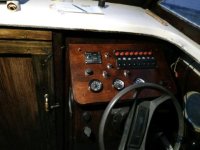
Good news and some not so good today, I got the dash finished, wired up, diagramed and ready to be installed with wiring to be run to where it needs to go
The good
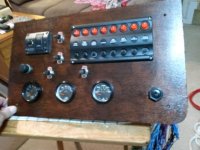
Helm Panel Front.jpg
Dash Diagram.jpg

The bad, and it's already been dealt with, is that the plastic thru hull I was giving it a cleaning and discovered a crack in its outside edge, not good. SO, I went for a look-see on a replacement and read that plastics are NOT recommended for use below the waterline, something that makes sense and that I didn't know. A bronze replacement has been ordered along with the needed cap.

Another example of the wood used in / on this vessel, still haven't heard what type it is. This ring was a spacer on the larger thru hull and if original to the construction of the boat is 61 years old and was located down in the bottom of the hull

This side was against the hull
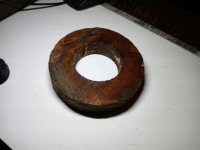
Wood Ring 1.jpg
This side had the bronze nut against it
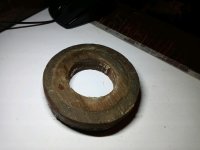
Wood Ring 2.jpg
 

wooky30014

Petty Officer 1st Class
Joined
Jun 8, 2012
Messages
288
Thanks cptbill, getting closer to splash day but not until they raise the lake a little and more important, I get finished with my going through her
 

cptbill

Senior Chief Petty Officer
Joined
Oct 6, 2012
Messages
762
I just got all my deck seating back for my regal 2760 but have stopped with the boat refurbish, picked up a motor home and have been upgrading that. The Admiral wants to go to the grand canyon and some places in Utah in March or April, but your project is coming along nicely
 

wooky30014

Petty Officer 1st Class
Joined
Jun 8, 2012
Messages
288
Thank You, I have a good start with a boat in as good of condition that this one is in. What I'm doing is basically the annual tune-up with a little rewiring. The hull is rock solid from what I've seen

Yeah, ya GOTTA keep the Admiral happy or . . . . . . . . My Admiral would rather I'd bought a 'toon boat, to me those are just a barge with a motor on one end. Riff Raft can be slept in if need be and has plenty of shade plus the fishing area
 

wooky30014

Petty Officer 1st Class
Joined
Jun 8, 2012
Messages
288
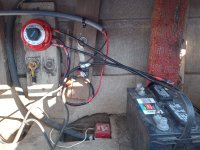
I installed the battery switch and some of the electrics today, need one more battery cable a bit longer than the one I have right now. Batteries One and Two go to the switch and come out to a common power point with the ground for the entire boat, the engine cable connects here, and I have routed power to the helm through a conduit. The ignition switch and gauge function will draw power from the engine with the gauge lighting from the helm switch panel
Battery Switch.jpg
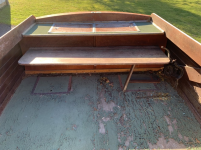
OH, and the layout you see back here at the stern with the brace boards and such looks to be how the boat was built. There is the transom proper and then the wood and glass layer on top of that upper and lower. The deck wood is just dirty looking (yes, a cleaning is on the list) but is solid, no soft spots or springy feeling, and no, I still have no idea of what kind of wood was used in this boat

On a side note, while I was tucking the conduit and engine cable up out of sight, I noticed that the helm seat brackets were a bit shaky, 6 rusty screws came out and I hit my stash of stainless nuts and bolts WITH fender washers. Now I won't go bouncing across the deck when then seat was going to give out

I also pulled some power points, a USB for phone charging, a cigarette lighter, a digital voltmeter, and a switch to turn them on and off. I'll clean them up and reinstall them. A busy day yes, didn't get as much done as I wanted to but I didn't antici . . . . . . . . . . . . . . . . pate the seat issue LOL
 
Last edited:

wooky30014

Petty Officer 1st Class
Joined
Jun 8, 2012
Messages
288
Messed up with a double post and no delete button :oops:
 
Last edited:

wooky30014

Petty Officer 1st Class
Joined
Jun 8, 2012
Messages
288
Finishing up on a couple of sub-assemblies and I found a sign that I bought years ago to put on the dash of a boat. I think I paid a dollar for it at a yard sale. It's in German and reads "The Driver is prohibited from talking to the Passengers" LOL, I guess any entertainment you'll have to bring it aboard yourself 😁
Sign.jpg
 

wooky30014

Petty Officer 1st Class
Joined
Jun 8, 2012
Messages
288
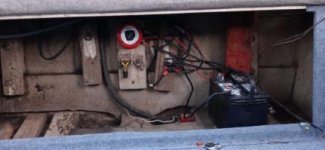
I got a bit more done today, cleaned up the wiring in the battery compartment (even though it looks a little like spaghetti, it isn't that bad) the longer ground cable is there too. Battery One is hooked up
Battery Cleanup 2.jpg
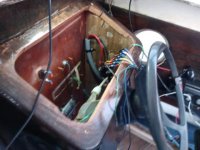
In keeping with having all soldered connections I cut off the connectors from the engine cable and have it hooked up and the motor is ready to rock. I also got the gauge signal wired spliced together
In Progress Wiring.jpg
The helm panel is in place but I'll be taking it out to shave a little off the top edge. I think it looks sharp as hell, not bad for an amateur.
Helm In Place.jpg
Even though it's not required I have a blower to install but need longer bolts so I'll put that on the "to do" list. She came with a Rule 800 pump, I need to find my float switch out in the garage, was also thinking (yeah, a dangerous sport around here LOL) thinking since I've got a Rule 1500 to swap out, we'll see. Maybe set both of them since I have two drains on the transom, what do yall think ?
 

wooky30014

Petty Officer 1st Class
Joined
Jun 8, 2012
Messages
288
No, it's an Attwood wheel, can just make out the letters on the center "horn button". The original helm was the old-style cable and pulley system and some of the pulleys are still there. I'll leave them be for nostalgia.

I did some more rewiring today, having to figure out what wires went where and some of it just has to be original and with the cracks in the insulation it WILL be replaced. The little trim of the top edge of the helm panel and it fits perfectly.
 

wooky30014

Petty Officer 1st Class
Joined
Jun 8, 2012
Messages
288
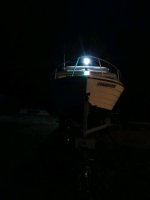
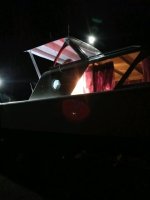
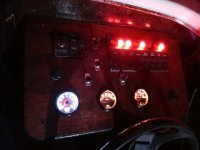
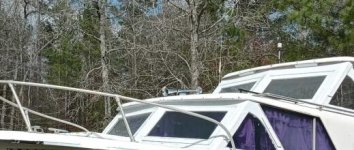
Well she's legal now as far as the running and anchor lights go. Got some pics of them lit up but still have some more to go. Oh and this was "under her own power" running off the battery. I still have a few more lights, the blower, stereo and speakers, bilge pump, and I found a float switch to make it an auto or momentary manual setup. Then I'll get back to the adjustments to the engine and cables. Thru hulls are here but been too chilly for gluing them in just yet.
Since Riff Raft is technically "tied up" and not under way the anchor light is lit
Nightlight 5.jpg
Bow Light is bright
Nightlight 2.jpg
Reading lamp in the cabin plus the stern light lights up the cockpit and yeah, that's my bald head seen in the window
Nightlight 3.jpg
I'll likely subdue the panel lights a bit
Nightlight 1.jpg
 

wooky30014

Petty Officer 1st Class
Joined
Jun 8, 2012
Messages
288
Thank cptbill, juss don't tell anyone about the belly dancer (it's my "counter-weight" so's I don't fall over when pickin' somethin' up 🏋️‍♂️🍞)

I got most of the rest of the old wiring out. Inside the cabin the WERE two outlets mounted next to each other, one had a label next to it that said "12V", while the other had "120V". I haven't seen any shore-power outlet so where the 120 came from is a mystery. I got the wires for the bilge pump and blower routed back, the ground is already there with the power point (one less wire to run back there)

I did a repair / splice on the antenna cable for the stereo and have it back in place as well. Some may be wondering just how to repair a coax antenna cable, well, (some of my Army Training being used on this project, Radio Repairer here) I stripped back a couple of inches of the sheathing, popped on a couple of shrink tubing, pulled back / bunched up the braided copper, stripped back the inner sheathing and popped on a length of shrink tubing, soldered the signal wire, fitted the shrink covering the ends of the center sheathing, pulled up the smaller of the braids then pulled up the other making them overlap and a quick solder on the overlap (I use flux paste applied with a small modelers paint brush, makes the solder flow faster), the slide up the outer shrink tubes overlapped and done. Just for some "insurance" I wrapped the entire splice with tape
 

wooky30014

Petty Officer 1st Class
Joined
Jun 8, 2012
Messages
288
I got a response on another site suggesting one way to put a bench type seat across the back. He said it could have "knock-away legs" and then fold up or down out of the way. I could do either something similar or seats on either side
1645486309883.png
 

wooky30014

Petty Officer 1st Class
Joined
Jun 8, 2012
Messages
288
The air horn is now fixed and remounted, goo'ed and screwed with 5200. The thru hulls are also goo'ed in place with 5200. I had to delete the wood ring spacer for room to goo the enroute bronze cap. No pics yet, got too dark and raining again today, I'll get some and post. The new angle of the horn with the new bracket will ensure that any water will run out (and it'll take a Poseidon Wave to clog it up)
 

wooky30014

Petty Officer 1st Class
Joined
Jun 8, 2012
Messages
288
No edit button ??
Here are the promised pics. The horn is pointing at the bow light (sorta), new wiring with a blob of 5200 where it goes through the cabin overhead, screws and the one bolt too.
Horn 2.jpg
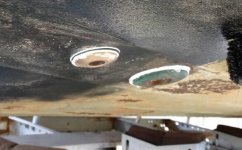
Now for the thru poo :poop: holes, 5200 in and out. I know the trailer has rust spots that need painting, and the hull needs a new bottom coat, and that the rollers aren't touching (was told the bunks are mor critical), and the brown spot behind the fittings is a poo :poop: :poop: stain (my story and sticking with it)
Thru Hulls Reset 2.jpg

Now to go do some more wiring, in that respect this will be a brand new 61yo boat 👍😬
 

cptbill

Senior Chief Petty Officer
Joined
Oct 6, 2012
Messages
762
Coming right along, are you making the rear seat easily removeable or just folding?
 

dingbat

Supreme Mariner
Joined
Nov 20, 2001
Messages
16,071
The thru hull fittings with hose barbs cut off for the threaded caps.
View attachment 355589
I assume those are plastic, hardware store caps. Are you aware that thru hulls use a special straight thread (NPS)?

Done on purpose so you cant use “plumbing” hardware with them.

And as you noted in prior post, no “plastic” below the water line, especially PVC fittings
 

wooky30014

Petty Officer 1st Class
Joined
Jun 8, 2012
Messages
288
Coming right along, are you making the rear seat easily removeable or just folding?
Can't find a multi-quote button here

The seat(s) will come later, I was thinking removeable so if we are alone on a fishing / riding excursion we could take it out, if a couple more go with us then put it in, have to be able to reach the battery switch
 
Top