hull extension in progress with pics

Status
Not open for further replies.

oops!

Supreme Mariner
Joined
Oct 18, 2007
Messages
12,932
Re: hull extension in progress with picks

Re: hull extension in progress with picks

hes got it up now...check to see if you can see it....i just get the red x
 

redfury

Commander
Joined
Jul 16, 2006
Messages
2,655
Re: hull extension in progress with picks

Re: hull extension in progress with picks

Should be working in firefox and IE browsers now. Hopefully I don't get bandwidth'd to death :D
 

drewmitch44

Lieutenant Commander
Joined
Jun 26, 2005
Messages
1,749
Re: hull extension in progress with picks

Re: hull extension in progress with picks

Where??? I dont get it? Is this the document you guys were talking about?
 

oops!

Supreme Mariner
Joined
Oct 18, 2007
Messages
12,932
Re: hull extension in progress with picks

Re: hull extension in progress with picks

up date comin in one hour
 

oops!

Supreme Mariner
Joined
Oct 18, 2007
Messages
12,932
Re: hull extension in progress with picks

Re: hull extension in progress with picks

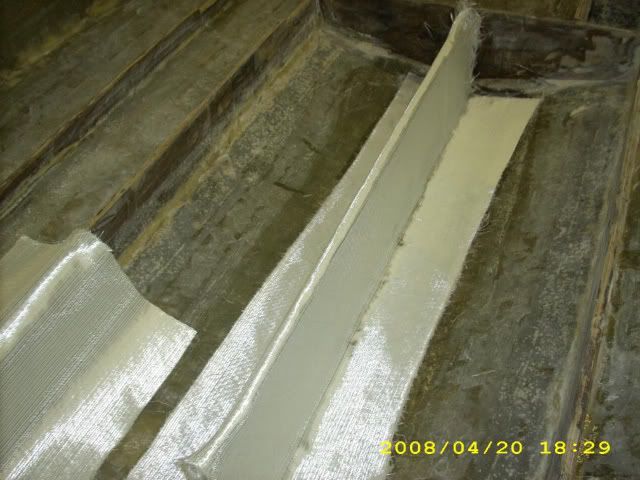
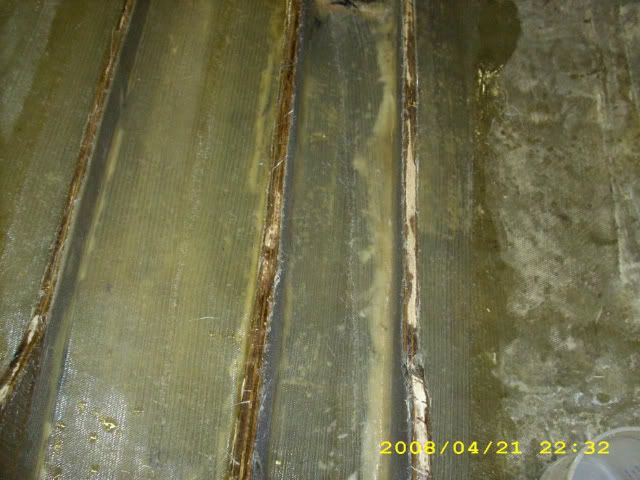
ok.....first thing i wanted to do was try wize ones method of capping....

i wet out the area of the stringer fully with a hot mix.....then i wated till it was allmost at cure.....(really sticky not wet sticky)....

and streched the fabric over it.

picgroup31001.jpg


i rolled the fabric into place firmly so it would fully cure there......i placed the top as best i could... rolled it...then streched the sides.....rolled it...then the curve at the bottom....and rolled it out....

i was worried about micro bubbles after curing, so i rolled it 3 times. there was no way i would know if i got all the bubbles out, but i did know that the cloth could not move....

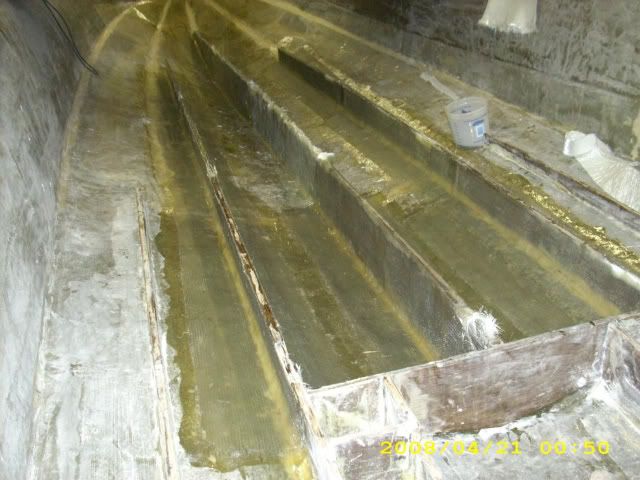
in the mean time i re cut some stripps for the other stringers and started glassing. this will be a cap method.

each one section took one hour including shaping , aceitoning and glassing.

the sections are 50 ins...and 2 layers of 1708 per side for a total of 4 layers

picgroup31007.jpg


that took till 1130 pm......

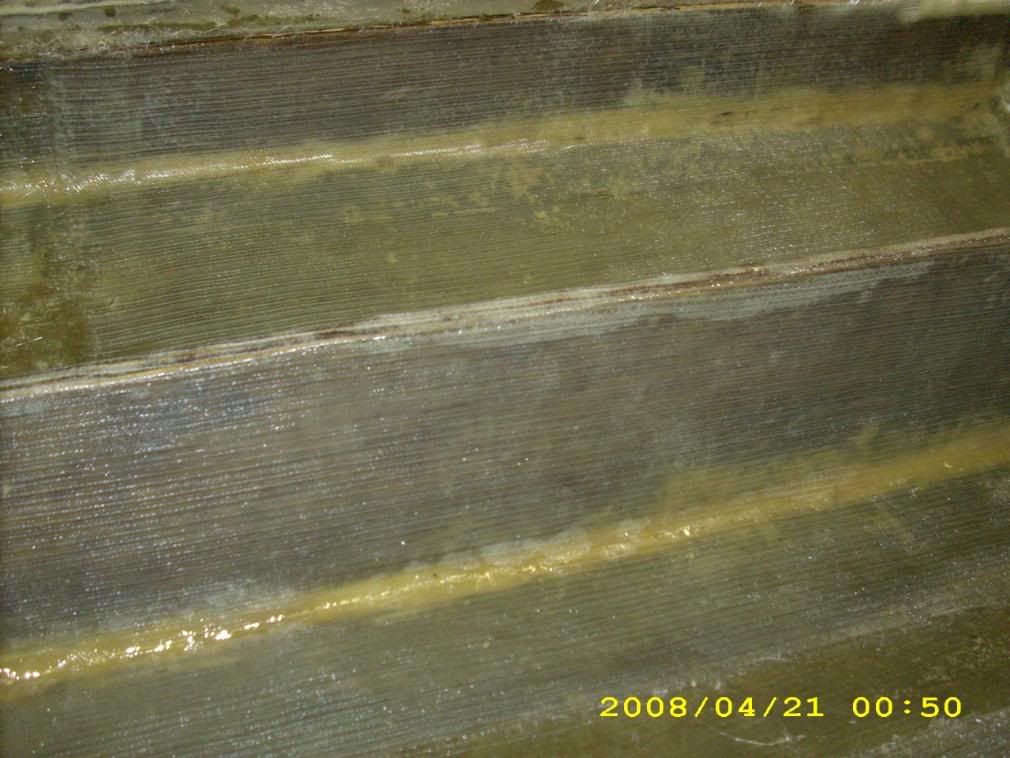
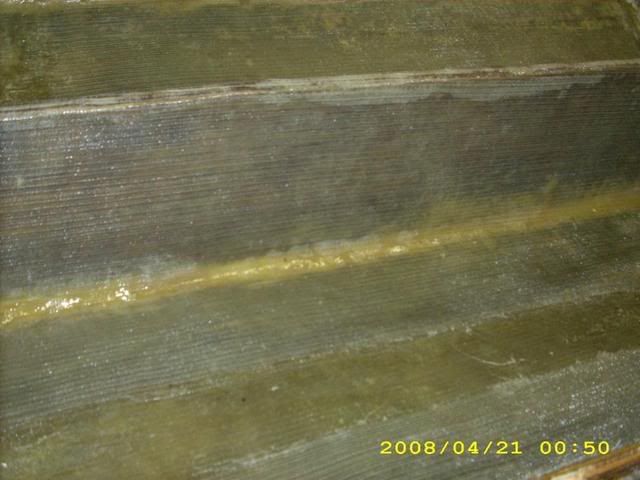
i did the experimental section at 5 30 pm. so it was time to glass it.

picgroup31005.jpg


it doesnt matter what you do...every time resin hits glass, the glass expands as the resin saturates it.......

you can see the top of the stringer had a few contact points with the glass

picgroup31006.jpg


the other thing (using this method) is that you can never be sure all the air is out....see bottom of stringer.

if i had added a layer of 10 oz matt at the top of the stringer...(as ondarvr suggested) during wet out...it is possible totally possible that i could have gotten a good bond at the top of the stringer. hovever the bubble problem would still exist.....

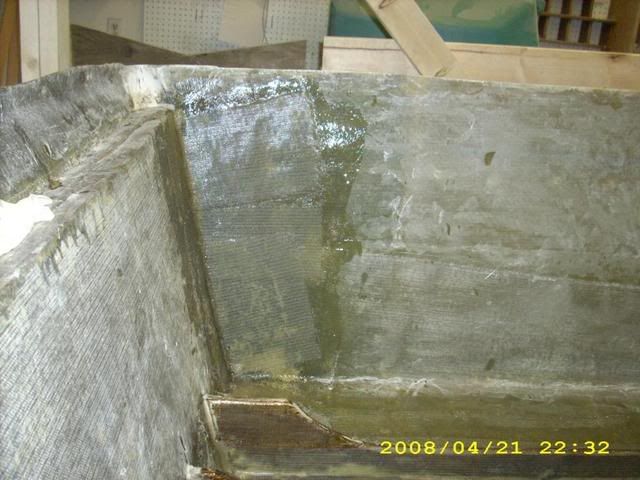
i took these shots because one poster was having problems with 1708 on vertical surfaces.

if you cut 1708 with the grain of material going upward on the surface, it is really hard to keep the fabric from flopping over and unraveling.....

i had cut some on the vertical and glassed it in position

picgroup31003.jpg


you can see the mess it was...that section took an extermely long time to roll. it was a real..... Pain In The .......(pita).

just behind the shoddy stringer is a properly glassed stringer with the grains of the glass running legnth wize with the stringer......it took only 15 minits for that peice of cloth.

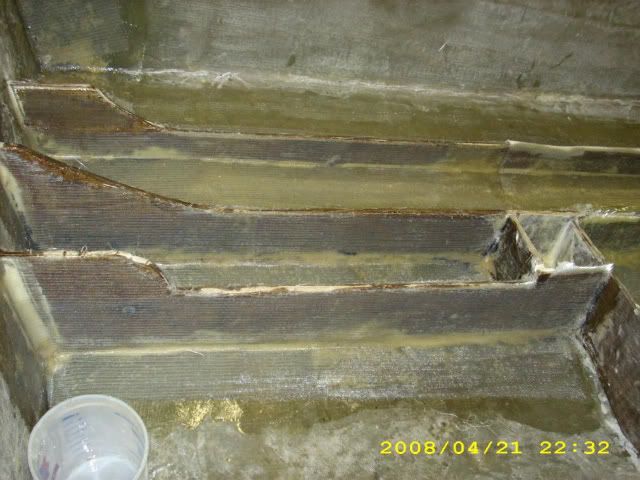
the three main stringers are now double glassed...and tonight im going to start on the motor housing stringers and the two outward stringers i added.

cheers
oops
 

WizeOne

Commander
Joined
Mar 23, 2008
Messages
2,097
Re: hull extension in progress with picks

Re: hull extension in progress with picks

oops, I assume that your 5:30 pm experimental picture was your attempt to try my method? If so, I feel bad that it did not work for you. Are you sure you let it set before you wetted it out? It does look a little better than your previous wetted out attempts.


There were only two differences in what I was working with vs what you were working with. I wrapped my glass over 2 x's not 3/4" and I was using epoxy resin as opposed to polyester.

Boy, when that epoxy got good and sticky, my cloth and in one area my biax stuck like glue. After it cured I wetted it out with no obvious bubbles like in your picture.

I also used that method, in my bilge, where I was trying to make biax only do a couple of stepped 90's without a quick return to another 90. It was the only way that I could keep the inside and outside bends from bubbling up.
 

oops!

Supreme Mariner
Joined
Oct 18, 2007
Messages
12,932
Re: hull extension in progress with picks

Re: hull extension in progress with picks

wize, im sure that method would work with a layer of 10 oz matt on top of the stringer during wet out.....

it just about worked with out it :D.....

unfortunatly the time it takes is way too long for the deadline.
even on a hot cure i waited 5 hours to hit it.

i talked to the new owner of the property last night.....really nice younger guy.

he has an electrical company, and he is renting several storage bins around town to store his stock in......so it doesnt matter how much i pay him for the space...he still looses....so i gotta move it......

where?.....at this time i have no idea :confused:
 

i386

Captain
Joined
Aug 24, 2004
Messages
3,548
Re: hull extension in progress with picks

Re: hull extension in progress with picks

I've been thinking about the problem you're having with glassing your stringers. I liked the idea of using the dowel or molding but I've got another idea.

You need a quick and cheap way to clamp the glass down around the stringer. Here's my idea. Get a roll of clear plastic film. Cut into strips long enough to lay on the top of the stringer with several inches hanging down on both sides.

Next you need some clamps. The big clothespin type spring clamps would work but that could get expensive. You'll need a bunch, so here's how to make them. Get some 2 or 3 inch pvc pipe. Cut it down into 1.5-2 inch lengths. Now cut a gap in these pieces. They'll all look like "C's". Make the gap a little smaller than the width of your stringer. You can knock this out in no time with a bandsaw. Now take your box full of clamps over to the bench grinder and knock the burrs off. You don't want them tearing your plastic.

Lay your glass and saturate with resin. Lay your plastic over the tops of the stringers and use a mallet or the heal of your hand to tap your clamps on. The clamps will pull the plastic down tight over the tops of the stringers holding the cloth tight against the wood. If your plastic is clear you'll be able to see the cloth through the plastic. Double the plastic over if you need it thicker. Thicker is better. Space them as needed to apply adequate clamping. Squeegee off the excess resin that will be running down the sides of the stringers.

When cured, yank off the clamps and peel away the plastic. The clamps can be reused.


That's my idea. I'd test of a prototype first though.
 

redfury

Commander
Joined
Jul 16, 2006
Messages
2,655
Re: hull extension in progress with picks

Re: hull extension in progress with picks

i386, that...is an AWESOME idea. Particularily if you were to make the stringers "I" beam style, you could tap it down until the contact points hit the inside curve.

Beyond that, I think the only way oops! is going to get results is if he were to have a way to clamp lengths of board along the stringer with the ability to clamp another board along the top of the stringer down against it...talk about a specialty tool :eek:
 

drewmitch44

Lieutenant Commander
Joined
Jun 26, 2005
Messages
1,749
Re: hull extension in progress with picks

Re: hull extension in progress with picks

That looks like pretty thin stuff. It looks lie 1708 or something like that. Id wrap those strings with something 24 oz. That way you are sure they wont go anywhere.
 

contractorguy

Petty Officer 2nd Class
Joined
May 13, 2007
Messages
116
Re: hull extension in progress with picks

Re: hull extension in progress with picks

How's your weight?..That's gotta be gettin heavy..

You are an animal oops...it's looking nice!
 

erikgreen

Captain
Joined
Jan 8, 2007
Messages
3,105
Re: hull extension in progress with picks

Re: hull extension in progress with picks

Lay your glass and saturate with resin. Lay your plastic over the tops of the stringers and use a mallet or the heal of your hand to tap your clamps on. The clamps will pull the plastic down tight over the tops of the stringers holding the cloth tight against the wood. If your plastic is clear you'll be able to see the cloth through the plastic. Double the plastic over if you need it thicker. Thicker is better. Space them as needed to apply adequate clamping. Squeegee off the excess resin that will be running down the sides of the stringers.

When cured, yank off the clamps and peel away the plastic. The clamps can be reused.


That's my idea. I'd test of a prototype first though.


This is essentially what I suggested earlier... :)

Of course, the right way to do it is to vacuum bag the stringer, and that way you also get the right amount of resin in it, but that's maybe more complicated than oops wants to tackle...

Erik
 

oops!

Supreme Mariner
Joined
Oct 18, 2007
Messages
12,932
Re: hull extension in progress with picks

Re: hull extension in progress with picks

That looks like pretty thin stuff. It looks lie 1708 or something like that. Id wrap those strings with something 24 oz. That way you are sure they wont go anywhere.

1708 is 25 oz material, thats 17 oz + 8 oz = 25 oz

the thicker the material the harder it is to wrap.....one oz csm will do it easy...ten oz won't....25 oz....never.
 

oops!

Supreme Mariner
Joined
Oct 18, 2007
Messages
12,932
Re: hull extension in progress with picks

Re: hull extension in progress with picks

How's your weight?.


i loose 10 pounds a night glassin ! :eek::D thanks for asking :)


its gonna be a freekin barge.....

but by my calculations....(who knows) its gonna be as heavy as a standard 24 footer....200 lbs heavyer than the 19...after i riped the wet wood out
 

oops!

Supreme Mariner
Joined
Oct 18, 2007
Messages
12,932
Re: hull extension in progress with picks

Re: hull extension in progress with picks

Of course, the right way to do it is to vacuum bag the stringer, and that way you also get the right amount of resin in it, but that's maybe more complicated than oops wants to tackle...

Erik

for this one job....vacc bagging is the only way to go.....actually...i...in hind site should have vacc'ed the hull durnd thing
 

oops!

Supreme Mariner
Joined
Oct 18, 2007
Messages
12,932
Re: hull extension in progress with picks

Re: hull extension in progress with picks

update tommorow morning
 

oops!

Supreme Mariner
Joined
Oct 18, 2007
Messages
12,932
Re: hull extension in progress with picks

Re: hull extension in progress with picks

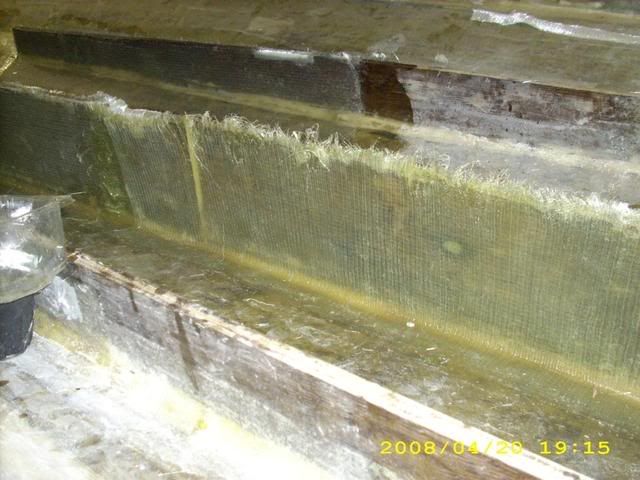
last night i got to the boat a bit late.

i missed the resin store so i only had a gallon or two of unwaxed left.

so i started to glass in the motor mount cage

picgroup32009.jpg


glassing these is relitively easy, and fast.....

on each stringer/motor mount, there is a tabbed strip of 10 oz matt, 0ne full legnth 4 inch strip of 10 oz, a 6 inch full strip of 10 oz csm, then 2 overlapping layers of 1708......

picgroup32008.jpg


those puppies will never move when i get thru with them.

i had a little resin still in the bucket. so i added some more tabs to the transom.


picgroup32010.jpg


that has to be one of the most solid transoms in history.....in between the final layer of the wood...i added a sheet of 1708 that ran up the transom and covered the full legnth of the inner hull....then i added an other layer of 5/8th ply encased on glass. then glassed that to the hull with a full sheet of 1708...and its still getting more tabbs !

im starting to think of another potential problem area that i will show the remedy for by the end of the week.....its water pooling around the butt end of the stringers.

im going to jump back on it tonight and finish the rest of the motor mount section and see if i cant start on the glue lam motor mounts.

cheers
oops
 

redfury

Commander
Joined
Jul 16, 2006
Messages
2,655
Re: hull extension in progress with picks

Re: hull extension in progress with picks

Once you are pretty close to being done glassing in the stringers, I would think that making drain holes in the stringers wouldn't be all that hard to do.

I was out looking at the boat the other day....just looking again. A couple of threads had me concerned about the overall boat, so I did some visuals. No hook, bottom looks straight as it should, and I have the hull sides held together with some copper wiring so that when I lift the cap off, it won't bow out again. I criss crossed them so they took up less of a footprint of my working area. Previous owner had put canvas "buttons" below my rub rail and I took them out. Worked pretty good for the new intended purpose of the holes :D

And I also found out that I poked tiny holes in the glass at the bottom of my transom with that spade bit...definitely take the tip off of them if you use them to chew up your old transom wood!
 

markedman

Cadet
Joined
Mar 10, 2008
Messages
24
Re: hull extension in progress with picks

Re: hull extension in progress with picks

thanks jasper ave crusier :D

i work at my store during the day...thats when i post on projects....(in between coustomers and fixing washer and dryers) then after i go to the boat at 6pm

i let the glass decide when i leave :eek:

cheers
oops
Fixing Washers And Dryers? :confused: You funning me? Thats my trade. Been doing that 25 yrs+.

Thats freaky ifn its true.


Sorry for the late reply been too busy to work on the boat or check the confuser... and now we're snowed in... least 10" of the (^*%&^$#^% stuff. Gave me time to check in.
 
Status
Not open for further replies.
Top