HUGE PROJECT!! 30' Scarab Sport overhual

Status
Not open for further replies.

colobiker

Petty Officer 2nd Class
Joined
Sep 12, 2008
Messages
191
Re: HUGE PROJECT!! 30' Scarab Sport overhual

still.. for the boat.. thats a great price.. and your right.. the cost of a new one is 10 times as much..

but as you know.. we only do this stuff cause we love it. its not the $$ its the joy it brings.. and once you get it done.. your gonna go out and enjoy it..


and.... start looking for another project.. :D
 

SnappingTurtle

Lieutenant
Joined
May 4, 2008
Messages
1,251
Re: HUGE PROJECT!! 30' Scarab Sport overhual

I like to look at is as if i were to buy this boat new it would be close to 10 times that.....

Exactly! :D

I saved every receipt from my tiny rebuild.

The day I sat down to add it all up after it was finished, my girlfriend came by and asked what I was doing. I told her, and she grabbed the whole pile of paper and threw it in the trash. I was under my budget, and she knew this, but she said now is the time to go play, not to administrate finances. :rolleyes:

We went out, and had a great day together. :)
 

jserb

Chief Petty Officer
Joined
Nov 29, 2005
Messages
406
Re: HUGE PROJECT!! 30' Scarab Sport overhual

well said!
 

ondarvr

Supreme Mariner
Joined
Apr 6, 2005
Messages
11,527
Re: HUGE PROJECT!! 30' Scarab Sport overhual

I think you've done a very poor job of setting the first budget. Most professionals (government contractors) at setting a budget are able to come in with a very low estimate, then at least triple it after the first phase comes in over budget, plus reduce the scope of the job to be done.

You've added many things that weren't included in the first budget and only been able to double the cost, you have no future as a gov contractor.
 

SnappingTurtle

Lieutenant
Joined
May 4, 2008
Messages
1,251
Re: HUGE PROJECT!! 30' Scarab Sport overhual

I think you've done a very poor job of setting the first budget. Most professionals (government contractors) at setting a budget are able to come with a very low estimate, then at least triple it after the first phase comes in over budget , plus reduce the scope of the job to be done.

You've added many things that weren't included in the first budget and only been able to double the cost, you have no future as a gov contractor.

HaHaHa
 

Attachments

  • LOL_LOL.gif
    LOL_LOL.gif
    8.2 KB · Views: 0

jserb

Chief Petty Officer
Joined
Nov 29, 2005
Messages
406
Re: HUGE PROJECT!! 30' Scarab Sport overhual

question.....i have an aluminum rub rail.....it had some pits in it so i used my grinder and grinded down and polish out the scratches.....but then AFTER the work was completed i thought..."HMM i wonder if i just removed a additive in the alloy that seal is from water".. like do i need to seal the alumninum since i have done this, will it turn bad...?i live in MI so i dont have to worry abotu salt water but im still concerd i did something worng. Please help! I wil b back in an hour to check for ansers I am working on it right now!!! thanks everyone!
 

colobiker

Petty Officer 2nd Class
Joined
Sep 12, 2008
Messages
191
Re: HUGE PROJECT!! 30' Scarab Sport overhual

Aluminum will not react with salt or water.. that dull gray color is actually a corrosive buildup as the aluminum reacts with the atmosphere. you notice that you polish a peice or work with it somehow it will be shiny. then after a while it dulls to gray..

typically with Aluminum, it is polished then has a clear coat applied to it to keep it from corroding with the atmosphere.(hence shiny aluminum finish) if you want a shiny finish, after polishing it, clear coat it. if not.. it will turn gray (aluminum color).. or you can paint it, anodize it or powder coat it. your choice.
 

jserb

Chief Petty Officer
Joined
Nov 29, 2005
Messages
406
Re: HUGE PROJECT!! 30' Scarab Sport overhual

Well here?s the story folks. I did a heck of a lot and unfortunately for you, you have to read about it and visualize it cuz my fianc? (camera girl) was MIA and was not their while we flipped the interior shell, put the hull and shell back together, and then rolled it into the garage. So with that being said you will have to visualize what took place. I will be as descriptive as possible?.
It all Started last week?.
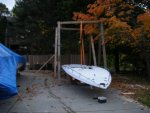
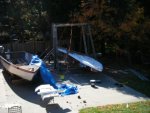
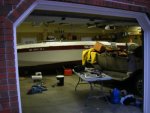
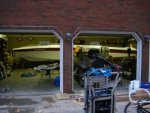
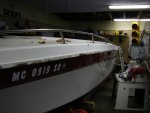
We finished the floor on the interior shell and we flipped it right side up just the same way we did the first time we flipped her. After we flipped her we then came back 2 days later and raised the shell all the way up on the A frames we built (13ft high). We then rolled the hull under the shell and test fitted the two pieces BEFORE we caulked the hull edge and applied ?gunk?/?peanut butter?, to the top of the stringers. Well to make a long 2DAYS short we probably test fitted those two pieces about 12 to 13 times before we got her to sit the way she was designed. It was definitely not nearly as easy as I thought it was going to be. The issues we ran into were that the hull ?opened? up and thus when we lowered the shell into the hull we would get one side of the hull edge in and then we?d go check the other side only to find it popped out/or vise versa. It was a constant struggle then when we finally came up with a system to overcome that ( about 6 people pushing on both ends to ensure the hull edges would fit under the shell), we then ran into the problem that a few stringers were too high! YUCK! So as you guessed it I had to get down there and finally run a string and find where I was high and cut them down and resin the tops of them. Well like I said it took about 13 test fits( dosent sound like a lot but if you think about a 30 foot shell trying to be fitted on an edge that gives you no more than ? inch of play is pretty demanding on the emotions and day light. FINALLY the day came where everything lined up and the test fitting fit! So what did we do?!............. Pulled it back off to apply gunk and caulk. And wouldn?t ya know it?. It began to rain and hail. But I said NO! NO, NO, NO! And we draped a tarp over the A frames thus shielding us from MOST of the weather and we continued on. We had 5 people helping. 1 caulking the hulls top edge, 3 mixing ?gunk? and myself and another good friend inside the hull applying a nice think layer (about 2 inches high) of ?gunk? over all the stringers. We then lowered and fought (again) the shell into its final resting place. I quickly ran around the boat and screwed about 10 screws into her so they would hold the two pieces together. The next day...This Monday?.we then got 14 good friends over to push this 30ft, 3500 lbs, boat into a 32ft garage. Talk about nerve wrecking! We had a 9ft opening to slide the 8ft beam threw, then we had to make a quick right turn (still a 30 ft boat mind you) and jockey her into place with 2 ft to spare. Needless to say here are some AFTER SHOTS of her in the garage. I hope you?ve all enjoyed this write up?.I know it would have been a sight to see if I had photos but as you all know being the one running the project while you have all this willing help, its pretty much impossible to stop everyone and take a photo every 15 mins. So that?s the story thus far! The plan is to now get everything organized in the garage and then begin stress crack work and cosmetic work. I will be back with several more questions regarding fixing cosmetics and stress cracks.
 

jserb

Chief Petty Officer
Joined
Nov 29, 2005
Messages
406
Re: HUGE PROJECT!! 30' Scarab Sport overhual

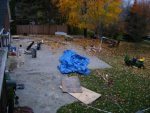
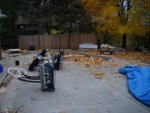
here are some photos of what the work area looks like now that i am breaking down the A frames Before----After
 

Attachments

  • Boat 203.jpg
    Boat 203.jpg
    60 KB · Views: 0
  • Boat 208.jpg
    Boat 208.jpg
    59.6 KB · Views: 0
  • Boat 230.jpg
    Boat 230.jpg
    51.7 KB · Views: 0
  • Boat 228.jpg
    Boat 228.jpg
    51.4 KB · Views: 0
  • Boat 229.jpg
    Boat 229.jpg
    48.8 KB · Views: 0

jserb

Chief Petty Officer
Joined
Nov 29, 2005
Messages
406
Re: HUGE PROJECT!! 30' Scarab Sport overhual

In the Garage...
 

Attachments

  • Boat 231.jpg
    Boat 231.jpg
    44.6 KB · Views: 0
  • Boat 232.jpg
    Boat 232.jpg
    50.5 KB · Views: 0
  • Boat 233.jpg
    Boat 233.jpg
    49.4 KB · Views: 0
  • Boat 234.jpg
    Boat 234.jpg
    39 KB · Views: 0
  • Boat 235.jpg
    Boat 235.jpg
    37.6 KB · Views: 0

wewefirex2x

Petty Officer 1st Class
Joined
Feb 19, 2007
Messages
267
Re: HUGE PROJECT!! 30' Scarab Sport overhual

I really wanna know how you got that thing in that garage, but am afraid to ask!!!!!
 

oops!

Supreme Mariner
Joined
Oct 18, 2007
Messages
12,932
Re: HUGE PROJECT!! 30' Scarab Sport overhual

i have estimated that by the end of the project including trailer i will double my orginal 8000. I like to look at is as if i were to buy this boat new it would be close to 10 times that.....


uh .....sorry bud.....even if you can get some stuff cheap......its gonna come in around 24k.....give or take......the trailer is gonna be 4k alone


but your gonna have a great boat......people were saying i was crazy with a 24 k budget for a 25 footer.......but i think about it the same as you....if i were to buy a new one.....and this one is built the way u want. .....

but .....done right.....you make cash ....not including your labor....

i think td said he made a dime an hour on boat restoring.

but you will have a great boat when your done
 

jcsercsa

Captain
Joined
May 21, 2007
Messages
3,401
Re: HUGE PROJECT!! 30' Scarab Sport overhual

OOOHHH MAN jserb, way did you give a yell I would have come over , uuummm where you at in mich ? I could have brought the camera !! man that must have been a site !!! lol shes looks good in the garage !!

to fix all the stress cracks you got to grind all them out then fill them , i am useing Marine Tex on mine ,

Man still cant get over gettin her in the garage , that had to have been a tight fit !!! John
 

oops!

Supreme Mariner
Joined
Oct 18, 2007
Messages
12,932
Re: HUGE PROJECT!! 30' Scarab Sport overhual

I really wanna know how you got that thing in that garage, but am afraid to ask!!!!!

you need to be able to manipulate the back end.....ie pick it up and move it over.


or lift the garage place boat in area and lower the garage :D
 

Mark42

Fleet Admiral
Joined
Oct 8, 2003
Messages
9,334
Re: HUGE PROJECT!! 30' Scarab Sport overhual

question.....i have an aluminum rub rail.....it had some pits in it so i used my grinder and grinded down and polish out the scratches.....but then AFTER the work was completed i thought..."HMM i wonder if i just removed a additive in the alloy that seal is from water".. like do i need to seal the alumninum since i have done this, will it turn bad...?i live in MI so i dont have to worry abotu salt water but im still concerd i did something worng. Please help! I wil b back in an hour to check for ansers I am working on it right now!!! thanks everyone!


Most aluminum rub rails (and I'm surprised that boat has aluminum, most boats have stainless steel rub rail) are clear anodized to prevent the natural oxidation of aluminum to that dull grey color. Yes, you did remove the anodize coat and it will turn grey.

Rather than continually maintain the rail, after it starts to oxidize, look for a marine salvage and pick up a used stainless steel rub rail to replace it.
 

jserb

Chief Petty Officer
Joined
Nov 29, 2005
Messages
406
Re: HUGE PROJECT!! 30' Scarab Sport overhual

the secret to the boat in the garage trick is that the boat is on a cart that has 360 degree wheels that allow us to push and slide and push and slide the hull
 

jserb

Chief Petty Officer
Joined
Nov 29, 2005
Messages
406
Re: HUGE PROJECT!! 30' Scarab Sport overhual

Question!

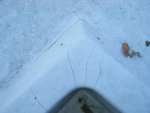
Regarding these stress cracks??I need a good detailed shake down on how to fix them? Now there are two photos attached here, and the photo on the RIGHT is the stress cracks that are in question, the photo on the LEFT I know how to fix. So as the story goes the photo on the LEFT shows a deep, clear crack. I have learned from all of you to fix this kind of stress crack you drill a small dimple at the end of each crack, then take the diamond blade and cut a notch right into the crack, then fill it in?..(just to make sure?. I only cut the surface of the glass, not go all the way threw it right??) Anyway so the other photo shows a different kind of stress crack. These (you can just tell) are more on the surface of the glass, and there are a million of them in some instances, and in this case if I were to notch each one of these I would have a section on the boat that looks like spaghetti! I mean think about it, it would be like 10 cuts all in a 10 inch area. So here we are?im just asking how to approach these two different stress cracks. I appreciate all the detail that you can offer.
 

Attachments

  • Boat 042.jpg
    Boat 042.jpg
    20.2 KB · Views: 0
  • Boat 027.jpg
    Boat 027.jpg
    24.2 KB · Views: 0

oops!

Supreme Mariner
Joined
Oct 18, 2007
Messages
12,932
Re: HUGE PROJECT!! 30' Scarab Sport overhual

pic one...
could be treated the individual way........however....the area looks like the gellcoat was applied to thin.....so the cracking will continue, id sand the area and re apply gell coat.....be advised....you will have to match the color, (allmost impossible to do) so you might end up painting.

same as pic 2 .....the area needs to be sanded off
 

jserb

Chief Petty Officer
Joined
Nov 29, 2005
Messages
406
Re: HUGE PROJECT!! 30' Scarab Sport overhual

well i was planning on painting her. So i guess the question is how deep do i go when i sand the area?....when i do this wont the fiberglass "dip" in this area since i took away material....thus will i have to put a "skim coat" of resin or fiberglass bondo to fill it in???
 

ondarvr

Supreme Mariner
Joined
Apr 6, 2005
Messages
11,527
Re: HUGE PROJECT!! 30' Scarab Sport overhual

Pic #1 looks like the gel coat is actually too thick, what you'll find is that it's probably at least twice as thick as it should be from puddling in the low area of the mold when it was being sprayed. Drilling the end of the crack, notching, then filling it will be a temporary fix because as soon as it flexes again the cracks will be back. Gel coat has little strength, so if it's too thick it will crack easily when flexed, you need to see why it flexes there and try to solve the issue plus fix the crack. Some times you need to grind off all of the gel coat, then build the area up with glass a little so when it gets re-gel coated the gel coat isn?t as thick.

Pic #2 looks like it got wacked by something, maybe a dock, another boat, a bottle of Corona, etc. That area should be ground down to the glass, which will most likely be in bad shape too, then grind out most of the fractured laminate, but not all the way through. Rebuild the area with glass, then re-gel coat or paint.
 
Status
Not open for further replies.
Top