HUGE PROJECT!! 30' Scarab Sport overhual

Status
Not open for further replies.

ezmobee

Supreme Mariner
Joined
Mar 26, 2007
Messages
23,767
Re: HUGE PROJECT!! 30' Scarab Sport overhual

The block thing is weird...but even weirder is it's not the first time we've seen it. LX Kid found something similar in the construction of a hatch cover (which certainly wasn't curved) on his Grady White. What's with those things?
 

Mark42

Fleet Admiral
Joined
Oct 8, 2003
Messages
9,334
Re: HUGE PROJECT!! 30' Scarab Sport overhual

I don't think a kerf cut will work becaue the surface is bowed in two directions. Kerf works on a surface that is curved in one direction, like fuzzywiggler's transom. But kerf cuts will not allow a single sheet of ply to conform to a bowl shape.

Either cut new 6" squares, or try laminating 1/4" ply. The 1/4" ply could be ripped into 3" strips long enough to span the area. Lay a series of 3" strips and epoxy in place. Probably need some weights to make them conform. Then after they are set, do another set of 3" strips at 90* angle to the first set. That will give a 1/2" of ply that has conformed to the compound curve of the fore deck.

Also, heating the strips will allow them to be bent and when cool, will hold the curve. Might make assembly easier if the strips are pre-bowed. Either soak in hot water, or use a steam gun, or just a hot air heat gun will work. The wood does not have to be wet to bend, just hot.

Or, you could just go to the Home Depot and buy a piece of 1/2" plywood. I'm sure you will find lots of pieces that are already warped to the shape you need... .... :D:D:D
 

SnappingTurtle

Lieutenant
Joined
May 4, 2008
Messages
1,251
Re: HUGE PROJECT!! 30' Scarab Sport overhual

Ok, I just gotta ask. Your boat already has a nice stainless steel Armstrong Transom Bracket on the back. Why did you buy a new Armstrong bracket?

I think I remember reading, that the old one was only rated for two 175hp's
 

SnappingTurtle

Lieutenant
Joined
May 4, 2008
Messages
1,251
Re: HUGE PROJECT!! 30' Scarab Sport overhual

Or, get some of the core foam material that is pre scored in one or two inch squares so it bends over rounded surfaces, replace the wood with the core foam and re-glass.

I like the foam idea. Lite, strong, and rot resistant.
 

frankie g

Petty Officer 1st Class
Joined
Nov 14, 2007
Messages
388
Re: HUGE PROJECT!! 30' Scarab Sport overhual

I just found this thread today and couldn't stop reading the posts that have been added. I have to commend you all for the help and support you all have given this man. I only wish I had the knowledge ( and finances ) to take on such a project. I'll be reading and keeping up with the progress of this transformation of a derelict hull, to a mans dream machine! Great job so far and keep up the good work! That's not only for the builder, but to all that's helping w/ the good advice and knowledge. :cool:
 

jserb

Chief Petty Officer
Joined
Nov 29, 2005
Messages
406
Re: HUGE PROJECT!! 30' Scarab Sport overhual

Ok, well this just goes to show you that if my fellow Iboaters tell me to do something I do it! I was pondering leaving the rotted root in the interior shell, however a few of you, including you Oops said ?no way rip it out?. So needless to say I did just what I was told and ripped out all the old rotted wood.
That is an example of how much i value your opinions. With that said, we all must keep in mind, that there is a budget and its not always possible to use the best, strongest items or material out on the market. And I cant fix everything the ideal way or else this boat would be a fortune. With this said here is my neck question?. I have a 150 gal aluminum gas tank?I cleaned it up and it looks great exceeeeppttt for the bottom. She was a slat water boat and yes there are some (like 5 or 6) pits that I would like to ?fill? just for some extra precautions. The tank holds fine, however after doing all this work I would like to make sure these pits A. don?t get bigger, and B. don?t leak down the road. Now like I said yeah we all know the best solution is to just buy a new tank, but I don?t have that kind of money to purchase a new 150 gal tank. So with that being said I am opening the flood gates to all of you and asking that you help me with a solution to fixing these pits. I was thinking A B weld?its like a special epoxy that is made to stick to metals?..I know other people have found creative techniques to this problem, and im asking for you all to share! Thanks again?I have a bunch of photos I just haven?t had time to post them yet. Stay tuned they will be up in a day or so!!!
 

triumphrick

Lieutenant Commander
Joined
Jun 26, 2008
Messages
1,737
Re: HUGE PROJECT!! 30' Scarab Sport overhual

John, having old cars I had a heck of a time finding a like new gas tank for a 59 Triumph TR3A, as you can imagine. Soooo, the last time the car was apart back in the 80's I used a gas tank sealer. It's a liquid that has to be sloshed around a bit to get it to cover well. However, the tank must be clean and dry. I used that treatment back then, and still have not noticed any leakage.
There may be arguments about the marine environment being a lot rougher than driving, however I autocross this car and it has still not shown any signs of leakage.
Just a thought...others will chime in...Rick
 

fire7882

Petty Officer 2nd Class
Joined
Jul 15, 2008
Messages
172
Re: HUGE PROJECT!! 30' Scarab Sport overhual

I just did a gas tank liner in a 66 cadillac. I used the Caswell Epoxy Gas Tank Sealer kit and couldn't be happier. The old tank had holes rusted all the way through with some as large as quarters. I taped up the holes and added the sealer and it worked great.

In your case, I would buy enough to just cover the bottem of the tank.

BTW, are the pits inside or outside the tank? That could make a big difference on what others might sudgest you do. The caswell kit might even work on the outside. I placed a little of the leftover epoxy on a piece of steel and let it cure. It took about 15-20 strikes with a 3lb hammer to remove about a square inch of the epoxy..
 

oops!

Supreme Mariner
Joined
Oct 18, 2007
Messages
12,932
Re: HUGE PROJECT!! 30' Scarab Sport overhual

dont wanna blow the budget john.....but since that is an offshore scarab...

the only thing that will work is the new titianimum reinforced stainless steel tank that has mars rock corner edges....it is only avalable from that web site that sold me my flux capasitor......:D :D :D


seriously.....gas tanks are not to be toyed with...i really sugesst new....but sometimes it just cant happen......make sure when you do the repair....you investigate the product fully....follow all manufacturers instructions to the letter.

keep atter bud
oops
 

triumphrick

Lieutenant Commander
Joined
Jun 26, 2008
Messages
1,737
Re: HUGE PROJECT!! 30' Scarab Sport overhual

the only thing that will work is the new titianimum reinforced stainless steel tank that has mars rock corner edges....it is only avalable from that web site that sold me my flux capasitor

BAAAAAA HAAAAAAAA HAAAAAAA (to quote a fellow iboater)

Sorry, oops, forgot all about that one. Please excuse my previous post. :p
 

Mark42

Fleet Admiral
Joined
Oct 8, 2003
Messages
9,334
Re: HUGE PROJECT!! 30' Scarab Sport overhual

If you patch and reuse the old tank, just be sure to build a hatch in the deck so you can replace it down the road when your wallet has recovered.
 

jserb

Chief Petty Officer
Joined
Nov 29, 2005
Messages
406
Re: HUGE PROJECT!! 30' Scarab Sport overhual

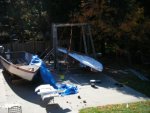
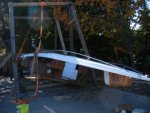
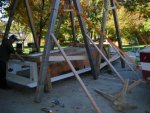
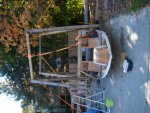
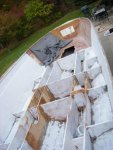
hey all! Well sorry i have been so bad at posting photos...infact im mad at myself cuz the last few days i have done sooo much i hasvent taken any progress photos and now iv accomplished so much that i cant go back and take photos cuz the repairs are already made! So sorry all but here is what took place the last week.


Ever seen two guys flip a 30 boat?


If theirs a will theirs a way...

We built 2 cradels out of 6X6 to sandwitch the interior shell. this was done so that as the boat rotated it would not point load. it worked like a charm...we raised it to 90 degrees then he lowers the come along while i pulled on the landing edge forcing the shell to revers and come back to the ground. it was pretty exciting!! thanks as always for each and everyone of your inputs, i read them at work, at home, in bed....ok that last one could be taken the wrong way!! hahaha
 

Attachments

  • Boat 208.jpg
    Boat 208.jpg
    59.6 KB · Views: 0
  • Boat 209.jpg
    Boat 209.jpg
    58.4 KB · Views: 0
  • Boat 212.jpg
    Boat 212.jpg
    61.8 KB · Views: 0
  • Boat 211.jpg
    Boat 211.jpg
    61.5 KB · Views: 0
  • Boat 213.jpg
    Boat 213.jpg
    61.8 KB · Views: 0

jserb

Chief Petty Officer
Joined
Nov 29, 2005
Messages
406
Re: HUGE PROJECT!! 30' Scarab Sport overhual

over she goes!!!!!!
 

Attachments

  • Boat 214.jpg
    Boat 214.jpg
    60.9 KB · Views: 0
  • Boat 215.jpg
    Boat 215.jpg
    61.3 KB · Views: 0

jserb

Chief Petty Officer
Joined
Nov 29, 2005
Messages
406
Re: HUGE PROJECT!! 30' Scarab Sport overhual

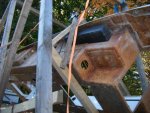
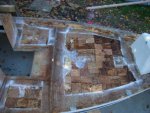
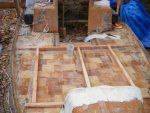
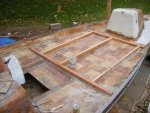
heres a photo of those wood squares that they used on the bow. I later found out that the entier interior liner was made of those! (this is a pic that i didnt take ;-( ) they used these squares on the bow becuase it curved bow fore and aft and starb-port. Thus you needed the small squares. amazingly this entier interior liner was made of 1 layber for 1708, 1/2 play squares (6X6) and one layer of 1708. I used 3/4 that was left over from the stringers in the bow, and bout1/2 for the floor. I redid the squares in the bow however found it unessary to do in the floor and did larger sheets with pl5200 inbetween them. it worked out good, ill take updated photos of the work for ya tomorrow!
 

Attachments

  • Boat 216.jpg
    Boat 216.jpg
    56.2 KB · Views: 0
  • Boat 217.jpg
    Boat 217.jpg
    62 KB · Views: 0
  • Boat 218.jpg
    Boat 218.jpg
    60.8 KB · Views: 0

oops!

Supreme Mariner
Joined
Oct 18, 2007
Messages
12,932
Re: HUGE PROJECT!! 30' Scarab Sport overhual

jesrb.......glass that puppie !!!!!

thoes stupid squairs.....4 layers of well laid 1708 with support peices of plywood sandwiched in between the 2 and 3 layer and an elephant could dance on it....

you allready have the curve of the existing glass.....lay another 2 full layers of 1708.....then
cut long thin strips of plywood....3 ins wide by the full legnth of the area needed to be supported...... lay them in....and glass two layers over them....fully incasing them......

done........4 ever !
 

proshadetree

Lieutenant Commander
Joined
Jul 19, 2008
Messages
1,887
Re: HUGE PROJECT!! 30' Scarab Sport overhual

You could take your tank to a metal shop and have it cut out and replaced or ebay a smaller replacement.
 

jserb

Chief Petty Officer
Joined
Nov 29, 2005
Messages
406
Re: HUGE PROJECT!! 30' Scarab Sport overhual

oops iv already redone this work and replaced new 6x6 wood in the bow..
 

jserb

Chief Petty Officer
Joined
Nov 29, 2005
Messages
406
Re: HUGE PROJECT!! 30' Scarab Sport overhual

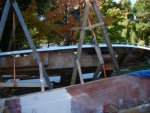
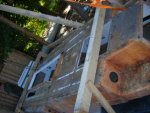
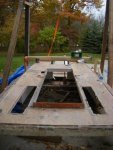
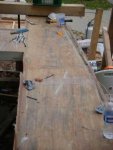
Here are some more photos. The weather is holding out for me!!!! NEXT WEEKEND WE ARE PUTTING THE HULL AND INTERIOR SHELL BACK TOGETHGER!!!! BE SURE TO STAY TUNED! PHOTOS OF THIS PROCESS WILL BE POSTED! I hasve included some shots of the first coat of white paint. It already has began to clean her up. I have included photos of the bow and the little 6X6 squares. The entier interior shell was made with these however i only did the bow like this cua it curves fore and after and starb to port. I used 3/4 compared to the 1/2 they used for ply. The process for restoring the bow was 1 layer of 1708 oz. BIAX then the 3/4 board which pl5200 was used along with resin, then a layer of 1708 again, then a frame was constructed for extra support and now its wayyy stronger than it ever was!!! I really under estimated the strenght of 1708. I wanted to make sure the bow was very strong, lot of people will want to lay out on this area and congregate. I will be putting a large sun pad in the bow. I will look pretty cool when its done. This will be for the wife and friends to relax on while me and my friends will be in the stern with the tunes
 

Attachments

  • Boat 219.jpg
    Boat 219.jpg
    31.1 KB · Views: 0
  • Boat 221.jpg
    Boat 221.jpg
    31.3 KB · Views: 0
  • Boat 222.jpg
    Boat 222.jpg
    31.8 KB · Views: 0
  • Boat 223.jpg
    Boat 223.jpg
    26.9 KB · Views: 0
  • Boat 225.jpg
    Boat 225.jpg
    30.8 KB · Views: 0

jserb

Chief Petty Officer
Joined
Nov 29, 2005
Messages
406
Re: HUGE PROJECT!! 30' Scarab Sport overhual

My question to all of you is..... When i pulled the boat appart i noticed the stringers had "fluff" on them. by this i mean that Wellcraft made all the stringers in the hull a specific height, and being that boat making is not an exact science they put this HARD HARD white stuff that looked like drywall mudd on the top of the stringers to make up for the inconsistancy in the height of the interior shell vs. the height of the stringers. They used this material not only to fasten the interior shell to the stringers, but to also fill the gap between the stringer and the interior shell. Now i matched what the height of the stringer that Wellcraft orginally made, and if memory serves me right i belive the gap in some spots was a good 1. So im opening the post up to all of you to sugest what type of "bondo" material they must hasve used that is SUPER STRONG to fill this gap and to fasten the hull down. now i knopw they make marinetex, however this stuff is super expensive. I will use it if i have to, but i know my fellow I boaters know of some tricks or things that are just as tough for half the cost. As always my project has come to a hualt, that is until one of you has that great Idea to give me to put get me back working again. So please help! I gotta put this thing together next weeked and i gotta order the product you all sugest, so ASAP everyone!


Take Care!
 

ondarvr

Supreme Mariner
Joined
Apr 6, 2005
Messages
11,527
Re: HUGE PROJECT!! 30' Scarab Sport overhual

Its putty, pumped from a putty gun most likely. Many boat companies bond in floors and other parts with putty pumped from a 55 gallon drum, it's catalyzed at the gun head, mixed well, then oozes out the end of the mixing tube right where you need it. You can make the putty yourself, or buy a pail, the difficult part can be getting all the putty in place and the floor down before it gets hard, longer gel times work well in this process. don't push the plywood down hard, just set it down in place. The floor can be glued down too, with a 1" gap it's a little more difficult though. If you use masking tape on each side of the stringer you can make a form (dam) to hold the adhesive in place. Again just set it down in place, don't walk on it until its completely hard. PL or 5200 will work.
 
Status
Not open for further replies.
Top