Here I go again!! 1995 Sea Ray 220 Signature Deck and Stringer Restoration SPLASHED!

Friscoboater

Captain
Joined
Jul 3, 2009
Messages
3,095
Re: Here I go again!! 1995 Sea Ray 220 Signature Deck and Stringer Restoration

Re: Here I go again!! 1995 Sea Ray 220 Signature Deck and Stringer Restoration

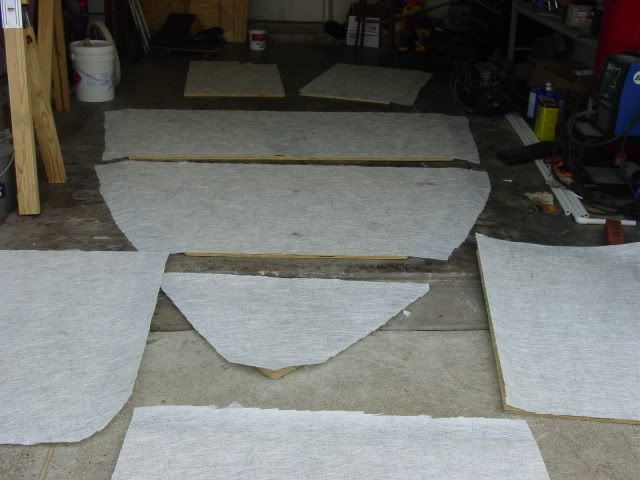
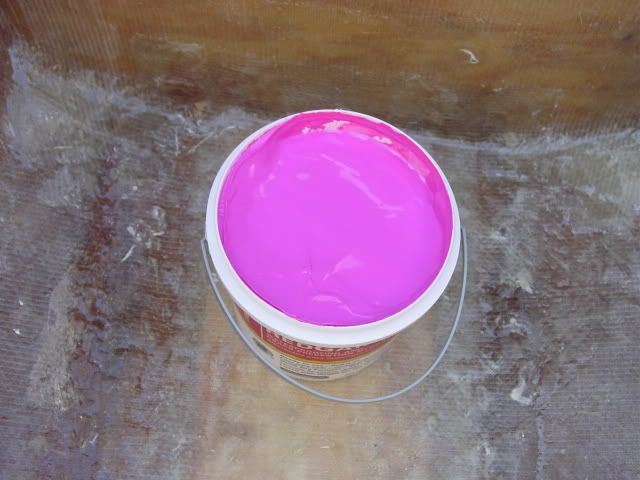
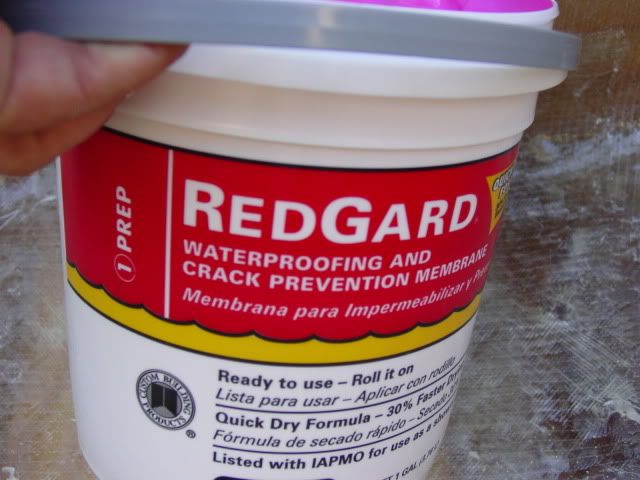
Well here we go, it is picture and video time. I am ready to put the deck in now, and I might get to that tomorrow. I have coated the back of the deck with 1.5oz CSM and red guard for good measure. I now think the red guard was not needed, but it is just one more ounce of prevention.

One thing i need to resolve is the seat mount. I know several people have made a small pedestal out of wood, glued it to the deck and then glassed over it. Does that really hold. I think mtribe did it.

Anyway here are some pictures

Adding cleats to screw the deck to
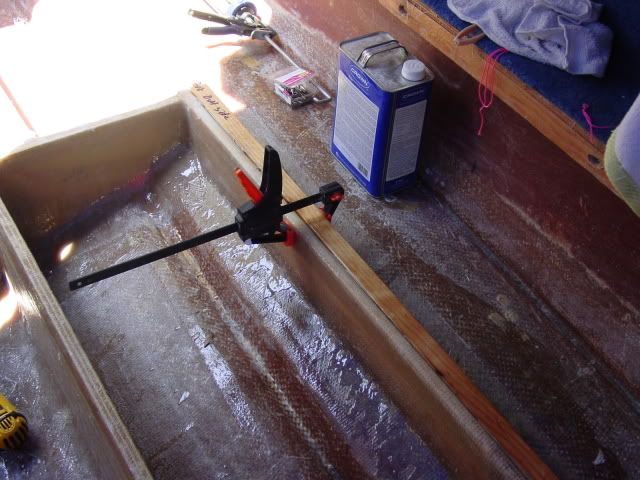
DSC00826-1.jpg


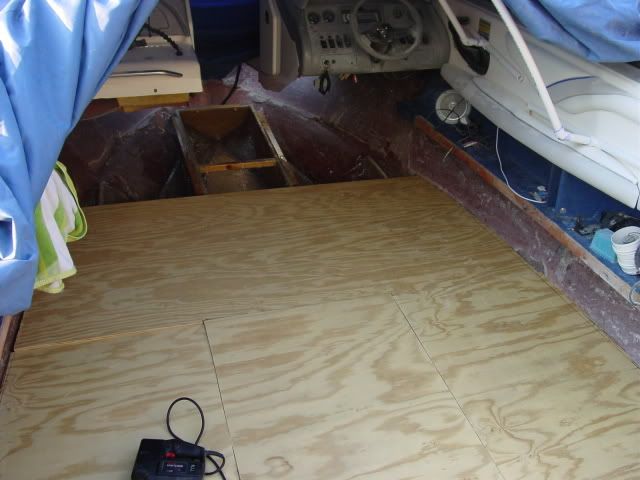
First section of deck added. I rethought the deck after cutting it out of foam. My intersections were not where the bulkheads are. So I started again from the back and made sure they all lined up.
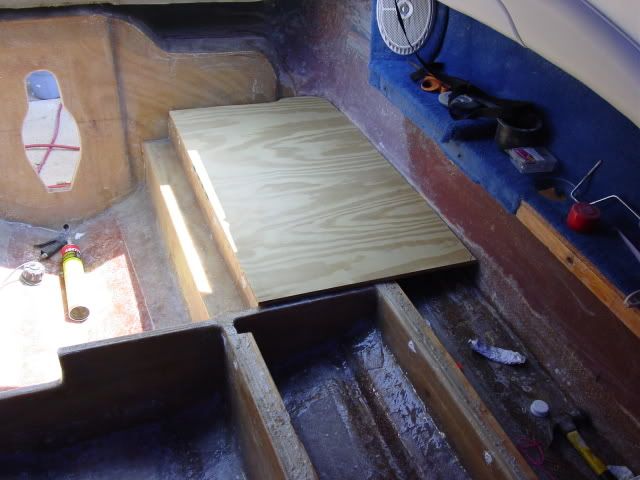
DSC00828.jpg


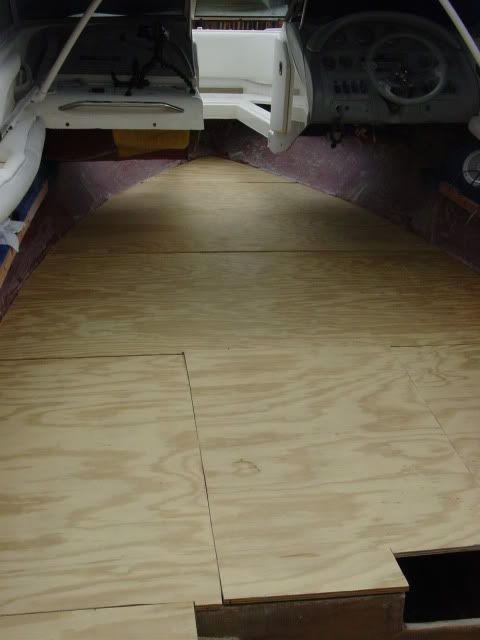
I had to make the middle section in three pieces. It would not fit between the cup holder area.
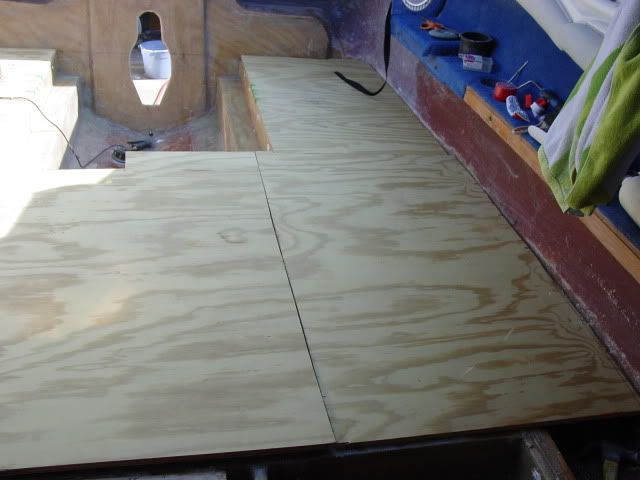
DSC00829.jpg


Getting closer

DSC00831.jpg


Done

DSC00832.jpg
 

Friscoboater

Captain
Joined
Jul 3, 2009
Messages
3,095
Re: Here I go again!! 1995 Sea Ray 220 Signature Deck and Stringer Restoration

Re: Here I go again!! 1995 Sea Ray 220 Signature Deck and Stringer Restoration

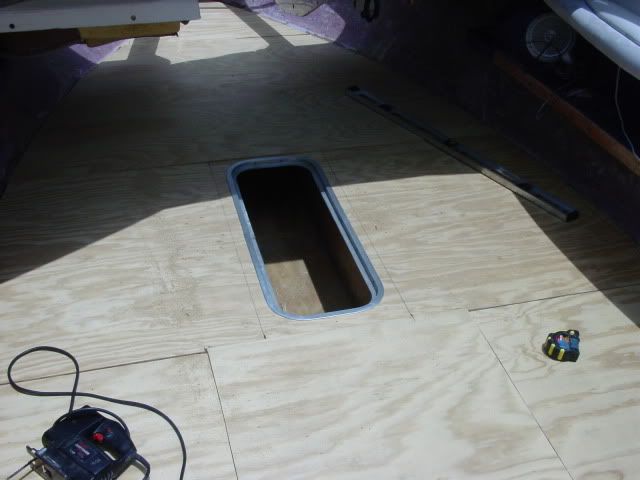
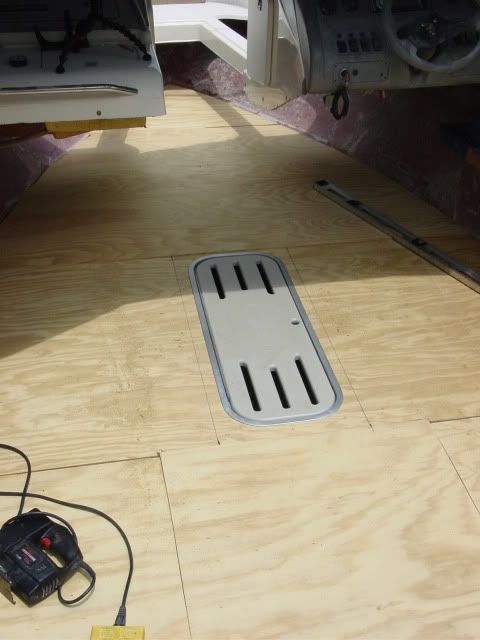
Ski locker cut in

DSC00833.jpg


DSC00834.jpg


CSM on the back of the deck

DSC00836.jpg


MMMMMM pepto

DSC00837.jpg


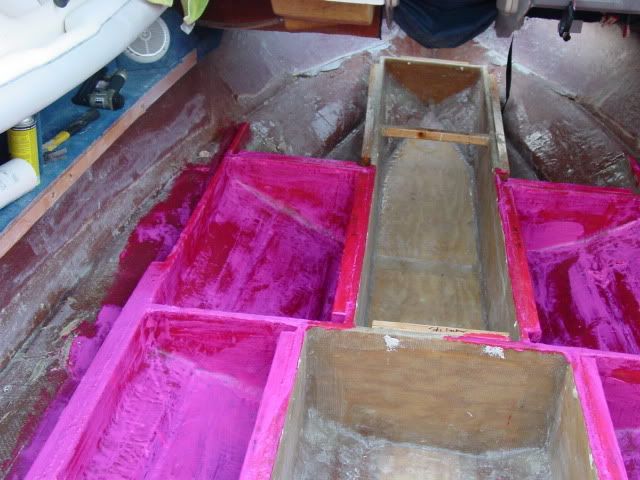
RedGard

DSC00838.jpg


The darker areas are where is it is dry.

DSC00839.jpg
 

Friscoboater

Captain
Joined
Jul 3, 2009
Messages
3,095
Re: Here I go again!! 1995 Sea Ray 220 Signature Deck and Stringer Restoration

Re: Here I go again!! 1995 Sea Ray 220 Signature Deck and Stringer Restoration


NickAndJena

Petty Officer 2nd Class
Joined
Mar 1, 2009
Messages
102
Re: Here I go again!! 1995 Sea Ray 220 Signature Deck and Stringer Restoration

Re: Here I go again!! 1995 Sea Ray 220 Signature Deck and Stringer Restoration

Jay,
I just got caught back up on your posts and videos and noticed a lot of
progress. I think it's great that you are taking your time and getting it all
done right. You do great work and we're all in awe...

I wanted to share two tips you might find useful at this point -- BEFORE you
put the decking down.

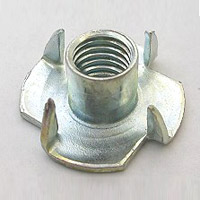
First, regarding the seat pedestal. I wish I had used some stainless steel
pronged t-nuts (see photo) under the extra boards we put under the deck where
the seats mount. We just used stainless steel screws to mount them and learned
that they have a tendency to vibrate loose (even with lock washers). If we
could really torque some bolts to hold the seat pedestal it would be much
better. So, put some extra wood underneath the deck where the seats mount,
drill holes where the bolts for the seat pedestals go and put those pronged
t-nuts in there before you put the deck down. You'll be thankful later.
prong_t_nut.jpg

Also, when we put our deck down we used the "glue & screw" method. Another
iBoater shared this method... We used stainless steel screws and mixed up a
batch of (epoxy) resin. I'm sure any resin works just as well. Here is how
it's done, for each screw:

1) Screw in through the deck and into the floor.
2) Unscrew the ss screw and temporarily remove it.
3) Blob some resin in the hole and then screw the ss screw back in right away.
4) We then brushed one last coat of resin on the top of the deck when done.

I believe this glue and screw method not only prevents water from getting in,
but it also ensures the deck screws stay where they belong.


One last note, I'm the guy who mentioned using whole wheat flour for the
fillet mixture. We used whole wheat flour, milled fiber, and epoxy resin. It
seemed to work well for us but then again I'm just an amateur and didn't have
anything to compare it against. Next time I'll use the cabosil like everyone
else. Your PB looks really good...

Hope this helps, keep up the good work you're getting close. I'm really
looking forward to watching how you apply the gel coat on top of the deck.


Cheers,
Nick
 

69rrvert

Petty Officer 1st Class
Joined
May 9, 2010
Messages
211
Re: Here I go again!! 1995 Sea Ray 220 Signature Deck and Stringer Restoration

Re: Here I go again!! 1995 Sea Ray 220 Signature Deck and Stringer Restoration

Jay,

I just finished your latest video installments. I think I can see a glimer of light shining at the end of the tunnel. You're doing an awesome job. I gotta get back on mine tomorrow. I took the kids skiing with the flat bottom (redneck still) this morning. We were on the water at 7:00 and loaded up by 9:30 before all of the holiday idiots got on the water. We only passed two other boats in the river. Thanks, Steven
 

parrisw

Ensign
Joined
Jun 8, 2009
Messages
985
Re: Here I go again!! 1995 Sea Ray 220 Signature Deck and Stringer Restoration

Re: Here I go again!! 1995 Sea Ray 220 Signature Deck and Stringer Restoration

Hey Jay, you're talking about using Woven as your final layer, the woven I have, can't remember the oz rating of it, been a while since I bought it, but it doesn't leave a smooth surface, CSM leaves a much nicer finish for your deck. You might want to do a little test piece of woven on a piece of Ply to see if you're happy with it as your final layer. I just used 2 layers of CSM on my deck, and tabbed in using a layer of CSM then Woven, then the final Deck layer of CSM wrapped right up the sides of the hull going over the woven tab.
 

archbuilder

Vice Admiral
Joined
Sep 12, 2009
Messages
5,697
Re: Here I go again!! 1995 Sea Ray 220 Signature Deck and Stringer Restoration

Re: Here I go again!! 1995 Sea Ray 220 Signature Deck and Stringer Restoration

Looks like you had a productive weekend Jay! Glad to see all the progress, it is down hill from here!
 

Friscoboater

Captain
Joined
Jul 3, 2009
Messages
3,095
Re: Here I go again!! 1995 Sea Ray 220 Signature Deck and Stringer Restoration

Re: Here I go again!! 1995 Sea Ray 220 Signature Deck and Stringer Restoration

Jay,

I just finished your latest video installments. I think I can see a glimer of light shining at the end of the tunnel. You're doing an awesome job. I gotta get back on mine tomorrow. I took the kids skiing with the flat bottom (redneck still) this morning. We were on the water at 7:00 and loaded up by 9:30 before all of the holiday idiots got on the water. We only passed two other boats in the river. Thanks, Steven

I heard from people around here that the lakes were miserable this weekend becuae if the wind. Waves coming over the bow of a 54' Sea Ray. WOW!

Hey Jay, you're talking about using Woven as your final layer, the woven I have, can't remember the oz rating of it, been a while since I bought it, but it doesn't leave a smooth surface, CSM leaves a much nicer finish for your deck. You might want to do a little test piece of woven on a piece of Ply to see if you're happy with it as your final layer. I just used 2 layers of CSM on my deck, and tabbed in using a layer of CSM then Woven, then the final Deck layer of CSM wrapped right up the sides of the hull going over the woven tab.

The last layer in the Glastron was 6 oz. I just thought that was general practice. I could put down a layer of 1708 and then finish up with CSM.

Looks like you had a productive weekend Jay! Glad to see all the progress, it is down hill from here!

Why does is feel like I am still looking up a mountain?
 

jasoutside

Supreme Mariner
Joined
Dec 20, 2009
Messages
13,269
Re: Here I go again!! 1995 Sea Ray 220 Signature Deck and Stringer Restoration

Re: Here I go again!! 1995 Sea Ray 220 Signature Deck and Stringer Restoration

Why does is feel like I am still looking up a mountain?

Man do I know this feeling ^^^^^^

Some days overwhelming eh buddy.

For me...

I surely keep the big picture in mind, but try very hard to focus on just the two or three next steps, ya know.

Man, you absolutely have a handle on this Sea Ray. Just click back your first couple of posts when you were digging out the rot. You've already climbed a mountain man!

Keep at it Jay, you'll get there!!:D:D:D
 

boatguy94

Chief Petty Officer
Joined
Jul 29, 2009
Messages
520
Re: Here I go again!! 1995 Sea Ray 220 Signature Deck and Stringer Restoration

Re: Here I go again!! 1995 Sea Ray 220 Signature Deck and Stringer Restoration

^ What EZ said up there. You've done the hardest stuff already, and great job with it. You'll have a great boat when you're done. Very sturdy and will be around for many more years.

That exhaust you were talking about in your video sounded like it would be sweet! Too bad I have a v4 outboard :facepalm: :D
 

Friscoboater

Captain
Joined
Jul 3, 2009
Messages
3,095
Re: Here I go again!! 1995 Sea Ray 220 Signature Deck and Stringer Restoration

Re: Here I go again!! 1995 Sea Ray 220 Signature Deck and Stringer Restoration

Thanks for the encouragement guys.


Very important question. I plan on making a pedestal of two pieces of 3/4' ply bonded together with t nuts in the bottom for the captains chairs. I do not want to penetrate the deck at all. I was going to bond it to the hull and them glass over it with a layer of 1708 and CSM. Do you think that will keep it from ripping loose?
 

ezmobee

Supreme Mariner
Joined
Mar 26, 2007
Messages
23,767
Re: Here I go again!! 1995 Sea Ray 220 Signature Deck and Stringer Restoration

Re: Here I go again!! 1995 Sea Ray 220 Signature Deck and Stringer Restoration

I was going to bond it to the hull and them glass over it with a layer of 1708 and CSM. Do you think that will keep it from ripping loose?

Is poly really THAT good of an adhesive? (I'm thinking no but I'm not a glass guy).
 

Friscoboater

Captain
Joined
Jul 3, 2009
Messages
3,095
Re: Here I go again!! 1995 Sea Ray 220 Signature Deck and Stringer Restoration

Re: Here I go again!! 1995 Sea Ray 220 Signature Deck and Stringer Restoration

The stringers seem solid. One more question. The strips that go under the gas tank are gross. What are some other options?
 

greg82255

Senior Chief Petty Officer
Joined
Oct 26, 2009
Messages
781
Re: Here I go again!! 1995 Sea Ray 220 Signature Deck and Stringer Restoration

Re: Here I go again!! 1995 Sea Ray 220 Signature Deck and Stringer Restoration

Thanks for the encouragement guys.


Very important question. I plan on making a pedestal of two pieces of 3/4' ply bonded together with t nuts in the bottom for the captains chairs. I do not want to penetrate the deck at all. I was going to bond it to the hull and them glass over it with a layer of 1708 and CSM. Do you think that will keep it from ripping loose?

I did exactly what you were thinking to mount my captains chairs. 3/4" plywood, but I used 2 layers of 24oz stitchmat to secure the wood. I cut 45 degree angles on all sides of the plywood so the glass didn't have to bend so severely around the wood, and just filled up any holes with fairing compound (I think this is the same as the "peanut better" you refer to). I've been using the boat for 2 years and the seats are solid.
 

guitarkev77

Seaman Apprentice
Joined
Jun 26, 2009
Messages
49
Re: Here I go again!! 1995 Sea Ray 220 Signature Deck and Stringer Restoration

Re: Here I go again!! 1995 Sea Ray 220 Signature Deck and Stringer Restoration

Jay,

I have a noob question about your project. When you have a large deck, and need to use many individually wrapped pieces of plywood in order to construct it, how do you ensure that you are maintaining its integrity as a structural member of the boat?

I would assume (and you know what this does!) that the only way you can tie these pieces together to act as one unified body, is to add your final layers of fiberglass on the top of the deck. Is this enough to make them act as one structural member? Is it even an issue? Does Each individually wrapped/screwed piece act on its own as part of the structure?

Just a little bit of curiosity. Great Job, by the way.

Kevin
 

kpiazzisi

Petty Officer 2nd Class
Joined
Jun 19, 2005
Messages
164
Re: Here I go again!! 1995 Sea Ray 220 Signature Deck and Stringer Restoration

Re: Here I go again!! 1995 Sea Ray 220 Signature Deck and Stringer Restoration

Jay,

The strips I think you are referring to our probably neoprene Chafe strips. Just google "neoprene strips gas tank" and multiple venders will come up. I don't recall the link (possible moeller), but they had a tutorial where they glued strips to the bottom of the tank with 3M 5200 and then placed glue on the outside of the gluing stripes and placed it into the compartment. They said that the 3M 5200 is so strong that straps over the tank are not needed. You can also foam the tank into place with your two part expandable foam. I did both on mine.

You should be fine making a pedistal for the Captains chair out of plywood. A bevel mentioned above is a good idea. I don't know if your pedistal was going to be round or square? Getting a bevel is something round might be difficult (maybe a drum sanding table), but I am not a wood working guy. If you can't do the bevel easily then make a dense large fillet out of peanut butter.

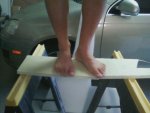
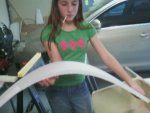
Floor Thickness- It looks like you are laminating both sides of your plywood? You know that doing this adds a lot of stiffness, so you may have been OK with 1/2 inch ply. I used the Nida Core which has no stiffness. After both sides are laminated I can stand on it supported by two saw horses. The stuff you got is going to be extremely stiff after you laminte it, but that a good thing. I am not sure I'd use 6 oz weave on the floor unless you finish it off with CSM. You are probably going to have to sand the floor before you Gelcoat. With weave or 1700 you are going to have low spots (shinny spots) in between the strands that are going to be difficult to abrade. If you use CSM you can sand away with your belt sander and not have to worry about cutting into the strands. You can sand until it's perfectly smooth and abaded making it ready for Gel Coat.
 

Attachments

  • laminate strenth with glass on both sides.jpg
    laminate strenth with glass on both sides.jpg
    50.3 KB · Views: 1
  • laminate strength unlaminated.jpg
    laminate strength unlaminated.jpg
    55.4 KB · Views: 0
  • unsanded low spots.jpg
    unsanded low spots.jpg
    28.1 KB · Views: 0

clockwatcher

Petty Officer 1st Class
Joined
Nov 8, 2009
Messages
289
Re: Here I go again!! 1995 Sea Ray 220 Signature Deck and Stringer Restoration

Re: Here I go again!! 1995 Sea Ray 220 Signature Deck and Stringer Restoration

Yahoo search: Shields Neoprene Tank Chafe Strips

Will your seat pedestal bases be strong enough? Only one way to find out...
 

Friscoboater

Captain
Joined
Jul 3, 2009
Messages
3,095
Re: Here I go again!! 1995 Sea Ray 220 Signature Deck and Stringer Restoration

Re: Here I go again!! 1995 Sea Ray 220 Signature Deck and Stringer Restoration

Jay,

I have a noob question about your project. When you have a large deck, and need to use many individually wrapped pieces of plywood in order to construct it, how do you ensure that you are maintaining its integrity as a structural member of the boat?

I would assume (and you know what this does!) that the only way you can tie these pieces together to act as one unified body, is to add your final layers of fiberglass on the top of the deck. Is this enough to make them act as one structural member? Is it even an issue? Does Each individually wrapped/screwed piece act on its own as part of the structure?

Just a little bit of curiosity. Great Job, by the way.

Kevin


Good question. The strength will come from the fiberglass. Each of the seams will have Peanut butter in them and then tabbed with 1708. That way it is super strong.
 

Friscoboater

Captain
Joined
Jul 3, 2009
Messages
3,095
Re: Here I go again!! 1995 Sea Ray 220 Signature Deck and Stringer Restoration

Re: Here I go again!! 1995 Sea Ray 220 Signature Deck and Stringer Restoration

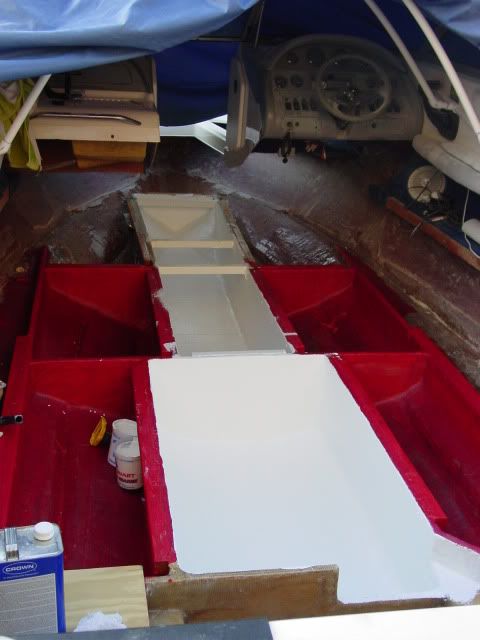
Well after much deliberation, I decided to use gelcoat for the ski locker, and the deck. I did a test sample of enamel with hardener, and gel coat. To be fair, I baked the enamel at a friends paint shop. I liked the way the gel coat looked when dry. Both were very hard, but the enamel chipped, and the gel did not.

Here is what I learned after coating teh ski locker and the tank area this evening.

1. Put two coats of the non wax stuff down, and then one coat of waxed. I did one of each.
2. Do not go over it again with your roller, as it takes off what you just put down.

DSC00842.jpg
 
Top