Here I go again!! 1995 Sea Ray 220 Signature Deck and Stringer Restoration SPLASHED!

oops!

Supreme Mariner
Joined
Oct 18, 2007
Messages
12,932
Re: Here I go again!! 1995 Sea Ray 220 Signature Deck and Stringer Restoration

Re: Here I go again!! 1995 Sea Ray 220 Signature Deck and Stringer Restoration

Got a question here. Does anyone know the best way to lay the 1708? Does the stitching go with the stringer or across it?

hey frisco.....

the 1708 weave goes legnth wize on the stringers.....if it goes the other way with the weave going up the stringers the cloth will fray....the edge will be all wobbly and will not bond properly to the stringer......it will be an ugly mess.

i think i have pics of it on the hull thread.

when i cut 1708 for stringers or a vertical climb......i allways cut it with the weave in mind.
it will save hours of extra work.
laying 1708 on the flat it does not matter,,,,just the vertical.
lundwanissa had the same problem and it took an extra 4 hours to gring off the top half of the 1708 jagged edge and re lay it.
 

Friscoboater

Captain
Joined
Jul 3, 2009
Messages
3,095
Re: Here I go again!! 1995 Sea Ray 220 Signature Deck and Stringer Restoration

Re: Here I go again!! 1995 Sea Ray 220 Signature Deck and Stringer Restoration

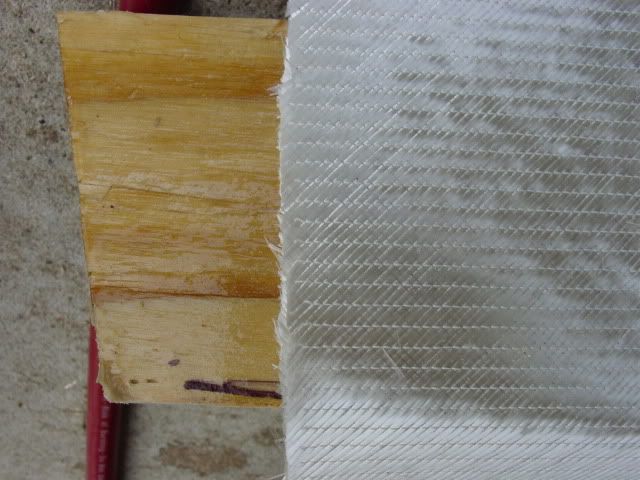
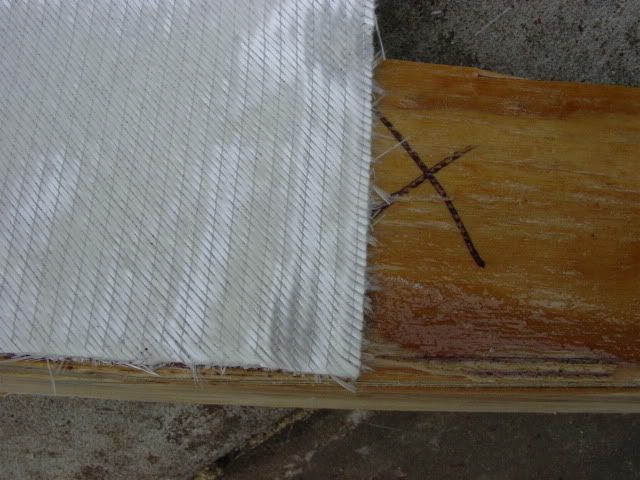
Ok,I took some pictures. Which one is correct?

This way? From side to side with the stitching?

DSC00707.jpg


Or this way? Going up and over the stringer.

DSC00708.jpg
 

clockwatcher

Petty Officer 1st Class
Joined
Nov 8, 2009
Messages
289
Re: Here I go again!! 1995 Sea Ray 220 Signature Deck and Stringer Restoration

Re: Here I go again!! 1995 Sea Ray 220 Signature Deck and Stringer Restoration

That's 45/45. If you cut it as it is in the first pic it will conform slightly better with stitching. Cut it as in the 2nd, you'll probably have less waist. The weave seems the same to me either way, 45 to the stringer. I guess it just depends if you want to try to lay a longer run at once. With epoxy, an overlap doesn't really matter wet on wet. I don't know about poly... Or maybe I'm not seeing it the same as other's. It's known to happen. If that's your stringer you may want to sand it. Glass on fuzzy tooth. The shine side won't stick too good.

No damage with the storms?. We lost power for 18 hours. I just came back on. There's a new 8kv generator in the garage today. What a pain...
 

Friscoboater

Captain
Joined
Jul 3, 2009
Messages
3,095
Re: Here I go again!! 1995 Sea Ray 220 Signature Deck and Stringer Restoration

Re: Here I go again!! 1995 Sea Ray 220 Signature Deck and Stringer Restoration

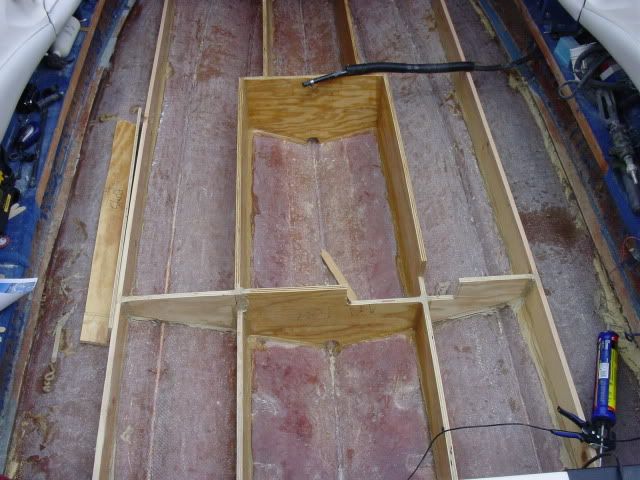
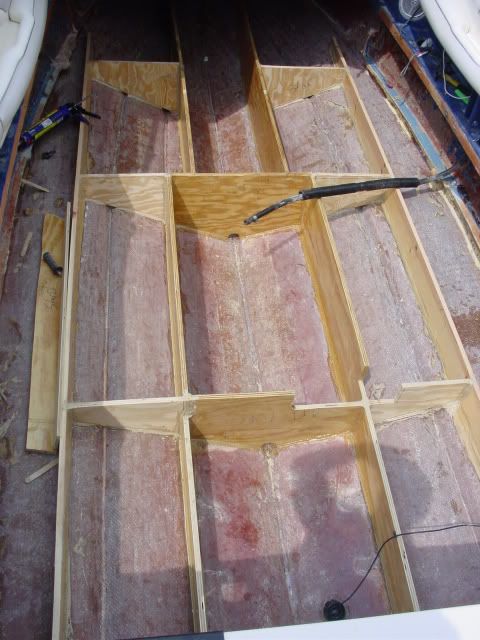
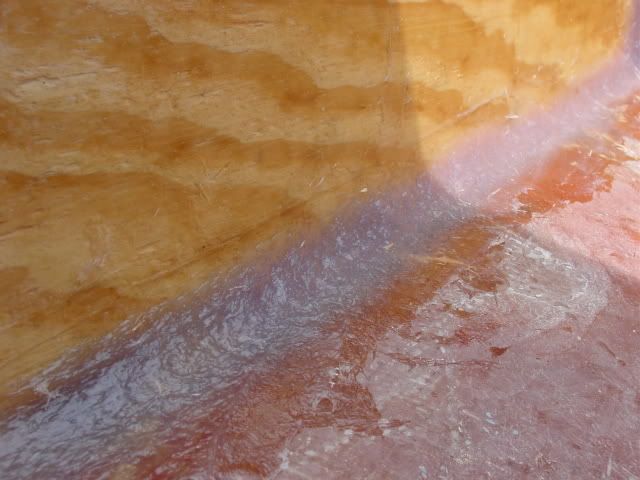
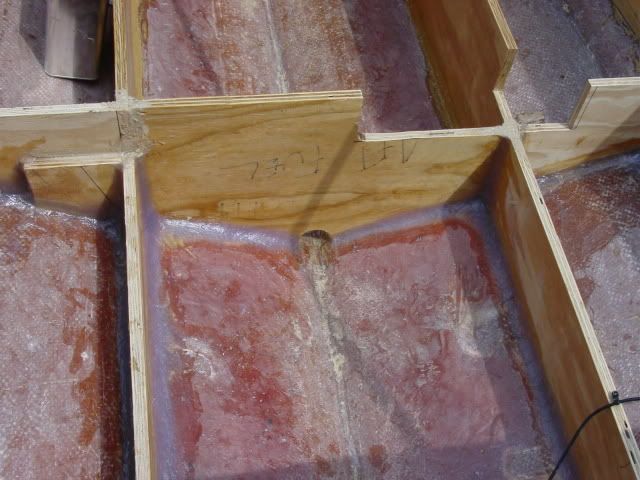
WOW!!! What a weekend. I really got in gear and got some stuff done. It is good to feel productive. I ended up adding three bulkheads between the stringer sets and I started to PB all the joints. The factory did not have any support from the inner stringers to the outer, so it should be bullet proof. It is going to be alot more work for me as far as glassing goes, but I do not mind. I tinkered with the PB recipe and found that too much 1/4" chopped fibers creates a mess. Just enough chopped and tons of cabosil was the ticket.

Here is a question for everyone. You will notice that my fuel vent hose is on the starboard side and has to penetrate the deck and both the stringers. That is where ALOT of water was getting in under the deck, and I want to eliminate that. Is there a limit to the length of the vent hose? I was thinking about running it down the gunwale and then back through where the fuel fill hose is. Is that going to be a problem?

Anyway, here are a bunch of pictures and a couple of videos.

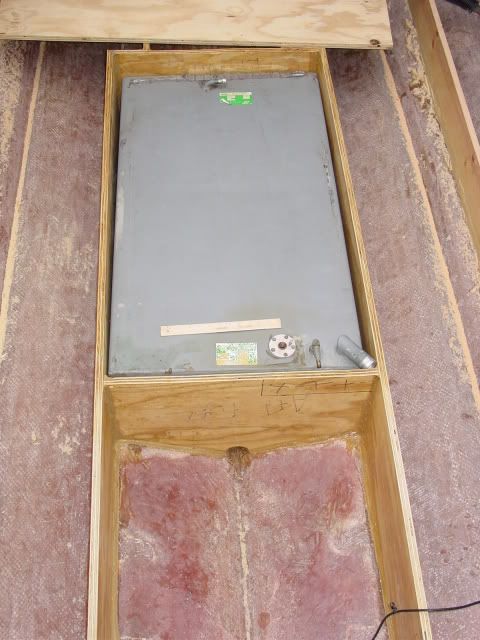
Test fitting the Tank

DSC00690.jpg


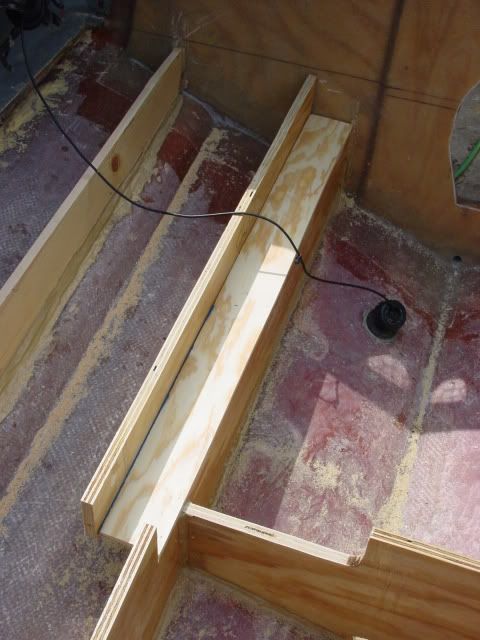
This is the kick out that I have to build to fit the Big Block. I have to glass the lower part of the stringer first before putting this in.

DSC00692.jpg


Everything cut to height

DSC00693.jpg


My helpers. For some reason they were by my side all day. That never happens.

DSC00697.jpg


It is going to be very strong

DSC00698.jpg
 

Friscoboater

Captain
Joined
Jul 3, 2009
Messages
3,095
Re: Here I go again!! 1995 Sea Ray 220 Signature Deck and Stringer Restoration

Re: Here I go again!! 1995 Sea Ray 220 Signature Deck and Stringer Restoration

My PB mix

DSC00701.jpg


I found a big metal spoon that worked great for rounding out the fillets.


DSC00702.jpg


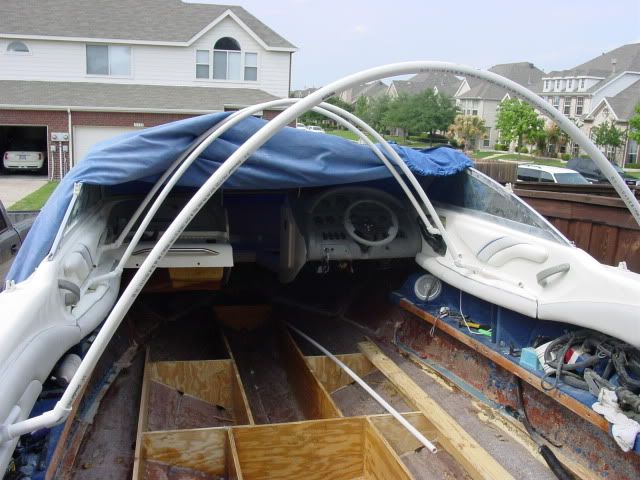
This was my idea for holding up the cover. Just some PVC PIPE and some elbows.

DSC00704.jpg


Here is the first video


And the second video.


texasabil

Petty Officer 2nd Class
Joined
Dec 24, 2010
Messages
163
Re: Here I go again!! 1995 Sea Ray 220 Signature Deck and Stringer Restoration

Re: Here I go again!! 1995 Sea Ray 220 Signature Deck and Stringer Restoration

Man just want to say it looks great!!!!!!:D
 

produceguy

Lieutenant Junior Grade
Joined
Sep 30, 2010
Messages
1,243
Re: Here I go again!! 1995 Sea Ray 220 Signature Deck and Stringer Restoration

Re: Here I go again!! 1995 Sea Ray 220 Signature Deck and Stringer Restoration

Frisco, Looking great.
It's nice when the kids want to hang out with dear old dad.

I don't know on the lenght of the vent line, but I think it would be fine.

Might want to send Bondo a pm on it , he seems to know alot about gas lines and hoses.
 

Silverbullet555

Chief Petty Officer
Joined
Mar 13, 2011
Messages
621
Re: Here I go again!! 1995 Sea Ray 220 Signature Deck and Stringer Restoration

Re: Here I go again!! 1995 Sea Ray 220 Signature Deck and Stringer Restoration

Awesome! As far as the vent hose, I think you'll be fine. My vent runs from the tank forward of the drivers console and vents there. Someone else might chime in, but I think you would be fine.
 

Friscoboater

Captain
Joined
Jul 3, 2009
Messages
3,095
Re: Here I go again!! 1995 Sea Ray 220 Signature Deck and Stringer Restoration

Re: Here I go again!! 1995 Sea Ray 220 Signature Deck and Stringer Restoration

Thanks for the input guys. I posted the question in the engine forum for confirmation.

Oh... We just had a HUGE storm go through and the tent I built shed the water like a champ. No puddles at all.
 

Silverbullet555

Chief Petty Officer
Joined
Mar 13, 2011
Messages
621
Re: Here I go again!! 1995 Sea Ray 220 Signature Deck and Stringer Restoration

Re: Here I go again!! 1995 Sea Ray 220 Signature Deck and Stringer Restoration

You can also look into a combination filler neck/vent. They make them that way as well then you could run the filler right next to the vent line and terminate at the same place.
 

vi

Seaman
Joined
May 17, 2010
Messages
56
Re: Here I go again!! 1995 Sea Ray 220 Signature Deck and Stringer Restoration

Re: Here I go again!! 1995 Sea Ray 220 Signature Deck and Stringer Restoration

Jay Looking good! On your vent line why not just take it back out to the transom or on the top lip near the filler, change out the old hole to a extra bilge pump outlet or just put a stainless cap on it, sealed of coarse. Vic
 

boaterinsd

Petty Officer 1st Class
Joined
Nov 19, 2010
Messages
276
Re: Here I go again!! 1995 Sea Ray 220 Signature Deck and Stringer Restoration

Re: Here I go again!! 1995 Sea Ray 220 Signature Deck and Stringer Restoration

You can also look into a combination filler neck/vent.

I agree here the combo is an answer ,might even find a combinded hose to run too.
Also on the foam question concern of never soaking up water. Why now seal it, wrap it in plastic? And if there is or was a concern is water being in a spot thats sealed up, why not use a kind of water alarm that you would find in a home water heater application.
Also what foam type are you going to use? The pink board type or a pour in type?
 

jasoutside

Supreme Mariner
Joined
Dec 20, 2009
Messages
13,269
Re: Here I go again!! 1995 Sea Ray 220 Signature Deck and Stringer Restoration

Re: Here I go again!! 1995 Sea Ray 220 Signature Deck and Stringer Restoration

Just thought I'd swing through and give ya a pat on the back! You are doing a heck of a job! Brilliant man, just brilliant - keep on keepin on:D:D
 

clockwatcher

Petty Officer 1st Class
Joined
Nov 8, 2009
Messages
289
Re: Here I go again!! 1995 Sea Ray 220 Signature Deck and Stringer Restoration

Re: Here I go again!! 1995 Sea Ray 220 Signature Deck and Stringer Restoration

Looks great. I got a laugh from your comments on the motherlovin cover. I know exactly what you're talking about. I just took it off and bungeed down a tarp. It's a lot easier to work with.

I don't know about Aeromarine (their site is blocked here at work), but boatbuildercentral has 5lbs of wood flour for $17. I think I used 10lbs. West Marine will sell you a tiny tub for $20..?? The wood flour goes much further than the silica and it's cheaper. The milled fibers I used were ground up much finer. It was little less pokey, but still a real pain to sand.

I mentioned testing early on. When I was unsure about how things might workout, I made samples out of scrap. If you're thinking about gluing on cleats, adding a fillet and glassing over it all, try it on the bench first. Glassing or filleting anything upside down is a royal pain. If it were mine I'd just run the glass straight up, then add cleats. I wouldn?t try to round over either. I'd just cut it off, then seal the tops when you bond it to your floor. It'll go much faster and easier. The slight benefit you get by rounding the tops just isn't worth trouble it you ask me.

On your kickouts, can you make a box to the hull under them? That way you're not trying to glass up in that tight space...

I vote running the vent out the stern. You don't want a loop that could potentially hold fuel or water.
 

Friscoboater

Captain
Joined
Jul 3, 2009
Messages
3,095
Re: Here I go again!! 1995 Sea Ray 220 Signature Deck and Stringer Restoration

Re: Here I go again!! 1995 Sea Ray 220 Signature Deck and Stringer Restoration

I am going to look into that filler neck for sure. Thanks for the great ideas.

I had another idea today and I wanted to run it by everyone. When I rebuilt my shower I used a product called redguard to waterproof the shower. Redguard is an elastomeric membrane that you brush on and it dries hard as nails, but stays flexible. My thought was to slather this stuff on all the stringers and hull after I do all the glassing, but before I pour in the foam. I think that just might give me the real protection against cracks letting water sit on the stringers. According to the technical sheet it will bond perfectly, and it is rated for outdoor use.

Thoughts?

LQWAF3_web.jpg
 

ezmobee

Supreme Mariner
Joined
Mar 26, 2007
Messages
23,767
Re: Here I go again!! 1995 Sea Ray 220 Signature Deck and Stringer Restoration

Re: Here I go again!! 1995 Sea Ray 220 Signature Deck and Stringer Restoration

Sounds like one of those "sure can't hurt" kinda things :)
 

Friscoboater

Captain
Joined
Jul 3, 2009
Messages
3,095
Re: Here I go again!! 1995 Sea Ray 220 Signature Deck and Stringer Restoration

Re: Here I go again!! 1995 Sea Ray 220 Signature Deck and Stringer Restoration

That is kinda what I was thinking, but I wanted to make sure that is was not a "silicone is made for houses" thing.
 

69rrvert

Petty Officer 1st Class
Joined
May 9, 2010
Messages
211
Re: Here I go again!! 1995 Sea Ray 220 Signature Deck and Stringer Restoration

Re: Here I go again!! 1995 Sea Ray 220 Signature Deck and Stringer Restoration

Jay,

Everything is looking great. I have the same problem with the vent line on my boat as well, and I was going to look at the dual filler neck as well. Also, thanks for all of the time that you are taking away from working on your boat making the videos and documenting your work. I wish we could get some of that rain that you had. I finally broke down last week and started watering my yard. It is DRY here in the Houston area. Thanks, Steven
 

bankfisher

Petty Officer 3rd Class
Joined
Nov 30, 2009
Messages
94
Re: Here I go again!! 1995 Sea Ray 220 Signature Deck and Stringer Restoration

Re: Here I go again!! 1995 Sea Ray 220 Signature Deck and Stringer Restoration

I am going to look into that filler neck for sure. Thanks for the great ideas.

I had another idea today and I wanted to run it by everyone. When I rebuilt my shower I used a product called redguard to waterproof the shower. Redguard is an elastomeric membrane that you brush on and it dries hard as nails, but stays flexible. My thought was to slather this stuff on all the stringers and hull after I do all the glassing, but before I pour in the foam. I think that just might give me the real protection against cracks letting water sit on the stringers. According to the technical sheet it will bond perfectly, and it is rated for outdoor use.

Thoughts?

LQWAF3_web.jpg

If it will work in a shower in your house that you use everyday......than I think it would be great to protect the work you have done in your boat!!! That product is designed to protect wood from water damage...........sounds like a great bit of added insurance to me!!

Keep the updates coming!!! You make my week!!!
 

vandentr

Petty Officer 3rd Class
Joined
Jul 26, 2010
Messages
88
Re: Here I go again!! 1995 Sea Ray 220 Signature Deck and Stringer Restoration

Re: Here I go again!! 1995 Sea Ray 220 Signature Deck and Stringer Restoration

Frisco,

I came across these descriptions for the various fiberglass materials and so I decided to create a bit of a visual for those of us attempting to get our heads around the various types of fiberglass and their uses:

1) Chopped Strand Mat (CSM) - Short glass strands laid down in a random pattern and held together by a resin-soluble binder. Easily wet out and able to conform to almost any shape, CSM is used as the base layer for many laminates. It is also the most watertight and adhesive of the glass materials. CSM is sold in various widths and lengths. The most common weights are .75 oz., 1.5 oz., and 2 ounces per square foot. Note: Do not use with epoxy.
csm.jpg

2) Woven Roving - Coarse plain weave material made of large flat bundles of glass fibers called rovings. WR is woven in 0-90 degrees; the highest strength is in these directions. Woven roving does not bond well to other layers. It?s best to use alternate layers of CSM as a binder. In fact, most all boats larger than about 20? are built with alternating layers of mat and roving. Woven roving is sold in various lengths and widths; the usual weights are 18 and 24 ounces per square yard.
WOVEN-ROVING.jpg

3) Cloth - Cloths of various weaves have exceptionally high tensile strength but provide little rigidity. Cloths come in many widths, and also in tapes which are selvedged on both sides to prevent unraveling. Cloths come in various weights from .25 oz. to 10 oz. per square yard.
cloth.jpg

4) Dual Bias Mat/Roving (1708 is an example) - This is a specialty material composed of a lightweight mat,usually .5 oz., and two layers of rovings at + and ? 45 degrees, all stitched together. This material reduces lay-up time, conforms better than woven roving, and can be used with any resin system since the fibers are stitched together. It also provides a more efficient use of resin than woven roving as the fabric design avoids the ?lace pattern? characteristic of the woven material.
biaxialmat.jpg

Interestingly, most materials will NOT allow a resin to attach to them. The resin will encapsulate the material but not actually touch it. Various chemicals, called sizings, are applied to the fibers to allow the resin to bond directly (Generally organo-silane chemistry compatible with polyester, vinylester and epoxy resin systems).

Note: Never allow the materials to become wet; resins will not bond to wet fibers and water will dissolve and wash away chemicals used in finishes.

Fillers:

1) Thickening Agents - You might know it as Fumed Silica, or by its trade names, "Aerosilor" or "Cabosil". These are used to thicken the mix and add thixotropic properties. In layman's terms, this gives the mixture ?hang? on a vertical surface.

2) Bulking Agents - These reduce the density of the putty and make it easy to sand. They include glass microspheres, phenolic microspheres, and wood flour. Glass microspheres are microscopically small hollow glass and phenolic (resin) spheres which add light-weight bulk to the mix. Wood Flour is essentially fine sawdust which is just another type of thickener.

3) Structural Agents - These are comonly referred to as milled fibers, which are basically ground up chop strand mat (CSM) and come in a variety of sizes.

Hopefully this brief rundown will help somebody who's trying to wrap their arms around the fiberglass lingo that is so important to understand when doing restoration projects such as these!

-TVB
 
Top