88 Sunray- Deck Transom and Stringers oh my!!

Woodonglass

Supreme Mariner
Joined
Dec 29, 2009
Messages
25,927
The top cap won't fit properly if you apply too much PB to it. As long as you apply several coats of resin and a layer or two of CSM it'll be fine.
IMG_4108_zpssakggwjn.jpg
 

Jbasham

Petty Officer 3rd Class
Joined
Apr 10, 2017
Messages
84
The top cap won't fit properly if you apply too much PB to it. As long as you apply several coats of resin and a layer or two of CSM it'll be fine.
IMG_4108_zpssakggwjn.jpg

So I shouldn't PB and tab the top?

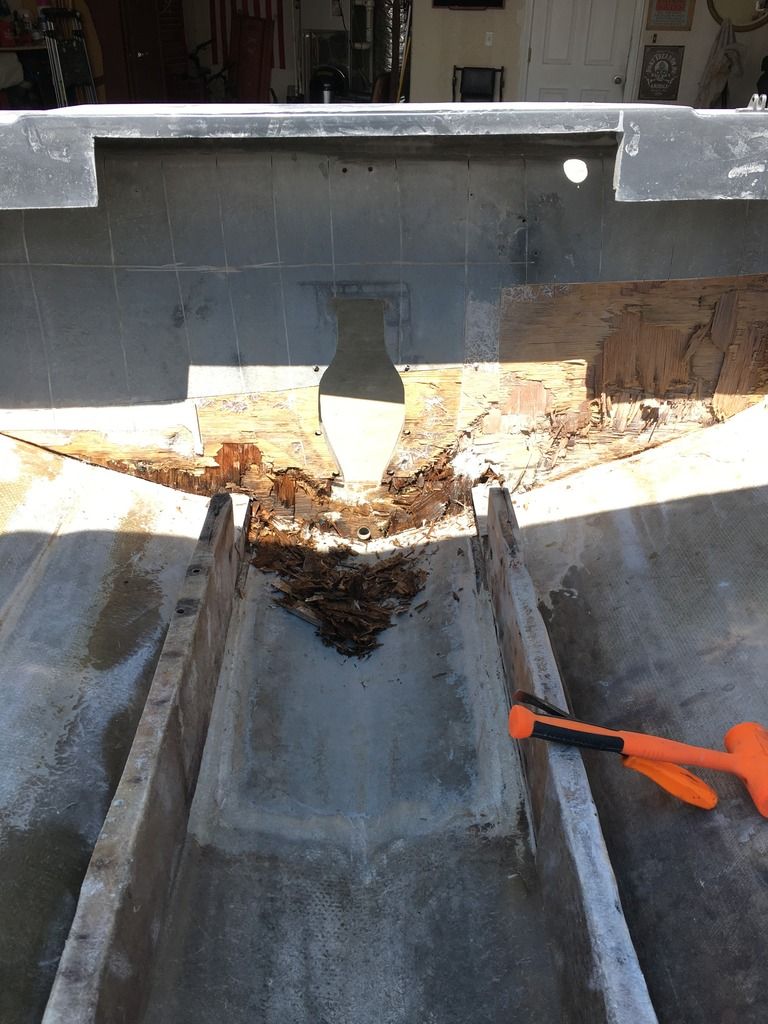
If you look back at post #14 you can see the seam where the cap/hull meet and just how close it is to the top.

I already removed all the screws/rivets and ground it down. My plan was to glass over that seam with a layer of 1708 then Install the Transom and Fillet the top with PB and finish tabbing it over that seam up to the top.

It would suck if I ever needed to remove the cap because I'd have to cut the rear but I don't think I'll ever have too.
 

Grub54891

Admiral
Joined
Jun 17, 2012
Messages
6,073
No Title

If you can do all work without removing the cap, go for it. I just could not see struggling to work under the helm area, so that's why I pulled the cap when the aft stringers were installed.
 

Attachments

  • photo263288.jpg
    photo263288.jpg
    315 KB · Views: 0
  • photo263289.jpg
    photo263289.jpg
    302.5 KB · Views: 0
  • photo263290.jpg
    photo263290.jpg
    286.2 KB · Views: 0

Baylinerchuck

Commander
Joined
Jul 29, 2016
Messages
2,726
I think WOG was concerned that if you removed the cap then did the transom work, that you could potentially have a fitment issue when you reinstall the cap.
Why did you decide to permanently seal the seam between the cap and tub?
 

Grub54891

Admiral
Joined
Jun 17, 2012
Messages
6,073
No Title

I think WOG was concerned that if you removed the cap then did the transom work, that you could potentially have a fitment issue when you reinstall the cap.

​Yes, if you remove the cap right away, and gut it, it looses it's ability to keep shape, unless you build a sturdy cradle to hold it all together before removing the cap. I re-did everything from the helm to the transom first, then took the cap off. Made it much easier to do the forward areas without losing the hull shape.
 

Attachments

  • photo263294.jpg
    photo263294.jpg
    299.2 KB · Views: 0

Jbasham

Petty Officer 3rd Class
Joined
Apr 10, 2017
Messages
84


There's only about 1.5" above the new transom before the seam. So all Id be able to do without going over the seam would be a tiny filet and about 1 inch of tabbing...
 

Jbasham

Petty Officer 3rd Class
Joined
Apr 10, 2017
Messages
84
If you can do all work without removing the cap, go for it. I just could not see struggling to work under the helm area, so that's why I pulled the cap when the aft stringers were installed.

Thanks Grub. I see your concern about trying to work under the helm, but it's not as bad as it looks. The stringers only go about 4 inches under where it might be a little tough but there is access from the sides. So I'm not removing the cap. BTW your build looks great!
 

Grub54891

Admiral
Joined
Jun 17, 2012
Messages
6,073
No Title

Thanks Grub. I see your concern about trying to work under the helm, but it's not as bad as it looks. The stringers only go about 4 inches under where it might be a little tough but there is access from the sides. So I'm not removing the cap. BTW your build looks great!

​Thank's, it's slowly coming together, prepping for final primer on the top/inside, then on to the sides and bottom.
 

Attachments

  • photo263301.jpg
    photo263301.jpg
    55 KB · Views: 0

Jbasham

Petty Officer 3rd Class
Joined
Apr 10, 2017
Messages
84
Good morning guys just wondering how my hull should be supported before I completely remove the stringers.

My trailer is a 4 bunk (2x4s) style. Right now I have blocks under the corners of the transom on top of the bunks. The only place they are still touching is about 12ft forward where the stringers stop and the bow is resting on the rubber v-block.

Any advice is appreciated. Thanks
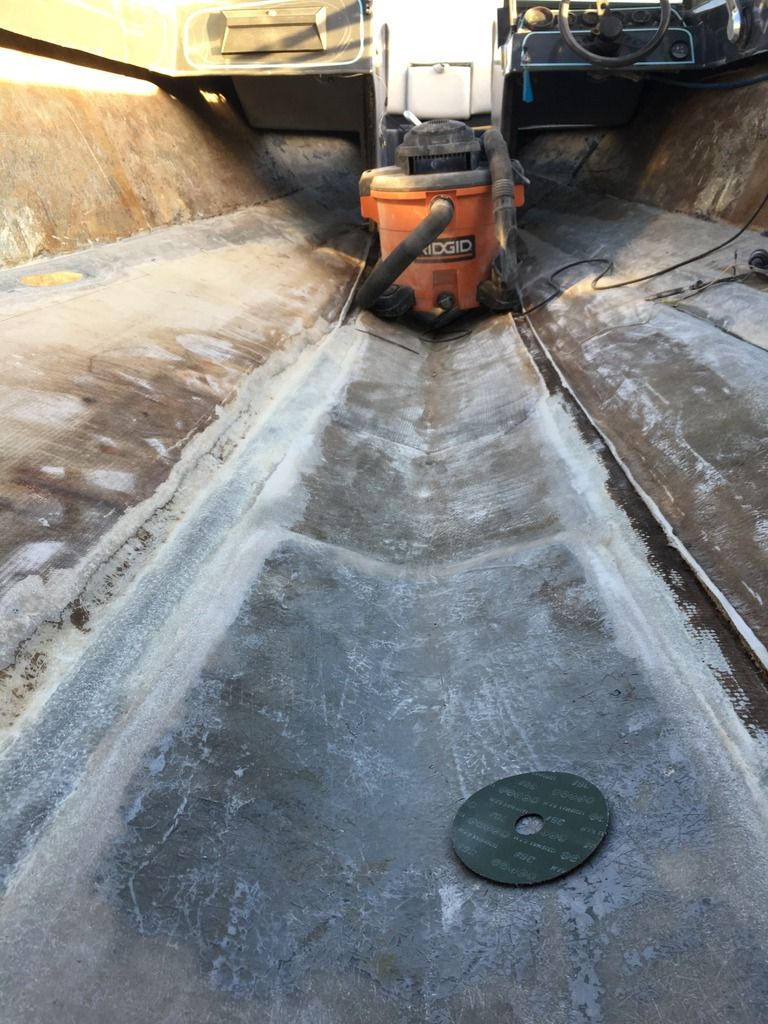
Will just 3 points of contact be sufficient?? It is now completely off the bunks, 1 block at each rear corner and 1 under the keel about 6 feet from the front. I removed the stringers on Sunday and you can really feel the hull flexing when im in there working.


Grub54891

Admiral
Joined
Jun 17, 2012
Messages
6,073
I laid my keel on a 2x6 flat on the floor, blocked the aft corners, measured both sides and leveled it port to starboard. Then blocked the hull fwd and measured, leveled that also. From there, I added 2 sets of bunks from fwd to aft, most of the way down the hull. Then proceeded to cut it apart. It was pretty solid when walking around in there.
 

Jbasham

Petty Officer 3rd Class
Joined
Apr 10, 2017
Messages
84
I laid my keel on a 2x6 flat on the floor, blocked the aft corners, measured both sides and leveled it port to starboard. Then blocked the hull fwd and measured, leveled that also. From there, I added 2 sets of bunks from fwd to aft, most of the way down the hull. Then proceeded to cut it apart. It was pretty solid when walking around in there.

Ive heard that the Hull should be in a relaxed state before glassing in new stringers. Is this true? When mine is sitting on the bunks its definitely not relaxed. Maybe because my hull is really thin?
 

Grub54891

Admiral
Joined
Jun 17, 2012
Messages
6,073
No Title

My hull is thin also, I simply supported it before dismantling it. You do not want to have a hook, or bow in the hull. I ground off all the old glass down to clean glass, and layed in 2 layers of chopped to replace what I had to grind out. Then replaced the stringers.
 

Attachments

  • photo263586.jpg
    photo263586.jpg
    282.8 KB · Views: 0
  • photo263587.jpg
    photo263587.jpg
    287.8 KB · Views: 0
  • photo263588.jpg
    photo263588.jpg
    239.8 KB · Views: 0
  • photo263589.jpg
    photo263589.jpg
    293.9 KB · Views: 0

Jbasham

Petty Officer 3rd Class
Joined
Apr 10, 2017
Messages
84
My hull is thin also, I simply supported it before dismantling it. You do not want to have a hook, or bow in the hull. I ground off all the old glass down to clean glass, and layed in 2 layers of chopped to replace what I had to grind out. Then replaced the stringers.

Nice job! When mine was on the bunks you could see it bowing in underneath . Now off the bunks it looks flat just flexes a lot.
 

Grub54891

Admiral
Joined
Jun 17, 2012
Messages
6,073
Nice job! When mine was on the bunks you could see it bowing in underneath . Now off the bunks it looks flat just flexes a lot.

​Yeah, I kept it blocked bow and stern, the bunks I added fwd to aft, just supported the hull for walking around. I'd double check the measurements, and level each day just to be sure nothing moved.
 

Jbasham

Petty Officer 3rd Class
Joined
Apr 10, 2017
Messages
84
40ish hours later the "hard" part of grinding is done!


I just got 1 stringer glued together. After this is dry I'll do the other one. I hope this will work!
 

Jbasham

Petty Officer 3rd Class
Joined
Apr 10, 2017
Messages
84


There's only about 1.5" above the new transom before the seam. So all Id be able to do without going over the seam would be a tiny filet and about 1 inch of tabbing...

Hey guys I really need some input on this. I'm almost ready to install the transom and my question wasn't fully answered.

Should I proceed with glassing over the seam or does the top of the transom not need to be tabbed in?

Thanks!
 

Grub54891

Admiral
Joined
Jun 17, 2012
Messages
6,073
I would say, you can glass over the seam, There are not to many boats that ever have the cap removed, And I'd imagine nobody will ever take yours off in the future. The cap is pretty solid to the hull to begin with, with the screws holding the cap on and the rub rail screws it's on there pretty good. On mine I sealed the rub rail with life seal, so no water will splash up and get inside.
Mine is tabbed in below the rub rail area, I slightly re-designed it to be tabbed in that way.
 
Top