72 Thunderbird Formula w/twin 165hp Mercs

Mark72233

Ensign
Joined
Jul 11, 2014
Messages
926
Well I went and checked it 😢. I was wrong about the pressure I had pumped it up to 18psi and in about 45minutes it is down to 8psi. It has no oil in it just air but it's still leaking. I guess I will have to take it apart and change out the other seal under the impeller housing 😝
 

archbuilder

Vice Admiral
Joined
Sep 12, 2009
Messages
5,697
Hey Mark I may have to drop my drive off at your place for pressure testing, lol! Surely a drive would be considered a carry on luggage if I flew down to your neck of the woods, :D

I have read a couple of places where you should also pull a vacuum on the drive. That sort of makes sense after talking with my friend that has two merc outboards on his 120 mph Skater. He put expansion tanks on his drives because when they get hot, then when they cool off the drives have a tendency to try to pull a negative pressure and suck in water. His deal is a lot more extreme, but I suspect the same is true of these drives to a lesser degree. And that would make a lot of since if the seals have an inner lip and an outer lip. The pressure and vacuum would test both lips. I'm not sure how critical the vacuum test is, most people seem to just talk about the pressure side of it.
 

alldodge

Moderator
Staff member
Joined
Mar 8, 2009
Messages
42,079
The drive uses O-rings and lip type seals. The issue with increasing pressure is the higher the pressure the more pressure is placed against the lips on the seals. As the pressure increases the tighter the seal is pressed to the shaft. So you want low pressure, and 15 psi is quite a bit to place on the seals, they to can be damaged. I use a bicycle pump to pressurize it.
 

Mark72233

Ensign
Joined
Jul 11, 2014
Messages
926
AllDodge I did use a bike pump so I didn't over pressure it. I checked around today on the web and it looks like most sites recommend no more then 10psi so I will go with that. I am hoping it is the one seal I didn't change out that is under the base of the impeller housing. I have a new seal but the old one looks a little different in its dimensions so I gave the old one a good look and didn't see any defects but who knows when it comes to rubber seals I should have just changed it out. Lesson learned. Tonight when I get home I will switch them out and try again.
 

alldodge

Moderator
Staff member
Joined
Mar 8, 2009
Messages
42,079
Hope it works out, and don't forget to rotate the shafts while under pressure
 

Mark72233

Ensign
Joined
Jul 11, 2014
Messages
926
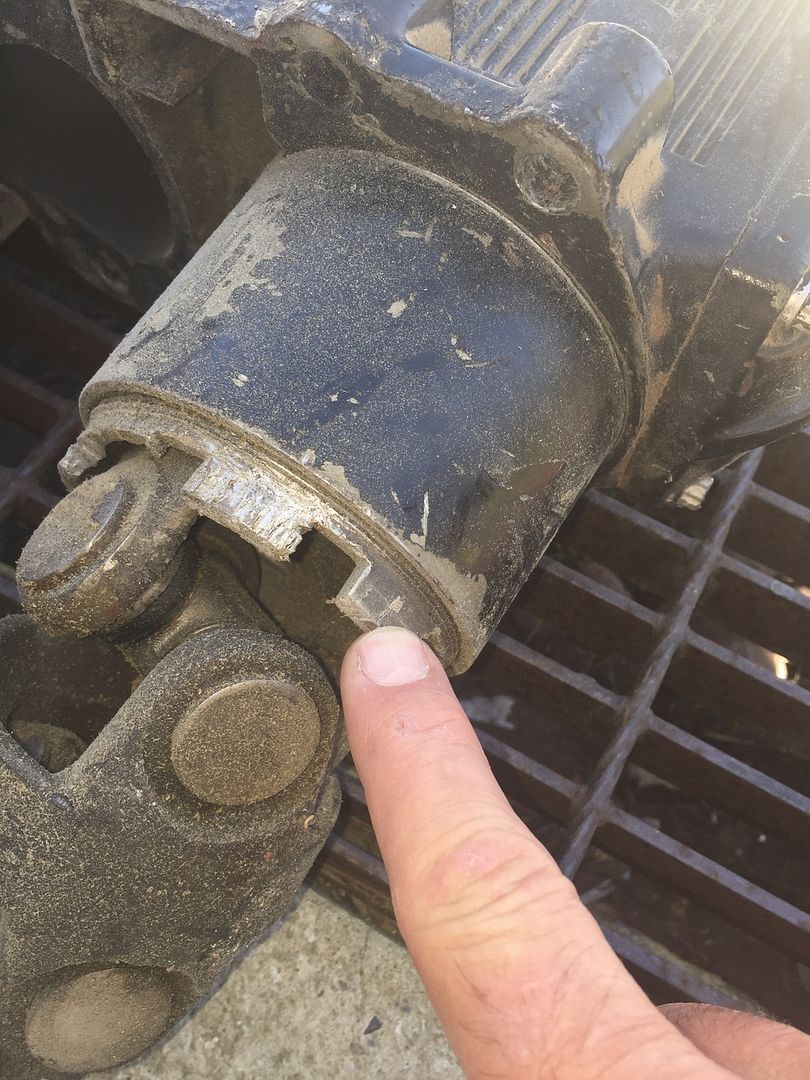
Well I took the drive apart again but before I started taking pieces off I realized if I blocked the oil passage hole where oil travels from the lower half to the upper half that I should be able to pressurize the lower unit. So I took a large C clamp and covered the hole using the small O ring to seal it and sure enough I could pressure the lower half up to 10psi and turns out it has no leak down so my problem appears to be the top half but which seal. I decided to put it back together and try again and sure enough it still leaks but I finally found where it is leaking from. It is leaking from the seal behind this large nut.

So I guess tomorrow I will try and break it loose and see what is back there and maybe I have the seal or O ring in all my spare seals and rings.
 

alldodge

Moderator
Staff member
Joined
Mar 8, 2009
Messages
42,079
Got to thinking about this after our last back n forth post. If it was mine I I was seeing a leak of any kind I would be thinking about replacing all the seals. The hardest one is the one your going after in the drive shaft.

Note of caution, don't try to remove it with anything other then the OEM or after market tool. Don't try to use a spanner or square drive punch of some kind.

Agree the leak is most probably coming from that area, with that you will need a rolling torque meter to reassemble
 

archbuilder

Vice Admiral
Joined
Sep 12, 2009
Messages
5,697
I haven't studied it, but isn't that seal above the water 99% of the time? I'm not saying your shouldn't replace it, but it seems like one of the less critical seals in terms of water getting in.
 

Mark72233

Ensign
Joined
Jul 11, 2014
Messages
926
I hear ya AllDodge and yes I have the factory tool to take it off but no rolling torque meter. I know it is leaking there because after I pressured it up I sprayed it with soapy water and the bubble machine started right up so that's where it's leaking.

Arch it is at or just above the water line but as much air that is leaking out I will loose fluid in no time I and have seen what happens to those gears when the oil drains out and you're running on plane for awhile, 2 melted gears.
 

alldodge

Moderator
Staff member
Joined
Mar 8, 2009
Messages
42,079
Don't know why I called it a rolling torque meter, is a dial torque wrench used to measure rolling torque, guess just blending terms. Thanks for humoring me

Suggest doing the prop shaft while your at it
 

Mark72233

Ensign
Joined
Jul 11, 2014
Messages
926
Well I decided to go ahead and take off the roller bearing retainer nut and pulled the entire yoke/bearing assembly out. I made sure to keep the shims all in the same order. While I was taking this off I remembered taking the same thing off of our older 18 foot Thunderbird Cathedral hull boat that we used to have that had a Merc 140 in it. I remember someone telling my dad you cant replace these parts without doing certain things or without specialized tools. I remember my dad said we would see. We had to change out both of the big gears and after we fixed it we used that boat at least another 2 years without any issues so here goes. I replaced the Oil seal and the "O" ring and put it all back together only to have it still leaking air out of the oil seal where it seats against the shaft of the yoke. I pulled it apart again and noted that the shaft was rusty and pitted. I spent some time cleaning it with Emory clothe and put it all back together, crossed my fingers again and BAM it is holding 10psi and did for several hours with no loss with me rotating the shaft every now and than. So after a couple of coats of self etching primer and gloss black paint I have one out drive back on the boat and looking good.

And yes if you look closely you can still see the right side trim cylinder is still blown apart. I haven't worked up the energy to try and fix the hydraulic issues I have had that will be after the other drive is done.
 

alldodge

Moderator
Staff member
Joined
Mar 8, 2009
Messages
42,079
Looks good, you will get it.

You said this boat won't sit in the water for long correct, it will be a trailer boat?
 

Mark72233

Ensign
Joined
Jul 11, 2014
Messages
926
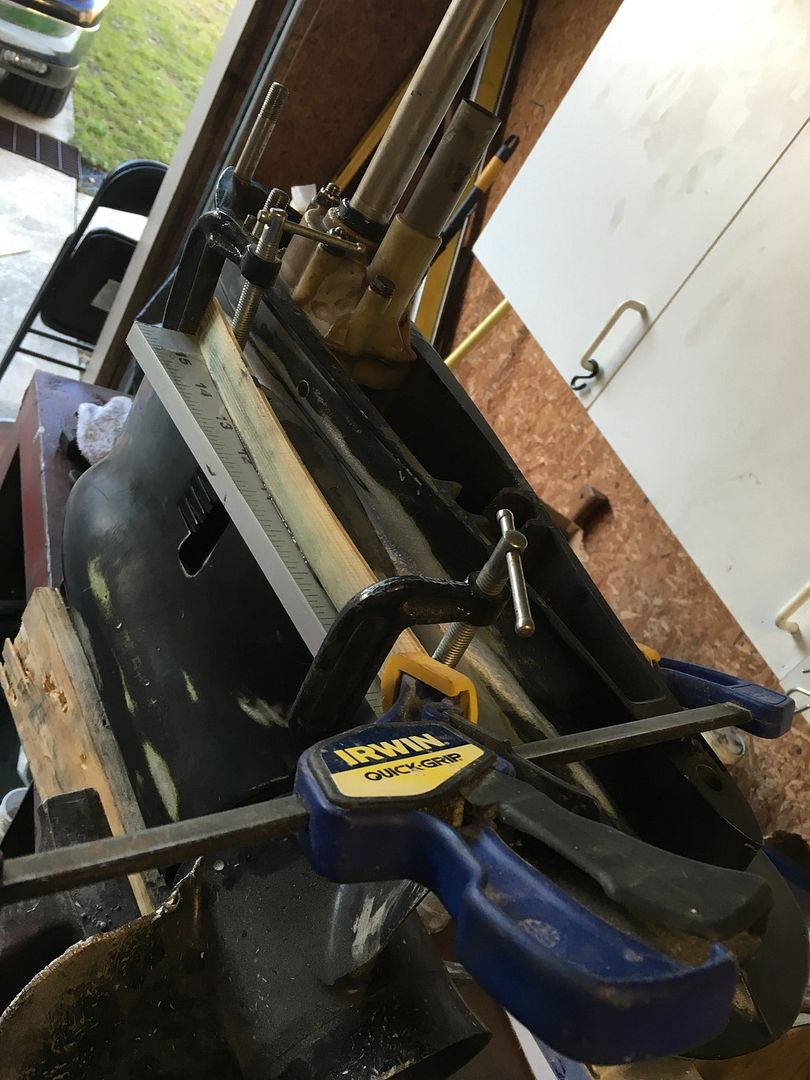
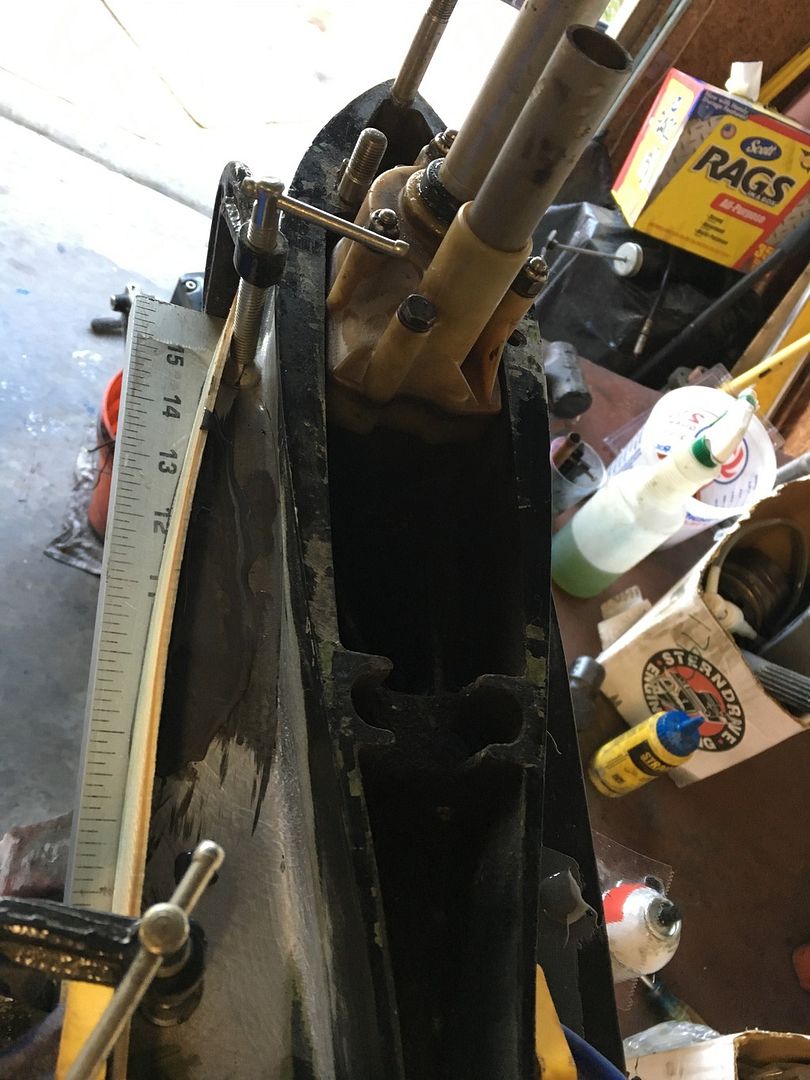
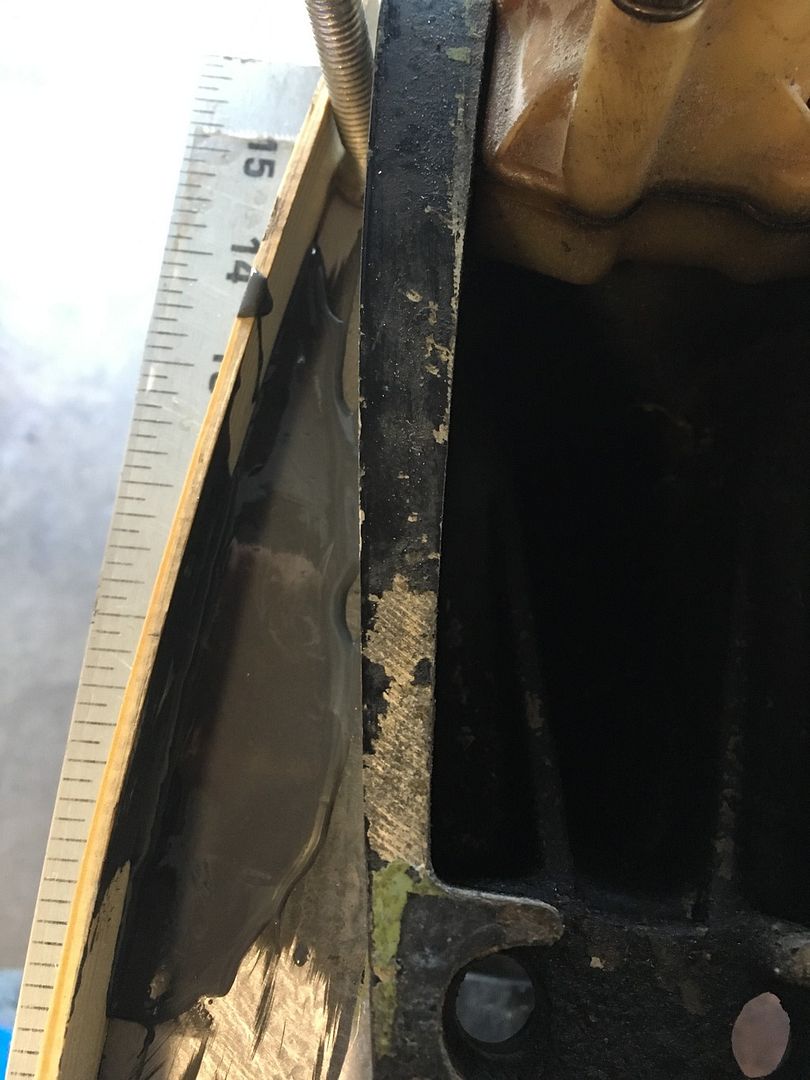
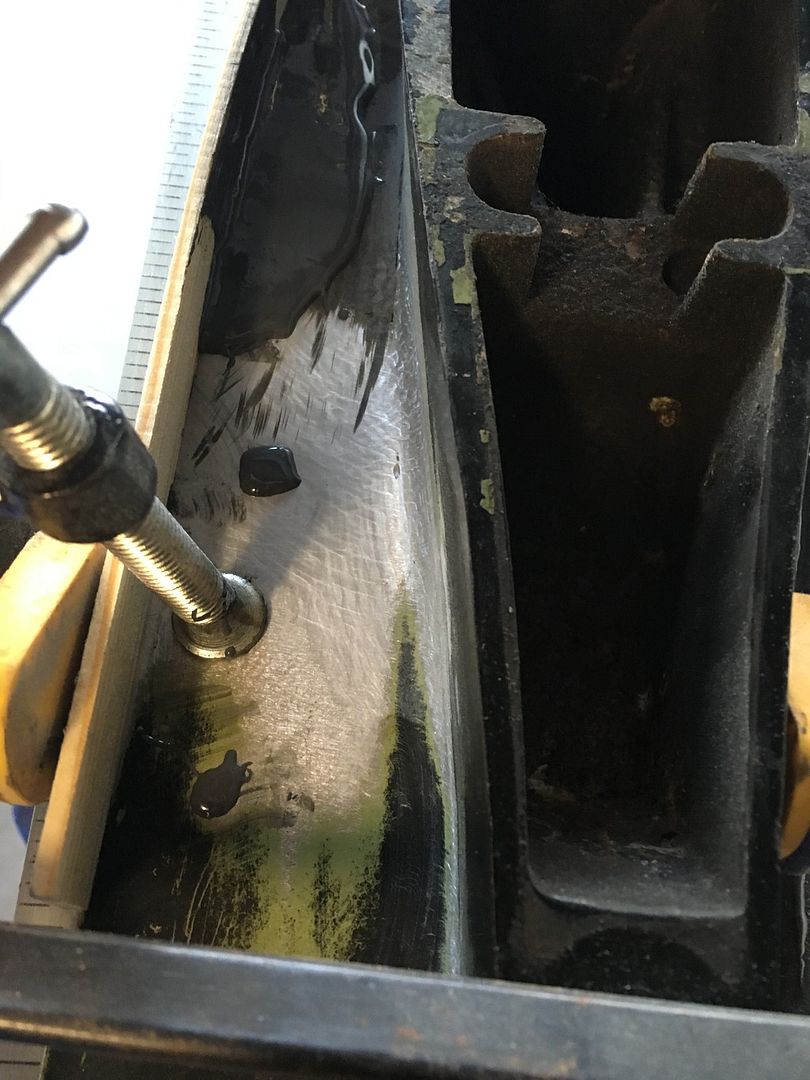
As for the other drive I picked the best looking one from the other 3 I have. This one was off of the donor boat I think and had a whale tail attached to it. Once that was pulled off I noticed that the whale tail was put on to cover up the fact that part of the fin on the side of the lower unit was broken off. The previous owner had used probably JB Weld as a filler and covered it with an aluminum can for added strength I am guessing so after scrapping and sanding it all back smooth I decided to try and patch the missing part and the 4 holes for the bolts that held the whale tail on using again JB Weld. So I clamped a flat edge ruler covered with tape to the bottom and used a stir stick for the curved edge and slapped a thick layer of JB onto the fin. Once it hardens I will sand it back down, prime and paint it. Goldie did the same thing and it turned out looking pretty good.

I wanted to use this outdrive because it looks and is newer then the other two, looking at the serial numbers and when I pressure tested this one it held the air with no leak down. When I took it apart everything was clean and appeared to have just been rebuilt. The impeller and housing show absolutely no wear and the bolts and nuts come right loose and have been recently greased so fingers crossed I wont be replacing much on this drive. Even the paint is original and clean looking. I will still sand it down and prime and paint it to get rid of all the nicks and scratches. The only real problem I am having with it is the prop it wont come off the shaft. The prop nut came off pretty easy but you can see the corrosion at the prop and shaft and so far with heat and penetrating oil spray it wont come off. The prop has damage to it so I am not going to worry about damaging it and I already have 3 other props that are the same diameter and pitch. Any one have any suggestions on how to get a prop off a shaft when it is corroded on.
 

Mark72233

Ensign
Joined
Jul 11, 2014
Messages
926
Yes AllDodge she will only spend the day in the water and then right back up on the trailer.
 

alldodge

Moderator
Staff member
Joined
Mar 8, 2009
Messages
42,079
Hope it holds, least the top does not need to be smooth, it should be out of the water on plane.
 

archbuilder

Vice Admiral
Joined
Sep 12, 2009
Messages
5,697
Looks like you are making good progress Mark. I haven't run across a prop that was corroded on, but I am in fresh water. Usually heating it will do the trick....sounds like you might be in for a fight!
 

alldodge

Moderator
Staff member
Joined
Mar 8, 2009
Messages
42,079
The prop has damage to it so I am not going to worry about damaging it and I already have 3 other props that are the same diameter and pitch. Any one have any suggestions on how to get a prop off a shaft when it is corroded on.

I missed you asking the question. Agree, you can try heat, using some may damage the seal but I think you can replace it easy enough.

If you can find or make some long skinny fingers which can gab the edge on the bottom and can attach to a 3-jaw puller.
 

Mark72233

Ensign
Joined
Jul 11, 2014
Messages
926
AllDodge now that you say it I remember having a puller somewhere that has long fingers with a bar across the puller with pins to adjust from different length fingers set either facing in or out and wide or narrow on the bar so when I get home I guess I need to go digging for it. Thanks for reminding me I had it.
 

Mark72233

Ensign
Joined
Jul 11, 2014
Messages
926
I found the puller but the fingers weren't long enough so after more then a day of soaking it with penetrating oil and heat and hammers with wood blocks I have come to the conclusion that this prop is not coming off. I looked up methods to remove props frozen unto a shaft and tried all the methods I found with no success so where is my Sawzall. Started with cutting off the blades, then started cutting the length of the hub where the out ring joins to the inner ring in 3 spots cutting through all 3 which left me with the center hub which is basically the very inner tube which is the one frozen to the shaft that is surrounded by a rubber tube and again encased in aluminum creating the main hub or this part pictured.
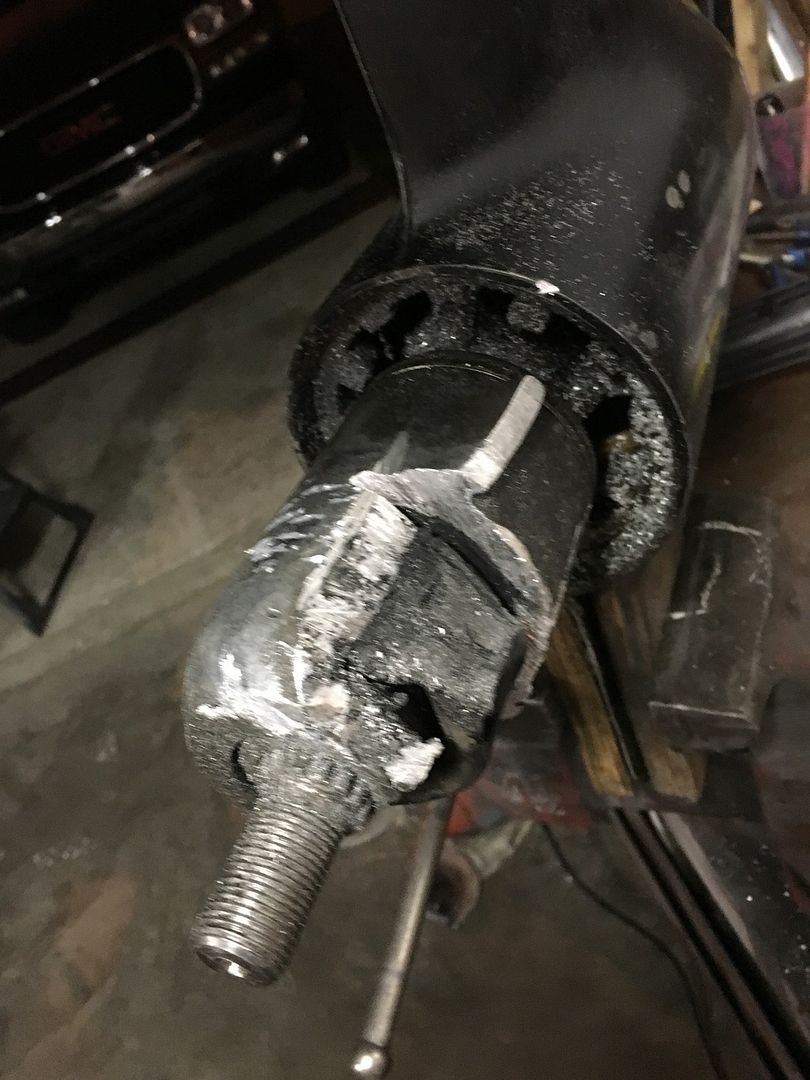
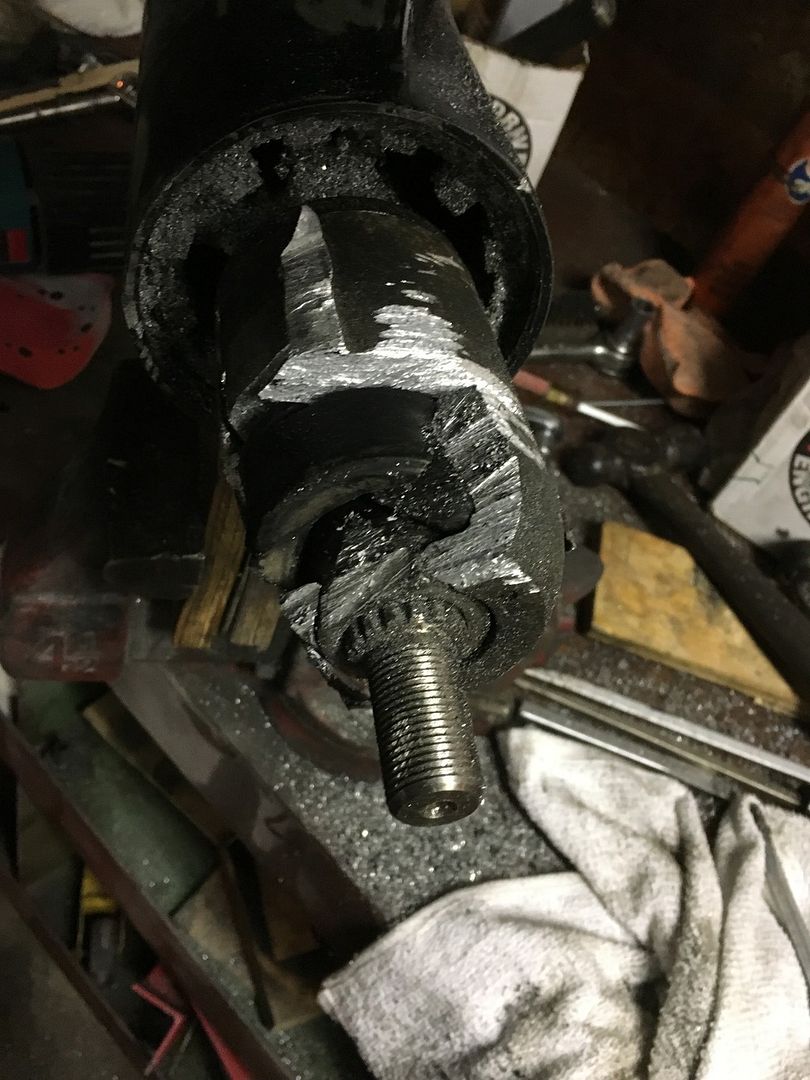

Once I got it to this part I tried the puller and it ended up breaking the puller and not budging at all. I then started cutting away the outer aluminum casing which really sucked because once the blade started hitting the rubber the rubber melts and grabs the blade and then the fun starts. I went through over a dozen blades and finally after 3 hours got it down to the inner tube.

Now that I had the tube fully exposed I again went with spray and heat and still it wouldn't budge so I cut the tube length wise ending up with this.
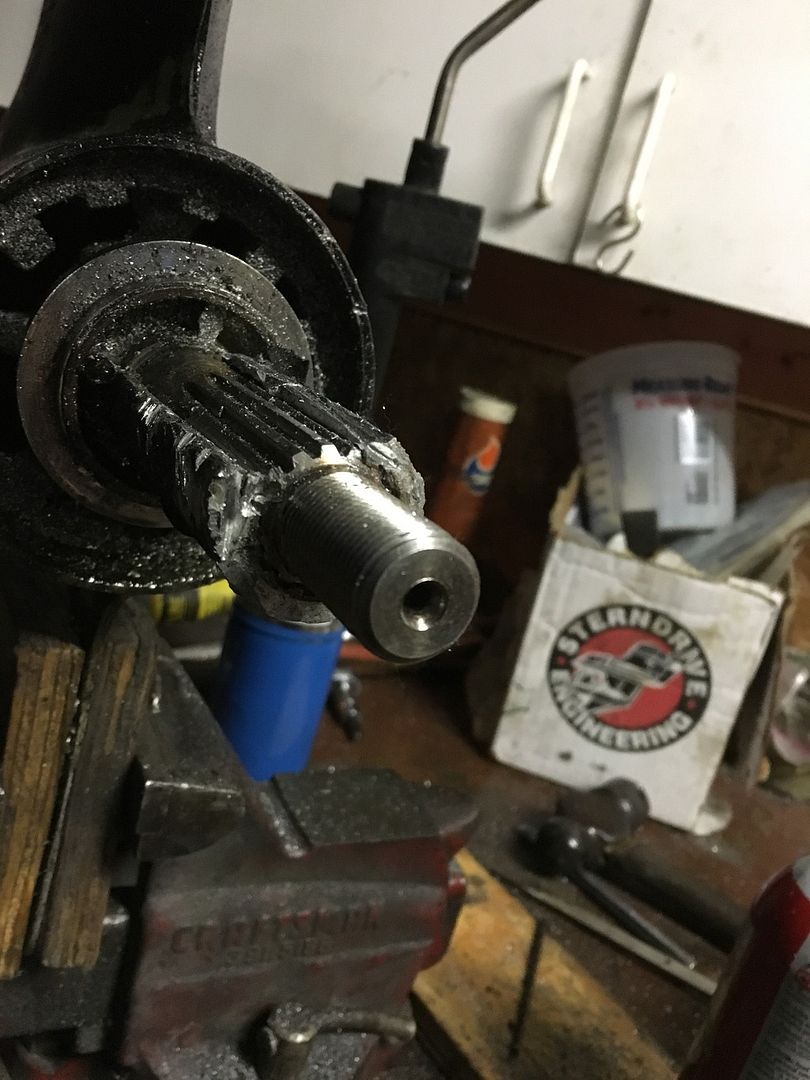
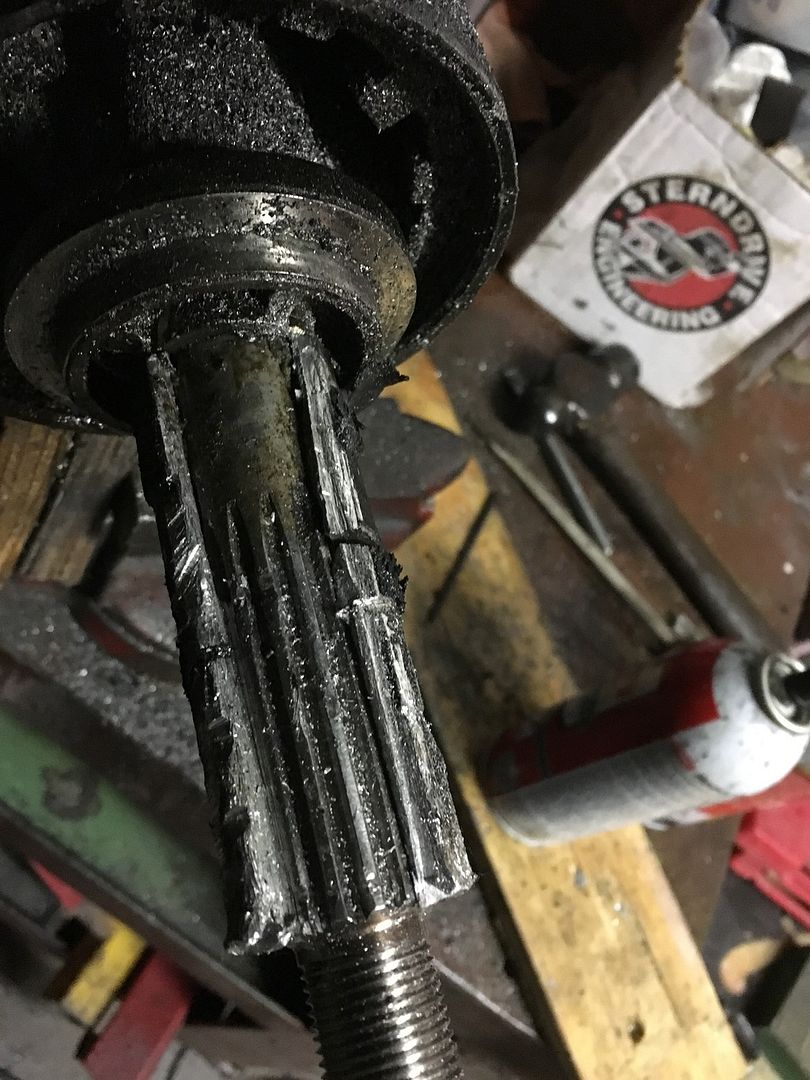
Now you would think with only this much inner tube and all that exposed area that it would come off. It did finally move an 1/8 of an inch but still wouldn't come off. I soaked it, heated it, chiseled it and still it wouldn't come off. I ended up having to cut it again length wise until only half of the shaft was left intact and used a chisel to knock that off the shaft and then finally success with very little damage to the shaft.
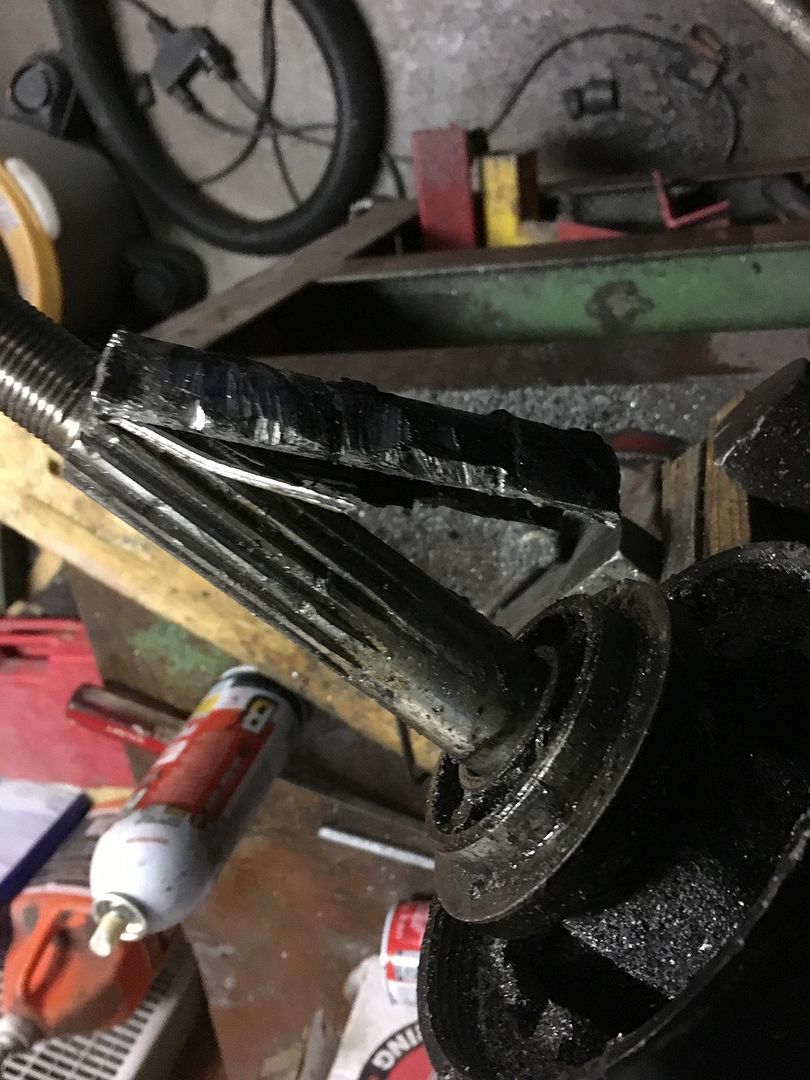


You can see the crusty stuff inside the tube that basically glued it to the shaft.
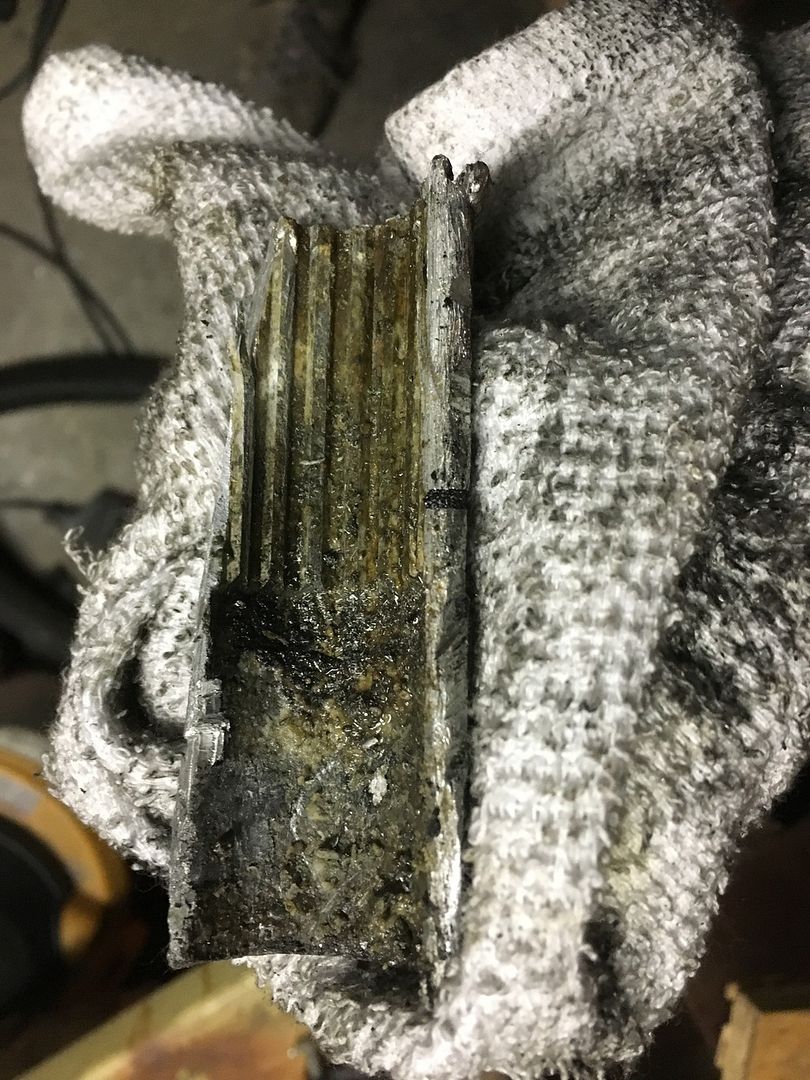


I am sure the seals are going to leak now so the next thing will be to remove the retainer nut and pull all that out. Here is what I was left with after more than 3 hours with a Sawzall.
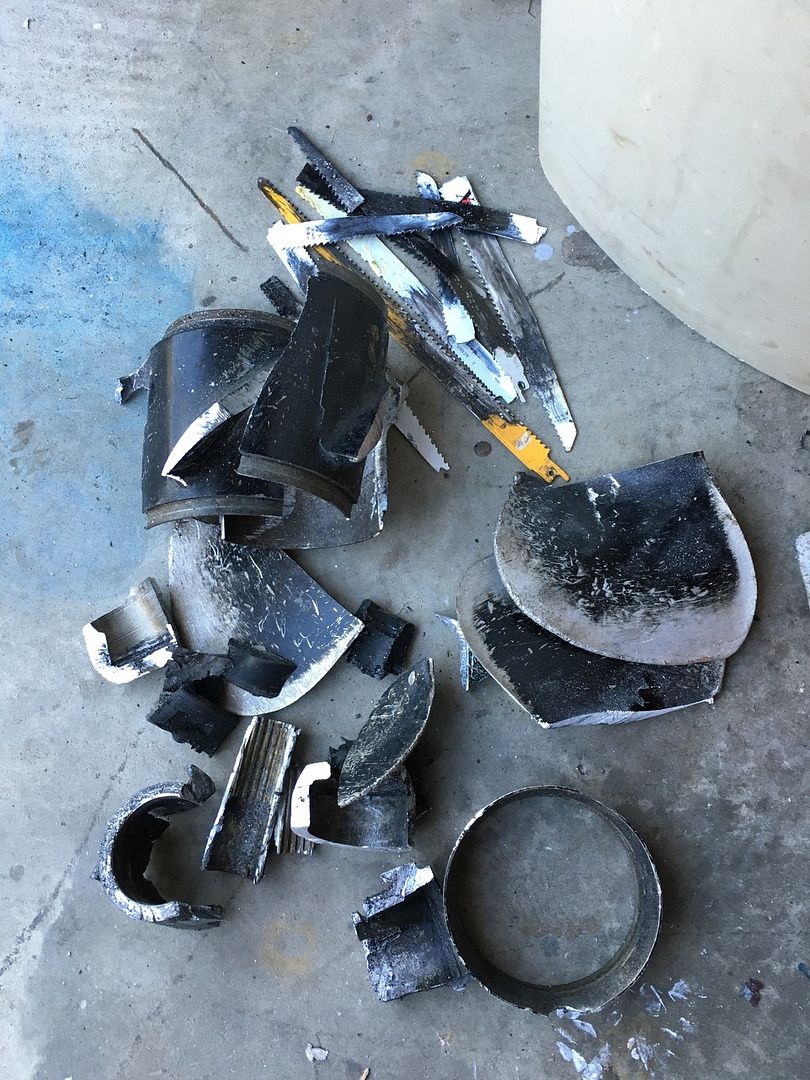


I have to say these props are built tough.
 

alldodge

Moderator
Staff member
Joined
Mar 8, 2009
Messages
42,079
Wow I can just imagine the words which may have been used during the process. Glad it came off, if only the prior owner would have removed every once in a while a greased the spline.

Wonder if a prop shop could put it back together :rolleyes:
 
Top