1987 Ski Centurion Tru Trac II - First Time Rebuild - Floor, Engine, Dash, etc.

Status
Not open for further replies.

ACon977

Senior Chief Petty Officer
Joined
Nov 21, 2017
Messages
759
Unfortunately no work on the boat yesterday, but I did help my friend build a water wheel for a festival he is going to. Turned out pretty good and it was fun to do. 125:1 gear ratio should drive the alternator at 2500 rpm.

20180529_223324-1280x960.jpg ​​​​​​​
 

ACon977

Senior Chief Petty Officer
Joined
Nov 21, 2017
Messages
759
Yea! Hes going camping for 2 weeks at a festival and was hoping to have power for a blender and lights :laugh: Should be interesting to see it up and running, very basic idea, but fun to put together from scratch.
 

Woodonglass

Supreme Mariner
Joined
Dec 29, 2009
Messages
25,927
Make sure to use CSM first and then the fabric and then more CSM and then the fabric.
 

ACon977

Senior Chief Petty Officer
Joined
Nov 21, 2017
Messages
759
Thanks WOG!
Definitely layering CSM between, the 10oz cloth.
 

ACon977

Senior Chief Petty Officer
Joined
Nov 21, 2017
Messages
759
Woodonglass How much of an overlap would you recommend? Between layers of cloth I was thinking ~3" but for the CSM between... I dont have an idea of how much overlap to have with that. Maybe 1" - 2"?
 

Woodonglass

Supreme Mariner
Joined
Dec 29, 2009
Messages
25,927
Is this a full transom (spans from sidewall to sidewall) or just the Transom plate with the keyhole?
You always want to coat any wood first with just resin and really pay attention to the edges and soak em good. Then coat the flat parts with plenty of resin to soak in. Once it tacks up apply another coat of resin and then lay the CSM on top of it and use the bubble buster roller to roll it out from the center to the edges. This forces the resin up thru the mat from the bottom. You then just add a bit more resin to any areas that are not penetrated by the resin below. Remember, with Resin LESS is Best. You only need enuf to make the CSM go Clear and all fibers are wetted out. To much resin actually makes the lamination weaker and increases the probability that it will crack.

When you are making just the transom you use full layers of both the CSM and the 10oz fabric making sure to wrap the edges. The 2nd link below tells you how I recommend fabricating a transom and stringers. NOTE: you don't have to drill the OOZE holes unless you want to. I like to cuz I believe it increases adhesion and strength of the transom.
 
Last edited:

ACon977

Senior Chief Petty Officer
Joined
Nov 21, 2017
Messages
759
I'm actually doing the stringers, not the transom. Since it is an inboard. But I have read your post on applying fiberglass and followed it when i did my first coat of CSM on the raw wood.
 
Last edited:

mickyryan

Rear Admiral
Joined
Apr 18, 2016
Messages
4,214
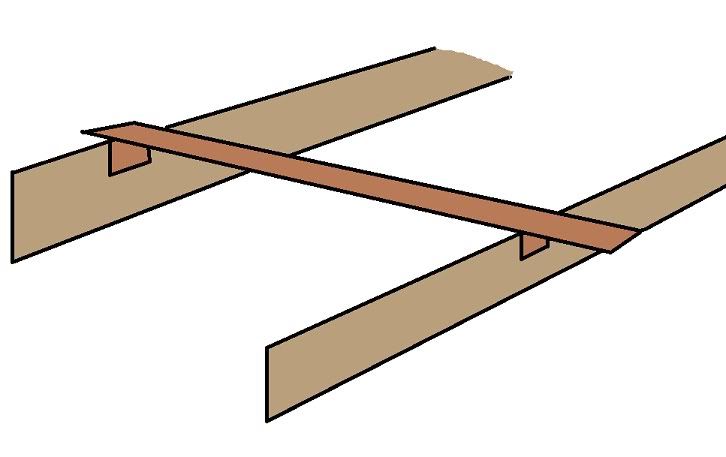
i usually don't overlap the csm because it isn't there for strength its a filler, so less overlaps less bumps to grind down the overlap on the cloth i would go 3 " minimum like you were thinking and for tabbing i would go out 5 4 3 like that and take them to top of stringer . you will have bullet proof stringers at that point!
WOG has a image that shows that as well :)
 

ACon977

Senior Chief Petty Officer
Joined
Nov 21, 2017
Messages
759
Perfect mickyryan, I wasnt sure if the CSM should be overlapped or not. Thanks!

I finished up my final prelayers of CSM on the stringers, kickball game tomorrow and then it's already Friday. Damn these short weeks fly by. But pumped to get them into the boat this weekend!
 
Last edited:

ACon977

Senior Chief Petty Officer
Joined
Nov 21, 2017
Messages
759
Also,

I ran into issues trying to cut the foam squares with my razor blade. I know its probably because my blade wasnt brand new. but I also was only able to get the 1/2" instead of the 1/4". Has anyone figured out a trick to getting these cut without them tearing?

My thought was to just get a new blade and try to cut it again, but people on here have some clever solutions, figured I would reach out.
 

ACon977

Senior Chief Petty Officer
Joined
Nov 21, 2017
Messages
759
Still looking for thoughts on how to space out the stringers from the Pylon, I really dont want to put it back together just to find that the motor mounts are too narrow or the pylon wont fit :confused::confused::confused:
 

Woodonglass

Supreme Mariner
Joined
Dec 29, 2009
Messages
25,927
I'm sorry but I'm confused are you wanting to space the stringers up off the bottom of the hull or space them apart from each other. Not sure what Squares you're talking about.
 

ACon977

Senior Chief Petty Officer
Joined
Nov 21, 2017
Messages
759
Sorry WOG, I am looking for spacing between them. My stringers will be spaced such that the Engine is mounted to it. And the Pylon will sit between them.

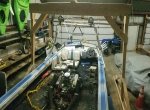
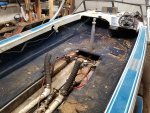
Click image for larger version  Name:	hoist - rear view.jpg Views:	5 Size:	703.6 KB ID:	10582750 . Click image for larger version  Name:	Seats and Engine out.jpg Views:	3 Size:	1.70 MB ID:	10582751

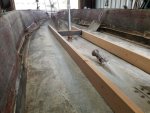
I had them roughly set them into the boat, using the Pylon for spacing.But as I am doing the first layer of CSM out of the boat for waterproofing; I quickly realized that I will be layering glass around these once they are in the boat, and will actually have less space between the stringers than when they would be first PB'd into place, if I used the pylon as my spacer.

Click image for larger version  Name:	20180505_164030-1024x768.jpg Views:	2 Size:	236.5 KB ID:	10582747

Regarding the foam, I was talking about the foam squares that people used as spacers between the Hull and their Stringers to avoid hard spots. I had bought a small section of it from the Home Deopt and realized it is 1/2" which is way too thick. (Most people used 1/4" I believe), so I was trying to cut it down to 1/4" strips but my knife kept pulling it apart and not cutting it smoothly.

Hopefully that explanation makes sense! Thanks for your help!
 

Attachments

  • hoist - rear view.jpg
    hoist - rear view.jpg
    703.6 KB · Views: 0
  • hoist - rear view.jpg
    hoist - rear view.jpg
    703.6 KB · Views: 0
  • hoist - rear view.jpg
    hoist - rear view.jpg
    703.6 KB · Views: 0
  • Seats and Engine out.jpg
    Seats and Engine out.jpg
    1.7 MB · Views: 1
Last edited:

ACon977

Senior Chief Petty Officer
Joined
Nov 21, 2017
Messages
759
So I guess my question is, how much space EXTRA do I need to offset my stringers in order to compensate for my fiberglass and resin to adequately secure it to the deck. I dont think it will be more than 5mm (?) but even that on both sides could have me not being able to fit the pylon between, or have the motor mounts not seat correctly.... :facepalm:
 

mickyryan

Rear Admiral
Joined
Apr 18, 2016
Messages
4,214
ok here is thing if you want instead of using spacers period put you a bead of pb down the stringerline , enough bead that it will squeese out press a stringer into said bead and boom you have a bedded stringer, folks make it way harder then it needs to be, all you want is 100 % contact of bedding material and hull and stringer and when it squishes out you take a spoon and smooth it out on each side , done :) from factory they are just usually layed in wet csm glass and then worked in, or a setting material if its a different day , searay uses a pink goop if i recall and dont even make sure its 100 % contact from what i have seen.at least the boats i have pulled apart all had the indentation of that.
 

Woodonglass

Supreme Mariner
Joined
Dec 29, 2009
Messages
25,927
Heck I just use 1/4" dowel and cut em to size and slip em under the stringer as I bed them into the PB. I don't even worry about removing them. I put one on each end and one in the middle. As for spacing I make a jig from 1x scraps to hold em upright and at the correct spacing until I get the tabbing done.

stringerBraces.jpg


Your resin and glass work will add approximately 1/8" - 3/16" to your stringer size..
 

Baylinerchuck

Commander
Joined
Jul 29, 2016
Messages
2,726
I did basically the same as WOG except I used 1/4”thk plastic, (UHMW). Like Wood, I left the spacers in because after it’s bedded and filleted in, who cares
 

ACon977

Senior Chief Petty Officer
Joined
Nov 21, 2017
Messages
759
ok here is thing if you want instead of using spacers period put you a bead of pb down the stringerline , enough bead that it will squeese out press a stringer into said bead and boom you have a bedded stringer, folks make it way harder then it needs to be, all you want is 100 % contact of bedding material and hull and stringer and when it squishes out you take a spoon and smooth it out on each side , done :)

So you don't use any kind of a spacer at all? I had thought from reading quite a few build forums that people said this was necessary to avoid the bond from cracking when the boat hull will flex. Although when I pulled the old stringers out I dont think there was any space between the wood and hull, honestly, not sure if there was even any resin, looked like dry wood which had been glassed over.


Heck I just use 1/4" dowel and cut em to size and slip em under the stringer as I bed them into the PB. I don't even worry about removing them. I put one on each end and one in the middle. As for spacing I make a jig from 1x scraps to hold em upright and at the correct spacing until I get the tabbing done.

Your resin and glass work will add approximately 1/8" - 3/16" to your stringer size..

I guess I was only doing foam due to what I had seen other people do and JMink used in his videos.... but a 1/4" sliver of wood would also work.
Thank you for that dimension! That's pretty much what I was wondering about, I figured I could make a guess... but wanted to rely on the big brains that are on this forum.


I did basically the same as WOG except I used 1/4”thk plastic, (UHMW). Like Wood, I left the spacers in because after it’s bedded and filleted in, who cares

Agreed indeed, I wasnt planning on removing them at all, just having them there to have some separation and then use the glass to create the strength.


Thank you guys so much for helping out! I dont want to seem too hesitant, I just dont want to be diving too far headfirst without thinking about all the possibilities. The goal is to leave these stringers in place once they are in, no more grinding lol
 

mickyryan

Rear Admiral
Joined
Apr 18, 2016
Messages
4,214
the spacers are there to be sure you have a opening to evenly distribute the glass in , my point is if you lay a thick bead push it down you achieve a 100% fill , might not be exact same thickness but the danger is having voids not having spots where it touches because every stringer i have ever seen is touching after pb is layed in except where spacers are left in so that's kinda defeating the purpose in the first place :) the point is if you don't bed the stringers you can have a hardspot that creates spider cracking because the stringer is only supported in that one spot and energy gets transferred from there out, by bedding the stringer 100 % you assure that energy is transferred along hole stringer and out into rest of glass .
 
Status
Not open for further replies.
Top