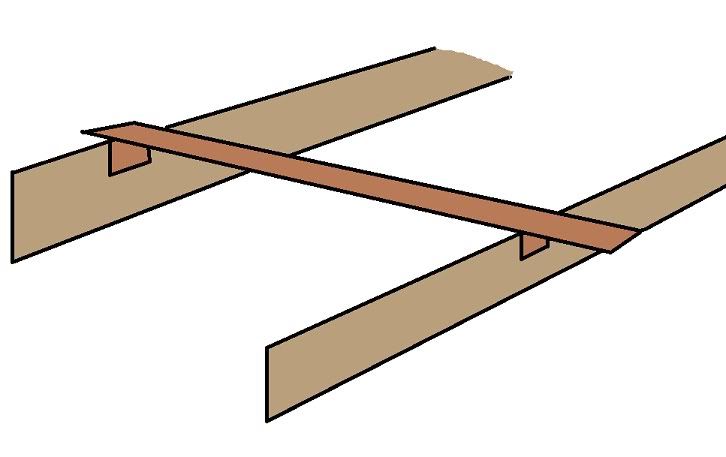
ok here is thing if you want instead of using spacers period put you a bead of pb down the stringerline , enough bead that it will squeese out press a stringer into said bead and boom you have a bedded stringer, folks make it way harder then it needs to be, all you want is 100 % contact of bedding material and hull and stringer and when it squishes out you take a spoon and smooth it out on each side , done
")
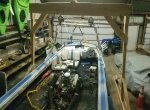
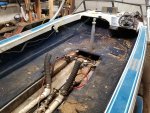
So you don't use any kind of a spacer at all? I had thought from reading quite a few build forums that people said this was necessary to avoid the bond from cracking when the boat hull will flex. Although when I pulled the old stringers out I dont think there was any space between the wood and hull, honestly, not sure if there was even any resin, looked like dry wood which had been glassed over.
Heck I just use 1/4" dowel and cut em to size and slip em under the stringer as I bed them into the PB. I don't even worry about removing them. I put one on each end and one in the middle. As for spacing I make a jig from 1x scraps to hold em upright and at the correct spacing until I get the tabbing done.
Your resin and glass work will add approximately 1/8" - 3/16" to your stringer size..
I guess I was only doing foam due to what I had seen other people do and JMink used in his videos.... but a 1/4" sliver of wood would also work.
Thank you for that dimension! That's pretty much what I was wondering about, I figured I could make a guess... but wanted to rely on the big brains that are on this forum.
I did basically the same as WOG except I used 1/4”thk plastic, (UHMW). Like Wood, I left the spacers in because after it’s bedded and filleted in, who cares
Agreed indeed, I wasnt planning on removing them at all, just having them there to have some separation and then use the glass to create the strength.
Thank you guys so much for helping out! I dont want to seem too hesitant, I just dont want to be diving too far headfirst without thinking about all the possibilities. The goal is to leave these stringers in place once they are in, no more grinding lol