1987 Ski Centurion Tru Trac II - First Time Rebuild - Floor, Engine, Dash, etc.

Status
Not open for further replies.

ACon977

Senior Chief Petty Officer
Joined
Nov 21, 2017
Messages
759
the spacers are there to be sure you have a opening to evenly distribute the glass in , my point is if you lay a thick bead push it down you achieve a 100% fill , might not be exact same thickness but the danger is having voids not having spots where it touches because every stringer i have ever seen is touching after pb is layed in except where spacers are left in so that's kinda defeating the purpose in the first place :) the point is if you don't bed the stringers you can have a hardspot that creates spider cracking because the stringer is only supported in that one spot and energy gets transferred from there out, by bedding the stringer 100 % you assure that energy is transferred along hole stringer and out into rest of glass .

Ahhhh I think we are on the same page now. I was always going to lay down a thick bead of PB, then push my spacers into it to keep the stringers from pushing all the glass out from underneath.
It makes way more sense to think of it as a stress riser if the stringer is transferring all the force into one point, thus creating the cracks. Same reason you want to fillet your PB on the sides. Not only does it make the glass wrapping smoother and easier, but it also distributes the force and does not create a riser in that joining seam.

Perfect explanation mickyryan !
 

ACon977

Senior Chief Petty Officer
Joined
Nov 21, 2017
Messages
759
I was going to recommend making an engine mount template / Jig(s) but this is way more elaborate than what I was thinking...so I'd go with this approach.

Haha yea I was gonna just cut some boards with a bird mouth on each side to reference the mounts connected in the middle. Thiers is a bit elaborate with the drive coupling and everything else... but it is a pretty good idea, if you have the time and scrap wood, to make it more realistic.

I think, for time and money, Ill make a more simplistic model, and post it here for thoughts and feedback. I was hoping that you would have a magic solution since you have nearly the same boat...
 

ACon977

Senior Chief Petty Officer
Joined
Nov 21, 2017
Messages
759
Well good news, and bad news.

Good news, had a great weekend rock climbing and hiking 4 peaks at 14,000 ft.

Click image for larger version  Name:	20180602_103113.jpg Views:	1 Size:	1.30 MB ID:	10584968 . Click image for larger version  Name:	20180602_120422.jpg Views:	1 Size:	1.47 MB ID:	10584969 . Click image for larger version  Name:	20180602_091022(0).jpg Views:	1 Size:	1.07 MB ID:	10584972 . Click image for larger version  Name:	20180601_184407.jpg Views:	1 Size:	1.66 MB ID:	10584971

Bad news, all that adventure took a lot of time! haha ended up getting the stringer support pieces mounted to the stringers on Saturday after the hike but the PB still did not cure by the time I went to work on it Sunday afternoon. So sadly, the stringers didn't go into the boat this weekend.

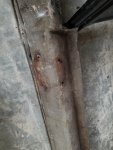
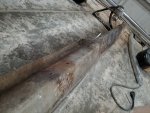
I did notice when I was looking at the old stringers, that there is a 1" section cut out of the stringers where the motor mounts, thus.. the height of the new stringers need to be at that same height to ensure the motor is lined up with the drive coupling to the prop. Glad I noticed this before. Sounds like the circular saw is gonna be cutting into all that nice glass work I just did...
 

Attachments

  • 20180602_091022(0).jpg
    20180602_091022(0).jpg
    1.1 MB · Views: 0

Mad Props

Lieutenant Commander
Joined
Jul 8, 2016
Messages
1,766
Nothing wrong with that.. Family and friends always comes before boats...Otherwise, who is going to ride in you new fancy boat!
 

ACon977

Senior Chief Petty Officer
Joined
Nov 21, 2017
Messages
759
Nothing wrong with that.. Family and friends always comes before boats...Otherwise, who is going to ride in you new fancy boat!

Haha I've had so many friends asking when it's gonna be done. The pressure is on, but I'm trying to get out and adventure since the weather is nice. It's the constant balance of excitement to work on the boat, and desire to get out and enjoy the mountains.

And we should get power back in the garage this week! So then I can do more work during the week days since Ill have overhead lights rather than just a headlamp
 

ACon977

Senior Chief Petty Officer
Joined
Nov 21, 2017
Messages
759
and work SHOULD be slowing down again, so no more 7a - 7p at the office! I really like getting back and get a few hours in on the boat in the afternoons. Gives me time to think during the day, execute, then let everything dry for almost a day.
 

ACon977

Senior Chief Petty Officer
Joined
Nov 21, 2017
Messages
759
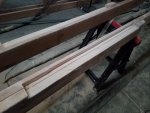
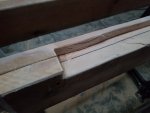
Tonight I cut out the motor mount faces to match the original stringer design.

20180604_192504-1512x2016.jpg .

20180604_192507-2016x1512.jpg

20180604_201557-2016x1512.jpg

20180604_201601-2016x1512.jpg


and then I cleaned all the surfaces with acetone, mixed up some PB and tried to bed the stringers. Ended up that my PB was too thin and it ran all over the place.... how much cabosil do I need to put in to make it thick enough? I feel like I put a lot, but obviously not... does anyone have a mix ratio I can reference? I felt like it was really thick in the bucket and then turned to water once I laid it in the boat

Screenshot_20180604-211437_Gallery.jpgScreenshot_20180604-211433_Gallery.jpg
 

mickyryan

Rear Admiral
Joined
Apr 18, 2016
Messages
4,210
i usually keep tossing it in and stirring with a drill and paddle wheel until it sticks to mixer the way i want it too with it off of course :)
 

kcassells

Fleet Admiral
Joined
Oct 16, 2012
Messages
8,600
Like Micky said. Ya wanna use a drill and small paddle {like for paint mixing** You should be able to hold it in front of you with out sagging. That way you can sculp with it. :joyous: Eats up alot a cabosil but a good workable paste. Even holds up on upside down work ya see. Not really a science to it more of a texture. Also be ready to use it fast. It will set up in your pot real fast if your not working it. Your pic looks like alot at once. I did the same thing on my first batch! Learning curve.
Heck I borrowed my wifes big soup spoon and ladle. She was ok with it. Didn't want it back.
 
Last edited:

Timr71

Petty Officer 1st Class
Joined
Jul 19, 2012
Messages
326
Are you going to sit your motor mounts directly back on the stringers? If you look in my rebuild thread at post 6 and look closely, you'll see mine sitting on 1/4 inch angle. It wasn't my idea; it was my cousin's. I can't say that I'm super knowledgeable on the pros and cons of that. I do know that some Nautiques come from the factory with an incorporated engine frame that sits on the stringers.
 

ACon977

Senior Chief Petty Officer
Joined
Nov 21, 2017
Messages
759
i usually keep tossing it in and stirring with a drill and paddle wheel until it sticks to mixer the way i want it too with it off of course :)

Like Micky said. Ya wanna use a drill and small paddle {like for paint mixing** You should be able to hold it in front of you with out sagging. That way you can sculp with it. :joyous: Eats up alot a cabosil but a good workable paste. Even holds up on upside down work ya see. Not really a science to it more of a texture. Also be ready to use it fast. It will set up in your pot real fast if your not working it.

So basically I didn't use enough cabosil... dang, well good to know, I felt like I put a lot into it but if its deceiving then I'll mix up and add more tonight when I make a new batch. I was also a little excited to finally be putting the stringers in so that I thought it was "good enough", famous last words!

And I was also worried about it setting up on me before I could get it into the bag and squeeze it into the hull, then the squares and fit the stringer with my proper spacing.

Your pic looks like alot at once. I did the same thing on my first batch! Learning curve.
Heck I borrowed my wifes big soup spoon and ladle. She was ok with it. Didn't want it back.

Yea I knew I neeeded a lot for my stringer (~14' long) and thought if I needed to put it into the boat, then go and mix a second batch, it would take too long and the first batch would have already started setting up. I made about 56oz and I think I was still a little on the low end. Should probably make another 10-12 oz with this next batch.

The learning curve is certainly there for every step of this project, and that is definitely to be expected! I quickly scraped it all off the hull and scooped it back into an old OJ container before it could set up and mess with my grinding job. It was a bit of epoxy, so expensive mistake, but with the cost of this rebuild... its negligible.


Thanks for the help guys!
 

ACon977

Senior Chief Petty Officer
Joined
Nov 21, 2017
Messages
759
Are you going to sit your motor mounts directly back on the stringers? If you look in my rebuild thread at post 6 and look closely, you'll see mine sitting on 1/4 inch angle. It wasn't my idea; it was my cousin's. I can't say that I'm super knowledgeable on the pros and cons of that. I do know that some Nautiques come from the factory with an incorporated engine frame that sits on the stringers.

I did see that in your thread and a couple other rebuilds that I was looking up. But my engine mounts seem to be different than any others which is odd. they have a L shape with lag bolts in the top and sides. I was planning on putting through bolts for the sides. As we had discussed before, overdrill, fill with epoxy, and then drill a proper hole, and thread in the lag/bolt.

Angle would be a decent idea though, I just dont have any on hand so I wasn't really thinking of that.. but maybe I'll reach out to a few places and see if I can get some. I think it would certainly make it stronger. Which is the goal!
 

ACon977

Senior Chief Petty Officer
Joined
Nov 21, 2017
Messages
759
well Timr71 after looking around and asking some co workers where they buy their project steel from, I think Im going to buy a piece of angle to strengthen up the motor mounts. Good recommendation. Due to the size and shape of my motor mounts it looks like we will have to buy 3" x 4" angle. my mounting brackets are 2" on the top, but 3.75" on the bottom. Should be able to pick it up today, and then can install after I get the stringers in.


Anyone have an idea on what the best way to mount steel to fiberglass? My first thought would be to just lay down some puddy, and then have a few through bolts in addition to my motor mounts.
 

Mad Props

Lieutenant Commander
Joined
Jul 8, 2016
Messages
1,766
Your through bolt idea seems to be a good option... I would paint the steel first to make sure it doesn't oxidize and react with the fiberglass in any way. Then i would probably lay some PB between the angle and the stringers to make a bed that conforms perfectly. Then use nice big thick fender washers on the other side with nylok nuts.
 

ACon977

Senior Chief Petty Officer
Joined
Nov 21, 2017
Messages
759
Well Kelly and I called up a couple steel yards and got 2 pieces of 3" x 4" x 1/4" angle iron in 3ft sections. ~$24 each. not bad, and probably overkill but Id rather have too much strength than not enough.

Now it's down to looking back at the stringer spacing for the motor mounts. We are looking at 21" across (I had measured it before I took it all apart when I was measuring the hull, YAY for planning ahead!) So now If Im putting these in then I need to take another 1/4" off of the top and move them 1/4" out from each other in addition to the 1/8" of spacing for the extra glassing that I plan on doing.

i was hoping to use the Pylon and some features on the back of the boat, but with the extra 1/2" that I need to put in I will most likely have to think of something more clever.
 

ACon977

Senior Chief Petty Officer
Joined
Nov 21, 2017
Messages
759
Your through bolt idea seems to be a good option... I would paint the steel first to make sure it doesn't oxidize and react with the fiberglass in any way. Then i would probably lay some PB between the angle and the stringers to make a bed that conforms perfectly. Then use nice big thick fender washers on the other side with nylok nuts.

Great idea on the paint, didnt think about doing that, but these will almost certainly be getting wet, so a nice protection layer would be smart.

A bed of PB seems like the best option, good adhesion and a solid connection.

And good thought on the Nylock nuts, was planning on doing some massive washers, but if the nut doesn't stay on.. thats a bigger issue haha
 
Status
Not open for further replies.
Top