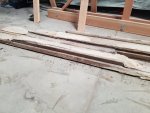
1987 Ski Centurion Tru Trac II - First Time Rebuild - Floor, Engine, Dash, etc.

Status
Not open for further replies.

ACon977

Senior Chief Petty Officer
Joined
Nov 21, 2017
Messages
759
Thanks TRH299 ! I actually have epoxy on hand from other projects so I will be sure to use that over the Poly i was gonna use for the rest of the project.
 

ACon977

Senior Chief Petty Officer
Joined
Nov 21, 2017
Messages
759
[h=2]POSTING HERE FOR REFERENCE:


Bonding studs: an alternative to bolts or screws[/h] Instead of using bolts or screws, you can bond threaded rods or studs into the substrate and attach the hardware with nuts. This variation is appropriate for many engine, motor or machine installations. Coat the base of the hardware with wax/mould release to make it removable. Although the hardware is not 'bonded' to the substrate, the epoxy still provides a bearing surface that perfectly matches and supports the base of the hardware. [h=2]1. Prepare the studs or threaded rods[/h] Do this by waxing the upper ends (above the surface) and cleaning the lower ends (below the surface).
[h=2]2. Place a nut and washer on the studs[/h] Make sure you have wet out the lower ends then push them into the epoxy filled holes. Allow the epoxy to cure thoroughly before attaching the hardware and tightening the nuts.
199x127xORG_23.png.pagespeed.ic.57tiXcbzzS.webp

Bond threaded rods or studs into the substrate as an alternative for easily removable hardware.
[h=2]Removing fasteners[/h] If you know that you will need to remove a fastener at a future date, coat the threads with wax or mould release. The purpose of this is to 'contaminate' the surface sufficiently to prevent a good bond.

If you need to remove a fastener that has been permanently bonded, apply heat to the head of the fastener with a soldering iron or propane torch. It's a good idea to use a heat shield to protect the surrounding area. Heat will travel down the fastener and will soften the epoxy it comes into contact with. After this heating, the epoxy should soften enough to allow you to back out the fastener. Allow more time for heat to travel along longer fasteners and fasteners with a larger diameter fasteners.
 

archbuilder

Vice Admiral
Joined
Sep 12, 2009
Messages
5,697
I have drilled the holes oversized as in the link TRH provided and filled them with epoxy. It works well and gives a much better pull out strength. That is actually how my sky pylon is attached to the deck. But I don't know that you really need to do that given the bolt configuration. Could you through bolt the horizontal one? If so I don't see how it would ever go anywhere without the stringer. Nice project by the way.
 

ACon977

Senior Chief Petty Officer
Joined
Nov 21, 2017
Messages
759
I have drilled the holes oversized as in the link TRH provided and filled them with epoxy. It works well and gives a much better pull out strength. That is actually how my sky pylon is attached to the deck.

Nice! Good to have two examples of this working. I was planning on doing something similar for my ski Pylon, it was also lag bolted into the stringers but I thing through bolts would make more sense.

But I don't know that you really need to do that given the bolt configuration. Could you through bolt the horizontal one? If so I don't see how it would ever go anywhere without the stringer. Nice project by the way.

The goal is to make it as waterproof as possible, so if I am putting 16 holes (4 per mount) into the stringer I need to make sure they are sealed up to avoid rot. I considered through bolts instead of the horizontal lag bolts. It seems like that would be stronger to me.

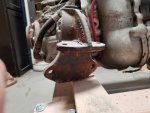
And sorry, slipped my mind to get pictures of the mounts and stringers last night. I had been putting off working on my car and of course it took me longer than I had thought once I dug into it.
 

archbuilder

Vice Admiral
Joined
Sep 12, 2009
Messages
5,697
Acon, you can over-drill the mount holes for the thru bolts, fill them with epoxy and then drill a smaller hole through it. You get a water tight, stronger connection. But again probably over kill in the strength department. I hate dealing with sealing up stringers and transoms, so I just use Seacast. Expensive, but never rots and takes the thought out of a lot of it. Looks like you are moving along nicely.
 

ACon977

Senior Chief Petty Officer
Joined
Nov 21, 2017
Messages
759
Thanks archbuilder I think the overdrill and refill is going to be the strategy. I am all about the over strength and water right. But with this being a budget rebuild (lol that 4-5k is budget :lol::facepalm:), I will always defer to swear equity over material costs.

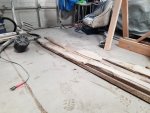
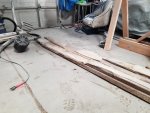
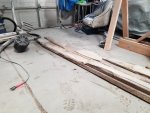
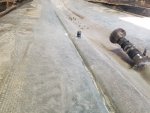
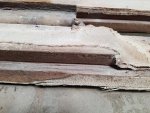
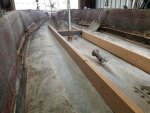
andddd I think we are at a stopping point for the grinding. I did about 6" on either side of where the stringers sat.
20180504_173259-1024x768.jpg20180504_173204-1024x768.jpg20180504_173204-1024x768.jpg


and finally. A little trick I did to help keep the fiberglass from blowing up my pant legs. Worked like a charm with electrical tape to keep it flexible. I put a piece on the inside across and then on the outside so that the sticky parts were together. Then put them on and taped around the ankles just above the top of my foot. Keep this a little loose so you can still get them on and off.
20180504_170303-1024x768.jpg
 

Attachments

  • 20180504_173204-1024x768.jpg
    20180504_173204-1024x768.jpg
    220.2 KB · Views: 0
  • 20180504_173305-1024x768.jpg
    20180504_173305-1024x768.jpg
    169.9 KB · Views: 0
  • 20180504_173242-1024x768.jpg
    20180504_173242-1024x768.jpg
    158.5 KB · Views: 0
  • 20180504_173321-1024x768.jpg
    20180504_173321-1024x768.jpg
    232.7 KB · Views: 0
  • 20180504_173325-1024x768.jpg
    20180504_173325-1024x768.jpg
    213.9 KB · Views: 0
  • 20180504_173211-1024x768.jpg
    20180504_173211-1024x768.jpg
    271.5 KB · Views: 0
  • 20180504_173237-1024x768.jpg
    20180504_173237-1024x768.jpg
    154.7 KB · Views: 0
  • 20180504_173202-1024x768.jpg
    20180504_173202-1024x768.jpg
    226.6 KB · Views: 0
  • 20180504_173250-1024x768.jpg
    20180504_173250-1024x768.jpg
    159.1 KB · Views: 0
  • 20180504_173308-1024x768.jpg
    20180504_173308-1024x768.jpg
    171.9 KB · Views: 0
  • 20180504_173207-1024x768.jpg
    20180504_173207-1024x768.jpg
    258.8 KB · Views: 0

ACon977

Senior Chief Petty Officer
Joined
Nov 21, 2017
Messages
759
And now we are making progress, cut and dry fit the new stringers. Used the pylon to have the spacing and it's a good feeling to see new things going in the boat.
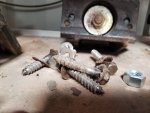
I was leaning towards plywood based on the recommendations on here. But we were at the store and the boss said it seemed like a lot of work and I should just get the 2x6. So obviously listened to her :lol:.

20180505_164030-1024x768.jpg

I still need to wipe everything down with acetone and get my puddy figured out. Also. I know you are supposed to out foam squares under the stringer every now and then. This is to avoid a hard spot as the hull flexes? Right?
 

Baylinerchuck

Commander
Joined
Jul 29, 2016
Messages
2,726
That’s correct, it’s best to have a 1/4” minimum gap under the stringers. Thickened resin is then forced in the gap to properly bed the stringer. I used 1/4” chop strand in my thickened resin for strength and to prevent it from shrinking or cracking.
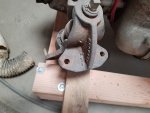
BTW, kiln dried dimensional lumber is fine to use. I just prefer plywood. The wood is just a core. The real strength comes when it’s fiberglassed and properly bonded to the hull. My boat had dimensional lumber in one place, the motor mounts.
 

kcassells

Fleet Admiral
Joined
Oct 16, 2012
Messages
8,715
I highly recommend you wear boots and socks! :D
Kickin some butt there AC!

fetch
 

ACon977

Senior Chief Petty Officer
Joined
Nov 21, 2017
Messages
759
That’s correct, it’s best to have a 1/4” minimum gap under the stringers. Thickened resin is then forced in the gap to properly bed the stringer. I used 1/4” chop strand in my thickened resin for strength and to prevent it from shrinking or cracking.
got it. That was my first thought but just wanted to confirm. I got foam from HD and it's about a 1/2" thick. I plan on just trying to cut it to 1/4 x 1/2 x 1/2 and then push it into the puddy. I saw a lot of people using chopped strand and cabosil in their puddy. Chopped for strength, cabosil for thickness.

BTW, kiln dried dimensional lumber is fine to use. I just prefer plywood. The wood is just a core. The real strength comes when it’s fiberglassed and properly bonded to the hull. My boat had dimensional lumber in one place, the motor mounts.

Like I said, I was leaning towards ply, but I am glad to have the stingers already cut and in the boat without too much prep work. And my fiberglass place is closed on the weekend :grumpy: so I'll have to wait until monday to start anything new.
 

ACon977

Senior Chief Petty Officer
Joined
Nov 21, 2017
Messages
759
I highly recommend you wear boots and socks! :D
Kickin some butt there AC!

fetch

:laugh: haha KC. I have definitely been wearing boots! Just figured it wouldn't make sense to post a picture of my old boots with the soles falling off
 

ACon977

Senior Chief Petty Officer
Joined
Nov 21, 2017
Messages
759
I just figured I had to do something when I noticed my inner thigh starting to get itchy. Had the whole cuff wide open and going straight up the leg. Just wanted to try and help someone else to avoid that
 

chevymaher

Commander
Joined
Mar 29, 2017
Messages
2,921
I was a viking I was in a sweat shirt and pants in 90 degree weather last year. I just itched and liked it. LOL
 

kcassells

Fleet Admiral
Joined
Oct 16, 2012
Messages
8,715
That glass grinding stuff can really get to your skin. It's really a good idea you have to beat the itch.
 

ACon977

Senior Chief Petty Officer
Joined
Nov 21, 2017
Messages
759
Thanks Baylinerchuck that looks like it could be useful on the wrists, I noticed a little dust getting in around the elastic cuffs.

chevymaher LOL Im sure that felt greatttt. I was sweating in 60*F, cant imagine in a sweat suit at 90! :yield:
 

ACon977

Senior Chief Petty Officer
Joined
Nov 21, 2017
Messages
759
Sorry guys, no updates recently. Work picked up and the fiberglass store I have near my house not only closes at 5 but is only open on weekdays. :frusty: Hoping to get out early to stop by today or tomorrow and then the progress can continue!
 

Timr71

Petty Officer 1st Class
Joined
Jul 19, 2012
Messages
326
I was wondering what was going on. I'm needing to get my own boat ready for the water here in the next week.
 

ACon977

Senior Chief Petty Officer
Joined
Nov 21, 2017
Messages
759
I saw your updated profile picture Timr71 and figured that meant you were already out on the water! I was pretty jealous.
 

Timr71

Petty Officer 1st Class
Joined
Jul 19, 2012
Messages
326
Unfortunately, that picture is from the end of last season. I'm ready to tear it up now though. It hit 92 here yesterday. Tied the record high set back in 1998.
 
Status
Not open for further replies.
Top