1987 Ski Centurion Tru Trac II - First Time Rebuild - Floor, Engine, Dash, etc.

Status
Not open for further replies.

ACon977

Senior Chief Petty Officer
Joined
Nov 21, 2017
Messages
759
Well that'll be you soon enough! That is an awesome photo, btw. We had a week of 80s here in Colorado, but then it went and rained at 50F for the past 3-4 days. Either way, I still have plenty of time to let the water warm up before we are ready lol
 

mickyryan

Rear Admiral
Joined
Apr 18, 2016
Messages
4,214
i use gold bond foot powder "blue bottle" doller tree has it non name brand as well .and rub it all over before i grind , no clue about this itching you folks speak of the goldbond feels cold to skin and closes pores and the baby powder keeps the glass from getting in , but alas i have finally spilled my sekrets!
 

ACon977

Senior Chief Petty Officer
Joined
Nov 21, 2017
Messages
759
Haha love getting all the well kept secrets after the 4 days of grinding. Great idea mickyryan! I like the combination of closed pores and cover, very clevar. In the end, I didnt really mind it too much, The most annoying part was the dust and how to clean it up afterwards. But live and learn, I think I will make a "tent" and funnel it all into a pillow case or sheet when I grid down the walls to attach the new floor.
 

ACon977

Senior Chief Petty Officer
Joined
Nov 21, 2017
Messages
759
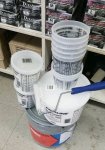
AND without further ado, we have fiberglass supplies! Current materials on hand for the project. I plan on doing some test runs on some scrap lumber so that I don't make a mess of the puddy or mistime the cure or whatnot. I will need more of resin and glass but hopefully the rest will be adequate
Snapchat-183100575.jpg

5 gal - Polyester Resin (Impact grade) - $ 171
** this was the strongest multi dimension resin they had, their single plane resin was $161 but I know how dynamic the forces on a boat were so I figured I would go with the multidimensional
10 yds - 10oz cloth - $ 120
10 yds - 1.5oz CSM - $ 48.5
8 oz - PlastiSet Catalyst - $ 8
1 gal - Resothix (cabosil, or what the guy said was close) - $ 18.5
2 qts - 1/2" Chopped fibers - $ 14
1 - Catalyst dispenser - $ 7
Pint and quart cups - $6
Taxes - $ 31

Total $ 434.5

Overall it seemed like a good haul for a decent price (glad i didnt have to ship), I will likely need more Resin, Catalyst, Cloth, and CSM. But my buddy redid his floor and I am hoping to get some of his extra cloth and CSM. I have chip brushes and whatnot. If there is anything I overlooked I would appreciate the comment at this point!


ALSO...
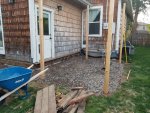
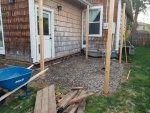
Since I didnt have fiberglass and was at a standing point on the boat, the past few weeks Kelly and I have been slowly building a patio at the house. 2 weekends ago was getting sand and gravel all over Denver with a rented UHaul, and then dirt work (mostly Kelly when I was at work), putting in the posts, and leveling the base. Since I will be traveling this weekend we decided to get the gravel in and leveled. Below is the progress we had this week/weekend.
20180515_193329.jpg

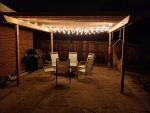
This was one I had built at my previous house, no flagstone this time, but hoping for the same pergola, lights, speakers, etc.
20170802_213043.jpg
 

Attachments

  • 20180515_193329.jpg
    20180515_193329.jpg
    1.4 MB · Views: 0
  • Snapchat-2147352241.jpg
    Snapchat-2147352241.jpg
    1.5 MB · Views: 0

Timr71

Petty Officer 1st Class
Joined
Jul 19, 2012
Messages
326
Hopefully, you'll be skiing soon. I'm sure it's not this way, but this is how I imagine early skiing in Colorado. See the swim platform pushing ice out of the way. BTW, this video was shot in Alaska.
 

ACon977

Senior Chief Petty Officer
Joined
Nov 21, 2017
Messages
759
Opening day on the lake was April 1st! Its actually pretty warm in Denver, I've had the opportunity to ski a few times already this year with friends boats but just haven't been available. Mountain skiing is a little (temperature wise) different but there are a few lakes I would like to tow the boat up to and check out.

Funny story about pushing ice out of the way before skiing, back in Michigan we did a polar ski where they had aluminum fishing boats pushing the ice out of the middle of the lake so that people could take sets in dry suits, it was a memorable day for sure, enjoyable? Questionable. But any day on the lake is a good day. And dry suits make anything doable.
 

ACon977

Senior Chief Petty Officer
Joined
Nov 21, 2017
Messages
759
Alright everyone, sorry for the delay, work has been crazy and I have done a bit of traveling for work and personal recently. BUT long weekend means a full 3 days to get stuff done! Plan on practicing with bedding old scrap lumber I have, then practice waterproofing with CSM and doing Layups with my 10oz cloth.

Does anyone have any comments on my order I had posted? Good prices? Bad prices? They seem to be pretty average to me. I know I will need more resin and catalyst, and probably more glass, but since its local, I figured I can stop by to get more without having a ton of it on hand.

5 gal - Polyester Resin (Impact grade) - $ 171
** this was the strongest multi dimension resin they had, their single plane resin was $161 but I know how dynamic the forces on a boat were so I figured I would go with the multidimensional
10 yds - 10oz cloth - $ 120
10 yds - 1.5oz CSM - $ 48.5
8 oz - PlastiSet Catalyst - $ 8
1 gal - Resothix (cabosil, or what the guy said was close) - $ 18.5
2 qts - 1/2" Chopped fibers - $ 14
1 - Catalyst dispenser - $ 7
Pint and quart cups - $6
Taxes - $ 31

Total $ 434.5
 

mickyryan

Rear Admiral
Joined
Apr 18, 2016
Messages
4,214
not sure but i doubt the resin will be enough :) then again i have never used 10 oz cloth so not sure how much resin it sucks up , i usually use 17 oz biax think im sitting at 25 gallons of resin for my boat thus far its a 21 footer and granted i replaced almost every piece of wood in top cap and bottom so ...
 

AShipShow

Lieutenant Commander
Joined
Jul 8, 2016
Messages
1,792
I can verify 10oz doesn't use much resin at all... literally just finished covering my new floor with it ...

that being said, its substantially thinner than 1708... I can't see 10oz providing much strength, it would highly recommend you use 1708 for transom, stringers , and tabbing the deck and any other structural items
 

Baylinerchuck

Commander
Joined
Jul 29, 2016
Messages
2,726
If you’re not using the 1708, just make sure you use CSM first before you lay the cloth. The beauty in the 1708 is the CSM is already stitched to the biax so you can glass in one shot. Every layer should be done this way when using polyester resins for proper bond and strength.
 

mickyryan

Rear Admiral
Joined
Apr 18, 2016
Messages
4,214
If you’re not using the 1708, just make sure you use CSM first before you lay the cloth. The beauty in the 1708 is the CSM is already stitched to the biax so you can glass in one shot. Every layer should be done this way when using polyester resins for proper bond and strength.

lets not forget the real beauty in bi axle is strength :)
 

AShipShow

Lieutenant Commander
Joined
Jul 8, 2016
Messages
1,792
And the even realer beauty in its ability to conform to just about any shape.
 

ACon977

Senior Chief Petty Officer
Joined
Nov 21, 2017
Messages
759
Thanks guys! I definitely am going to need some more resin since I'm doing everything possible in the boat and want to make sure that everything is properly glassed for maximum strength. Looking around the glass store I didn't see any 1708 which was surprising but I certinaly plan on doing a layer of CSM and then my 10 oz cloth. Maybe even 2 layers of cloth to make sure.

I spent some time over the long weekend practicing making PB and working with the CSM that my buddy had extra of. It was a steep learning curve. Certainly glad that I didn't jump into the actual stringers right away.

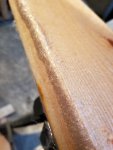
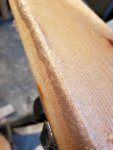
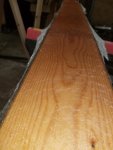
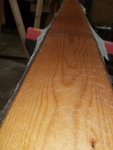
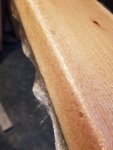
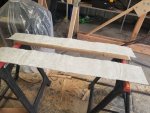
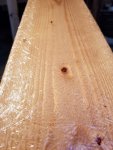
But after some practice, I got on the stringers and got a layer of some thick CSM (not sure on the oz. But it's much thicker than what I bought) I wanted to be sure to have some extra strength and waterproofing. The timing of wrapping around the boards took some time and so I had to grind a few bubbles this afternoon. But I was glad by how quickly I picked it up.

20180528_185715-1024x1365.jpg

It got too cold on monday for me to glass much more. I want to put a layer on the other side of the stringers and then get the motor mount boards attached to the main stringers. Then measure out the motor mount holes and prep them for the lag screws.
 

Attachments

  • 20180528_185715-1024x1365.jpg
    20180528_185715-1024x1365.jpg
    223.2 KB · Views: 1
  • 20180526_150848-1024x1365.jpg
    20180526_150848-1024x1365.jpg
    244.1 KB · Views: 0
  • 20180526_150848-1024x1365.jpg
    20180526_150848-1024x1365.jpg
    244.1 KB · Views: 1
  • 20180528_185718-1024x1365.jpg
    20180528_185718-1024x1365.jpg
    224.8 KB · Views: 1
  • 20180526_152017-1365x1024.jpg
    20180526_152017-1365x1024.jpg
    425.2 KB · Views: 1
  • 20180528_185726-1024x1365.jpg
    20180528_185726-1024x1365.jpg
    316.9 KB · Views: 2

AShipShow

Lieutenant Commander
Joined
Jul 8, 2016
Messages
1,792
Agreed, looks good to me tho! CSM seems stiff and hard to manage, but once the styrene binder dissolves in the resin, it actually conforms to shaps really well. Its really nice to work with. Downside tho is it uses ALOT of resin.
 

ACon977

Senior Chief Petty Officer
Joined
Nov 21, 2017
Messages
759
Looking good AC. Practice was a good idea.

Thanks! I was a bit discouraged when I first tried and messed it up pretty bad, the roller was what I had got from a buddy and it didnt roll very well. Seeing as that is its only job.... not super helpful lol

but as you can see in the pictures, once I got the hang of it it went pretty well. Just the one bubble spot where I did the full top face and then had to mix some more resin to do the sides. aaaaand it had started setting up, so no matter how much I pushed, it didnt want to conform. No big deal though!

Agreed, looks good to me tho! CSM seems stiff and hard to manage, but once the styrene binder dissolves in the resin, it actually conforms to shaps really well. Its really nice to work with. Downside tho is it uses ALOT of resin.

Thanks! Doing the faces of the board, once I threw out the old roller and used the new one I bought, was a breeze. Just takes a while to let the resin sink in and break up that binder. then its just the fibers floating in the resin which bent very nicely around the boards. The CSM that my friend had left over was HEAVY, probably 2x or more what I bought, so it was really thirsty. The timing of letting it set up was a bit touchy, but I had a better feeling for it after a little work. Saturday was 95F and I noticed the resin set up a lot faster than it did at 70F on Friday evening when I did my scrap practice.

I plan on doing the other side of the stringers, get that 100% coverage, and then PB and screw the motor mount extension board to them. cut to match the profile of the boat, and then PB them to the hull.

My question is, would It make sense to put them in 100% and then figure out the through holes for my Ski Pylon and motor mounts? or try to pre drill them? My fear is that i could be off by 1/8" and have to either drill new holes, or try to force it to fit. Which, anytime you try to force something, you end up breaking something else down the road. But it would be easiest to get them drilled before install.... I just don't quite trust my measuring enough lol
 

AShipShow

Lieutenant Commander
Joined
Jul 8, 2016
Messages
1,792
Are you planning to only put CSM on the stringers? CSM provides good waterproofing and a way of transfering loads from one layer to another, but on its own has very little strength. Your stringers should be covered in at least 2 layers of 1708.

As far as the holes... I would drill them once the stringers are installed and then reseal the holes with resin.
 

ACon977

Senior Chief Petty Officer
Joined
Nov 21, 2017
Messages
759
Mad Props CSM is not gonna cut it, I want to have these stringers to be harder than hard. I have 10oz cloth as well that I plan on doing 2 layers of.

My current thought:
1. seal all the stringers with CSM before install.
2. PB and foam squares under the stringers during install. Using the Pylon for dimension and vertical (I will probably put washers between to leave space for the extra glass. Any recommendations?)
3. Tab the corners with CSM
4. Cap the stringers with CSM
5. overlay the corners with 10oz cloth
6. overlay the cap of stringers with 10oz
7. 2nd layer of 10oz cloth (extra long to overlay the 1st layer)

We had already talked about how to seal and do the lag/through holes a few pages ago. I just was planning on measuring and drilling based off the old holes in the stringers; but looking at it yesterday, I thought it would make more sense to do after they are already installed to insure the holes are in the right place. .
 
Status
Not open for further replies.
Top