1987 Power Play XLT-185 - floors, stringers, and upholstery

todhunter

Canoeist
Joined
Sep 15, 2020
Messages
1,308
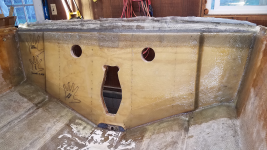
I was able to get the transom fully tabbed in today (except for the area around the drain). I piped hairy PB around the border, smoothed it out, then laid 2 layers of 1708 over the PB, wet-on-wet-on-wet. Again, I pre-wet the back of all my 1708 on a sheet of plastic before laying it down. I mixed my resin at 1.0% and had plenty of time to work with it. This was my first experience glassing inside the boat - a little different than glassing flat on a table. I almost managed to knock over a cup of resin in the boat, but just barely saved it. I did spill a 32 oz cup of acetone on my table in the garage...what a mess, but it evaporated quickly. I also melted part of my Snap-On screwdriver handle by setting it in the cup of acetone...oops. Thankfully the bow of the boat has a piece of decking over the fuel tank that I am not replacing, so I did have a flat spot to stage things. All in all, a very productive day.

Tomorrow I'm going to work on the drain, and I'll trim the overhanging glass at the top of the transom. I think I'm going to smooth out a few areas in the keyhole and exhaust holes with PB also.
1.png
 

todhunter

Canoeist
Joined
Sep 15, 2020
Messages
1,308
Today I trimmed the overhanging glass at the top edge of the transom then installed my garboard drain. I used 5200 and SS screws to attach it to the hull, added a piece of 3/4" PVC, then filled the area under the transom with PB and laid a piece of 1708 over it. Today was the first time I experienced heat from one layup kicking off the next layup fast. It took a good amount of PB to fill that void, and not long after laying the 1708 I noticed it was all starting to kick. The PB under the glass turned brown as it heated up...hope that's OK. Now that I'm done with the transom, I got back on mocking up the two long stringers this evening, and this is where I quit.

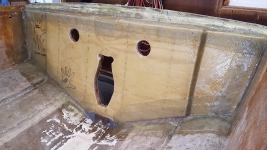
The finished transom. If you look at the garboard drain area, you can see the middle of it is brown because the resin was kicking off.
1.png


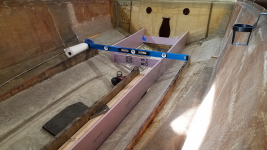
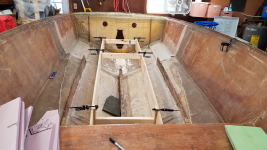
Stringer mock-up with foam board. I left the two smaller outer stringers in place for now and am using them to set the height of the new inner ones. After I have the inner stringers in place, I'll cut out the three remaining stringers and replace them with new ones.
2.png
 

todhunter

Canoeist
Joined
Sep 15, 2020
Messages
1,308
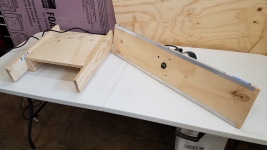
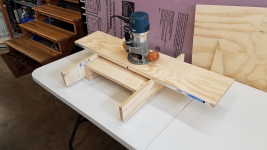
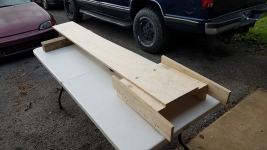
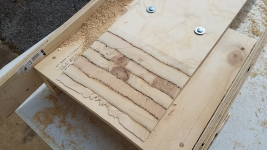
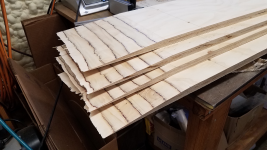
Today I officially got started on the stringers. I started by building a scarf joint fixture for my router by copying this guy's video - it worked out pretty good. I used 3/4" plywood and I put some 1/16" aluminum angle on the edges of my router board so that it would slide against the plywood guides on the fixture. I'm using a 1" diameter straight cut router bit. My scarf joints are 8.5" long on a 3/4" sheet of plywood...pretty much 12:1. Next, I cut out some 10" wide pieces of plywood and used the fixture to make the scarf joints on one end of each board. These will get put together with one layer of CSM and some polyester resin to form the full length stringers.

My scarf joint fixture
1.png

2.png


One stringer bolted to the fixture, ready to be scarfed.
3.png


One board scarfed.
4.png


Four boards scarfed.
5.png
 

tpenfield

Moderator
Staff member
Joined
Jul 18, 2011
Messages
18,040
Interesting . . . We have not seen such creativity all that often . . . usually folks just double up the wood at the joint area. It will be interesting to see how that works out (y)
 

buxmj

Petty Officer 1st Class
Joined
Jun 9, 2018
Messages
294
Looking great Tod! I think it is funny I am finishing the deck before doing the transom and you are doing the opposite at almost the exact same time. My deck doesn't touch the transom so that is why I am doing it this way.

Keep the pics and updates coming!

Buck.
 

todhunter

Canoeist
Joined
Sep 15, 2020
Messages
1,308
Interesting . . . We have not seen such creativity all that often . . . usually folks just double up the wood at the joint area. It will be interesting to see how that works out (y)
I'm just copying what @PC on the Bayou did, and a video I found on YouTube - don't give me the credit for the creativity.

Looking great Tod! I think it is funny I am finishing the deck before doing the transom and you are doing the opposite at almost the exact same time. My deck doesn't touch the transom so that is why I am doing it this way.

Keep the pics and updates coming!

Buck.
Thanks, Buck. Yeah, we are on a similar mission but attacking it from different angles. I appreciate your thread on your restoration, and all the other active members on this forum as well.
 

todhunter

Canoeist
Joined
Sep 15, 2020
Messages
1,308
I laminated my stringers together today.

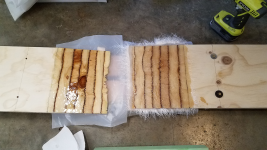
I started by wetting out both surfaces of the scarf joint then laid one layer of 1.5 CSM and wet it out.
1.png


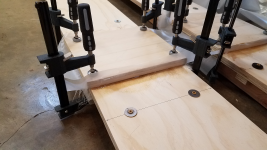
I screwed both sides of the joint down to a backer board so the two pieces couldn't spread apart, then clamped it between two small pieces of plywood to apply even pressure. I used a layer of plastic on both sides of the board so the small plywood would release.
2.png

3.png


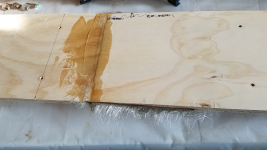
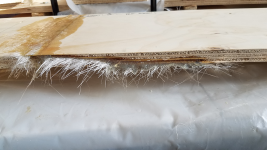
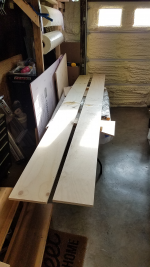
After curing I removed the clamps, small pieces of plywood, screws, and plastic and this is what I'm left with - two 3/4" plywood boards that are now 10" tall by ~12 ft long. After it fully hardens I'll come back through and clean up the edges then cut out my stringers.
4.png

5.png

6.png
 

todhunter

Canoeist
Joined
Sep 15, 2020
Messages
1,308
More stringer progress.

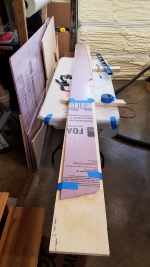
I cleaned up the edges around the scarf joints then laid on my foam template, traced it, and cut it out. The picture below shows the scarf joint after cutting the stringer's shape out. I did not cut the top edge of the stringers yet, but I did trace on where I expect them to be. I'll trim them to be level with the outer stringers once these are bedded in place.
1.png

2.png


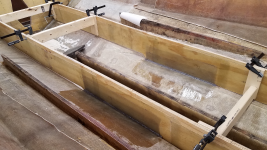
Next I mocked up everything and made a few adjustments. I made some simple spacers that can be clamped in place at specific points to hold the desired shape and to keep the stringers vertical while bedding.
3.png


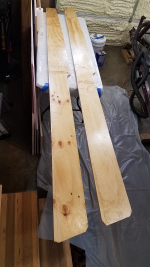
Next I pulled the stringers back out, cut out pieces of 1708 to lay on the faces while they are on the bench, and then I filled holes/voids and put a coat of resin on the raw wood on one side.
4.png

5.png


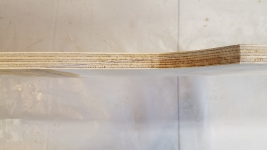
One thing I will mention - I was strategic about how I chose the wood for the stringers. Over a few weeks, one of my 3/4" sheets of plywood developed a very slight bow to it. I made sure to cut the boards out for the stringers so that the bow in the wood would work to my favor, as the stringers are straight in the bilge but curve inward as they move towards the bow.
 

todhunter

Canoeist
Joined
Sep 15, 2020
Messages
1,308
I got one layer of 1708 laid on both sides of the two stringers today. Tomorrow I'll hopefully start bedding and tabbing these babies in.

1.png
 

todhunter

Canoeist
Joined
Sep 15, 2020
Messages
1,308
Today I went and picked up some ACX 1/2" plywood for my deck and also some mahogany for making cleats to hold the decking to the stringers.

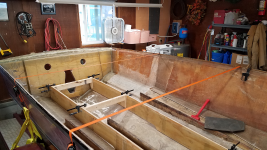
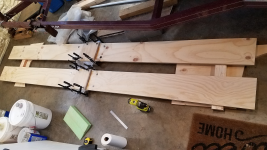
Next I set the stringers in the boat and checked my hull width (I had previously measured width every foot from the transom after removing the cap) - it had splayed open by about 3/8" at the worst, so I used some ratchet straps to get the boat back in shape before starting to bed/tab the stringers.
2.png


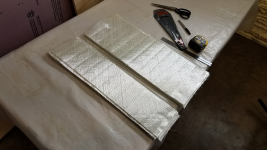
Next I cut 1708 for tabbing - 6"x25" and 10"x25". I've found that a 25" length (half the width of my roll) is fairly easy to handle, so I plan to do most of it in those shorter lengths.
1.png


I was able to do a wet layup to put down PB and both layers of tabbing in a section about halfway down the stringers. I'm taking tomorrow off from working on the boat, but Thursday I plan to do more tabbing.
3.png
 

PC on the Bayou

Petty Officer 1st Class
Joined
Apr 27, 2020
Messages
234
Looking great. Using the jig and router sure makes doing the scarfs easy. I like how you used the screws to align everything so they don't move. I found that parchment paper worked really well, as well, to get the resin to release.

Nice Work!!
 

buxmj

Petty Officer 1st Class
Joined
Jun 9, 2018
Messages
294
Awesome work Tod! Even though my project is probably half of your project I used shorter strips also. When I tabbed the top of the deck to the hull I used different length strips for the 2 layers so the seams wouldn't end up on top of each other.
 

Reserector_

Chief Petty Officer" & 2021 Splash of the Year Win
Joined
Oct 15, 2019
Messages
607
I used ratchet straps to pull my hull to dimension across the beam, also. I was meticulous to keep it at the recorded widths, but in the end, it still came out a bit wide when I released the tension.
So if yours has any amount of tension holding the sides, the sides may be curving like a bow until they start to pull it together at the chine, which is where the floor will join.
Maybe you took measurements down near the chine, but if not, you may be wise to pull your beam a little extra to allow for the spring-back. Thinking maybe a half inch? That's about what mine needed.
The cap still went on, but it was a bit of a struggle.
Food for thought, in case you didn't have enough already.
 

todhunter

Canoeist
Joined
Sep 15, 2020
Messages
1,308
Looking great. Using the jig and router sure makes doing the scarfs easy. I like how you used the screws to align everything so they don't move. I found that parchment paper worked really well, as well, to get the resin to release.

Nice Work!!
Thanks! Yes, your thread was inspiration and the jig worked great.

Awesome work Tod! Even though my project is probably half of your project I used shorter strips also. When I tabbed the top of the deck to the hull I used different length strips for the 2 layers so the seams wouldn't end up on top of each other.
Good idea on the strip length. Probably not a big deal for the stringers since they won't be seen, but I'll definitely make a mental note for when it is time to do the floors.

I used ratchet straps to pull my hull to dimension across the beam, also. I was meticulous to keep it at the recorded widths, but in the end, it still came out a bit wide when I released the tension.
So if yours has any amount of tension holding the sides, the sides may be curving like a bow until they start to pull it together at the chine, which is where the floor will join.
Maybe you took measurements down near the chine, but if not, you may be wise to pull your beam a little extra to allow for the spring-back. Thinking maybe a half inch? That's about what mine needed.
The cap still went on, but it was a bit of a struggle.
Food for thought, in case you didn't have enough already.
No, my measurements were at the top where the cap goes. Maybe I'll pull it in another 1/2". It would definitely spring back if I released tension now. I was even thinking about dropping the cap on with the ratchet straps in place then cutting them off, if I had to.
 
Top