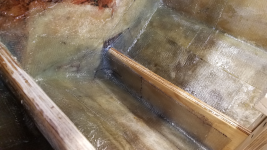
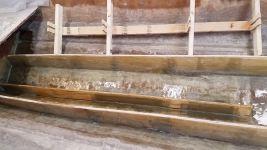
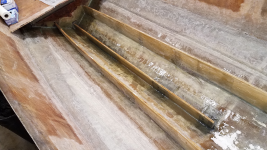
1987 Power Play XLT-185 - floors, stringers, and upholstery

todhunter

Canoeist
Joined
Sep 15, 2020
Messages
1,316
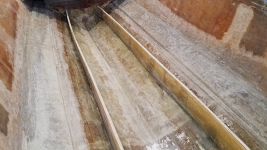
More tabbing the two stringers today. Was hoping to finish, but I underestimated the work required.

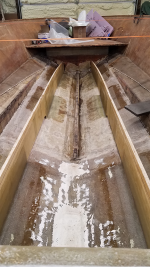
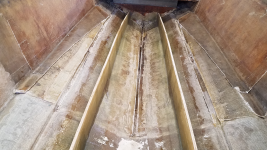
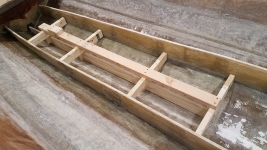
First I pulled the final brace. Looks cool with nothing holding the stringers up but the glass.
1.png


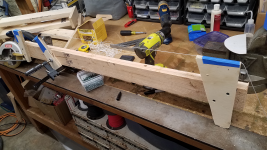
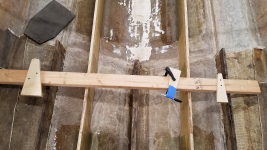
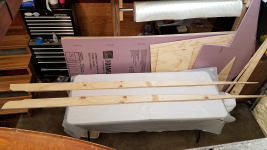
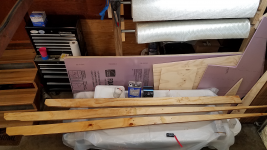
Next I made a jig to mark the height to cut the stringers to. It's just a 2x4 with some plywood feet, then I pulled a string between the feet and clamped a board with a marker to the 2x4 and aligned the tip with the string. This way the feet slide along the original stringers and the tip of the marker is at the same height, and marks the stringer.
3.png

2.png


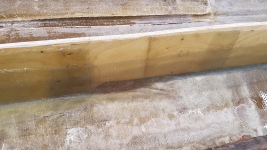
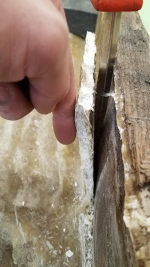
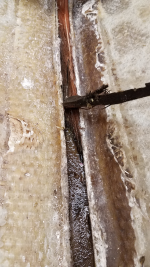
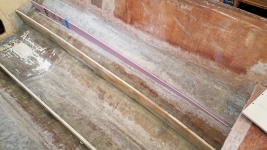
I used a jigsaw to cut the stringer height along my line. Unfortunately I didn't do a very good job keeping it straight. It's nothing a little PB can't fix though. I stuck some sand paper on my 4-ft level and sanded some of the worst spots some. Then I used a 3/8" round-over router bit to smooth the top edge of the stringers to aid in the glass going down when I cap the stringers.

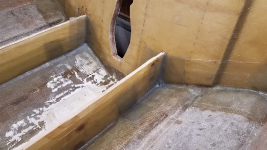
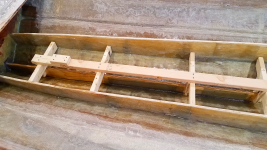
I then cut the rest of my tabbing for these two stringers out of 1708 and was able to get the back section by the transom done and another section in the middle. I have one more section in the middle to do and then a very short section near the front bulkhead. Likely to finish that tomorrow.
4.png
 

Pulse186

Cadet
Joined
Nov 3, 2019
Messages
22
Great work! and thanks for taking the time to post up all the details and pics.
 

todhunter

Canoeist
Joined
Sep 15, 2020
Messages
1,316
Great work! and thanks for taking the time to post up all the details and pics.
Thanks, and no problem.

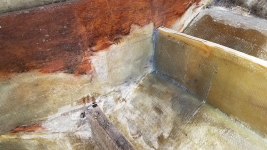
I finished tabbing in the two large stringers today. Now both have two layers of 1708 tabbing. All that tabbing and PB took a toll on my resin supply, haha. I'll be ordering another 10-15 gallons next week.

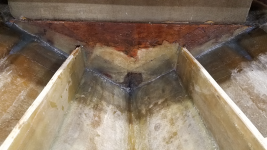
Tabbing over the "step" in the bottom of the stringer profile. I packed it with PB before laying the tabbing over it.
2.png


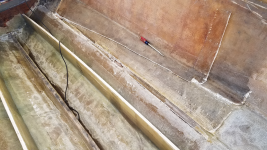
Stringers tabbed into the front bulkhead.
3.png


I will wait to cap these with 1708 until all the new stringers are in. I started tearing out the final 3 stringers today. Unfortunately that means more grinding later this week - hopefully the last of it.
4.png


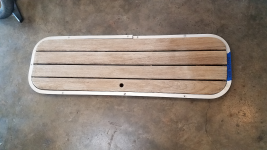
I also ordered a ski locker door and aluminum frame from eBay and it arrived today. A little sanding (or a trip through the planer) and some oil and it should look good.
1.png
 

todhunter

Canoeist
Joined
Sep 15, 2020
Messages
1,316
Are you still doing that pre plastic thing for glass?
Yes, I have been laying the 1708 mat-side-up on plastic sheeting, wetting it out, then transferring to the area on the boat where it will go. For CSM I just wet it out in place.
 

todhunter

Canoeist
Joined
Sep 15, 2020
Messages
1,316
Question for the learned folks:

My 3/8" rubber fuel line originally was run under the deck, through a bulkhead and stringer, and was foamed in place. To me this is not conducive to future maintenance, and I'm not wanting to drill holes through my stringers and bulkheads if I can help it. See below for some pictures of how it was originally ran.

Is there any reason I shouldn't just run the new fuel hose up under the gunwale with all the wiring and steering cable? It would be the easiest, most serviceable way to run it, but are there any regulations against doing this? Any mechanical reasons (vapor lock, etc.) to avoid this method?

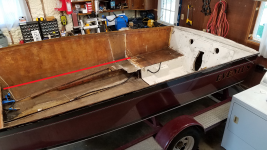
My second option would be to glass in a piece of PVC pipe along the inside of the hull on top of the deck that has an inner diameter big enough to pass the rubber fuel hose through. This could then be covered with the carpet and be mostly invisible to all but the most discerning eye. This way if the hose needed replacing, it would be as simple as pulling it out of the pipe and pushing a new one through. See the last picture below for a sketch of what I'm talking about.

Fuel tank under the bow, with the "kick panel" removed. You can see the rubber fuel line coming off the top of the tank go over the front bulkhead then under the deck.
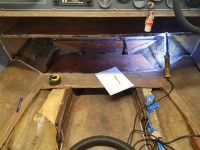
3.png


With the deck and rotten stringer partially removed, you can see the original path of the fuel line - it had pour-in foam over the top of it, then it goes through a hole drilled in the rear bulkhead and through another hole in the stringer to emerge in the bilge.
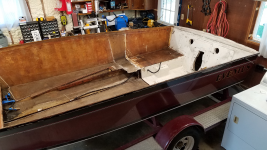
6.png


In this picture, the red line is my proposed location for the PVC pipe to pass the fuel hose through. It would be above the deck (no drilling through bulkheads/stringers required).
8.png
 

todhunter

Canoeist
Joined
Sep 15, 2020
Messages
1,316
Really? I can't ask where to source something on this forum? My other thread was deleted looking for a drop / small piece of Coosa. What's the harm?
 

todhunter

Canoeist
Joined
Sep 15, 2020
Messages
1,316
I finished getting the last of the remaining stringers out today. The center stringer fought me hard. It had 1/2" thick glass in some places, so it took a while to cut out. It was also solid mahogany while the others were just pine plywood. I started building what I hope is my last dust containment tent for my next round of grinding.

Current state - last 3 stringers removed.
3.png


Fiberglass on the center stringer - 1/2" thick!
1.png


There was water under the center stringer. Here you can see that it was solid mahogany.
2.png


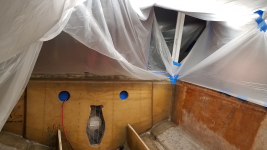
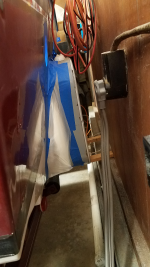
The beginning of version 3 of my grinding tent. Hopefully never have to build one of these again, lol.
4.png
 

Reserector_

Chief Petty Officer" & 2021 Splash of the Year Win
Joined
Oct 15, 2019
Messages
609
Fuel line height, fitting access, etc all matters. I sent you the regs so that you can read up and bring your system up to date. The rubber line that is there now is not rated for ethanol fuels, for example. The regs explain the type ratings to help you select the right replacement hose for modern needs.
 

todhunter

Canoeist
Joined
Sep 15, 2020
Messages
1,316
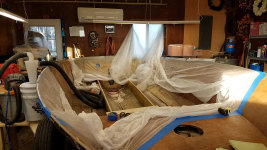
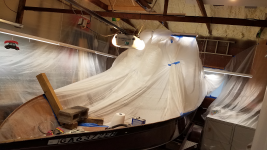
No update for almost a week - sheesh. I got so much done over Christmas break, I feel like a slacker now. Anyhow, I spent the evenings this past week getting the tent set up like I wanted. I built it so that a box fan (on low) blows air in through the keyhole and the tent is attached to a window in my garage to vent the dust. Today, I finished grinding all the tabbing for the last 3 stringers and the decking. Fingers crossed, no more grinding!

The new tent with ventilation worked great. I had one area blow the tape seam out, but I just weighted it down with some 4x4 and that seemed to work. The cross flow of air kept the suspended dust to a minimum which meant my respirator clogged up less often and my safety glasses stayed cleaner.

The grinding part sucked - it took about 6-7 hours because the glass was so thick in spots. Also - don't touch the grinding wheel with your fingers while the grinder is on. I took a big chunk out of a finger today by being careless - borderline should have gone to the doctor, but I decided to bandage it up myself. Tomorrow I'll tear down the tent, pull the boat into the driveway and rinse it, and clean the shop and pull down the other plastic sheeting.

The tent, version 3. You can see where it's taped to the window at the stern.
3.png


Inside the tent - you can see the vent window and the fan in the keyhole.
2.png


I sealed the fan (with painter's tape and plastic) to the hull.
1.png
 

todhunter

Canoeist
Joined
Sep 15, 2020
Messages
1,316
More small bits of progress:

Not pictured - I got my tabbing cut for the front bulkhead. I plan to lay it tomorrow.


Foam board templates made of the remaining stringers.
1.png


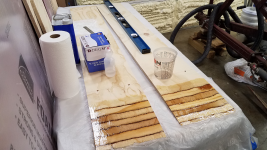
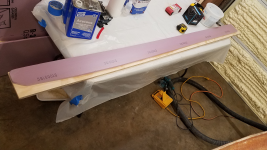
Scarf joints cut and soaking up a coat of resin for the two outer stringers. This board is 10" wide, which will be wide enough to cut both stringers out of it. The center stringer is only 94" long, so it doesn't need a scarf joint.
2.png
 

todhunter

Canoeist
Joined
Sep 15, 2020
Messages
1,316
Scarf joint bonding in-process. This board will get cut in half (long ways) to become my two outer stringers.
1.png


I also re-tabbed the front bulkhead to the hull tonight. The boat originally was only tabbed with some CSM and it was poorly done. I also ground through the tabbing in a few places while grinding the hull out, so I laid PB and two layers of 1708 wet-on-wet.
2.png
 

todhunter

Canoeist
Joined
Sep 15, 2020
Messages
1,316
More work tonight - I unclamped my scarf joint and sanded down the squeezed out resin. Didn't get a picture of that.

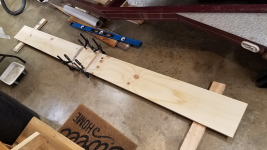
I did some tweaking on the foam template for my center stringer to get it where I wanted it, then traced it onto some 3/4" plywood and cut out the shape.
1.png


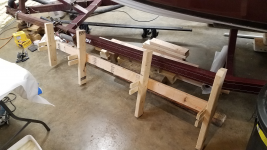
Next I used some 2x4's and some scrap 3/4" plywood to build a frame/fixture to hold the center stringer vertical when I go to bed/tab the stringer in place.
2.png

3.png
 

tpenfield

Moderator
Staff member
Joined
Jul 18, 2011
Messages
18,068
Wow . . . :oops: You are going to great lengths to hold things in place.
 

Pulse186

Cadet
Joined
Nov 3, 2019
Messages
22
In this picture, the red line is my proposed location for the PVC pipe to pass the fuel hose through. It would be above the deck (no drilling through bulkheads/stringers required).
View attachment 331215

I've never seen a fuel line run above the cockpit sole (the deck is the part you lifted off the hull). While it would be easy to service it certainly isn't a standard practice from a marine design standpoint. As Reserector mentioned I would read up on the regulations and follow them very closely.
And that is a sweet boat, I've always liked the XLT 185. It has a straight 24 degree dead rise hull and with your rebuild it will much stronger than it was originally, I'm sure you'll find it a capable little boat.
 

todhunter

Canoeist
Joined
Sep 15, 2020
Messages
1,316
Thanks Pulse - I did read the regulations and there isn't anything against it that I saw. I'll go back through them again here to make sure before I start closing anything in. I haven't made my mind up on this yet. Glad to hear your feedback on the XLT-185, also. Looking forward to seeing what it will do.

Cut the two outer stringers to shape, pulled the center stringer back out, routed the top edges of all 3 stringers, and coated one side in resin tonight. Didn't get a pic of all 3 together, but here are the two outer stringers after cutting.
1.png
 

todhunter

Canoeist
Joined
Sep 15, 2020
Messages
1,316
Finished my 2nd 5-gallon bucket of resin today while tabbing in the the center stringer.

The last 3 stringers after coating with resin. The knots suck it up so it took a few coats where the wood looked dry.
1.png


First round of tabbing is curing. I tabbed it to the front bulkhead and in 3 sections to the hull, with each section having PB and 2 layers of 1708 laid wet on wet. After it cures I'll pull the fixture and add tabbing where it's missing. The plywood had some bow to it, so I wanted to use this much fixture to straighten out the stringer.
2.png

Front of the stringer tabbed into the front bulkhead.
3.png
 
Top