1987 Power Play XLT-185 - floors, stringers, and upholstery

todhunter

Canoeist
Joined
Sep 15, 2020
Messages
1,299
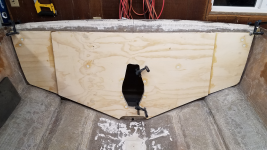
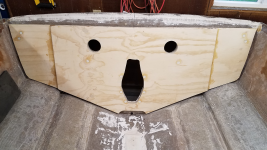
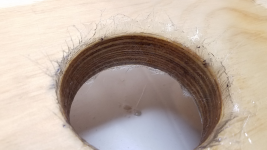
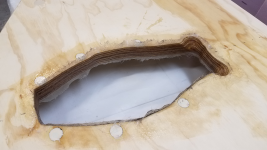
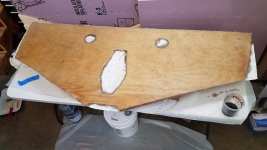
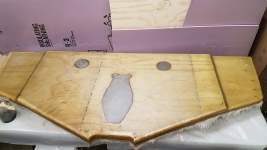
I got the keyhole cut out and finished the 2nd round of filling/sanding the PB-filled holes so they are nice and smooth. Hoping to cut out the two exhaust holes and start laying glass on the transom (laying flat on the work bench) this weekend.

20201203_201112.png
 

kcassells

Fleet Admiral
Joined
Oct 16, 2012
Messages
8,707
You can add some pb the make a bevel on those straight edges or use a planer. The glass will roll righ over in 1 pc.
Looks GREAT Tod!
 

todhunter

Canoeist
Joined
Sep 15, 2020
Messages
1,299
You can add some pb the make a bevel on those straight edges or use a planer. The glass will roll righ over in 1 pc.
Looks GREAT Tod!
Thanks. Yes, I plan to lay some PB at the edges and then go right over that with some glass. I already broke the edge there with a 1/4" round router bit.

I'm planning to do a layer of CSM on the back face and build layers of 1708 on the front face to get the thickness where it needs to be. Will I be OK not glassing around the edges and just letting the tabbing/PB during the install into the hull seal that up?
 

Reserector_

Chief Petty Officer" & 2021 Splash of the Year Win
Joined
Oct 15, 2019
Messages
602
Pre-soak the edges with resin and give it time to drink it in. It might take a couple of coats to seal it. Mix a batch of resin, hit the edges, then wet the faces, then go back to the edges. Do this before you lay the glass down.
It might be wise to round the bottom edge and let a layer of the CSM wrap around to seal the bottom. That way you know for sure that the bottom edges are strongly sealed. Sides are not as critical because water won't lay there.
CSM your keyhole and exhaust holes, also. Easier to do while it is flat. Otherwise some of it will be "overhead".
 
Last edited:

todhunter

Canoeist
Joined
Sep 15, 2020
Messages
1,299
Thanks for the tips guys. I made some more progress today. I got the exhaust holes cut and I took your advice, @Reserector_ and glassed the inside of the exhaust holes and keyhole first. I had originally planned to do this when in the boat. After that cured, I trimmed the overhang and put down one layer of CSM on the back face, let it cure, then trimmed the overhang. I also added the steering arm reliefs to the keyhole before glassing.

My plan for tomorrow is to finish encapsulating the transom by glassing the front face, and to also build up the thickness to be at least close to where I think it should be (should be 2-3 layers of 1708).

A few more questions:

1. All my resin is laminating resin. I have PVA for when I want a full cure. Realistically, how long can I go before I lay the next layer without having to sand? Days? Weeks? What happens if I don't put PVA over it and I wait a month to lay more glass? Does it eventually just cure fully on its own?

2. For those using PVA...how do you prefer to remove it? How do you know it's all gone? I imagine leaving some PVA behind and laminating over it will not be a good thing. I just want to make sure I'm doing it right.

3. I routered all the edges along the front face of the transom so the glass can easily wrap around the edges. But my plan is to just use 1708 and not use CSM as my first layer, since the 1708 already has a mat on the back side. Am I asking for trouble by planning to wrap the 1708 around the edges of the transom (especially the corners and the drain plug area)? I used a 3/8" radius router bit. If this is going to be an issue, I could always do a 2-3" strip of CSM around the outside edge first and then add layers of 1708 just on the face, overlapping the CSM border. Curious for your thoughts.

Test fitting transom with exhaust holes cut.
1.png


Glassing the inside of the exhaust holes.
3.png


Glassing the inside of the keyhole.
4.png


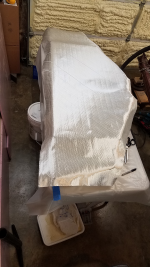
Glassing the back face of the transom (1 layer of CSM).
2.png
 

todhunter

Canoeist
Joined
Sep 15, 2020
Messages
1,299
Well, today didn't go like I planned. I started by wetting out the face and edges and then I made up some PB to fillet the edge where the smaller piece of plywood ends. Next I draped the 1708 over the face (mat side down) and began wetting it out. It fought me pretty hard to lay down around the edges, especially around the corners. I also underestimated how much resin it would drink up, so I don't think I was wetting it out enough, because there were white splotches all over it. I was starting to make progress getting the face to wet out fully with my fin roller, but by then I was ~45 minutes in, the resin was starting to kick, and the edges were not going to lay down, so I pulled the cloth off and tossed it. Needless to say my first 1708 experience was a learning experience. I'd love to hear any tips and tricks you guys may have for getting 1708 to fully wet out...I don't want to repeat what I went through today.

After failing with the 1708, I didn't want to waste the wet PB that I had laid, so I decided to tear some strips of CSM and lay them down over the PB to try and smooth it out - that seemed to work OK. I went ahead and laid CSM strips all the way around the border of the transom too. My new plan is to let that cure, then lay 1708 down on the face that is ~1" undersized, this way I'm not trying to get the 1708 to do all the funky bends. Since I'm not laying the 1708 on wet, I'm not sure if I should cure the CSM and sand it so it's smooth before laying the 1708. What do you guys think?

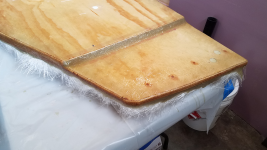
This morning after laying the 1708 on, just before I started wetting it out.
1.png


My PB job at the edge of the plywood. This also has CSM over it.
2.png


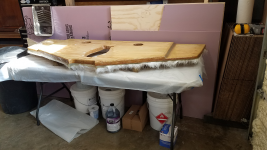
The transom as it sits right now.
3.png
 

kcassells

Fleet Admiral
Joined
Oct 16, 2012
Messages
8,707
Well, today didn't go like I planned. I started by wetting out the face and edges and then I made up some PB to fillet the edge where the smaller piece of plywood ends. Next I draped the 1708 over the face (mat side down) and began wetting it out. It fought me pretty hard to lay down around the edges, especially around the corners. I also underestimated how much resin it would drink up, so I don't think I was wetting it out enough, because there were white splotches all over it. I was starting to make progress getting the face to wet out fully with my fin roller, but by then I was ~45 minutes in, the resin was starting to kick, and the edges were not going to lay down, so I pulled the cloth off and tossed it. Needless to say my first 1708 experience was a learning experience. I'd love to hear any tips and tricks you guys may have for getting 1708 to fully wet out...I don't want to repeat what I went through today.

After failing with the 1708, I didn't want to waste the wet PB that I had laid, so I decided to tear some strips of CSM and lay them down over the PB to try and smooth it out - that seemed to work OK. I went ahead and laid CSM strips all the way around the border of the transom too. My new plan is to let that cure, then lay 1708 down on the face that is ~1" undersized, this way I'm not trying to get the 1708 to do all the funky bends. Since I'm not laying the 1708 on wet, I'm not sure if I should cure the CSM and sand it so it's smooth before laying the 1708. What do you guys think?

This morning after laying the 1708 on, just before I started wetting it out.
View attachment 330031


My PB job at the edge of the plywood. This also has CSM over it.
View attachment 330032


The transom as it sits right now.
View attachment 330033
man that blows! Couple of tricks is to keep the batches on ice and use as needed. Like I saaid I'm so glad I don't use poly.
That area could be done as you attempted but a learing curve is just that.
You may want to make smaller cuts, overlap 2-3" and progress like that until you get a feel for the timing.
All good, been their, done that. I sure know the cuss words I used ripping out the wetted glass and tossing it. We all have.
Utterwise looks good.
 

Reserector_

Chief Petty Officer" & 2021 Splash of the Year Win
Joined
Oct 15, 2019
Messages
602
The Mercruiser drawings I found said transom thickness 2". 2 1/4" max. Watch that you don't make it TOO thick. I doubt you ground off much hull thickness. What was the total thickness with the new plywood in place?

20191114_212131.jpg


I'd hate to see you lay up a ton of glass on the transom if it's not needed. If your thickness is good, you only need glass to seal it, and to strengthen the surface.
My boat originally had CSM half way up and a layer of gel coat to seal the wood. That's all. I glassed mine completely, and was approaching the 2 1/4" max. Barely had enough stud length on the lower part of the gimbal housing when I put it back together.

You already sealed the edges with CSM, so that's good. Just trim the excess off with a cutting disc on a grinder. Like a hot knife through butter.

Laminating resin on my build is still sticky in the ski locker where I plan to add carpet. A quick wash with acetone wakes it right back up, and cleans it, too. Fresh resin also softens the last layer, and that surface then cures with the new layer.
I tried sanding laminating resin once, but it was too gummy.

Don't PVA until you are done done. Only then will you use it on surfaces that won't get anything else. PVA, and then wash it down with water and a brush. Hose it off. You can really only do that when the glass work is finished.
You might do the floor, or inside of a compartment or something. Few areas, if any, will be left as bare resin.
Areas that get foamed can stay sticky.

Any time you lay glass on a surface such as the side of a stringer, keep it back from the edge that will be overlapped by tabbing. It can be close; you just don't want a frazzled edge.

Bring it all the way to the top edge, and trim it after it kicks. I used a router for that step. A grinder will take it down flush, too.
 

todhunter

Canoeist
Joined
Sep 15, 2020
Messages
1,299
What is the minimum thickness it can be? My transom ranged from 1.75" to 1.81" thick around the keyhole before I tore it out. Right now I'm around 1.52" thick. What's left of the hull around the keyhole is about 0.20" thick glass - so with PB that puts me right around where I originally was. I guess I'll just do one layer of 1708 on the face while the transom is sitting flat on the table. I can always add more in the boat if needed.

Thanks for the guidance on the PVA. But what if some sanding needs to be done between glassing layers? I know wet layups are ideal, but they aren't always feasible. Maybe I'll buy some wax additive for my resin, in case I need to cure / sand before my final layer. Yes, I agree that sanding the uncured laminating resin gums up the paper very fast.
 

Reserector_

Chief Petty Officer" & 2021 Splash of the Year Win
Joined
Oct 15, 2019
Messages
602
In the upper left corner of the Merc drawing photo that I posted it states 2 MIN. 2 1/4 MAX. That is a narrow window to hit when you get down to it.
It's good that you know what yours started out at, because you know that worked. If you hit that or a little thicker, you're golden.
I like your plan of build-up if (and where) you need it.

As for adding wax so you can sand between applications, I never did any of that, so I have no advice on that topic. I did, however, knock down the threads that stuck up out of my 1708 after it cured. Those were annoying, but nothing a quick pass with a flap disc wouldn't fix in a jiffy.
 

todhunter

Canoeist
Joined
Sep 15, 2020
Messages
1,299
Tonight went better than yesterday with the 1708. I started with a much smaller (~16" wide) piece. After cleaning with acetone I rolled out some resin on the wood, then laid the cloth mat-side-up on some plastic and wet it out. I then transferred it to the transom and further rolled it out. I was a lot more liberal with the resin this time too...maybe too liberal, as I was having to scrape the excess out. I'm not very good at calculating how much I need, so I'm going to waste a lot of resin from this first 5 gallon bucket. Hopefully the future buckets get used more accurately. Anyhow, I'm happy with the result and my confidence is back for trudging forward.

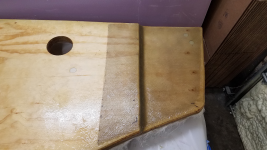
Small piece of 1708 laid on the transom.
1.png

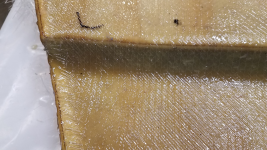
Close-up of the fillet
2.png


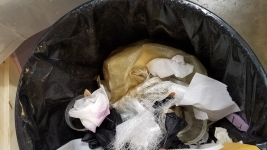
My shame from yesterday...nearly 2 yards of 1708 balled up in the trash can, lol.
3.png
 

kcassells

Fleet Admiral
Joined
Oct 16, 2012
Messages
8,707
Tonight went better than yesterday with the 1708. I started with a much smaller (~16" wide) piece. After cleaning with acetone I rolled out some resin on the wood, then laid the cloth mat-side-up on some plastic and wet it out. I then transferred it to the transom and further rolled it out. I was a lot more liberal with the resin this time too...maybe too liberal, as I was having to scrape the excess out. I'm not very good at calculating how much I need, so I'm going to waste a lot of resin from this first 5 gallon bucket. Hopefully the future buckets get used more accurately. Anyhow, I'm happy with the result and my confidence is back for trudging forward.

Small piece of 1708 laid on the transom.
View attachment 330111

Close-up of the fillet
View attachment 330112


My shame from yesterday...nearly 2 yards of 1708 balled up in the trash can, lol.
View attachment 330113
As you move along you will better understand how much to mix for the area that needs worked.
 

tpenfield

Moderator
Staff member
Joined
Jul 18, 2011
Messages
17,984
Looks good. . . and your method of wetting the surface and the underside of the cloth is the right way to go. It forces air out of the cloth and results in perfect wetting of the cloth, . . . as opposed to wetting from the outside of the cloth merely traps air and results in a bubbly lamination.
 

PC on the Bayou

Petty Officer 1st Class
Joined
Apr 27, 2020
Messages
234
Question for everyone:
I'm going to have to scarf together wood for two of my stringers. I'd rather not buy an epoxy kit just for this. Any drawbacks to gluing together my scarf joints with PB or with a layer of CSM and polyester resin? I'm going to be fully encapsulating the stringers in 1708 and polyester resin anyhow, and if it's good enough for laminating the transom, why wouldn't it be good enough for scarfing together stringers?

I would think that a good PB mix would be solid for your scarf joints. You may want to pre-coat the joint surfaces with some thinned resin first to make sure you get a good soak into the wood.

Also, when you laminate the stringers and tab them in, you'll be adding additional strength.

As you can see in my thread, I used 12:1 scarfs on my stringers; but, I opted to go ahead and spring for some epoxy for the joints.
 

todhunter

Canoeist
Joined
Sep 15, 2020
Messages
1,299
I would think that a good PB mix would be solid for your scarf joints. You may want to pre-coat the joint surfaces with some thinned resin first to make sure you get a good soak into the wood.

Also, when you laminate the stringers and tab them in, you'll be adding additional strength.

As you can see in my thread, I used 12:1 scarfs on my stringers; but, I opted to go ahead and spring for some epoxy for the joints.
Yes sir - I closely read your thread regarding the scarf joints. Once the transom is installed, this is what I'll be focusing on next!
 

kcassells

Fleet Admiral
Joined
Oct 16, 2012
Messages
8,707
Tod,d
You may want to skip the glass on the plastic and go to wet out the ply. The ply shoudl always be wetted out first and soaked in and dry.
Then wet out and lay the glass over that.
 

todhunter

Canoeist
Joined
Sep 15, 2020
Messages
1,299
I laid the rest of the first layer of 1708 on the transom tonight. In total, I did it in 3 pieces to make it more manageable. Again, I wet out the transom, wet out the mat side of the cloth on a sheet of plastic, then transferred the cloth to the transom and rolled it out. This method seems to work pretty good for me. Tomorrow I'm going to try to get a 2nd layer all the way down, again in 3 pieces. I'll stagger where the cloth get's cut so the seams of the 1st layer are covered.

Peace.
1.png


First layer of 1708 down.
2.png
 

Reserector_

Chief Petty Officer" & 2021 Splash of the Year Win
Joined
Oct 15, 2019
Messages
602
I don't know how much you need to build up, but one trick I did was to put my outer layer of 1708 on in two overlapping pieces. The large overlap in the middle gave the keyhole two layers while giving the rest of the transom one layer.
My factory transom only had CSM halfway up, and then a coat of gel coat. One layer was a vast improvement on mine. (Your mileage may vary.)
 

todhunter

Canoeist
Joined
Sep 15, 2020
Messages
1,299
I don't know how much you need to build up, but one trick I did was to put my outer layer of 1708 on in two overlapping pieces. The large overlap in the middle gave the keyhole two layers while giving the rest of the transom one layer.
My factory transom only had CSM halfway up, and then a coat of gel coat. One layer was a vast improvement on mine. (Your mileage may vary.)
Not a bad idea. I may just cut out the keyhole tonight and check thickness to see how much 1 layer of 1708 added and figure out how much more I need to add. One variable that I don't know yet is how thick the PB layer will be when I install the transom. I was guessing about 0.040" thick. Any thoughts on whether I'm close on my estimate?
 
Top