1987 Power Play XLT-185 - floors, stringers, and upholstery

Reserector_

Chief Petty Officer" & 2021 Splash of the Year Win
Joined
Oct 15, 2019
Messages
592
Clamp a scrap of plywood across the inside of the keyhole in the hull and check the "depth" from the outer hull surface to the plywood. That way, if you have any gaps that are going to hold off your plywood transom, you will be able to see and measure it.
PB might add another 0.040" like you say, but that won't be significant.
 

todhunter

Canoeist
Joined
Sep 15, 2020
Messages
1,244
I got another layer of 1708 down on the transom tonight. Before laying it down, I cut a spot out in the keyhole and measured the total thickness after the first layer of 1708 - about 1.575". That means one layer of 1708 added roughly 0.050" of thickness, so after tonight's layer, I should be about 1.625". Add 0.040" for the PB and 0.250" for the transom glass thickness, that puts me at around 1.9" thick, right about where I want to be. So, this should be the last layer of glass going onto the face of the transom. This coming weekend I'll clean up all the edges and start figuring out clamping and alignment for installing the transom. I've still got to replace my drain plug too.

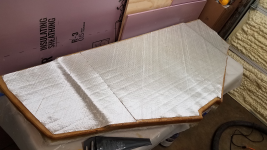
Laying out the glass. Again, I broke it up into 3 separate pieces, with the seams a mirror image of where the first layer's seams were.
1.png


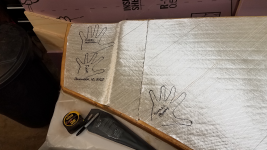
My daughter had the idea for us to trace our hand prints into the glass before I laid it.
2.png


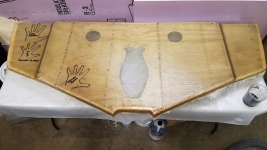
Fully wet out.
3.png
 

kcassells

Fleet Admiral
Joined
Oct 16, 2012
Messages
8,600
You animal! Looks great! I usually let the glass overhang of the edges @ 1". Not to make the edge curve transition but knowing the glass gets short/long on wet out. Ten simply use a multi tool with metal blade to trim back.
 

todhunter

Canoeist
Joined
Sep 15, 2020
Messages
1,244
Tonight I cut another spot out in the keyhole to measure in the same spot - right at 1.620 - 1.625", which is right where I want to be. Tomorrow I'll get the edges cleaned up.
 

kcassells

Fleet Admiral
Joined
Oct 16, 2012
Messages
8,600
Did you get to wrap some glass around the edges of the transom. I would recommend that. Even something like the lightweight stuff used for car patches from an auto or HD store. Wraps around edges real easy. Will seal off the edges that on bottom will be subject to water in the bilge.
 

todhunter

Canoeist
Joined
Sep 15, 2020
Messages
1,244
Did you get to wrap some glass around the edges of the transom. I would recommend that. Even something like the lightweight stuff used for car patches from an auto or HD store. Wraps around edges real easy. Will seal off the edges that on bottom will be subject to water in the bilge.
Yessir, if you look back at post #127 in this thread, I laid CSM around the border of the entire transom, in the keyhole, and in both exhaust holes before I glassed the front face. The entire transom is now fully encapsulated.
 

todhunter

Canoeist
Joined
Sep 15, 2020
Messages
1,244
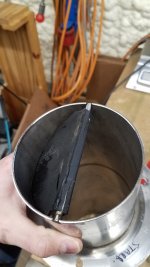
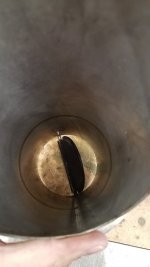
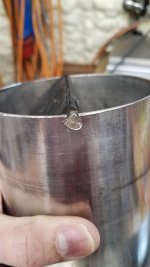
A little detour from the transom - where can I find replacement flaps for my 4" exhaust pipes? Both thru-hull pipes look like this, where half of the flap is gone. The pin that the rubber flap rides on is welded in - I am capable of cutting the tacks and re-welding myself if I can find replacement flaps. Or is there a more serviceable option besides welding the pin back in?

EDIT: Would something like this work? :


1.jpg


3.jpg


2.jpg
 
Last edited:

todhunter

Canoeist
Joined
Sep 15, 2020
Messages
1,244
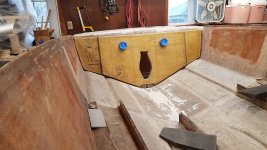
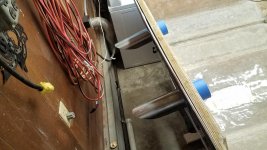
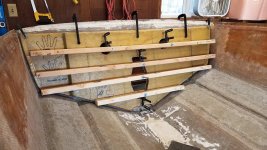
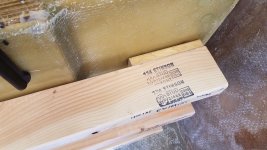
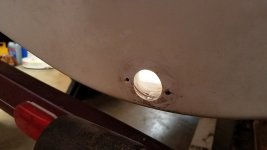
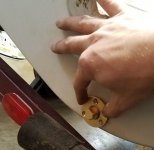
I've made a lot of progress this weekend. I got the glass trimmed out of the keyhole, exhaust holes, and all around the edges of the transom, and all the edges are sanded smooth. I am going to use my exhaust pipes to help align the transom during installation, so I taped them up to protect them from getting resin on them. I test fit the transom in the boat, laid out my clamps, and built some additional 2x4 clamps. I also got the old garboard drain off and test fit the new bronze one.

Transom laid in the boat with taped up exhaust pipes helping align everything.
1.jpg


A view to both sides of the transom showing the exhaust pipes.
2.jpg


Transom all clamped up.
4.jpg


Close-up of the extra wood on the 2x4 clamps to apply even pressure out on the edges.
5.jpg


Old garboard drain removed.
3.jpg


New garboard drain fitting test fit.
6.jpg
 

tpenfield

Moderator
Staff member
Joined
Jul 18, 2011
Messages
17,710
Your fiberglass work is outstanding. (y) :cool:

You may find the stringer glassing a bit more challenging, but keep the under side of the cloth wetted as you have been doing and let the resin soak outward through the cloth. (y)
 

todhunter

Canoeist
Joined
Sep 15, 2020
Messages
1,244
Thanks for the words, and for the tips, guys.

I spent 2 hours tonight with a plastic chisel and a can of WD-40 cleaning the silicone off the back of the transom. What a pain. I've probably got another hour worth of scraping tomorrow and then it should be good enough.
 

Reserector_

Chief Petty Officer" & 2021 Splash of the Year Win
Joined
Oct 15, 2019
Messages
592
An "eraser wheel" in your drill will take that off and leave it looking like it was never there. Eraser wheels are mostly used for removing old decals and pinstripes without hurting paint or gelcoat. 3M makes them.
 

todhunter

Canoeist
Joined
Sep 15, 2020
Messages
1,244
I tried the eraser wheel and it didn't work on the silicone so I just kept at it with the plastic chisel and WD-40 and got the majority of it off. I got all the small screw/bolt holes on the back of the transom masked and masked around the exhaust holes and keyhole. I attached plastic below them to catch any drips runs. I'm off work for 2 weeks starting tomorrow and plan to get the transom PB'd and clamped in place on Monday.

20201218_185102.jpg
 

kcassells

Fleet Admiral
Joined
Oct 16, 2012
Messages
8,600
Yea sorry... I missed the speed you worked. So those kind of penetrations you made should be lubed out with some kinda grease, wd 40, vaseline etc. for future guys doing this. You can spread any of the above on the bolts and areas where the squeeze out occurs. Usually it will wipe right off.
 

todhunter

Canoeist
Joined
Sep 15, 2020
Messages
1,244
We got home from the weekend trip earlier than expected, so I had my wife help me PB the transom to the boat this afternoon. She did great by helping make PB while I spread it and also helping with the clamping and wiping up the squeeze-out. I should be able to start laying fillets and tabbing tomorrow. Thanks @Reserector_ for the last minute tips today.

Everything laid out prior to the transom installation. I rolled out a coat of resin on the transom plywood (actually already coated in 1 layer of CSM on the back face), spread the PB onto the fiberglass with a 1/4" v-notch trowel, and clamped with a bunch of bar clamps, deep c-clamps, and 2x4 clamps.
1.png

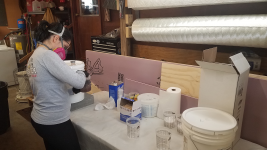
My wife mixing up the PB. She did a great job.
2.png

Transom clamped and waiting to cure.
3.png
 
Top