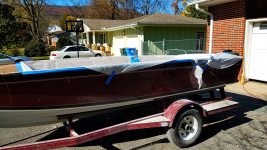
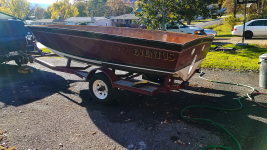
1987 Power Play XLT-185 - floors, stringers, and upholstery

Reserector_

Chief Petty Officer" & 2021 Splash of the Year Win
Joined
Oct 15, 2019
Messages
607
Let me preface this by saying that my only experience is what you've read in my thread. But you're a smart guy, and you've done your homework, so I will share my thoughts.

Transom will depend on how flat the wood fits to the hull. If it is flat, and won't have any dips or gouges in it, you could go with a couple layers of CSM. If it is full of pockets, you will be better off with PB.

Joining the two layers of plywood can be done with resin only, or one layer of CSM. You will need a way to clamp or weight it, pressing from the center out. I would suggest gluing laminating the transom before installing it, and before cutting any holes. (Better to work flat when you can.) Once it is laminated, test fit and trim, mark and cut the holes. I say that because the holes will give you places to run C-clamps through. Definitely prep the holes like PC did: https://forums.iboats.com/threads/90-maxum-2100sr-restoration-conversion.730950/page-5#post-5615352

Your tabbing schedule looks good.

Stringers can be covered with CSM in the flat before bedding them in. Leave it up from the bottom far enough not to interfere with the hull. That may mean more clearance on one side than the other. You just want it in range of the tabbing for an overlap.
If the floor will go on top, trip the CSM at the top edge. seal the edge with resin, and plan on the glue or PB to insure a seal on the top edge.
If you have a center stringer that needs to be capped, round the top edges. I would go with CSM there, as well.

On the deck I would go with more than a single layer of CSM to insure a good protective layer. One exception might t be if you use carpet glue as your redundant layer of sealant.
 

todhunter

Canoeist
Joined
Sep 15, 2020
Messages
1,308
Thanks again for the suggestions - I'll take all that into consideration.

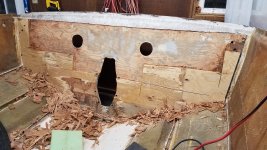
More progress tonight - I spent about 2 hours on it. I've gouged the transom a few times with the chisel - I'm guessing I'll just PB/sand those spots before installing the new wood. I tested the belt sander some along the top where I've chiseled away as much wood as I could - it seems to work really well for taking it all the way down to the glass.


20201113_195039.jpg
 

todhunter

Canoeist
Joined
Sep 15, 2020
Messages
1,308
For filling small voids on the plywood edges and faces, what do folks think about resin and glass spheres or Q-cells? This would make it more sandable than resin and Cabosil, and it will still be polyester resin based so there won't be any issue going over it with cloth and polyester resin. The only thing I've read about glass spheres/Q-cells is to not use them below the water line. This would be used on the transom and stringers before laying glass.
 

todhunter

Canoeist
Joined
Sep 15, 2020
Messages
1,308
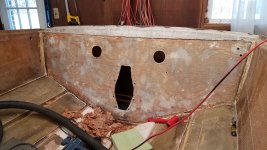
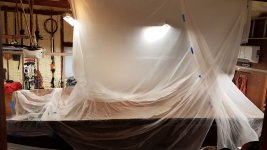
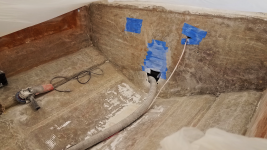
I spent this morning draping plastic to contain the dust from grinding, then spent about 2-3 hours grinding around the transom. I got all the tabbing knocked down. I spent most of my time on the actual transom though. Areas where my chisel had dug into the CSM when removing the wood, I had thought were from me having bad technique. It turns out that these areas were delaminated from the hull. My nice flat transom that I sanded yesterday with the belt sander is no longer flat because I've had to grind out so much delaminated CSM. I think that put's my plan to use Reserector's method of 4x CSM layers to glue in the transom out the window. I'll likely do a layer of CSM on the wood and then use PB to actually install the transom.

I've read a lot of threads and watched a lot of YouTube, but none of that could prepare me for the amount of fiberglass dust that grinding generates. My tenting did "ok" - containing about 90% of of the dust. The other 10% made it out of the tent and onto everything in my garage. I'm going to regroup tomorrow by tearing down my original tent and coming up with a better tent that is sealed to the boat all the way around. I'm so glad I bought the cyclone for my vacuum - it's removing nearly all the dust before the actual vacuum filter.

I also went ahead and picked up 3 sheets of 23/32" cabinet grade plywood (I think it's AC?). There are some small voids on the edge in just a few places, and a few on the "C" face, but I plan on filling those with thickened resin and sanding before use.

First iteration of the tent - worked OK but dust still got out.
20201115_095148.jpg

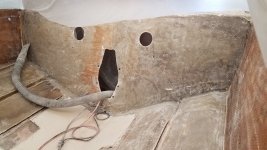
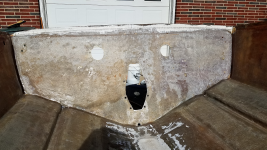
Current status of the transom. Everywhere you see the weave pattern (port side) is where the CSM was delaminated. You can still see the edge of delamination below the keyhole, as I haven't really worked the starboard side yet.
20201115_142945.jpg
 

Baylinerchuck

Commander
Joined
Jul 29, 2016
Messages
2,726
Just make sure you are using exterior grade plywood. Cabinet grade rings a bell as for being interior plywood.
 

Reserector_

Chief Petty Officer" & 2021 Splash of the Year Win
Joined
Oct 15, 2019
Messages
607
For filling small voids on the plywood edges and faces, what do folks think about resin and glass spheres or Q-cells? This would make it more sandable than resin and Cabosil, and it will still be polyester resin based so there won't be any issue going over it with cloth and polyester resin. The only thing I've read about glass spheres/Q-cells is to not use them below the water line. This would be used on the transom and stringers before laying glass.
I used glass spheres throughout because at the time I could get better pricing on that than I could fumed silica. It worked fine, and was probably as dusty as Cabosil to work with from what I've seen in videos. Wear a respirator. I do recall it sanding easily on the few places that required sanding.
I never heard anything about not using it below the waterline, and I can't imagine why. It is used for making fishing lures buoyant. Pretty sure they go underwater.
I used a tip from Boatworks Today that saved me from sanding my fillets; I prepped my tabbing, applied a section of PB, and then got my first layer of tabbing on while the PB was still workable. The brush and hard roller pushed the tabbing into it, giving it its final shape.

Great work, by the way! I agree with your gluing plan. No need to waste time trying to "level" the surface.
Regarding the plywood, the difference is the glue between the layers. Exterior grade uses a resin that is waterproof. Most of the wood in my boat was completely gone, leaving behind layers of dark brown paper thin glue from between the layers of veneer that made up the plywood. I guess termites can't stomach that stuff. LOL
 
Last edited:

todhunter

Canoeist
Joined
Sep 15, 2020
Messages
1,308
Good to know about you having a good experience with the glass spheres. The "no use below water line" was listed on US Composite's website. Good tip on applying the tabbing while the PB is still wet. I think it makes sense to do as much wet-on-wet as possible, especially with tabbing and covering fillets. I think I should be good on the plywood - Home Depot's website says it is exterior rated and specifically mentions the use of "exterior PF resin".

Version 2.0 of my tent did pretty good today - some dust got out but I can improve my "door" and I honestly think most of it got out through the keyhole and exhaust holes in the transom. I've got power and vacuum coming in through the keyhole, but I can probably block off most of it tomorrow before starting up.

I'm using cheap flap discs on my grinder from Amazon and they seem to be doing OK, though I have gone through quite a few of them. They're cheap though, and I have more on the way. Grinding on the transom is finished, other than a small stripe at the top of the hull that was too close to my tent plastic to grind on. I also got the engine mount tabbing and stringer and deck tabbing in the bilge 90% knocked down. I'm going to switch back to the multi-tool to get the rest of the tabbing in the boat cut closer to the hull, which should save some grinding time. My vacuum cyclone has filled one 5 gallon bucket with dust in the last 2 days, and I'm on my way to filling a 2nd. I'm hoping I can finish this round of grinding by the end of next weekend and start on putting the transom back together. I've left 3 stringers in place and won't pull those up until I've at least got the first 2 bedded in, so that means I'll have a 2nd round of grinding in the future. The grinding work isn't so bad, but the dust is hell. I'm ready to be done grinding...I'm sorry I ever complained about chiseling out the old transom, lol.

Apologies for the bad pic, but I just stuck my phone into the tent and snapped a picture, as I was already clean by the time I thought of getting a picture. You can see that the tabbing at the bottom of the hull is all ground out in the bilge, though.
20201116_140647.jpg
 

Reserector_

Chief Petty Officer" & 2021 Splash of the Year Win
Joined
Oct 15, 2019
Messages
607
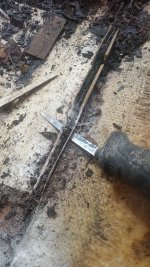
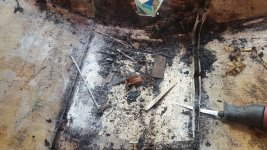
Tabbing removal tool that won't kill your blade budget. $20 HF Sawzall with long, flexible blades, like so:
 

Attachments

  • 20191005_090821.jpg
    20191005_090821.jpg
    2.9 MB · Views: 16
  • 20191005_090848.jpg
    20191005_090848.jpg
    2.6 MB · Views: 16

Baylinerchuck

Commander
Joined
Jul 29, 2016
Messages
2,726
Good to know about you having a good experience with the glass spheres. The "no use below water line" was listed on US Composite's website. Good tip on applying the tabbing while the PB is still wet. I think it makes sense to do as much wet-on-wet as possible, especially with tabbing and covering fillets.
View attachment 329111

I think they are concerned about water absorption, though I’ve not seen proof of that. I used a fairing compound on my transom that I mixed from a WOG recipe. It consists of polyester resin, phenolic micro balloons, a little cabosil, and surfacing wax. This was most certainly used below the waterline. I’m just not sure how microscopic hollow glass balls absorb water. The phenolic balloons are plastic. A lot of the guys that were big experts on this subject don’t seem to be around anymore.
 

Reserector_

Chief Petty Officer" & 2021 Splash of the Year Win
Joined
Oct 15, 2019
Messages
607
Even if the micro balloons were opened by sanding, they are microscopic. Anything beneath the tabbing is encased anyway. You can probably use sawdust as a thickener.
If you lived closer I'd invite you to come get some of my micro balloon stash. I have half a bucket left. Will last me a lifetime at my age.
 

Reserector_

Chief Petty Officer" & 2021 Splash of the Year Win
Joined
Oct 15, 2019
Messages
607
Pardon me while I beat the dead horse. LOL Found a link with more insight and some mention of Don Casey, author.
 

todhunter

Canoeist
Joined
Sep 15, 2020
Messages
1,308
Nice. Regarding the balloons, I don't think it will really matter in my case as I'm only planning on using it in places which will have fiberglass cloth laid over it, and all of it will be on the inside of the boat hull (although, some of it may technically be below the water line).

I ordered my first round of fiberglass supplies - I went with 10 gallons of laminating polyester resin (knowing I'll need more) and 50 yards of each CSM and 1708.

I'm taking tonight off grinding and will get back on it tomorrow after work.
 

todhunter

Canoeist
Joined
Sep 15, 2020
Messages
1,308
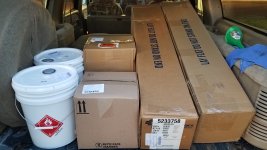
Last night I spent some time cutting more of the left over tabbing out with my multi-tool, and a little bit of time grinding. I'm planning on hitting the grinding hard this weekend. Fiberglass supplies showed up today! I got 50 yd 1.5 oz CSM, 50 yd 1708, 10 gal polyester resin, cabosil, Q-cells, chopped strand fiber, and a 2-lb pour-in foam kit. I figure it should be a good start.

20201120_170123.jpg
 

todhunter

Canoeist
Joined
Sep 15, 2020
Messages
1,308
I was able to work on the boat about 4 hours this morning. Cut more tabbing close to the hull and ground a bunch more. I think if I can get 4 hours in both tomorrow and Monday I should be done grinding for the transom and two large stringers.

Question: will the PB I use to glue the transom wood to the hull be enough to take up the lack of flatness on the transom? In the picture below, the lower port side of the transom is ground down further than the rest of the transom because of delamination. The material on the starboard side was all well adhered, so I'd prefer to not grind it down if it isn't necessary.

20201121_115701.png


This pic shows most of what I worked on today. Port side large stringer area (foreground) is ground down about 2/3 of the way to the front bulkhead, and the starboard side large stringer (background) I just started grinding down where the tabbing was really thick by the bilge bulkhead (right side of pic).
20201121_115654.png
 

Baylinerchuck

Commander
Joined
Jul 29, 2016
Messages
2,726
Yes, the thickened resin will fill all the imperfections in the transom. When you clamp it, all the excess will squeeze out around the edges.
 

tpenfield

Moderator
Staff member
Joined
Jul 18, 2011
Messages
18,039
Subscribing in . . . Looks like you are coming along nicely. Removing the cap was a good idea, although a bit of work.

I was surprised to see the transom wood in as good a shape as it was. The rot in the stringers along the engine mounts would have festered into the transom at some point. So, it is all good that you gutted the back end.
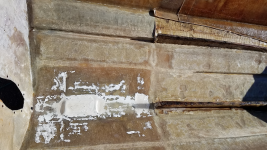
 

Reserector_

Chief Petty Officer" & 2021 Splash of the Year Win
Joined
Oct 15, 2019
Messages
607
If those holes in the transom go through (screw holes, etc.) be sure to seal them with tape on the outside to seal them before applying the PB or it will pass through and run down the the outside. I had some leak through a couple of tiny holes that I didn't thing were significant, but that was a mistake.
Mask around the keyhole and exhaust holes as well. The resin will run all the way down if it escapes, so best to protect everything below the holes, and put something on the floor to catch the drips.
I taped a walmart bag under my keyhole. Walmart bags are impervious to resin. LOL
 

todhunter

Canoeist
Joined
Sep 15, 2020
Messages
1,308
All good recommendations, Reserector. Yes, all those tiny holes go all the way through. It's crazy how many holes there are.

I was able to finish the first round of grinding yesterday and spent today cleaning up the boat and my garage. The second version of my tent did a pretty good job containing the majority of the dust, but a lot of fine dust still got out, so I spent all day moving stuff out, blowing it off, wiping it down, etc. I've still got another full day of doing this to have the garage back in order. I'll spend more time on my tent the next time I grind so that it seals even better.

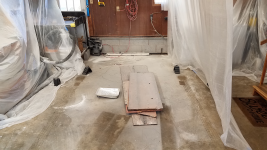
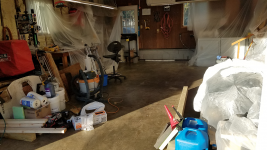
Here is the garage after pulling the boat out.
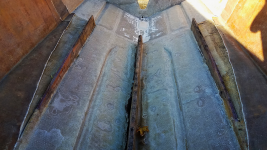
20201123_131437.png


Here is the garage this evening. I've still got a lot to do, but plan to knock it out tomorrow.
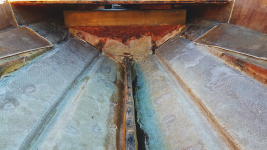
20201123_162443.png


Here is the boat after I pulled it out into the driveway. The tent is still taped on in this picture.
20201123_131202.png


I fully rinsed the trailer and the boat, inside and out to get the dust off.
20201123_151714.png


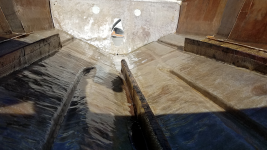
Fore looking aft, just after rinsing with water. I'm leaving the center stringer and the two outer stringer until the transom and inner stringers are installed.
20201123_141228.png


Transom:
20201123_141251.png


Bilge area:
20201123_141218.png


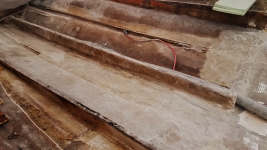
Fore looking aft - inner stringers tabbing is ground down, and the hull is ground down where new tabbing will lay.
20201123_162315.png


Aft looking forward - I'm going to lay some new glass over this bulkhead and the new inner stringers will tie into it.
20201123_162346.png
 
Top