1987 Power Play XLT-185 - floors, stringers, and upholstery

todhunter

Canoeist
Joined
Sep 15, 2020
Messages
1,308
Sweet Tod! One of the best rebuilds I've seen in a long time.
KC
Appreciate it!

Question - I think I'm only going to use one layer of 1708 to tab the ski locker floor in - anyone have an opinion on that? I figure since it's not really part of the structure, it doesn't need the 2nd layer.
 

todhunter

Canoeist
Joined
Sep 15, 2020
Messages
1,308
Ground down all the glass that was sticking up above the top edge of the stringers from the bulkhead tabbing. Also started calculating material for cleats to hold the decking down.

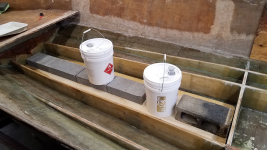
Laid a fat bead of PB on top of the center stringer and laid the ski locker floor down with some weight. I did not do cleats and am not screwing it down to the center stringer - I figure the PB, the tabbing, and the foam will be enough to hold it in place.
2.png


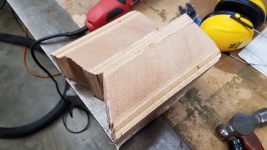
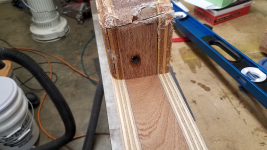
I also peeled the glass off one of the original engine mounts and cut it in half to see how it was constructed - a solid piece of mahogany sandwiched between two pieces of 3/4" plywood. It makes sense, as the mahogany will take the lag bolts better than plywood and be more rot resistant. I'll be building new engine mounts the same way.
3.png
 

todhunter

Canoeist
Joined
Sep 15, 2020
Messages
1,308
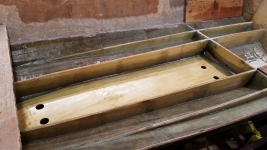
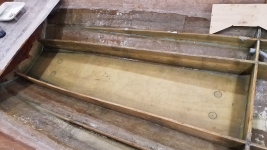
Ski locker floor tabbed in, holes drilled for pour-in foam. I did end up just going with 2 layers of 1708 tabbing after all.
2.png
 

PC on the Bayou

Petty Officer 1st Class
Joined
Apr 27, 2020
Messages
234
Looking good.

In my ski locker floor, I PB'd in the edges and put a single 1708 tabbing. Of course under the floor is open for drainage from the front of the boat (anchor locker) to the bilge. That being said, I then put a full layer of CSM down the stringer, across the floor, and up the other stringer. Then I did two layers of Gelcoat on top of all that.

For ski locker drainage, I put a 1.25 PVC threaded coupler through the rear of the floor and actually epoxied it in. I did the same in the Fuel Tank bay which you can see in my thread's picture (post 181) . In the ski locker, I plan to actually screw a cap in to keep any water from backing up to the ski locker to keep it dry & allow for removal if water gets in there and needs draining. Unfortunately in the fuel bay, the tank will partially cover the drain; so, I can't cap it like I can in the ski locker.

Just thinking with all of the ski locker being so glassed and gelcoated in, I could use it as a live well when fishing . . . Nah, I don't think I want to fill it with water (LOL).
 

todhunter

Canoeist
Joined
Sep 15, 2020
Messages
1,308
Looking good.

In my ski locker floor, I PB'd in the edges and put a single 1708 tabbing. Of course under the floor is open for drainage from the front of the boat (anchor locker) to the bilge. That being said, I then put a full layer of CSM down the stringer, across the floor, and up the other stringer. Then I did two layers of Gelcoat on top of all that.

For ski locker drainage, I put a 1.25 PVC threaded coupler through the rear of the floor and actually epoxied it in. I did the same in the Fuel Tank bay which you can see in my thread's picture (post 181) . In the ski locker, I plan to actually screw a cap in to keep any water from backing up to the ski locker to keep it dry & allow for removal if water gets in there and needs draining. Unfortunately in the fuel bay, the tank will partially cover the drain; so, I can't cap it like I can in the ski locker.

Just thinking with all of the ski locker being so glassed and gelcoated in, I could use it as a live well when fishing . . . Nah, I don't think I want to fill it with water (LOL).
Appreciate the detailed input. I'm going to CSM and gelcoat my ski locker too. It will drain constantly directly into the bilge. I think I'm going to put some kind of drain in the deck where people will sit to allow that area to drain into the ski locker, and the ski locker into the bilge. I just don't want water to pool up at the back of the passenger area if I get rain or lots of water splashed in the boat. I've decided to completely seal the area under my ski locker and under the deck where the ski locker isn't at.
 

PC on the Bayou

Petty Officer 1st Class
Joined
Apr 27, 2020
Messages
234
I've decided to completely seal the area under my ski locker and under the deck where the ski locker isn't at.

I thought about doing that, too and using PVC to provide drainage from the front lockers (ski & anchor); but, I decided against and will let it be the drain mechanism. Mine is a very small area anyway (maybe only 2" below the locker floors at the bottom vee of the boat.

If I find that I get water into the ski locker too often, I may leave the plug out of it as well.

I like seeing all of the different approaches to the builds and the fact that we all can share ideas freely.
 

todhunter

Canoeist
Joined
Sep 15, 2020
Messages
1,308
A few days ago I poured foam under my ski locker floor. I missed the temperature recommendation of 80F+ before the first pour, so it didn't expand as much as I calculated. After that I cranked up the heat in the garage and heated up the cans of resin before mixing them. Today I PB'd the pieces back in where I poured the foam in.
2.png

I spent a while prepping the ski locker floor for 2 layers of CSM by sanding down the edges of the 1708 tabbing. I went ahead and cut the CSM to shape. I also started capping my stringers in 1708.

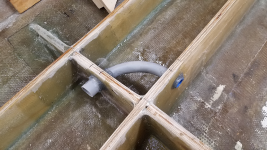
I've been back and forth on what to do about fuel hose routing. I really didn't want to drill holes in my stringers/bulkheads, but just sucked it up and did it. Per recommendations of others in the Mercruiser stern-drive forum, I am using 1" PVC electrical conduit with long sweeping bends. I got this bend PB'd in place where the fuel hose will come out into the bilge. This should let me pull the hose out to inspect/replace it if I ever need to.
1.png

3.png
 

todhunter

Canoeist
Joined
Sep 15, 2020
Messages
1,308
Today I got 2 layers of CSM down on the ski locker floor. Other than gelcoat, I think the ski locker is done.
2.png


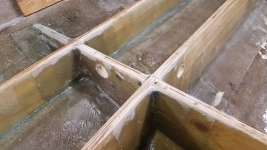
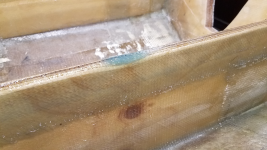
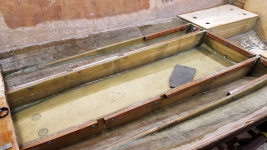
I spent some time capping more stringers. I'll have about one more evening of that, then I'll be done. Here's a picture of one spot on one of my stringers where I got a little wild with the jigsaw when cutting them down to height. I just filled the dip with PB and glassed right over it. I have found that I prefer using a chip brush instead of a roller when capping stringers - I can more easily push the glass around to squeeze out air bubbles. The roller is still king for large flat areas, though.
4.png

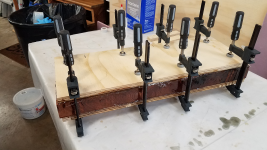
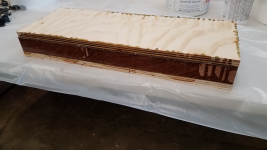
I started building my engine mounts today by sandwiching a piece of 2" mahogany between two pieces of 3/4" plywood. I used a single layer of CSM between each piece of wood to bond them together.
1.png

3.png
 

todhunter

Canoeist
Joined
Sep 15, 2020
Messages
1,308
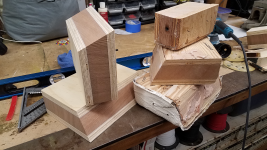
I spent more time on the engine mounts tonight. Other than some router work and some sanding, they're ready to go in the boat. Here they are stacked up next to the original mounts.
1.png


The thickness of the "sandwich" came out pretty much dead on.
2.png


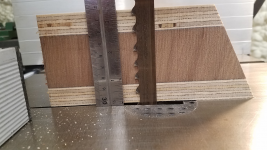
With the wood sandwich being as thick as it was, and with it having fiberglass in it, I decided to break out the big guns - my 3/4" carbide tipped resaw blade. It did a good job.
3.png
 

PC on the Bayou

Petty Officer 1st Class
Joined
Apr 27, 2020
Messages
234
Looking great. Thanks for the pictures and description of your motor mounts. I'm nearing having to build mine; so, this will be a good reference.
 

todhunter

Canoeist
Joined
Sep 15, 2020
Messages
1,308
I got all my stringers capped in 1708 last night.

Tonight I routed and sanded the edges of the engine mounts and set them in the boat. I'm going to do 2-3 layers of 1708 on these.
1.png


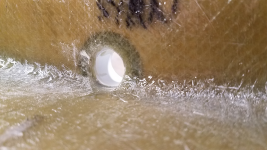
I also cut the glass off the face of the ski locker drain. Positioning came out really good, with the bottom of the PVC inner diameter pretty much level with the ski locker floor.
2.png
 

todhunter

Canoeist
Joined
Sep 15, 2020
Messages
1,308
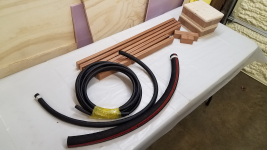
Ripped / planed some mahogany for cleats to hold the floor down. I've got to pick up about 4 more board-ft to make the remaining cleats. Also, my new fuel line, vent line, and fuel fill line showed up today.
1.png
 

todhunter

Canoeist
Joined
Sep 15, 2020
Messages
1,308
Question for the learned folk:

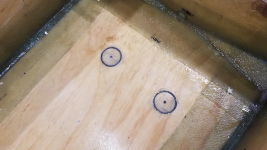
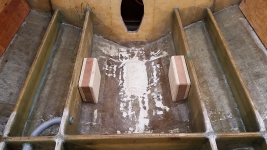
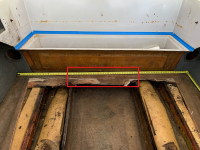
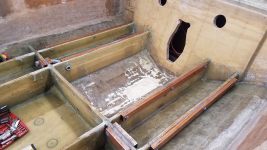
Should I put some kind of drain at the back of my passenger area to drain any water that gets in the seating area? In the picture below the floor is pulled up and you can see down into the ski locker - this is looking back at where the bench seat goes. Should I put a drain in the center of the deck (marked with red outline) to drain into the ski locker (when on the trailer, bow high), which will drain into the bilge? Or is such not really necessary? I mean, there's going to be a big hole in the floor to get into the ski locker, but it will be more forward in the seating area. Appreciate any input.

Oh yeah, if it matters, I'm doing glue down carpet.
1.png
 

todhunter

Canoeist
Joined
Sep 15, 2020
Messages
1,308
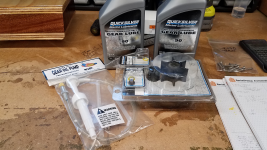
Carpentry isn't really my thing...I'm more of a gear-head, so seeing this package show up today means the tide is starting to turn. I'm looking forward to start doing maintenance on the drive and engine. I'll continue ordering small mechanical bits as I get closer to finishing the hull.
4.png


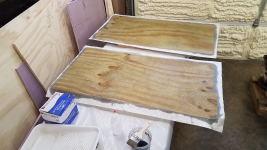
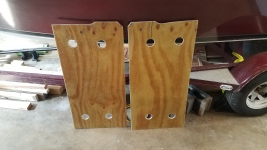
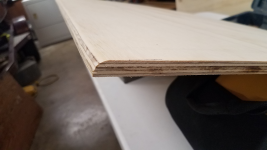
I cut out the small pieces of deck that go to either side of the bilge from a sheet of 1/2" plywood and routered the edge by the bilge to make laying glass easier.
1.png


One layer of resin down, then one layer of CSM on the back faces:
5.png


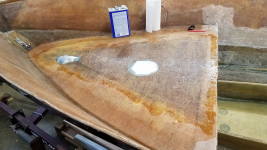
The "deck" over the gas tank (the floor of the storage area) in the bow was actually in good shape, so I didn't replace it. The boat builder did not fiberglass the top face other than tabbing though. I spent a good while cleaning off carpet adhesive then I laid one layer of CSM in the center triangle area that was not covered by tabbing fiberglass.
6.png


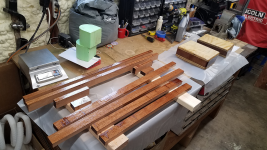
I got more mahogany last night and made the rest of my cleats. I started coating them and the engine mounts in resin.
7.png
 

todhunter

Canoeist
Joined
Sep 15, 2020
Messages
1,308
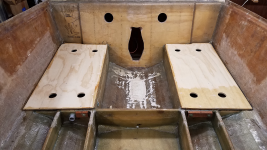
Trimmed the glass on the back deck pieces and drilled holes for foaming.
2.png


Mahogany cleats for the stern of the boat installed.
1.png
 

Meames1

Petty Officer 2nd Class
Joined
Dec 14, 2020
Messages
157
How did you attach the cleats ? Hard to tell from the pics, but looks like some screws ? How are you planning to attach the floors, screws into the cleats ?
I'm unsure how I am going to attach mine. Thought about just using PB, but I'm thinking some mechanical attachment too. Definitely don't want to screw down into the stringers like Larson did (actually staples).
 

todhunter

Canoeist
Joined
Sep 15, 2020
Messages
1,308
How did you attach the cleats ? Hard to tell from the pics, but looks like some screws ? How are you planning to attach the floors, screws into the cleats ?
I'm unsure how I am going to attach mine. Thought about just using PB, but I'm thinking some mechanical attachment too. Definitely don't want to screw down into the stringers like Larson did (actually staples).
I'm using #10-24 SS screws/lock nuts to attach the cleats to the stringers. First I used a level/straight edge to set the height of the cleats relative to the tops of the stringers then clamped and drilled. Disassembled, cleaned, then I piped hairy PB on the back of the cleat, stuck it to the side of the stringer, coated the hardware in 3M 5200 and bolted it up. I smoothed out the PB squeeze-out along the top then coated the exposed ends of the hardware in PB. In the bilge I used countersunk/flat head screws so there won't be any bumps. For the rest of the hardware that will be under the floors, I just used pan head screws. I thought 2.25" hardware would cover me for all the cleats, but in areas where several pieces of tabbing overlapped on the stringers I had to use 2.5".

I'm going to be using SS #10 screws to attach the deck to the cleats...probably about every 6-12 inches...haven't decided yet. I plan to pre-drill holes in the decks and cleats and countersink the holes in the deck. I'm also going to pipe a fat bead of hairy PB along the top edge of the stringers/bulkhead when I'm putting the deck down for the last time. I too am trying to avoid putting additional holes into the stringers...I almost didn't want to bolt the cleats to the stringers.
 

todhunter

Canoeist
Joined
Sep 15, 2020
Messages
1,308
Rear decks are PB'd and screwed down. My wife's hand print is pretty much fully covered. I'll have her do another one over by the other hand prints when I glass the top of the deck.

I put a screw every 6" on these...I'll probably open that up to one every foot on the rest of the deck.
1.png
 
Top