1987 Power Play XLT-185 - floors, stringers, and upholstery

todhunter

Canoeist
Joined
Sep 15, 2020
Messages
1,316
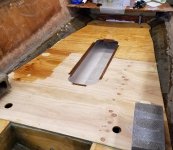
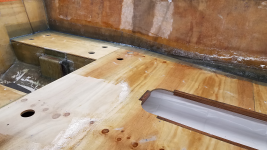
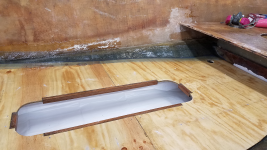
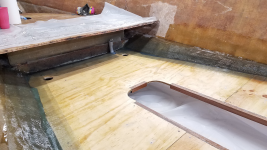
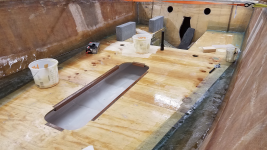
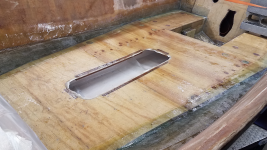
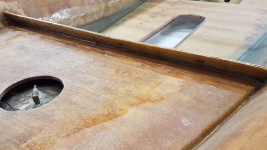
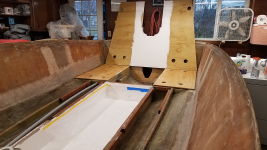
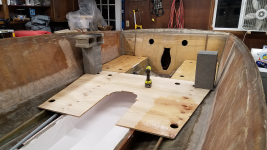
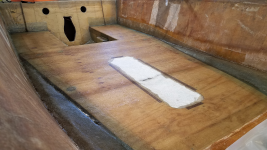
I got the "rear" piece of decking down tonight. I'm trying to be ready to reinstall the cap on April 10. Not as soon as I'd hoped, but I'm trying to not completely ignore my family and other hobbies.

My order of operations was: sanded gelcoat where the PB will go, cleaned everything with acetone, PB'd along the top edge of the stringers/bulkhead, set deck in place, screwed deck to cleats with 3M 5200 on screw threads. The cinder blocks are there to hold the corners of the deck down while the PB cures. After screwing it all down, I smoothed out the squeezed out PB along the edges, including inside the ski locker. I had plastic down in the ski locker so I didn't make a mess, and pulled the plastic after smoothing the PB.
1.png

2.png
 

buxmj

Petty Officer 1st Class
Joined
Jun 9, 2018
Messages
294
Tod, I was away for about a month and you have made some amazing progress, looks great!
 

todhunter

Canoeist
Joined
Sep 15, 2020
Messages
1,316
All the decking is down, ski locker cleats installed, and 2 of the 8 compartments are foamed.
IMG_20210227_181241_371.jpg


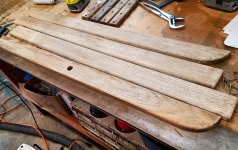
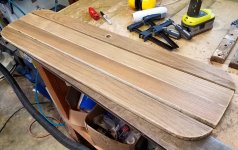
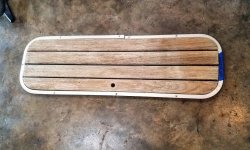
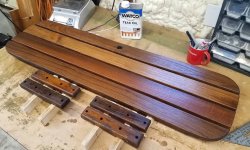
I also disassembled my 2nd hand ski locker hatch I got on eBay and sent the planks through the planer. They went from looking like bones to looking like beautiful wood. Can't wait to see the finished product with oil on it.
Before:
IMG_20210227_163122_573.jpg

After:
IMG_20210227_163122_579.jpg
 

todhunter

Canoeist
Joined
Sep 15, 2020
Messages
1,316
I spent most of the day doing indulging in my other boat related passion - whitewater canoeing.
1.jpg


After getting home and unloading gear, there was still enough time to get down two layers of 1708 tabbing along the port side of the decking.
1.png

2.png
 

todhunter

Canoeist
Joined
Sep 15, 2020
Messages
1,316
Finished tabbing the deck perimeter tonight. I had my wife re-do her hand print on a piece of tabbing since her original one is now mostly covered up by the stringer and deck.
1.png

2.png
 

todhunter

Canoeist
Joined
Sep 15, 2020
Messages
1,316
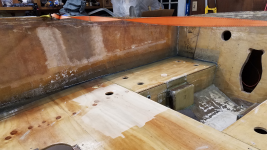
I poured foam under the decks tonight. Between the foam under the ski locker floor and all the spaces under the decks, two 16lb kits was the perfect amount.

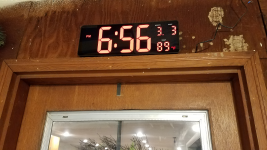
I set the heat pump for the garage on the max (86F) and had my wife turn the kerosene heater on full blast at 3:30pm this afternoon. Today's high was 61F, and it was 84F in the garage when I got home and climbed to 89F by the time I was done.

Also - my roll of carpet showed up today...no pics of that yet.

2.png

1.png
 
Last edited:

todhunter

Canoeist
Joined
Sep 15, 2020
Messages
1,316
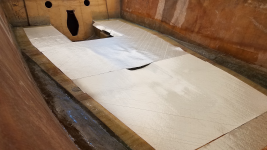
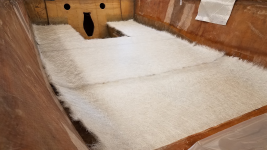
I plugged all my foam pour holes and I got all the 1708 down on the deck except for a small spot in the stern/starboard area - I was boxing myself in, so I left it out and will lay the last piece tomorrow, then move on to the CSM.

2.png

3.png


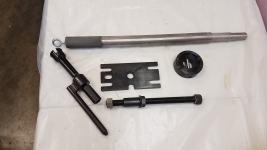
All my gimbal bearing tools arrived today too. I bought them from MBS Manufacturing, and they seem pretty stout.

1.png
 

todhunter

Canoeist
Joined
Sep 15, 2020
Messages
1,316
Questions for the gurus: I know most of yall don't do carpet, but that's what I'm going to put down. Can I glue my carpet down directly to CSM that was laid up with waxed resin, or do I need to sand before gluing down the carpet? If it makes any difference, I'm planning to use DAP Weldwood spray grade / HHR / Landau Top and Trim Adhesive.
 

tpenfield

Moderator
Staff member
Joined
Jul 18, 2011
Messages
18,068
Maybe you can just use some acetone to pull up the wax layer. Sanding may not be the best approach, since it will tend to cut into the fibers of the CSM, and promote water penetration through the fiberglass layers.

You can always do a pull test on a small area of the floor by seeing how well the glue adheres, before you lay the carpet down.
 
Last edited:

kcassells

Fleet Admiral
Joined
Oct 16, 2012
Messages
8,732
Questions for the gurus: I know most of yall don't do carpet, but that's what I'm going to put down. Can I glue my carpet down directly to CSM that was laid up with waxed resin, or do I need to sand before gluing down the carpet? If it makes any difference, I'm planning to use DAP Weldwood spray grade / HHR / Landau Top and Trim Adhesive.
Sanding makes the wax go into the glass. Acetone or other neutralizer.
 

todhunter

Canoeist
Joined
Sep 15, 2020
Messages
1,316
Well, my truck decided to get jealous of all the attention I've been giving the boat project and threw a fit, so I've been bogged down with trying to fix it. I'm out of town this coming weekend (if I can get the truck fixed) and also again in 2 weekends, so progress on the boat is slowing from the maddening pace it's been at the last 2+ months.

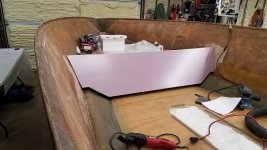
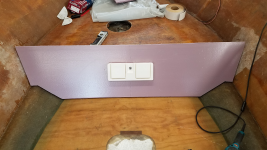
I did get started on templating the kick panel. I'm going to put a small glove box in the center of the kick panel for some storage, and to give access to the area behind the kick panel in case I ever need to get to the fuel hose where it runs under the deck through the conduit.
3.jpg


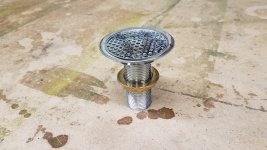
I picked up this fitting to drain the deck into the ski locker. I'm planning to put it in the deck centered right in front of the rear bench seat. This should funnel any water that gets in the boat to the back of the passenger area, down into the ski locker, and into the bilge.
2.jpg


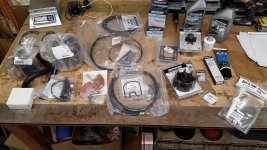
Finally, I've been collecting mechanical bits the last few weeks for when it's time to work on the drive and engine. Transom assembly kit (bellows, gimbal bearing, etc.), lower shift cable, other transom plate rubber seals, new flappers for the exhaust pipes, oil drain kit, oil filter, fuel filter, exhaust manifold & elbow gaskets, distributor cap & rotor, impeller kit, lubes and sealants. I bought a remote oil filter kit also, but it hasn't arrived yet.
1.jpg
 

todhunter

Canoeist
Joined
Sep 15, 2020
Messages
1,316
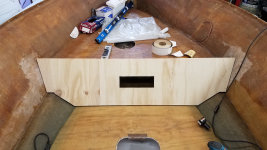
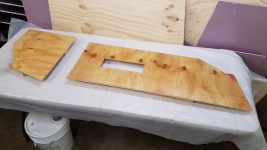
More work on the kick panel. Got the foam template dialed in and hole cut for the glove box.
1.png


Template transferred to 1/2" plywood and cut out:
2.png


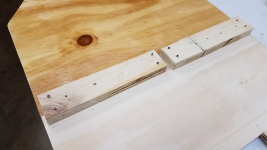
Plywood with a coat of resin on one side. To avoid having to buy another $55 sheet of plywood, I opted to build it from two pieces and just glass it together.
3.png
 

todhunter

Canoeist
Joined
Sep 15, 2020
Messages
1,316
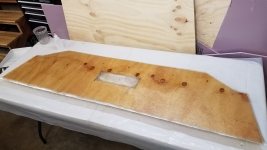
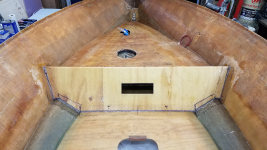
Big work day today - it was my last day off for a long weekend. I got the kick panel glassed on both sides and tabbed in. All that remains to do on the kick panel is to add a layer of CSM with waxed resin to the face/top edge.

To hold the two pieces of kick panel together while glassing the first side, I used some small pieces of 3/4" plywood and some finishing nails that I didn't hammer all the way through. Kind of hard to tell in the picture, but I put a piece of packing tape over the face of the small temporary pieces of plywood so that any resin that oozed into the crack wouldn't bond the small pieces to the kick panel.
1.png


Then I laid a single layer of 1708 on the opposite side. After curing, I flipped it, removed the nails and temporary pieces of 3/4" plywood, filled the nail holes with PB, resin coated the wood, and laid a layer of 1708 on that side. After that layer cured, I trimmed and sanded the edges. I also rounded the top edge with a 1/4" round-over router bit to facilitate laying glass to seal the top edge.
4.png


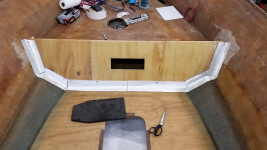
I cut my tabbing, test fit the kick panel in the boat, marked everything, then prepped the surfaces.
7.png


I mixed up some PB, piped it around the border, and laid my tabbing over the PB, wet-on-wet. I'm only doing a single 4" wide layer of 1708 around the kick panel. This is the last structural piece of the boat to go in before the cap gets reinstalled - I'm excited to be at this point. It was almost 70F in the shop today, and I had a brush with resin kicking faster than expected while tabbing. Thankfully I was able to get everything down before it really kicked.
8.png

9.png


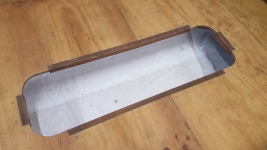
In between layups I did a few other tasks like trim/sand the glass around the ski locker hatch...
3.png


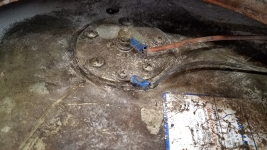
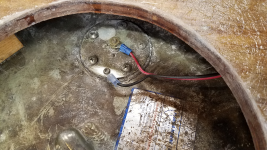
...and run new wires to the fuel tank sending unit, since the old ones looked pretty rough.
5.png

6.png


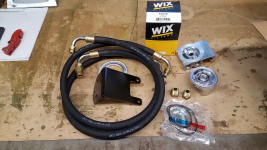
Lastly, my remote oil filter kit showed up.
2.png
 
Top