Wellcraft 170 Classic -89 full restoration

Woodonglass

Supreme Mariner
Joined
Dec 29, 2009
Messages
25,924
Re: Wellcraft 170 Classic -89 full restoration

Nope but it will take longer. When temps are cool, 1.5 to 2% MEKP is recommended or for small patches that won't take long to mix and apply. Bigger batches and hotter temps 1% is the way to go. Patience my friend. It will evntually cure...;)

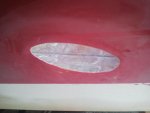
That is a "PRO" job on that Patch. On the outside. Use CSM first then one layer of the cloth and then 2 layers of CSM and you'll be done. Mix up some Resin with some Glass Bubbles and a bit of Cabosil to get a Mayonaise or Ketchup consistency to "Fair" in the patch and then sand her smooth. You'll never know it was ever there. Really nice Glassin' my friend!!!!

borat-very-nice.jpg
 

Jussi-T.

Petty Officer 2nd Class
Joined
Jan 5, 2013
Messages
151
Re: Wellcraft 170 Classic -89 full restoration

I am relief to hear that the second patch didn't fail! And happy to hear that you think my transom patch is good!!

I have a question about the CSM and cloth, why do we put CSM,cloth,CSM,cloth and the last layer/finishing CSM? The seller said that the cloth should put last, actually he told me to do this: CSM,CSM,CSM....,cloth...
Don't get me wrong Wood, I KNOW you KNOW how these things should be done, I'm just curious. I put to the inside CSM,cloth,CSM,cloth,CSM,cloth. 3 layers of each, you think it's enough for the inside? And now the last layer isn't CSM, it's cloth, does it matter?
 

Woodonglass

Supreme Mariner
Joined
Dec 29, 2009
Messages
25,924
Re: Wellcraft 170 Classic -89 full restoration

Nope, not on the inside. Here's the deal. The cloth, as you can see, has a distinct, texture/pattern to it. CSM on the other hand yields a much smoother finished surface. Sooo...on the outside and sometimes on the inside where you will see the final product, you want to "HIDE" this texture. You do this by laying the extra layer of CSM and resin over the cloth to fill in the texture. As to why we use CSM first in the layup...I'll make it as simple as possible without going into a lot of Chemical garbly goop....

Polyester resin has no "Binders" in the resin. When it cures it becomes extremely brittle. You can tell ths from the leftovers in your mix buckets. They will easily break into pieces. With epoxy this is not true because the resin does contain binders and when it dries it remains kinda flexible. With Poly the CSM fibers are the Binders for the mix. Poly contains Styrene which Breaks down the fibers in the CSM and blends this all into one mix to make it less brittle and more like Epoxy. The Fiberglass cloth will not break down and therefore without the CSM the Bond will be brittle and weak and most probably de-lamintate from the substrate. I hope this helps to explain what you were asking.
 

Jussi-T.

Petty Officer 2nd Class
Joined
Jan 5, 2013
Messages
151
Re: Wellcraft 170 Classic -89 full restoration

Yup, it helped! Thanks!
 

Jussi-T.

Petty Officer 2nd Class
Joined
Jan 5, 2013
Messages
151
Re: Wellcraft 170 Classic -89 full restoration

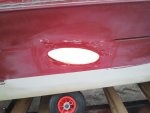
The side patch turned out OK, pics:
005 (2).jpg006 (2).jpg003 (3).jpg

Today I took my first contact with peanut butter as I filled the tears and the bolt holes at the transom, Still needs to be sanded.004 (3).jpg

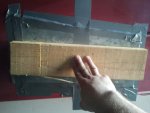
I also made a template out of cardboard for my transom wood which I am going to cut tomorrow. Should I thin the resin with styrene when I coat the wood?
 

Woodonglass

Supreme Mariner
Joined
Dec 29, 2009
Messages
25,924
Re: Wellcraft 170 Classic -89 full restoration

Nope, just use 1% MEKP so it takes a while for it to set up and give it more time to Soak In. TIP: If you take a couple of 1x2's and drive a nail in each end and lay em across some saw horse's you can coat one side of the transom with resin then flip it onto the NAIL points and coat the other side. that way it will only be a one day job to get both sides coated. Take special care on the edges and coat them really well. As soon as it starts to tack up go ahead and lay the first layer of CSM and use 1.5% or 2.0% MEKP with this resin. Pour it in the middle and work it out towards the edges. If you cut the CSM about 2" oversized and tug and tear the edges they'll lay down over the edges of the transom much better. Use a chip brush with the bristle cut 1/2 off to DAB not Stoke the resin on the edges to get the glass to lay down over the edges. Works Great.;) Try really hard to get all the bubbles out. Only use the bare minimum of resin. Most people use way to much when they first start learning how to fiberglass.
 

Jussi-T.

Petty Officer 2nd Class
Joined
Jan 5, 2013
Messages
151
Re: Wellcraft 170 Classic -89 full restoration

That Nail tip is very handy! So you mean that I lay up the first coat of CSM BEFORE I put the transom in place? And do I lay the CSM right after the first coat of resin?

I thought I'd do it like this: Cut the wood, coat the bigger and smaller piece of transom separately with resin, bond the biggerr and smaller pieces (two 3/4") together with peanut butter, glue the ready transom to the hull with peanut butter and put peanut btterto the edgges, and then put the first CSM layer. But Wood, if you think I should put the CSM before I install the transom, then I'll do that! ;)
 

Woodonglass

Supreme Mariner
Joined
Dec 29, 2009
Messages
25,924
Re: Wellcraft 170 Classic -89 full restoration

Duh, I forgot this is a two piece I/O transom. My bad. I'd use Titebond III wood glue to glue the 2 pieces together with and use wood screws to hold em together. (You can use PB if you wish, I just like using the wood glue cuz it's easier and I think the bond is better) After 24 hours remove the screws and then coat the back side with resin as I described. As it's drying mix up your PB (without the hardener) and have it ready. When the resin tacks up add the hardener to the PB spread it on the transom skin and the transom and install the transom and clamp it in. Fillet the edges with additional PB. Next day coat the inside of the transom with Resin and apply your first layer of CSM. Now we're on track;)
 

Jussi-T.

Petty Officer 2nd Class
Joined
Jan 5, 2013
Messages
151
Re: Wellcraft 170 Classic -89 full restoration

Well I could coat the front side with CSM BEFORE I put the transom in to place, that way the edges would be water proofed better I think. What if, I'd do it like this: Glue the two pieces together (I think I'm going to use PB because the wood glue is expensve :D), coat the front side with resin, wait until it tacks, then coat it with CSM and resin, let it dry. Then to the back side: coat it with resin, wait until it tacks, glue it in with PB

If I put the CSM before the insttalling, then I can waterproof the edges of the transom.
 

Woodonglass

Supreme Mariner
Joined
Dec 29, 2009
Messages
25,924
Re: Wellcraft 170 Classic -89 full restoration

That'll work too. I find it's easier sometimes to work with the CSM OUTSIDE of the boat. I would advise using the Chip Brush method as I described. It really works best. If you don't have a bubble roller I'd highly recommend getting one. They come in hand at times. At least for me. Some people don't think so, but I do. I also use a bondo spreader or a plastic putty knife a lot. Kinda like a squeegee to spread the resin out with. Seems to work for me. Light strokes and minimal resin.
 

Jussi-T.

Petty Officer 2nd Class
Joined
Jan 5, 2013
Messages
151
Re: Wellcraft 170 Classic -89 full restoration

I think I'll coat it with CSM before installing :) And going to use the methods you adviced. Yes Iv do have a bubble roller, it was very handy in the transom patch! Putty knife was priceless today when I filled the transom holes and tears. :)
 

Jussi-T.

Petty Officer 2nd Class
Joined
Jan 5, 2013
Messages
151
Re: Wellcraft 170 Classic -89 full restoration

I got my transom cut and glued the two pieces today. I test fitted it and I found that the transom skin isn't flat, it doesn't sit perfectly to the plywood. The patch at the transom is partly responsible for that. But I think that when I glue it with thick coat of PB, it'll be fine. What do you think Wood, should I put the cap ON while I glue the transom in. If the wood twists the transom, the cap won't never sit again. What would you do?

004 (4).jpg
 

Woodonglass

Supreme Mariner
Joined
Dec 29, 2009
Messages
25,924
Re: Wellcraft 170 Classic -89 full restoration

How bad is it? Is it more than 1 cm? Is it at the top, bottom, sides? Can you put it in the boat and take some pics so we can see what it looks like? Do you have your clamps made yet so you could do a test clamp and see what happens?
 

Jussi-T.

Petty Officer 2nd Class
Joined
Jan 5, 2013
Messages
151
Re: Wellcraft 170 Classic -89 full restoration

No not that much, I'd say about 5-7mm. The gap is near the keyhole, I tried today with one 2x4, and the gap "closed". BUT I hadn't glued the plywoods together at that point, so the ply flexed also. I can take a picture of it tomorrow, but I was planning to glue it tomorrow. The time distance is 7 hours so it is night in the USA when I am working :D
 

Woodonglass

Supreme Mariner
Joined
Dec 29, 2009
Messages
25,924
Re: Wellcraft 170 Classic -89 full restoration

I'm usually up till midnight East Coast time in the states so feel free to contact me anytime before then. Here's what I'd recommend...
Drill a 3" hole in the middle of where the key hole is going to be use a couple of 2x4's and some allthread or a large bolt and clamp the transom to the outer skin like this

th

but you only need two boards one for the inside and one for the outside. Once clamped measure the stern and then measure the cap and see if you can ascertain whether or not it has deformed the hull.
 

Jussi-T.

Petty Officer 2nd Class
Joined
Jan 5, 2013
Messages
151
Re: Wellcraft 170 Classic -89 full restoration

I usually start working at 8 am so it's 2 am in the USA east coast. But, I didn't get the transom glued in today.. I decided, that I want to make sure it will sit properly to the skin. So I laminated a piece of CSM to the skin, where the gap was, then sanding with orbital sander and test fitteng, sanding again, fitting... It took a lot of time, but now it is much better. Then I also coated the transom with CSM and made my clamps. You said Wood that use only one pair of 2x4's? I thought that I'd use two pairs... I think it would be better?

What do you think Wood, should I use microballoons or the chopped strand for the PB when I glue the transom? Yesterday I used chopped strand between the ply's and I think it was difficult to spread. Microballoons would work better I think?

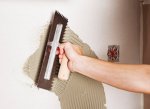
I am going to spread the glue with this kind of thing: 8844256608286.jpg
 

Woodonglass

Supreme Mariner
Joined
Dec 29, 2009
Messages
25,924
Re: Wellcraft 170 Classic -89 full restoration

I meant on pair of 2x4's just for the test clamping for the actual installation the more the better. I would recommend the milled fibers and not the ballons. Yeah, they are kina a PITA to work with but...they yield a much Stonger Glue for the transom and since the transom is one of the most critical structural components of any boat, I want it to be the strongest it can be. It's your boat and you're free to do as you wish. If you use the trowel, I find the V-notch to work better than the square notch.

th
 

Jussi-T.

Petty Officer 2nd Class
Joined
Jan 5, 2013
Messages
151
Re: Wellcraft 170 Classic -89 full restoration

You know what, I think I'm gonna use the chopped fiber then! :) I decided to put the cap on while glueing the transom. I want to make 100% SURE the cap will sit after the transom is glued and I wasn't assured when I measured the hull and the cap today... So I'll do it this way.
 

Woodonglass

Supreme Mariner
Joined
Dec 29, 2009
Messages
25,924
Re: Wellcraft 170 Classic -89 full restoration

Not a Bad Idea!!! If it's not to much of a hassle, it's always better to be safe than sorry!!!!:D
 
Top