Tore the transom ...how to repair? (pics)

BillaVista

Petty Officer 1st Class
Joined
Jul 1, 2013
Messages
204
Re: Tore the transom ...how to repair? (pics)

Some solid progress at last.

At it for 13 hours straight today.

Got the bottom stuffed with foam:

Starcraft-2013-Aug-10-6074.jpg


Starcraft-2013-Aug-10-6076.jpg


Don't think I could get much more in there.

This is all that is left from two 4x8 sheets and six 2-8 sheets of 1" thick extruded polystyrene insulation,

Starcraft-2013-Aug-10-6073.jpg
 

BillaVista

Petty Officer 1st Class
Joined
Jul 1, 2013
Messages
204
Re: Tore the transom ...how to repair? (pics)

Floor is in!

Starcraft-2013-Aug-10-6082.jpg


I ended up deciding to use rivets instead of screws and I'm glad i did. They pull the floor down nicely and are easy to install and won't break when being installed. These are large head rivets from Jay Cee

Starcraft-2013-Aug-10-6083.jpg
 

jbcurt00

Moderator
Staff member
Joined
Oct 25, 2011
Messages
24,945
Re: Tore the transom ...how to repair? (pics)

Looking great! nice work
 

GA_Boater

Honorary Moderator Emeritus
Joined
May 24, 2011
Messages
49,038
Re: Tore the transom ...how to repair? (pics)

I don't think the transom will get pulled out this time, Bill. All good looking work. :D
 

GT1000000

Rear Admiral
Joined
Jul 13, 2011
Messages
4,916
Re: Tore the transom ...how to repair? (pics)

Congratulations on an extremely well done job!:thumb:
 

BillaVista

Petty Officer 1st Class
Joined
Jul 1, 2013
Messages
204
Re: Tore the transom ...how to repair? (pics)

Thanks guys for the very kind words.

A little more progress:

The splashwell is back in, all the trim installed, the corners on, and what the buck-babe calls "my swim fins" (aka the Smart Tabs SX Trim Tabs) are installed.

Went through a whole tube of 5200 today.

That stuff has to be second only to never-sieze for its uncanny ability to get all over everything!!

Pics:

Starcraft-2013-Aug-11-6096.jpg


Starcraft-2013-Aug-11-6101.jpg


Starcraft-2013-Aug-11-6097.jpg


Starcraft-2013-Aug-11-6098.jpg
 

BillaVista

Petty Officer 1st Class
Joined
Jul 1, 2013
Messages
204
Re: Tore the transom ...how to repair? (pics)

Tomorrow is courage day...have to find enough to drill the splashwell drain holes and the motor mounting bolt pattern in my nice new transom!
 

jbcurt00

Moderator
Staff member
Joined
Oct 25, 2011
Messages
24,945
Re: Tore the transom ...how to repair? (pics)

Save the liquid courage until the 'after party' :watermelon:

Then imbibe as necessary....

The usual good looking progress! Congrats.
 

GT1000000

Rear Admiral
Joined
Jul 13, 2011
Messages
4,916
Re: Tore the transom ...how to repair? (pics)

Tomorrow is courage day...have to find enough to drill the splashwell drain holes and the motor mounting bolt pattern in my nice new transom!

I haven't reached that point yet, but I can assure you that I will take the very sage advice given by those much smarter than me in times past...
Measure, then measure again, and again...mark the locations, measure once more...walk away, take a break...then come back refreshed and quintuple check everything, making absolutely sure every mark is spot on...steady your nerves...and go for it...:faint2::eek::rolleyes::lol:

Actually one of the easiest ways to measure for the mounting bolts is to make a cardboard template of the mounting bracket...

At least the splash well drains are still clearly marked...

If you don't have a way to drill your holes accurately at 90? to the transom, like one of these...

spin_prod_206167101

You can use a block of wood with one good flat side, place the flat side down on a drill press table and drill a pilot hole...this will give your drill bit a good guide for drilling into the transom at 90?...start with the smallest holes and gradually open the guide up to the largest holes...

Good luck and have fun!:D
 

BillaVista

Petty Officer 1st Class
Joined
Jul 1, 2013
Messages
204
Re: Tore the transom ...how to repair? (pics)

Yesterday was a very good day.
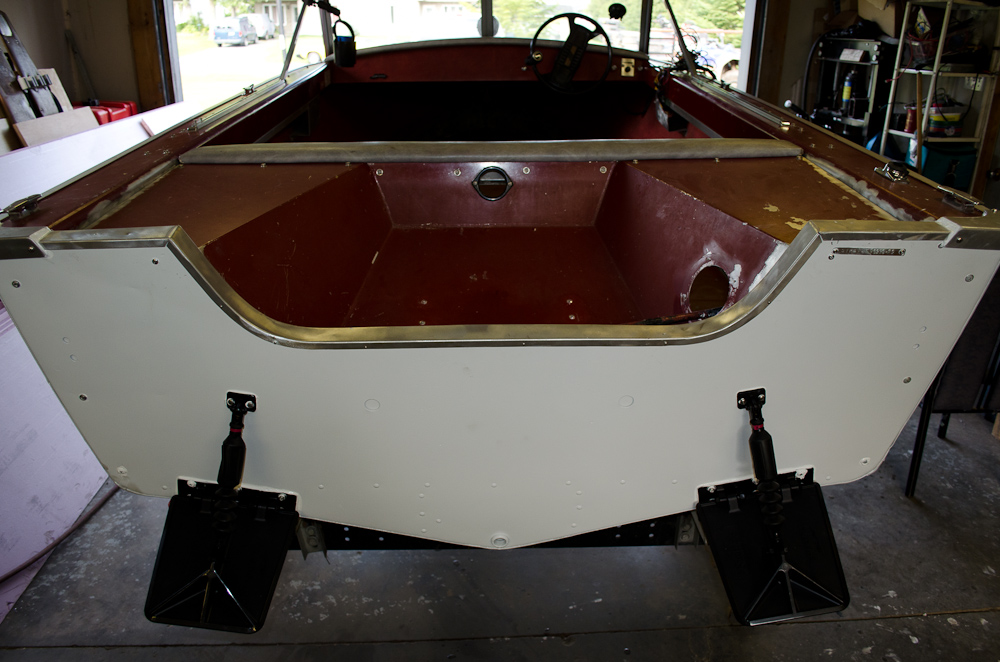
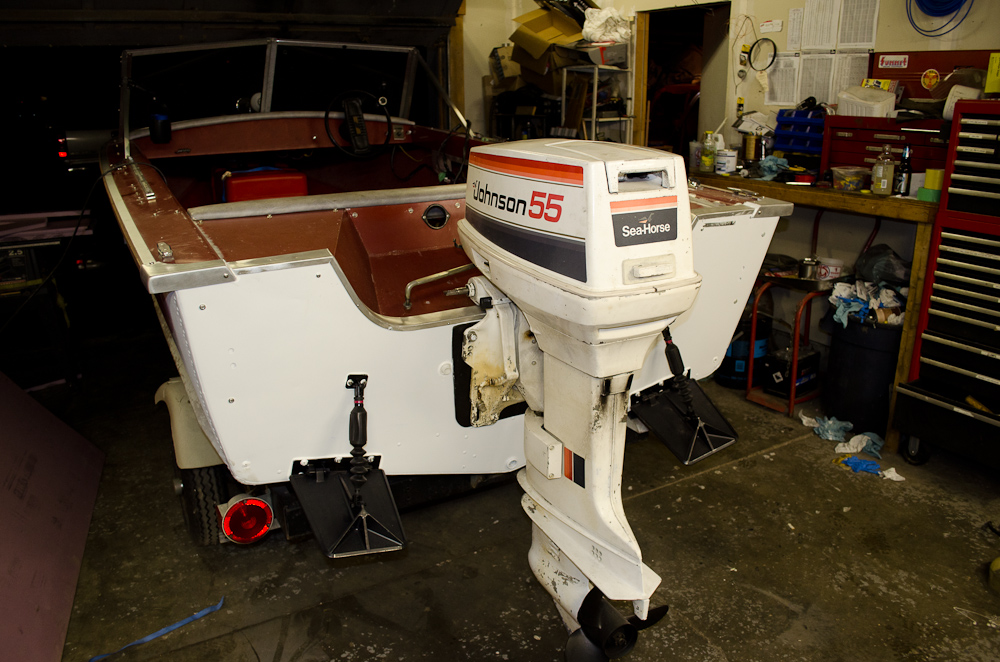
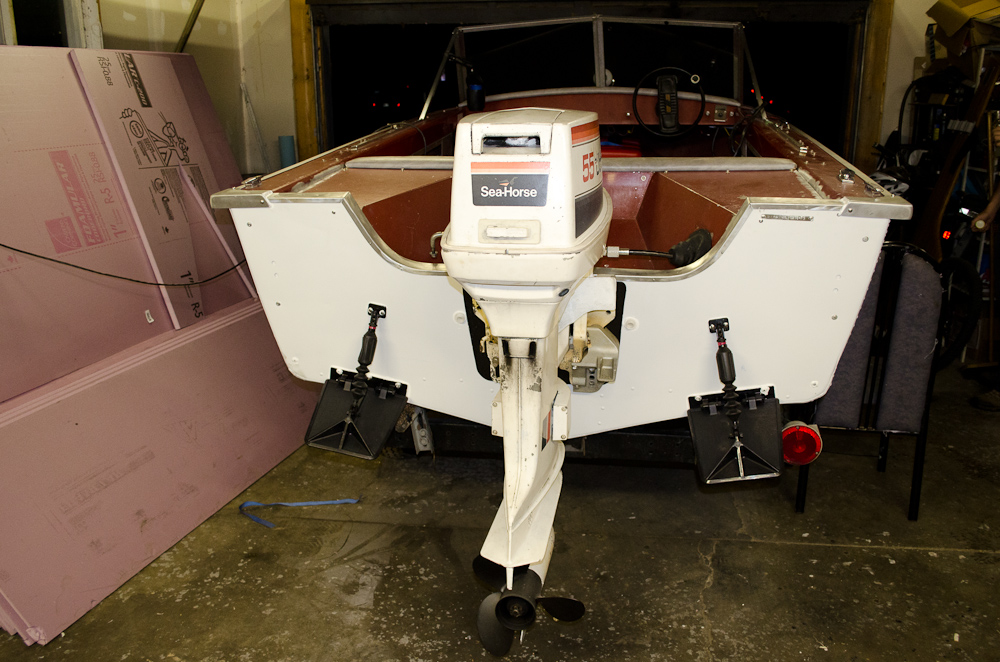
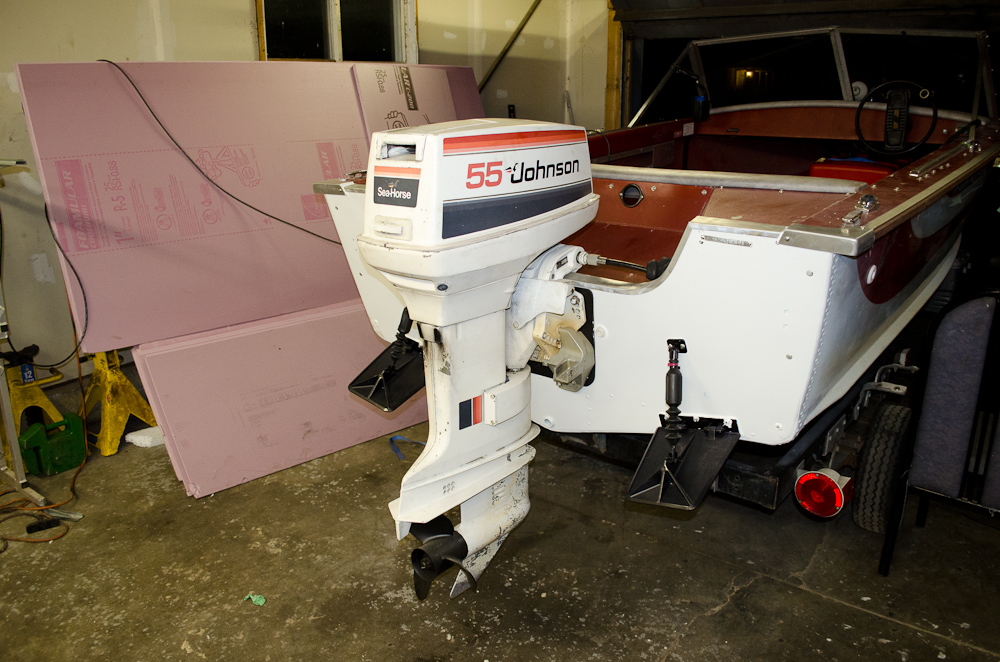
Motor mounting day!

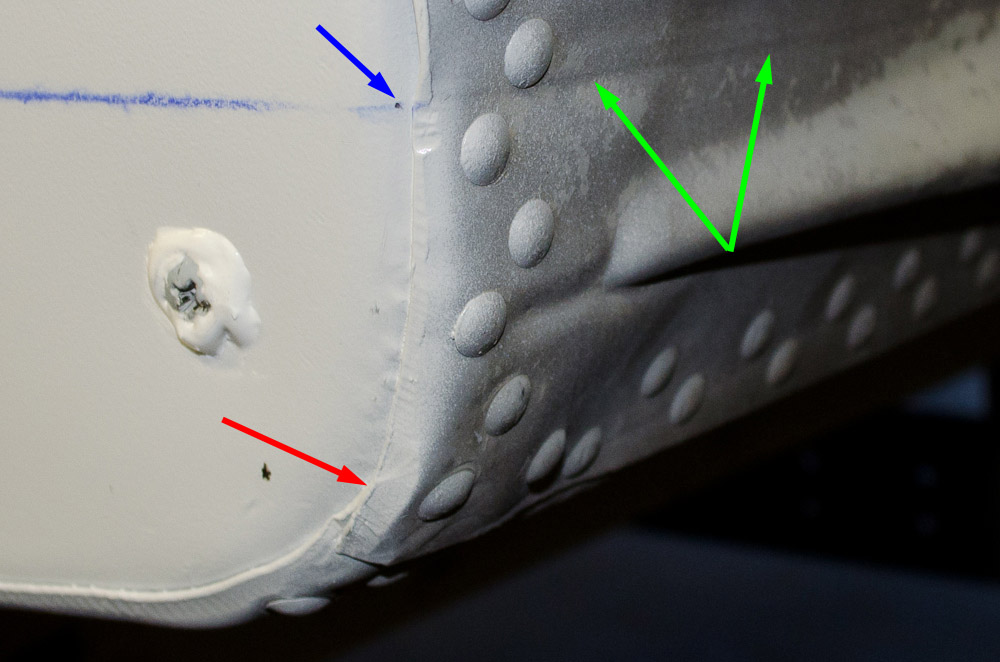
First thing to do was to mark a master line on the boat that was straight, square, and level. Has to be perfect (or really close to it), as everything else is built from that.

I started at the intersection of the side and the stern, right where the corners meet (red arrow). This was below where I has mounted the Smart Tabs, so to move it up, I set the corner of the ruler on this point and marked a point where the ruler intersected the side panel at exactly 3" (blue arrow). I did the same on the other side. These two marks became the points between which we snapped the blue chalk line that you see. This was our master line.

It wasn't until stepping back that we realized the my marks also lined up perfectly with the visible die marks on the side panels left over from when the stabilizing ribse were rolled in the side (green arrow)

Starcraft-2013-Aug-13-6104-2.jpg


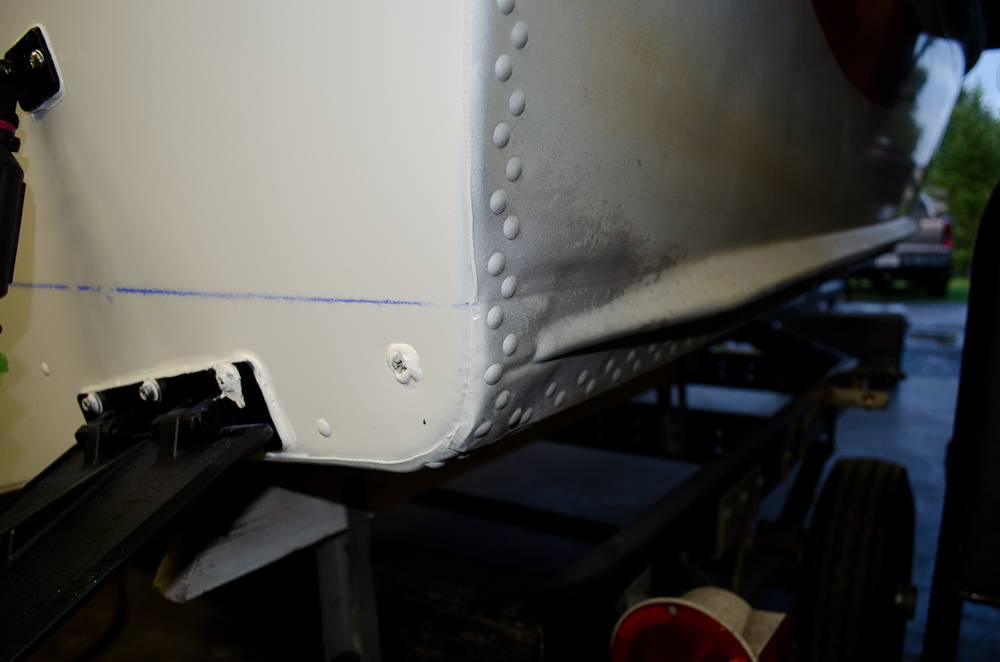
Shot from further away.

Starcraft-2013-Aug-13-6104.jpg


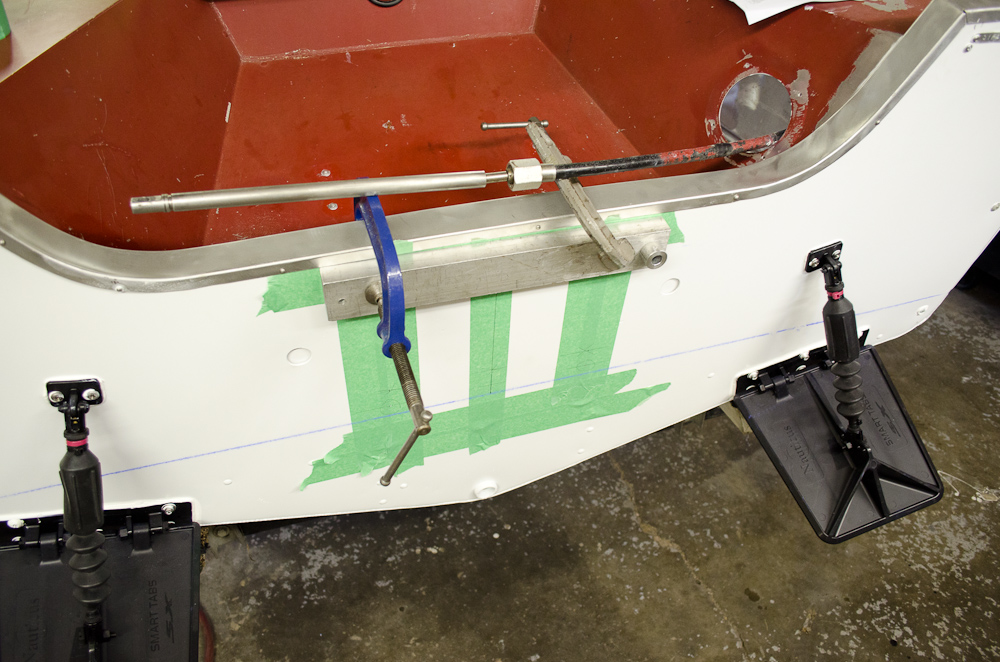
Next we laid some green masking tape on the stern so we could draw some prallel and perpendicular lines with a pencil. Then, by measuring, we laid out the the motor mounting bolt pattern by hand, using the standard ABYC dimensions (that I had confirmed my motor uses).

With the pattern laid out and double checked, we centre-punched the centres of the holes.

My good friend Justin who was helping me with all this (and who is also infinitely more patient and careful and talented than I am) made a jig to start and guide the drill bit exactly perpendicular (90*) to the stern out of scrap aluminum. Basically a bar to clamp to the stern with a big 1/2" bushing pressed into the end.

Looks like this:

Starcraft-2013-Aug-13-6103.jpg


In order to get it centred, we used a transfer punch, inserted in the drill guide. We used the transfer point punch to find and stick in the centre-punched mark, then aligned the drill guide and clamped it to the stern, ready to drill.

Starcraft-2013-Aug-13-6108.jpg


Then it was just a matter fo drilling the holse carefully, using the guide. I used fairly light pressure and high speed.

Starcraft-2013-Aug-13-6111.jpg
 
Last edited:

oldjeep

Admiral
Joined
May 17, 2010
Messages
6,455
Re: Tore the transom ...how to repair? (pics)

Jeeze Bill you're slipping. Over a month to beautifully do 6 months worth of work? Now get out there and use that thing.
 

oldjeep

Admiral
Joined
May 17, 2010
Messages
6,455
Re: Tore the transom ...how to repair? (pics)

And I hate to ask, but where are your transom hooks - isn't that what started this whole adventure?
 

GA_Boater

Honorary Moderator Emeritus
Joined
May 24, 2011
Messages
49,038
Re: Tore the transom ...how to repair? (pics)

Looks real god, Bill. How are ya gonna tube?
 

iamsaws

Petty Officer 3rd Class
Joined
Aug 14, 2012
Messages
93
Re: Tore the transom ...how to repair? (pics)

great rebuild! very informative!
 

BillaVista

Petty Officer 1st Class
Joined
Jul 1, 2013
Messages
204
Re: Tore the transom ...how to repair? (pics)

Here are the backing bars for the motor mount. Some of the excess sealant needs to be cleaned up.

Starcraft-2013-Aug-15-6135.jpg


Starcraft-2013-Aug-15-6141.jpg


Starcraft-2013-Aug-15-6138.jpg


Starcraft-2013-Aug-15-6140.jpg
 
Top