Tore the transom ...how to repair? (pics)

BillaVista

Petty Officer 1st Class
Joined
Jul 1, 2013
Messages
204
Re: Tore the transom ...how to repair? (pics)

Nice looking rig........very unfortunate that you had to experience the transom disintegrating. The good thing is you are in the right place to get all the information you need to take on the project and bring her back to great condition. Expectations: not a quick fix.. but knowing that when completed it should be better than original factory work. The advice given in prior post is to me the most important......take pictures.....lots of them. When you start dismantling take more pics along the way. What I did when I removed screws, bolts, etc I would put them in a ziploc bag and label as to where they came from so when it comes time to reinstall you know what bolts, screws went where, ie transom outside, transom inside, etc. Doesn't matter the condition of the hardware you put in the bag but at least you have the size and length that when you go to reinstall you can get new to match. Take your time and stop and look things over and debate it before acting on it. I do this often in my project boat visualizing what I am doing and how I will put it back together.

Good luck and looking forward to your progress.

Sage advice. Many thanks.
 

BillaVista

Petty Officer 1st Class
Joined
Jul 1, 2013
Messages
204
Re: Tore the transom ...how to repair? (pics)

There are nuts on the backside of the bolts.

Mine were so rusted out I had to use vice grips to hold the nuts to get enough torque to get them off.

Ahh...the nuts are on the backside of the aluminum bracket. I have it now. Controls are out. Thanks!
 

BillaVista

Petty Officer 1st Class
Joined
Jul 1, 2013
Messages
204
Re: Tore the transom ...how to repair? (pics)

I can't think of anyone that has reused the old foam.

I think the general consensus on the board is to go with the pink or blue closed cell foam insulation sheet from either Lowe's or Home Depot.

Then there are some that use pool noodles though that will cause a huge debate.

Then if you want the Mercedes of resto jobs then use the pour in styrofoam.


Congrats on beating the denial stage and starting your full restoration.

The board on the back of the transom really doesn't do anything feel free to eliminate it when you do the resto.

:)

I'm going to go with the pink extruded polystyrene from Home Depot, and replace it all..might as well, and no more little white balls!

QUESTION: Does it matter whether I use the C200 or C300 version? Price is only a couple of bucks between then per sheet, but might as well save it if no point in spending it. But if the 300 is better, I'll use that.

Thanks to EVERYONE for the continued advice and encouragement.

PS - Instead of calling this a "repair" project I am calling it a "This is NOT a restoration" project ...because I am NOT going to be doing paint (PLLLLEEEEASE don't encourage me too :) at this point), but it IS much more than a simple repair. I think this is a very special advanced kind of denial I am into at the moment!
 

BillaVista

Petty Officer 1st Class
Joined
Jul 1, 2013
Messages
204
Re: Tore the transom ...how to repair? (pics)

#1 - hammer and punch or screwdriver. Beat the inside flange until the drain tube is loose and pull it out. Replacement tubes are cheap.

#2 - Aqua Turf Boat Carpet - 6 Feet Wide - "Cardinal Red" Might be an exact match, There are other carpet suppliers.

#3 - Gorilla glue, PL Premium and maybe some others

#4 - You skipped #4. :lol:

#5 - 3M5200 sealant

#6 - Oops, skipped #6 too.

#7 - What I said in post 31. Water leaks past the splashwell flange.

#8 - Yes, just don't put the port eye anywhere up high like you did. The original is most likely under the kicker bracket. Starboard eye was fine.

#9 - No prep needed. You have to seal when you mount the xducer, so wait until then.

#10 - Leak test and Gluvit or Coat-It to seal the seams and rivets. Even if it's not leaking (you said some water was getting in) it's good insurance.

I think that's it. .................................For now. :rolleyes:

#3a: TiteBond3 is water cleanup, water-proof when dry
#3b: Find a good flat surface & clamp/weight the transom 1/2's together until dry. Any screws you use to 'clamp' it together can be removed & the holes filled prior to sealing it. Don't use your truck's weight. It may 'over' clamp 1 area & starve the lamination of glue, possibly even cup the transom.

#6: The transom ply sits in the channel that runs from chine to chine. Trim tabs & the transducer mounts may not be into the transom plywood:
Starcraft-2013-Jul-08-5588.jpg

I would lift all of the decking and remove all of the white beaded styrofoam (and rat nests), you can see how that stuff is breaking down with age and the little white beads are getting all over the place. The pink or blue polystyrene sheet foam is a much better material.

You should also inspect the bottom of the mid and fore pieces of decking, just because they look good on the top doesn't mean they'll look good on the bottom. If the mid piece of decking is wet, I'd replace it. You'll want all of your decking bone dry when you seal it so it'll absord the maximum amount of sealer, and you don't want to to seal moisture into your decking.

The amount of floatation foam installed in your boat at the factory is the bare minimum, you can do a better job and fit a lot more in there... just remember to leave room for drainage down the center.


MANY MANY thanks for the excellent advice and info
 

BillaVista

Petty Officer 1st Class
Joined
Jul 1, 2013
Messages
204
Re: Tore the transom ...how to repair? (pics)

Wow that was a quick tear down BV. We don't have quite as many places and choices for restore products up here in Canada. My choice for wood is G1S fir plywood. Spar varnish (4 good coats on the flats, hit the edges with each coat for double the protection). Gluvit is a little tough to come by up here as well. PM me and I can give to a list of great supplies in your neck of the woods for carpet, gluvit and acc's.

Yea, the tear down is the fun and easy part...I've done cars that never got past this stage! Not this time though...looking forward to following through. PM inbound. Thanks.
 

BillaVista

Petty Officer 1st Class
Joined
Jul 1, 2013
Messages
204
Re: Tore the transom ...how to repair? (pics)

BV - You're kinda in for a penny, in for a pound at this point. You might as well yank up the rest of the floor and de-mouse the whole boat. If they got into the back, they kinda had the run of the thing. Then you can do a leak check/reseal and put in all new decking/flotation foam. It's also a chance to clear the limber holes. The styro beads plug those when it starts to deteriorate and causes the poor drainage back to the bilge.

Yea, you're right...might as well follow through. I'm off to pull up the decking and de-foam, de-mouse the rest. Maybe install pet snake...should keep the mice down!

PS - is it me, or does anyone else just love that oily marine 2-stroke smell? It reminds me of very many happy days...I love it!
 

SigSaurP229

Commander
Joined
Oct 1, 2008
Messages
2,123
Re: Tore the transom ...how to repair? (pics)

The rest of your boat appears to be in decent shape. As far as the ply goes if you work this fast on rebuilding as you did tear out you will be done in about three weeks.
You have decent templates to go off of which is very advantageous. Since you aren't doing any upholstery or really anything to over the top with it I would yank every piece of floor from the stern up, yank all of the foam out lay new foam lay cut and lay new wood and you are good to go.
Spar is much quicker and cheaper to work with than epoxy. If you do it this way and keep it covered you won't have to worry about any of the wood for the next 20 years. As far as cost goes to do the whole thing you already have to buy Spar or epoxy and about 32 square feet of carpet. You can do the whole for for an extra 10 hours and maybe $100. Then you have all of the white foam gone and never have to worry about any of it again.

I ended up using TITEBOND III for my transom glue and a bunch of clamps. I wouldn't use your truck for clamping worst possible case scenario I would use concrete cinder blocks spread evenly on the whole thing.

Use 5200 to seal everything up.


Just put the stern eyes back where they were from the factory.
 

BillaVista

Petty Officer 1st Class
Joined
Jul 1, 2013
Messages
204
Re: Tore the transom ...how to repair? (pics)

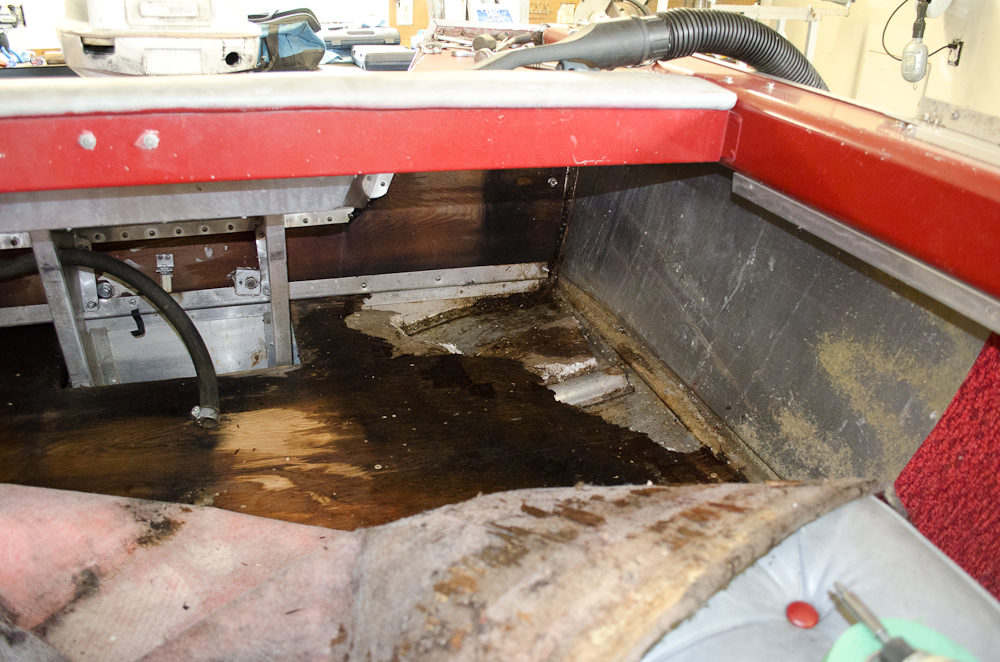
Just a little progress tonight after work.

Pulled out the rest of the floor and what little foam there was.

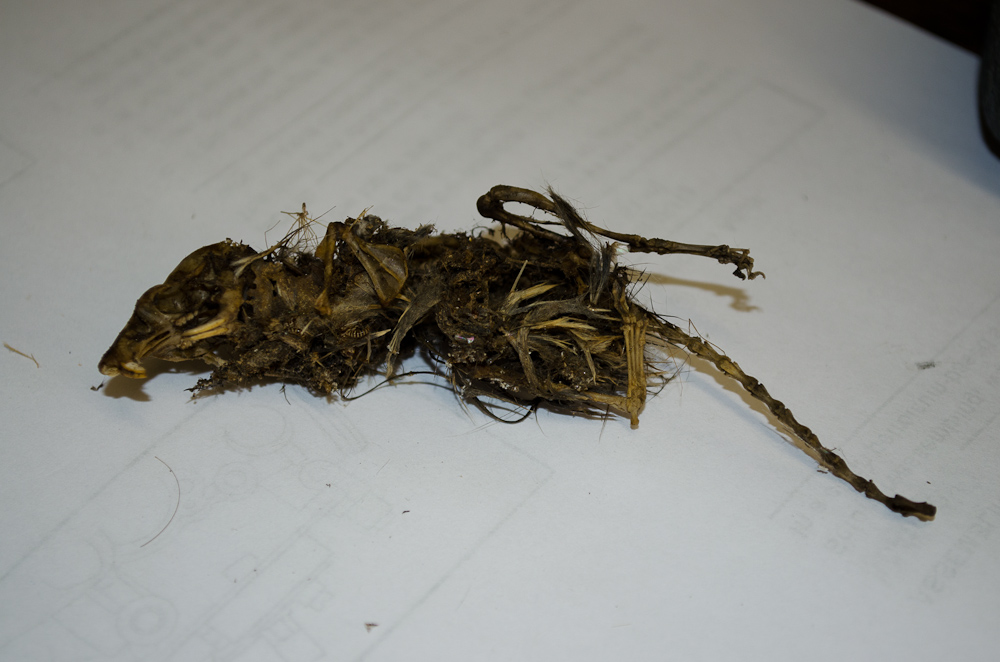
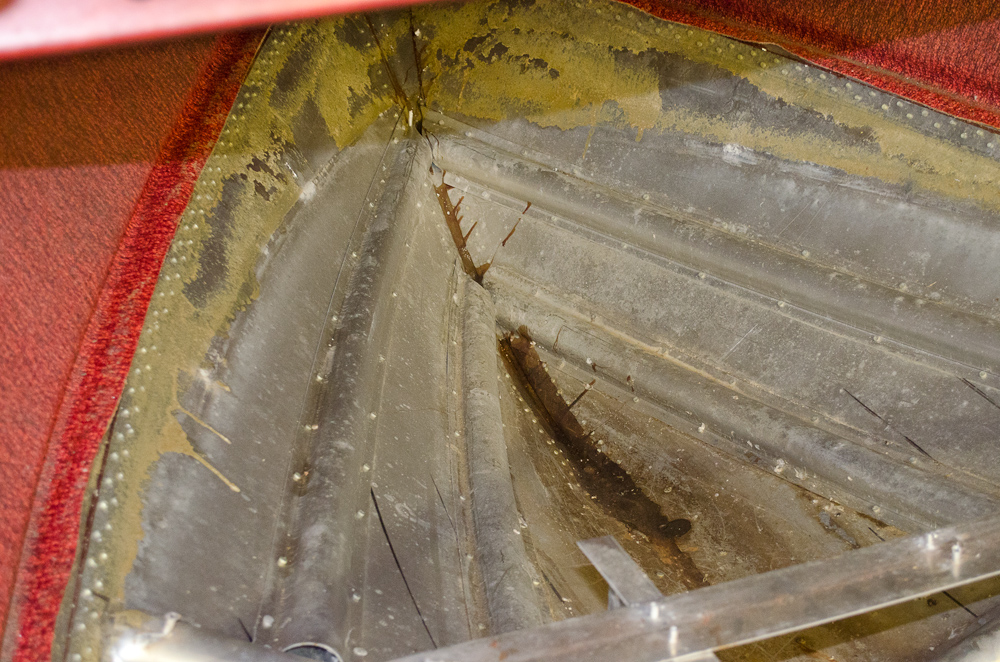
Found the nest culprit, or at least one of them, way up in the bow, semi-fossilized: Look at those teeth! Sabre-tooth rat!

Starcraft-2013-Jul-09-5678.jpg


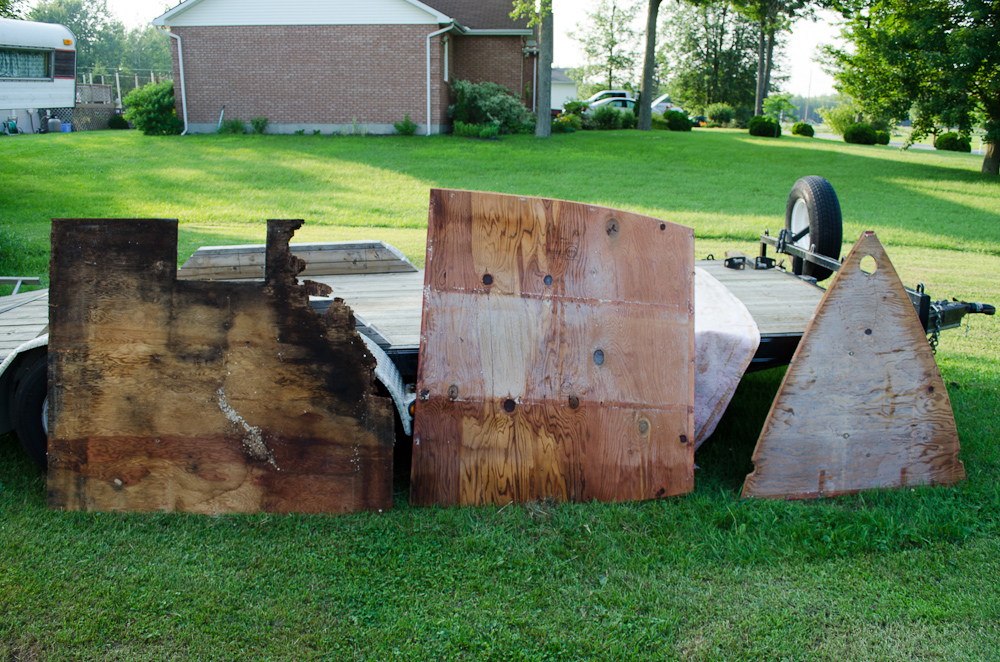
The floor sections removed:

Starcraft-2013-Jul-09-5682.jpg


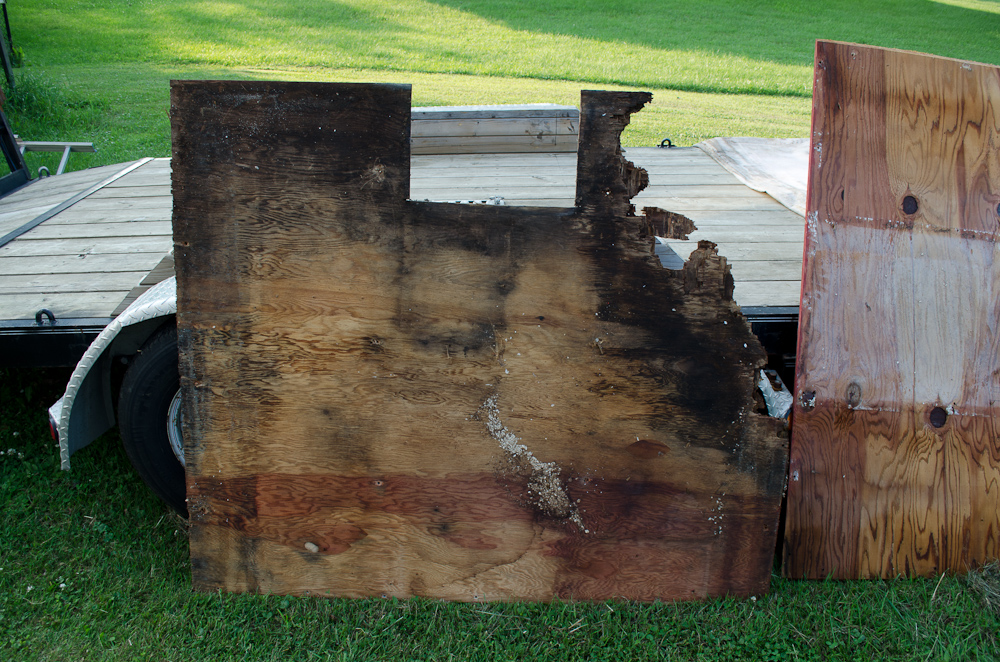
Aft floor:

Starcraft-2013-Jul-09-5683.jpg


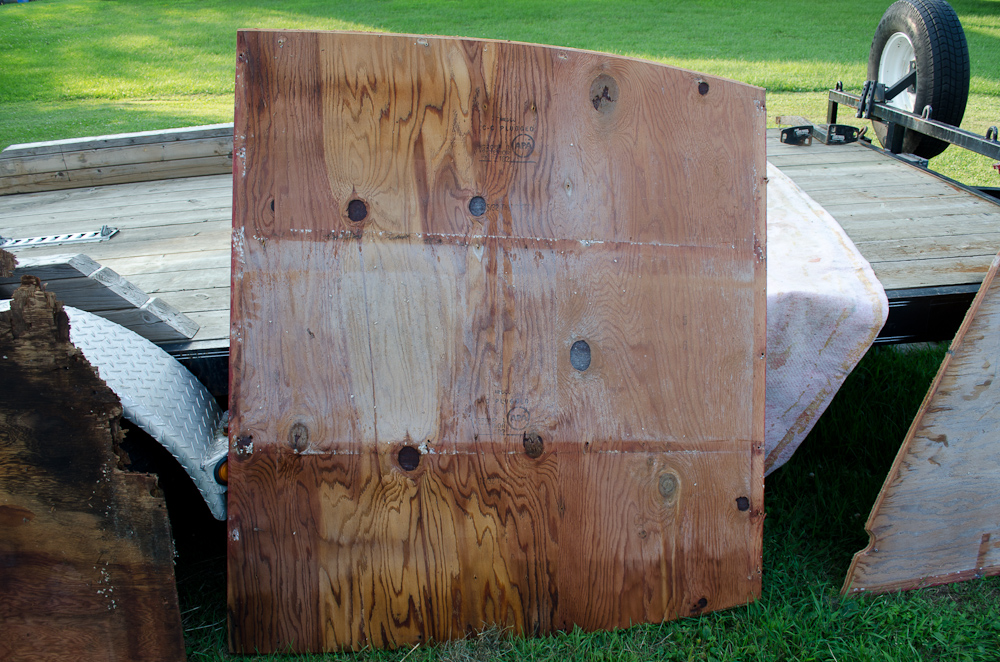
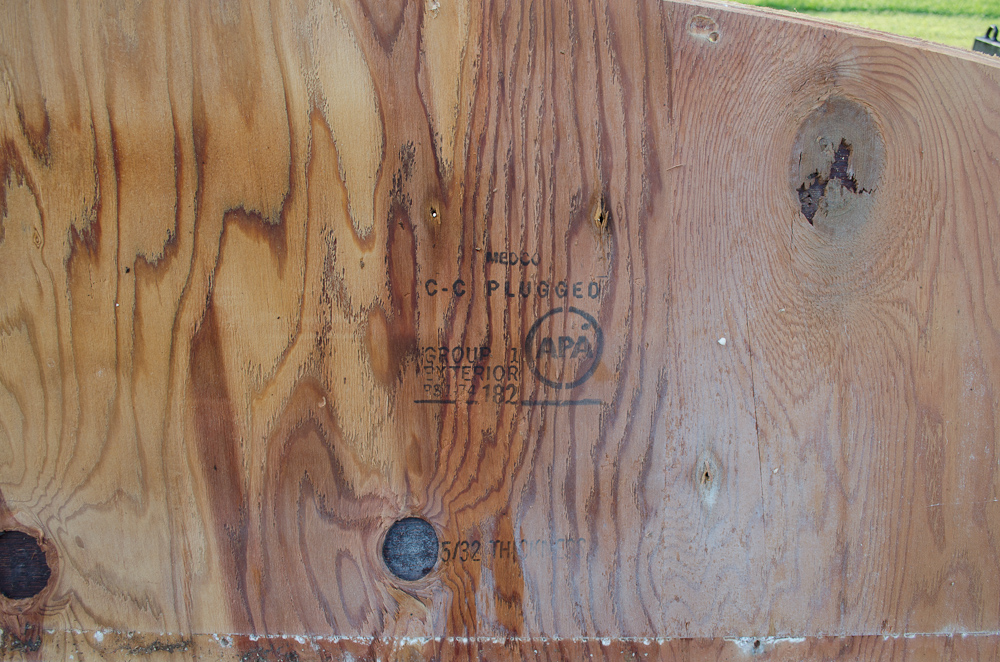
Mid floor. This is the underside. Note the knots. It is not marine grade. Don't know if it's factory original or not, but it looks like it is.

Starcraft-2013-Jul-09-5684.jpg


It says: "MEDCO / C-C PLUGGED / Group 1 Exterior / APA / PS174 / 182 / 15/32" Thickness"

Starcraft-2013-Jul-09-5689.jpg


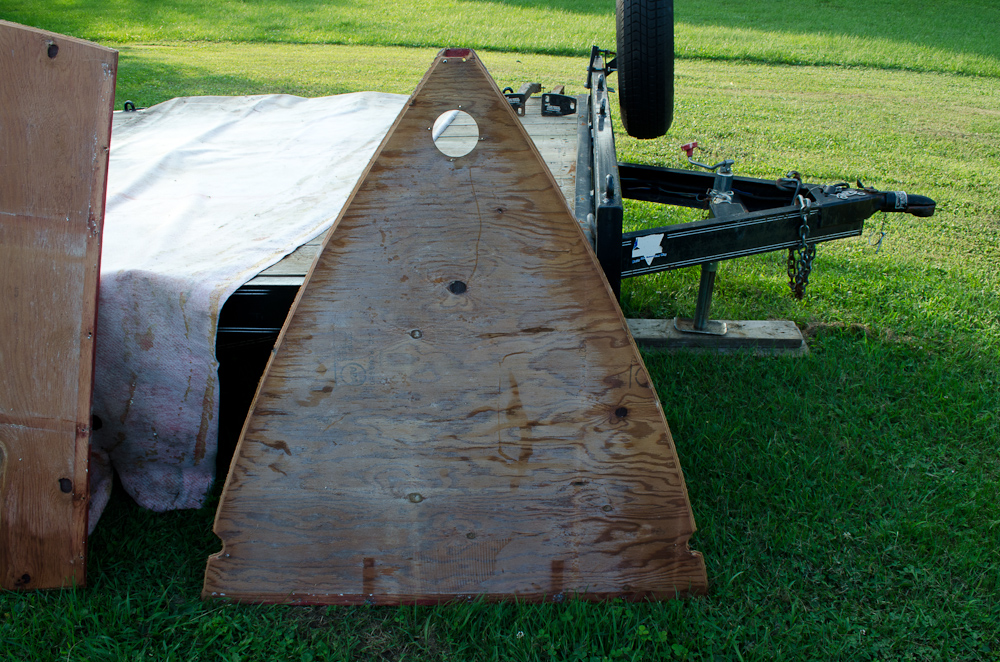
Bow section, underside:

Starcraft-2013-Jul-09-5690.jpg
 

BillaVista

Petty Officer 1st Class
Joined
Jul 1, 2013
Messages
204
Re: Tore the transom ...how to repair? (pics)

This was all there was fo r foam under the mid and bow floor (deck):

Starcraft-2013-Jul-09-5695.jpg


There was some standing water in the bow, right up front. I noticed that there is no way for it to get out unless it is over the top of the cross-brace / rib / spar (not sure the proper term)

Starcraft-2013-Jul-09-5693.jpg


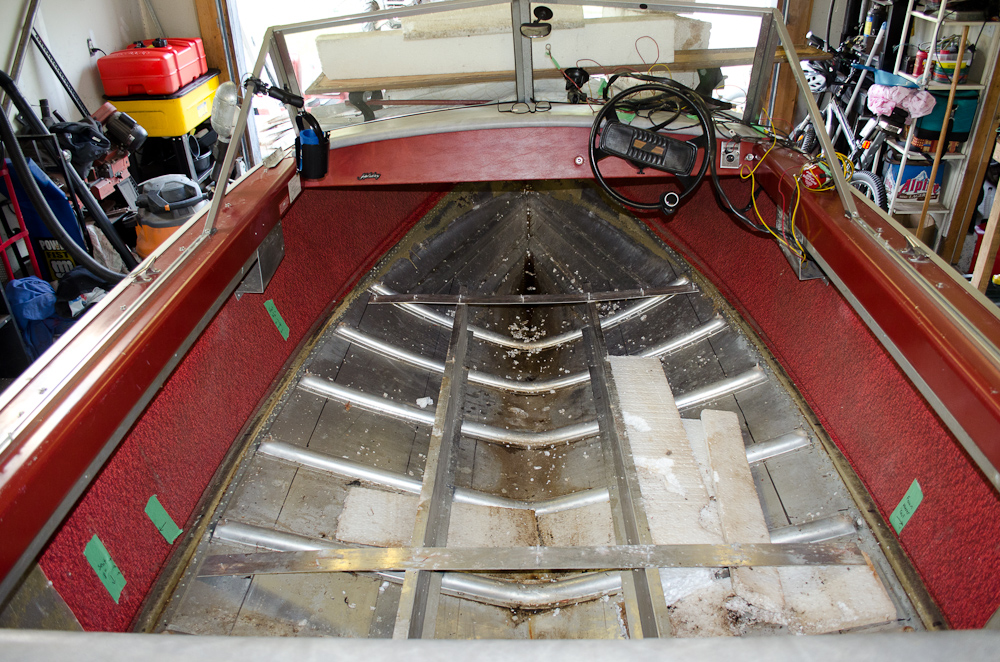
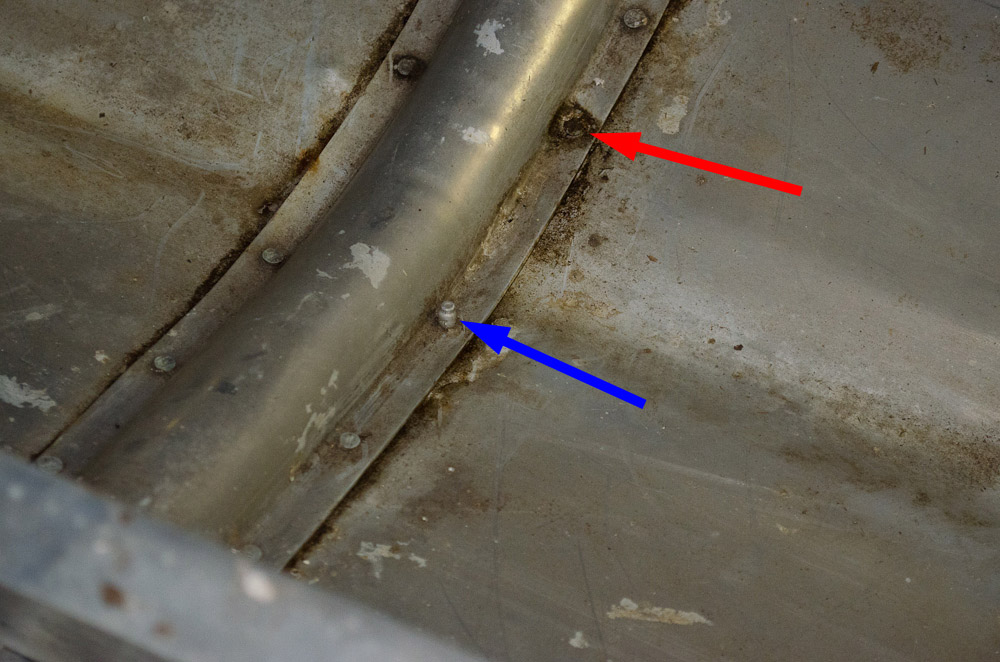
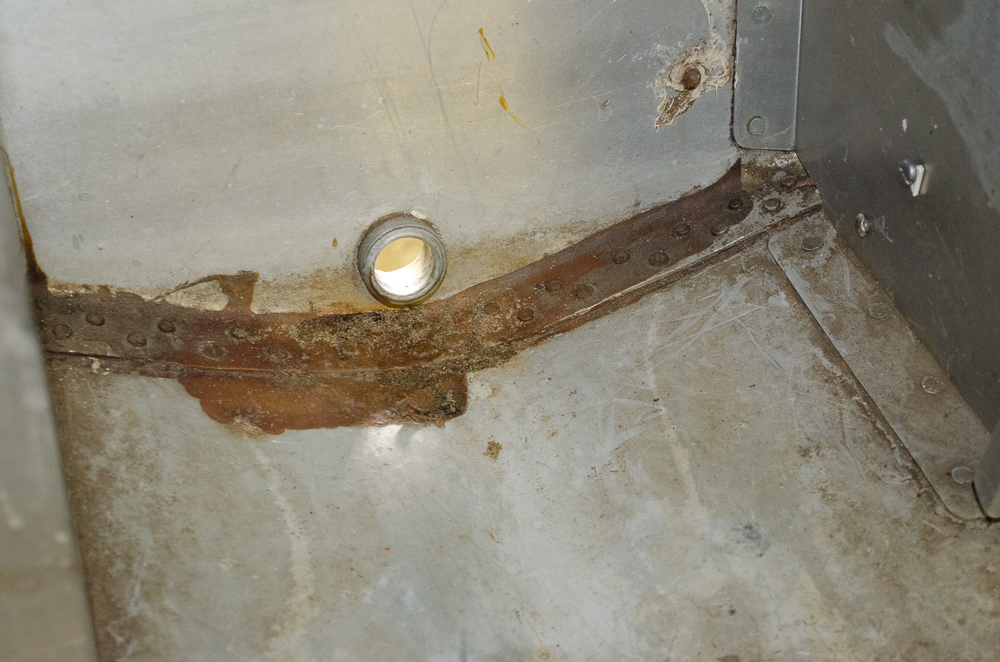
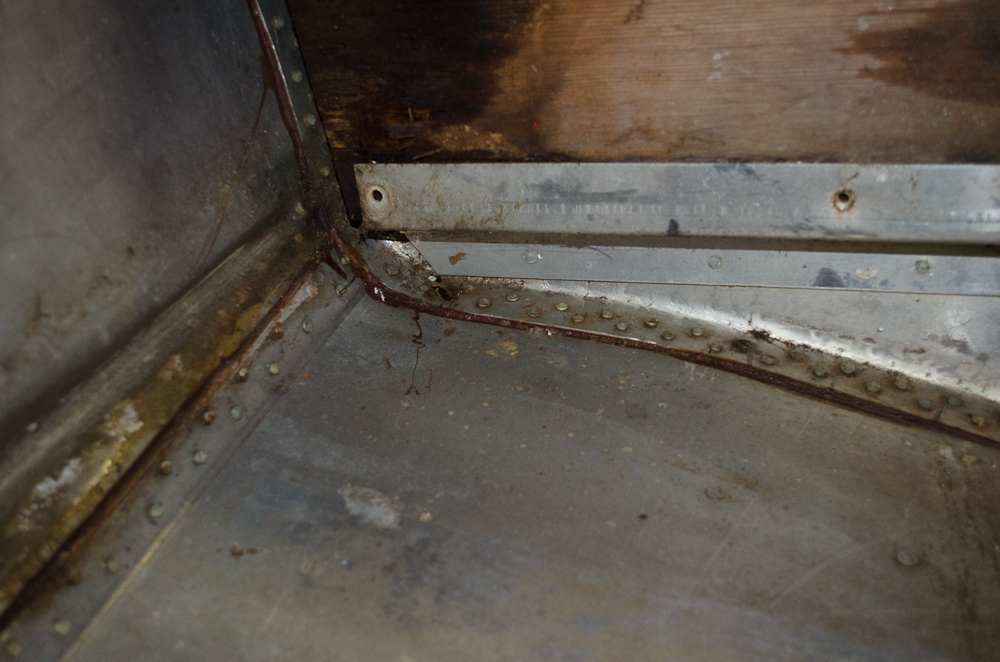
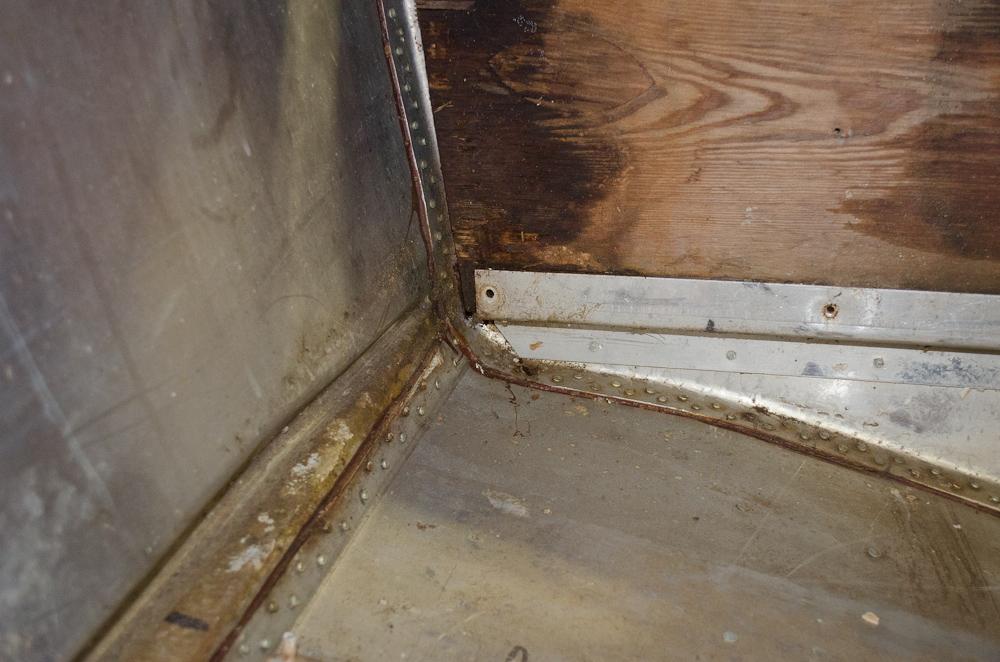
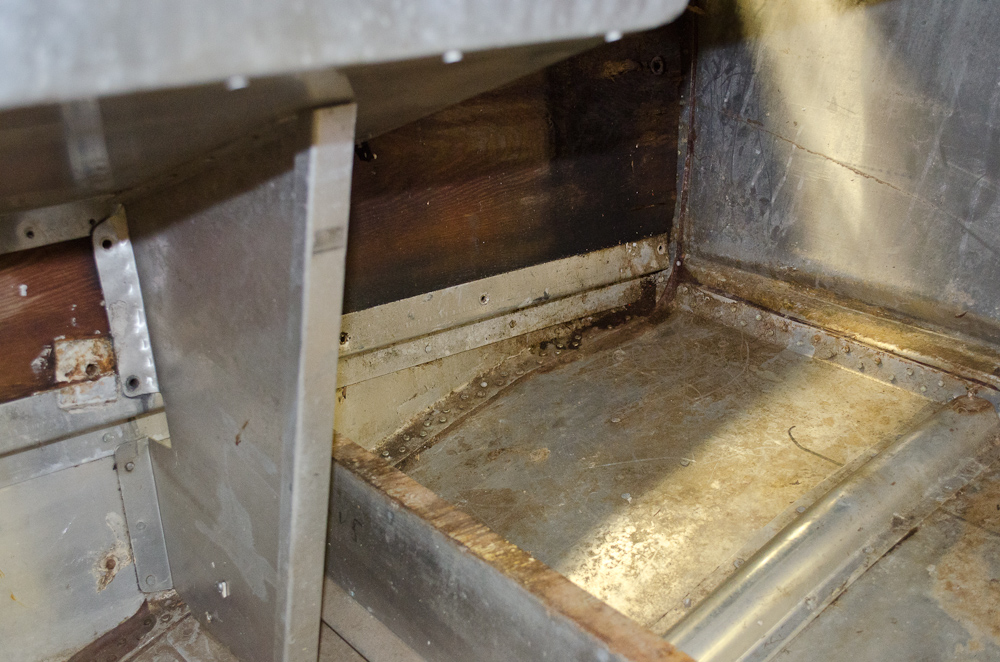
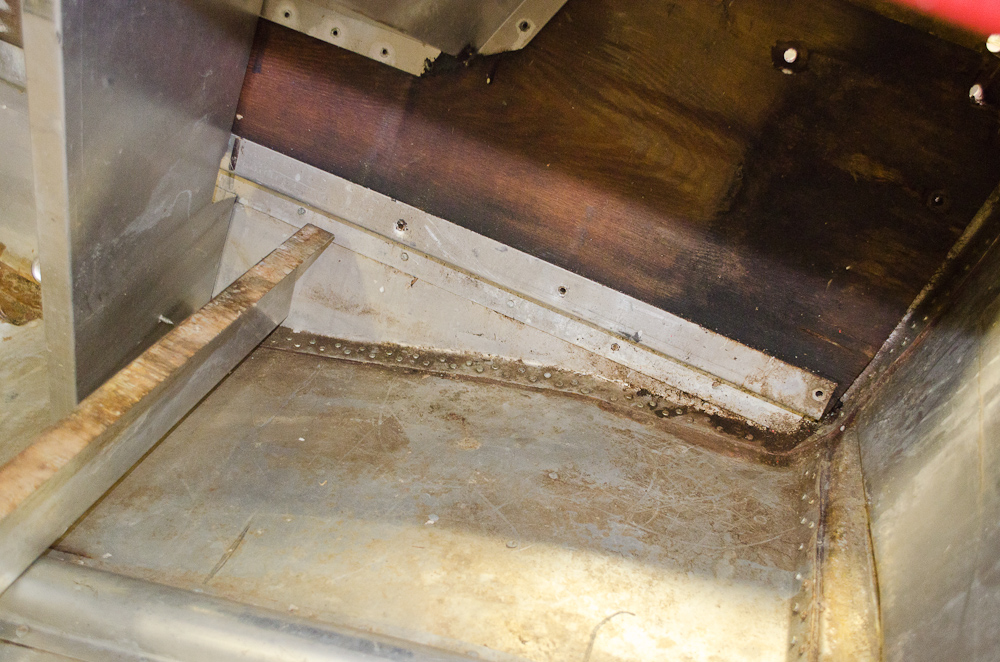
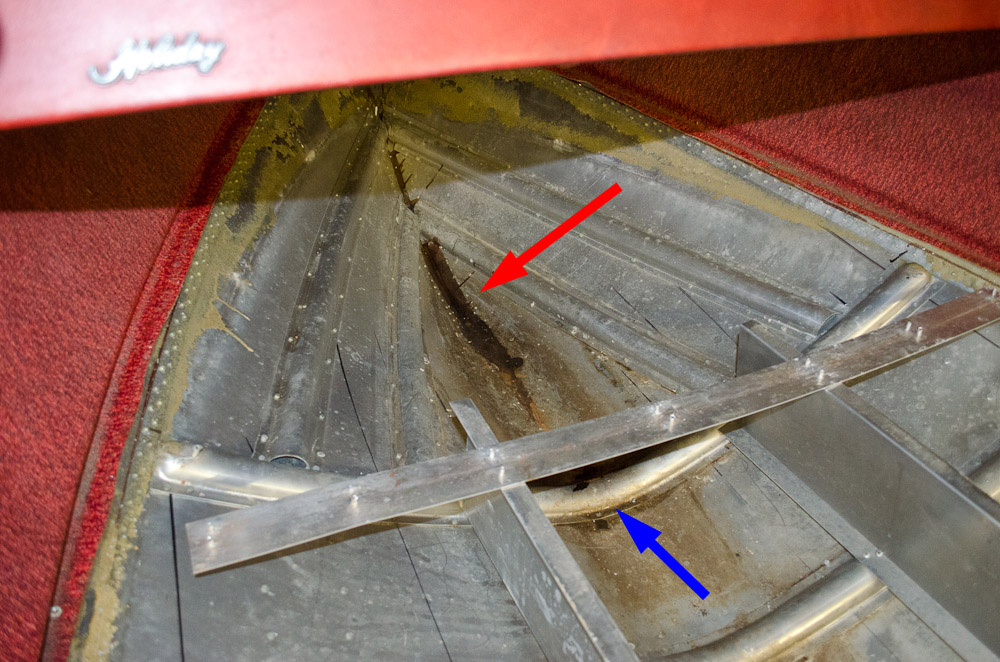
Now I need to focus on cleaning / inspection of the inside, especially the keel / bildge area. Here are some pics. Id appreciate if any of the experienced eyes could tell me if they see anyting alarming or that warrants particular attention. I'll point out what I noticed.

Blue arrow indicates what I think is a replacement rivet, but it doesn't look like the right type. Red arrow indicates a rivet that may be corroded away.

Starcraft-2013-Jul-09-5700m.jpg


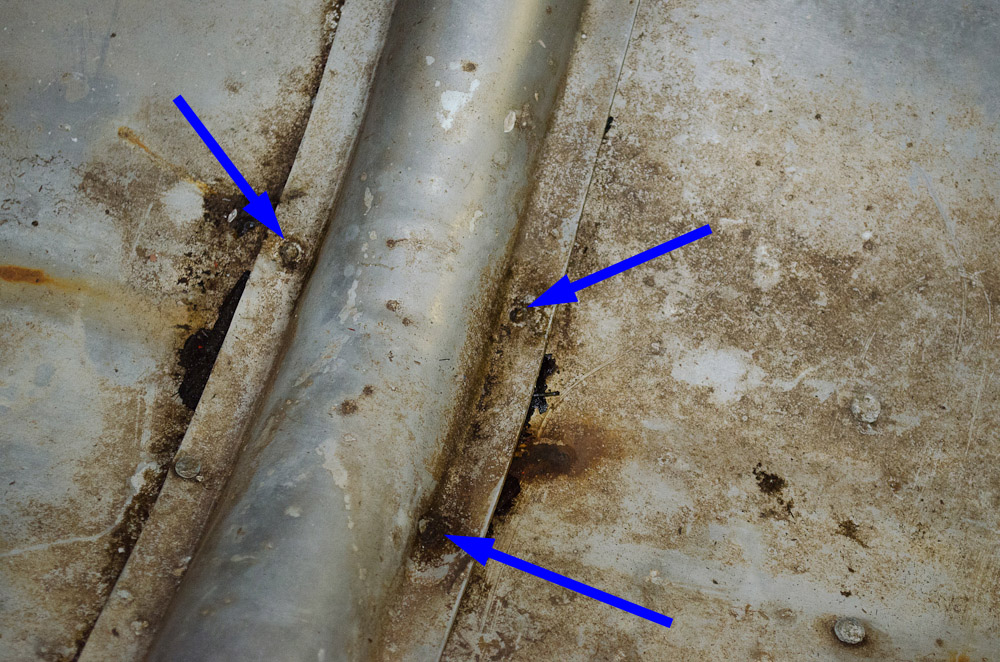
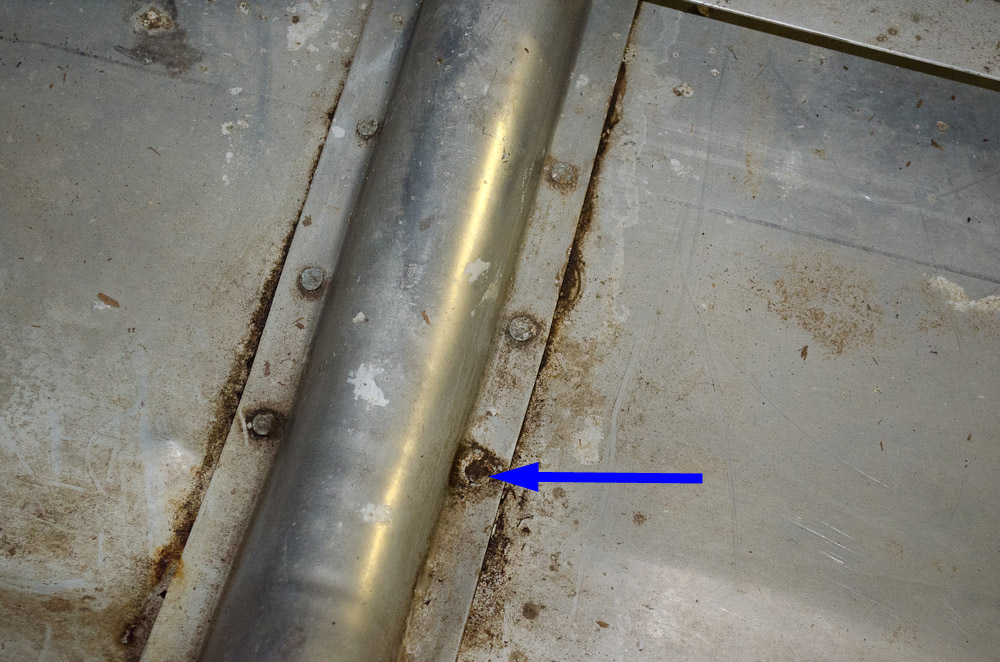
More corroded rivets?

Starcraft-2013-Jul-09-5701m.jpg


Starcraft-2013-Jul-09-5703m.jpg
 

BillaVista

Petty Officer 1st Class
Joined
Jul 1, 2013
Messages
204
Re: Tore the transom ...how to repair? (pics)

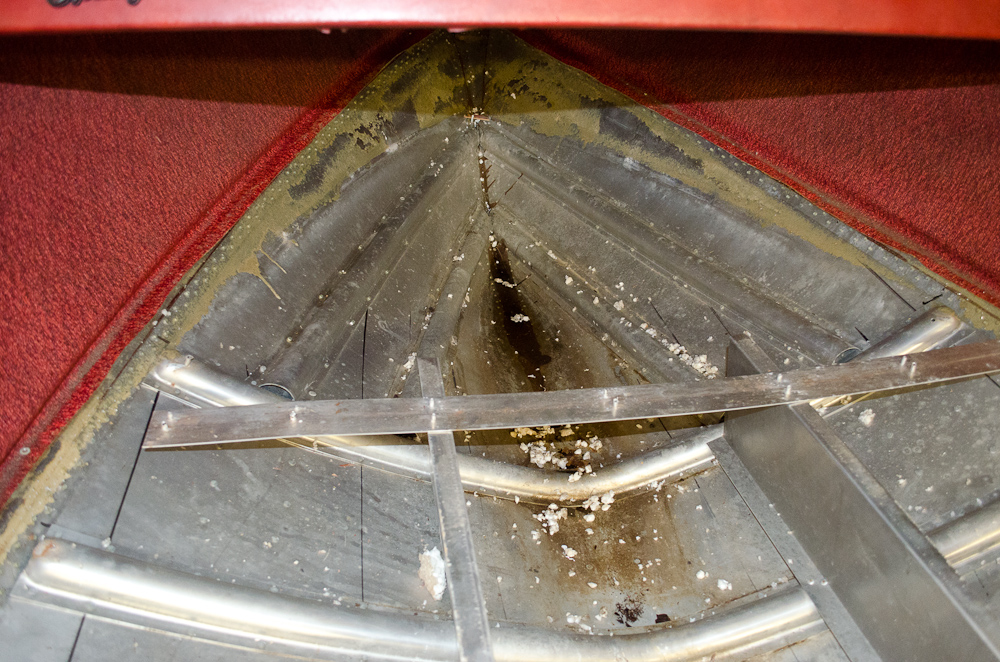
Some kind of red-ish sealant at the stern. Same stiff in the bow.

Starcraft-2013-Jul-09-5707.jpg


Starcraft-2013-Jul-09-5715.jpg


Aft sections:

Starcraft-2013-Jul-09-5708.jpg


Starcraft-2013-Jul-09-5709.jpg


Starcraft-2013-Jul-09-5710.jpg


Starcraft-2013-Jul-09-5713.jpg


Todays QUESTIONS:

Should I remove the red factory sealant in the bow and stern and replace with Gluvit?

What else should I Gluevit?

Should I remove / replace any suspect rivets?

What type and material rivets? Stainless steel? Aluminum?

What is the best tool / cleaning product for cleaning the bilge and around the seams and rivets?

Should I leak test first, or clean and patch first then leak test?

I assume replacement rivets should be coated in 5200 first?
 

BillaVista

Petty Officer 1st Class
Joined
Jul 1, 2013
Messages
204
Re: Tore the transom ...how to repair? (pics)

Can I / should I drill a small drain hole at the blue arrow to let the water that collects at the red arrow area out to the bilge pump?

Starcraft-2013-Jul-09-5719m.jpg
 
Last edited:

BillaVista

Petty Officer 1st Class
Joined
Jul 1, 2013
Messages
204
Re: Tore the transom ...how to repair? (pics)

No progress pics tonight - had to work late, but did drop by the local lumber specialist store and picked up one 4x8 sheet of 3/4 marine grade plywood for the transom and two 4x8 sheets of 1/2" fir exterior grade (non treated) for the aft and mid floor sections. I'm going to re-use the bow floor section as it is dry and already perfectly cut. I will however treat it with whatever I treat the rest of the floor with (debating Spar vs West System 105 Epoxy Resin). The 3.4 is listed as "4x8x18mm MARINE MAH 13PLY BS1088 CERTIFIED".

I got them from The Wood Source in Mannotick, Ontario, The Wood Source - Ottawa's finest specialty lumber store & mill shop

I have thought of a few more questions:

Does anyone know the coverage of the Spar and / or West System 105 Epoxy Resin? i.e - how much of each I would need?

I want to do some clean and seal prior to laying the floor - I have read a lot about Gluvit. Question is - how / why would this be better than just using a bunch of 3M 5200 in the seams and rivets on the inside?

Can I use SS screws instead of rivets to re-install the floor?

Whether screws or rivets for the floor - is it critical to get them all exactly back in the original holes? If so, any tricks to accomplishing that?

Has anyone laid a poly vapor barrier on the floor prior to carpeting? Like the heavy plastic poly vapor barrier used in home construction? Reasons why not? I want to feel as comfortable as possible - i.e. not flinch when the kids climb in from swimming or haul the tube in with 2 litres of water in it.
 

BillaVista

Petty Officer 1st Class
Joined
Jul 1, 2013
Messages
204
Re: Tore the transom ...how to repair? (pics)

I'm going to search for the info, but thought I'd fire off an easy question in case anyone knows off the top of their head.

What size rivets do I need for:

Hull:

Floor:

Topside stuff (like gunwale corners):

Are the Hull rivets Alu or SS?

Any reason I couldn't or shouldn't screw the new floor down instead of rivet? Surely you don't have to try and hit all the original rivet holes?

I'm sorry for appearing lazy, but I'm under some huge time pressures and trying to learn really fast.

You see, Admiral SWMBO (aka CINC-Homefleet) has set me an impossible task. She wants her boat fixed a) Well, B) Fast, and c) without costing too much. Bless her. What can i say - at least she loves the boat and wants to miss as little time on the lake as possible!

But you know what they say in most shops (including mine):

We do three kinds of work here:

1) Good
2) Fast
3) Cheap

...You may pick any two.


Soooo, I'm desperately trying to learn fast enough so I can order stuff I need quickly so I don;t get held up waiting for supplies (and a lot have to come from south of the border or the other side of Canada)

I'ma need you good folks help if I have any chance!

Thanks for your time!
 

Stephenatx

Petty Officer 2nd Class
Joined
Aug 1, 2011
Messages
156
Re: Tore the transom ...how to repair? (pics)

Not sure on yours, but the SS has a little space under the cross bracing to let water drain to the rear. All of mine were plugged. I used an old hacksaw blade clamped in a vice grips to clean the spaces.
 

BillaVista

Petty Officer 1st Class
Joined
Jul 1, 2013
Messages
204
Re: Tore the transom ...how to repair? (pics)

Not sure on yours, but the SS has a little space under the cross bracing to let water drain to the rear. All of mine were plugged. I used an old hacksaw blade clamped in a vice grips to clean the spaces.

I'll try that, thanks for the tip.
 

jbcurt00

Moderator
Staff member
Joined
Oct 25, 2011
Messages
24,944
Re: Tore the transom ...how to repair? (pics)

Between the arrows on the right side of this pix there should be a limber hole under the rib to let the water drain back to the bilge.
Starcraft-2013-Jul-09-5701m.jpg


Most (all?) of the tinny SC's should have them, and most of them are debris filled like Stephan's. 1 or 2 ribs up near the bow may not have good ones. My Jet doesn't drain well at all from the bow side of the foremost rib, almost no limber hole. The rest do a pretty good job, once the bedliner was removed.
 

BillaVista

Petty Officer 1st Class
Joined
Jul 1, 2013
Messages
204
Re: Tore the transom ...how to repair? (pics)

OK, not a lot of progress this weekend, but the new floors are cut and the transom is almost out.

I've decided to loosen the rub strips, remove some of the splashwell screws, and gently pry back the gunwals to get the old transom out and the new one in, rather than bending the aluminum gunwal corners. More work and time, but I just know with my luck the aluminum would crease badly or crack if I tried to bend it.

For any other newbies following I can confirm that the floor rivets are 3/16", as are the gunwale cap and other top stuff rivets.

For coating the floors and transom I ordered a gallon of Epoxy-Plus Marine Epoxy from Clark Craft.

I also ordered new stern gunwale caps from MichaelP (Search "Starcraft Boat Transom End Caps" on e-bay).

Next steps are:

- remove all the old floor rivets, test-fit the new floor sections.

- finish removing the old transom and build the new.

- start epoxy coating the floors and transom.

- pressure wash the inside of the hull, re-buck or R&R any suspect rivets, fill boat with water for leak test.

- install any needed new rivets then gluvit all rivets below the waterline.

BUT - I still have some questions that would help me with the next steps:


QUESTIONS:

1) Does it matter whether I use the C200 or C300 version of the pink extruded poly from HD for flotation? Price is only a couple of bucks between then per sheet, but might as well save it if no point in spending it. But if the 300 is better, I'll use that.

2) Should I remove the red factory sealant in the bow and stern and replace with Gluvit?

3) Can I use SS screws instead of rivets to re-install the floor?

4) Whether screws or rivets for the floor - is it critical to get them all exactly back in the original holes? If so, any tricks to accomplishing that?

5) Has anyone laid a poly vapor barrier on the floor prior to carpeting? Like the heavy plastic poly vapor barrier used in home construction? Any reasons not to? I want to feel as comfortable as possible - i.e. not flinch when the kids climb in from swimming or haul the tube in with 2 litres of water in it.

6) What size solid rivets do I need for the hull?
 

jigngrub

Fleet Admiral
Joined
Mar 19, 2011
Messages
8,155
Re: Tore the transom ...how to repair? (pics)

QUESTIONS:

1) Does it matter whether I use the C200 or C300 version of the pink extruded poly from HD for flotation? Price is only a couple of bucks between then per sheet, but might as well save it if no point in spending it. But if the 300 is better, I'll use that.

2) Should I remove the red factory sealant in the bow and stern and replace with Gluvit?

3) Can I use SS screws instead of rivets to re-install the floor?

4) Whether screws or rivets for the floor - is it critical to get them all exactly back in the original holes? If so, any tricks to accomplishing that?

5) Has anyone laid a poly vapor barrier on the floor prior to carpeting? Like the heavy plastic poly vapor barrier used in home construction? Any reasons not to? I want to feel as comfortable as possible - i.e. not flinch when the kids climb in from swimming or haul the tube in with 2 litres of water in it.

6) What size solid rivets do I need for the hull?

1. The C300 is a tougher grade of the poly insulation with a compression strength of 30 lbs. per square inch compared to 20 with the C200.

2. Sorry, that's not factory sealant... new boats don't need sealant, especially in random areas. Your decking wasn't factory either, not too surprising given your boats age.
Remove as much of the old red stuff as you can before applying the Gluvit.

3. SS screws work well, but are considerably more expensive than aluminum rivets.

4. Don't even try to hit the same old holes, just drill new holes and your life will much easier.

5. No need for vapor barrier with epoxy resin sealer, apply 4 coats of resin to the top of the decking and it'll be like a sheet of Lexan between your decking and the carpet.

6. More than likely 3/16" diameter... and I believe the length should be 1.5 times the thickness of the material (s)you intend to fasten.

You may want to consider this rivet installation:
1989 Sylvan Boat Rebuild Part 4 - YouTube
It turns a 2 man job into a one man job and no beating or banging, plus you'll be certain the rivet is set right.
 
Last edited:

SigSaurP229

Commander
Joined
Oct 1, 2008
Messages
2,123
Re: Tore the transom ...how to repair? (pics)

OK, not a lot of progress this weekend, but the new floors are cut and the transom is almost out.

I've decided to loosen the rub strips, remove some of the splashwell screws, and gently pry back the gunwals to get the old transom out and the new one in, rather than bending the aluminum gunwal corners. More work and time, but I just know with my luck the aluminum would crease badly or crack if I tried to bend it.

For any other newbies following I can confirm that the floor rivets are 3/16", as are the gunwale cap and other top stuff rivets.

For coating the floors and transom I ordered a gallon of Epoxy-Plus Marine Epoxy from Clark Craft.

I also ordered new stern gunwale caps from MichaelP (Search "Starcraft Boat Transom End Caps" on e-bay).

Next steps are:

- remove all the old floor rivets, test-fit the new floor sections.

- finish removing the old transom and build the new.

- start epoxy coating the floors and transom.

- pressure wash the inside of the hull, re-buck or R&R any suspect rivets, fill boat with water for leak test.

- install any needed new rivets then gluvit all rivets below the waterline.

BUT - I still have some questions that would help me with the next steps:


QUESTIONS:

1) Does it matter whether I use the C200 or C300 version of the pink extruded poly from HD for flotation? Price is only a couple of bucks between then per sheet, but might as well save it if no point in spending it. But if the 300 is better, I'll use that.

2) Should I remove the red factory sealant in the bow and stern and replace with Gluvit?

3) Can I use SS screws instead of rivets to re-install the floor?

4) Whether screws or rivets for the floor - is it critical to get them all exactly back in the original holes? If so, any tricks to accomplishing that?

5) Has anyone laid a poly vapor barrier on the floor prior to carpeting? Like the heavy plastic poly vapor barrier used in home construction? Any reasons not to? I want to feel as comfortable as possible - i.e. not flinch when the kids climb in from swimming or haul the tube in with 2 litres of water in it.

6) What size solid rivets do I need for the hull?

I don't think the type of blue or pink foam insulation matters as long as its the closed cell stuff.

Just Drill new holes for the floor.

SS screws are acceptable for the floor, though more expensive than rivets but SS Screws are a ton easier to install without and air riveter.

No need for a poly vapor barrier.

Can't remember the rivet size on the hull.


Additionally, I think all of the hulls are designed to have water flow underneath the ribs. Don't drill holes. I cheated when I cleaned my limber holes out.

Basically I vacuumed the entire inside of the hull out put a bunch of water in it tilted the trailer forward, then tilted it back I went through each rib with the air gun on the compressor and blew each one of them out until water drained from underneath. Then I vacuumed again. Then I blew them out again until basically crap stopped coming out from underneath them.

Anyways, I am prolonging the inevitable here, I need to be in the shop working on my boat at the moment. Good luck I will check in on your resto again this evening.
 
Top