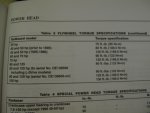
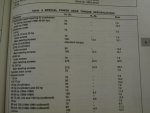
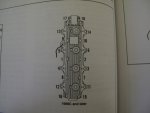
Took the head off my motor, heres a video explaining everything.

pnwboat

Rear Admiral
Joined
Oct 8, 2007
Messages
4,251
Re: Took the head off my motor, heres a video explaining everything.

Kind of hard to tell if those kits will work on your carburetors. I had a lot of trouble find the right ones for mine. Looks like the Mallory kit is for carbs with replaceable needle valve seats. Take a look at yours and see if the seats look like they are screwed in and can be removed with a socket or screw driver. Some of the carbs have pressed in seats. You have to destroy the seats to remove the pressed in seats and I've not seen any replacements sold anywhere.

What I ended up doing was taking mine apart (float and needle valve) and comparing the parts with the pictures on line. Just have to be careful because some of the pictures are not of the actual product.

I took some advice from folks on this Forum and installed an in line filter between the fuel pump and carbs. Haven't had any carb issues in the past 4 or 5 years.
 

swick

Petty Officer 1st Class
Joined
Aug 15, 2009
Messages
282
Re: Took the head off my motor, heres a video explaining everything.

Last year I bought my carb kits from another seller on ebay for $40 a piece, but I really think thats still kinda expensive considering all you really need out of the package is the new pin and the gaskets. And when I do my carbs I take them completely apart and soak them in carb cleaner for a good 24 hours. I think I maintain them pretty well, but even to take them off to let them soak means I at least have to replace the cork gasket that sits between the bowl and the carburetor. I'd rather not have to spend another $80 for the kits if there is a cheaper alternative.

I also have an inline fuel filter between my fuel pump and the carbs, and between my gas tank and the outboard I installed a fuel/water seperator earlier this year. I'm not so much concerned with any garbage making it into my carbs, I more or less like to take them off as part of my annual maintenance because the thing sits for the winter. Somewhere on here someone posted an idea I like, to disconnect the fuel line before storage and let the fuel run out of the engine and carbs. I might try that at the end of this season.
 

pnwboat

Rear Admiral
Joined
Oct 8, 2007
Messages
4,251
Re: Took the head off my motor, heres a video explaining everything.

I don't think I ever paid over $15 for a carburetor kit. Never needed those $45 kits. Needle valve, fuel bowl gasket and fuel bowl bolt gaskets are usually the only thing I've ever needed.
 

tater76

Senior Chief Petty Officer
Joined
May 7, 2010
Messages
712
Re: Took the head off my motor, heres a video explaining everything.

pnwboat is right on the $15 bucks thing. I hate to steer business away from iboats, but check amazon.com if you have a part#, I just ordered three the other day for under $15. Also, be careful with the carb cleaner. Especially if you reuse needles as it will eat the tips. I use WD40 to clear all the passages then install a new needle and bowl gaskets.
 

swick

Petty Officer 1st Class
Joined
Aug 15, 2009
Messages
282
Re: Took the head off my motor, heres a video explaining everything.

yeah I agree that the needle and the bowl gaskets are all that really need replacing, another reason I hate spending so much on something that costs about $0.02 to manufacture. I'll check around some more before I buy, I'll check amazon too. I hear you, not wanting to steer business away from here, but believe me they get their dues from us, and advertising too. I've spent plenty here and always recommend people to the site as well. iboats has to be my favorite of all forums. Believe it or not I got my powerhead gasket set today, ordered it yesterday and was totally surprised today when I got home with the kids.
 

pnwboat

Rear Admiral
Joined
Oct 8, 2007
Messages
4,251
Re: Took the head off my motor, heres a video explaining everything.

The gasket set covers several different variations of the 4 cylinder Force motors. Just pay close attention. I'm sure that if you have any questions, there will be folks here that will be able to help out.
 

swick

Petty Officer 1st Class
Joined
Aug 15, 2009
Messages
282
Re: Took the head off my motor, heres a video explaining everything.

I see, so basically I will have extras that were included for the sake of other models? I guess its like the carb kit scenario all over again; paying for extra parts. I remember the gasket from the botttom plate and the head gasket. Other than that, the reed assembly had thick plastic wedges in place of gaskets, I imagine I need to rere-use those, but I suppose it is very possible that the last person to "rebuild" this engine did not reinstall all the necessary gaskets, so I guess I can't just go off what I took off. At any rate I can't do anything until I get the pistons, unless I get a carb kit and thermostat first I guess. Thanks for the input. You and Tater have been life savers, seriously, I really appreciate all of the advice and help you guys have given me. And that goes for the rest of the guys on this thread too.
 

riptorn

Chief Petty Officer
Joined
Mar 8, 2012
Messages
433
Re: Took the head off my motor, heres a video explaining everything.

You must know this already but just a heads up, make sure all bolts and bolt holes are clean of debris before you start torquing down the bolts. Oil the bolts lightly to get the right torque down.
 

swick

Petty Officer 1st Class
Joined
Aug 15, 2009
Messages
282
Re: Took the head off my motor, heres a video explaining everything.

Hi guys. Believe it or not I'm still waiting on those pistons. I got the "electronic shipping info" today, which means the seller hasn't shipped them yet. I guess thats the price you pay for a decent deal on parts. Hopefully I'll have them by the end of the week, I'm anxious to get it all back together and see how we've done. Hopefully everything will go smooth and I'll finally know what it feels like to have a new/ reliable motor on the back of a boat! I went down to Ace Hardware today and matched up those broken/ missing bolts and got a few extras too. Does anyone happen to know the torque specs for this thing or where I can find them? I want to go and pick up a proper torque wrench also, I was wondering whether I should be using Lbs or Inches, but I guess it depends on what the specs say.
 

pnwboat

Rear Admiral
Joined
Oct 8, 2007
Messages
4,251
Re: Took the head off my motor, heres a video explaining everything.

The torque specs are in the manual. Just ask for specifics and I'm sure someone will be able to help. I have two torque wrenches. One for foot LBS and one for Inch LBS. Only time I use the Inch LBS is working on outboards. I use the one for Foot LBS a lot more on different things. You can also borrow one from AutoZone and other places like that for a small refundable security deposit. They give you your money back once you return the tool.

Remember to run double the amount of oil during the break-in and really coat the pistons well with 2-stroke oil when you install them in the cylinders.
 

tater76

Senior Chief Petty Officer
Joined
May 7, 2010
Messages
712
Re: Took the head off my motor, heres a video explaining everything.

Your 120 will likely have both inch pounds and foot pounds for some of the torque settings. If you pick up a foot pound wrench just google a calculator for inch to foot pounds theres a bunch. Or if your a good mathematician you could figure it out ;) I'm too lazy LOL. Calculate, then just round up in your readings, example.. head bolts will be like 17.85 inch lbs or something like that, and myself and others do 20 ftlbs.
If you need to buy one consider checking your local pawn shops. I often find professional name brand tools at half the cost. The last torque wrench I bought was a Snap-On, and I got the guy down to $40 bucks! AND the Snap-On tool rep I called had it checked for free! Thats the big thing with quality torque wrenches, they must be checked every so often and calibrated to make sure the readings are accurate.
I use one wrench for the entire rebuild, and just do the calculating/rounding.
I also could not agree with pnwboat more. I pour half a quart of 2 stroke oil into a dish to dip my fingers and parts in during assembly. I then take a syringe and shoot oil precisely over every bearing so there is no chance of a dry startup.
 

swick

Petty Officer 1st Class
Joined
Aug 15, 2009
Messages
282
Re: Took the head off my motor, heres a video explaining everything.

Theres a Harbor Frieght over by my house that has both torque wrneches brand new for about $20 a piece. At that price I can't argue with picking both up. I'll probably swing over there today after picking the kids up from school. I got the pistons in the mail today so I'm excited to start getting her back together, but I still need to find the torque specs, at least for the head for now. Do you guys have any thoughts on hosing the block out real good to make sure there are no left over metal particles in there before putting the pistons back in? I guess I'll also have to pick up some fresh shop raggs to give everything a good clean oiling while I'm at it.
 

pnwboat

Rear Admiral
Joined
Oct 8, 2007
Messages
4,251
Re: Took the head off my motor, heres a video explaining everything.

After I get my blocks back from the machine shop, I always take a brush and soapy water and clean'em out. Then I take a garden hose with a nozzle and rinse it out. Then use my compressor and blown out all the water. Then immediately take some WD-40 or something similar and spray on the cylinder walls. Doesn't take long for rust to start forming on the cylinder walls.

One other thing. When you're dropping the crankshaft into the case. Those little split rings (I think there's 3 of them) that look like small piston rings but they go around the crankshaft....These are the crankcase seals. It's important that these are intact. It's really easy to break one when you're dropping the crankshaft in place. I usually keep a couple of extra on hand just in case. Between those rings and making sure the dowel holes on the crankshaft bearings are lined up with the dowel pins in the case, just be patient and everything will eventually fit like a glove.
 

swick

Petty Officer 1st Class
Joined
Aug 15, 2009
Messages
282
Re: Took the head off my motor, heres a video explaining everything.

Ok thanks. I just found the manual that I bought a few years ago, its a cd (pdf) version, so I'll go thru it tonight and find all the specs and share them here when I find them. Hopefully tomorrow I can get started on this thing. I have all of the major components now, still need to pick up the thermostat and little hoses and whatnot, but I suppose that can wait a bit.
 

swick

Petty Officer 1st Class
Joined
Aug 15, 2009
Messages
282
Re: Took the head off my motor, heres a video explaining everything.

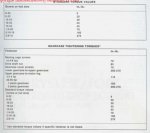
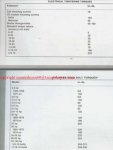
Ok, so this is what I found on the cd I have, not sure if this is specifically for the 120 or not, the cd is of the home-made variety and simply says Force Outboard Repair Manual 84-99. Let me know if these specs look/ sound accurate to you guys. I washed the block down real good tonight and oiled the cylinders with a good layeer of two stroke oil. Tomorrow I'm like to at least get the pistons and the crank back in. I'm going to go through the manual a little better and see if it explains the proper way to position those rings on the crank that I pointed out in the videos.
torque specs.JPGtorque specs 2.JPG

As far as the specs go, I actually anticipated seeing a more detailed version, such as head bolts torqued to ...
 

swick

Petty Officer 1st Class
Joined
Aug 15, 2009
Messages
282
Re: Took the head off my motor, heres a video explaining everything.

You know what, I don't think those specs cover the 20 at all. As it turns out what I have here is a Clymer shop manual covering 1966-1984 Chrysler 3.5-140 and 1984-1988 Force 4-125 hp outboards. I bet they 120 differed from the 125 a bit, not even sure why Force made a 120, seeing that they are the only ones to ever do it.
 

pnwboat

Rear Admiral
Joined
Oct 8, 2007
Messages
4,251
Re: Took the head off my motor, heres a video explaining everything.

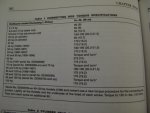
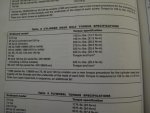
Specs from my Clymer manual.

Connecting rod torque.

IMG_2740.JPG

Cylinder head bolt torque.

IMG_2741.jpg

Flywheel torque.

IMG_2742.JPG

Main bearings. Allen head bolts inside the intake that hold the two halves of motor together.

IMG_2743.JPG

Cylinder head torque sequence.

IMG_2745.JPG
 

swick

Petty Officer 1st Class
Joined
Aug 15, 2009
Messages
282
Re: Took the head off my motor, heres a video explaining everything.

Awesome! Thats what I was looking for in my copy, but I guess mine is pretty dated, covering 1966 engines and all. Theres still some good info in this manual from what I'm looking at. I guess I'll have to figure out where all the gaskets go, but that shouldn't be too difficult.
 

swick

Petty Officer 1st Class
Joined
Aug 15, 2009
Messages
282
Re: Took the head off my motor, heres a video explaining everything.

I'm putting the crankcase back together right now, the torque specs above says 270" lbs or 22.5 ft lbs for themain bearing screws but nothing about the outer screws..... any thoughts?
 
Top