Time to get started on the starcraft resto.

GA_Boater

Honorary Moderator Emeritus
Joined
May 24, 2011
Messages
49,038
Re: Time to get started on the starcraft resto.

JB beat me to the screw stuff. The second thread I posted shows a little bit on the jump seats. Unfortunately his PO dicked them up. Have you looked in the brochures? Here is the '83 pub., not much detail but it does show the back to backs. And the transom cut out is the wide one. The Holiday page shows (again little detail) of the jump and back to back seats.
 

jbcurt00

Moderator
Staff member
Joined
Oct 25, 2011
Messages
25,047
Re: Time to get started on the starcraft resto.

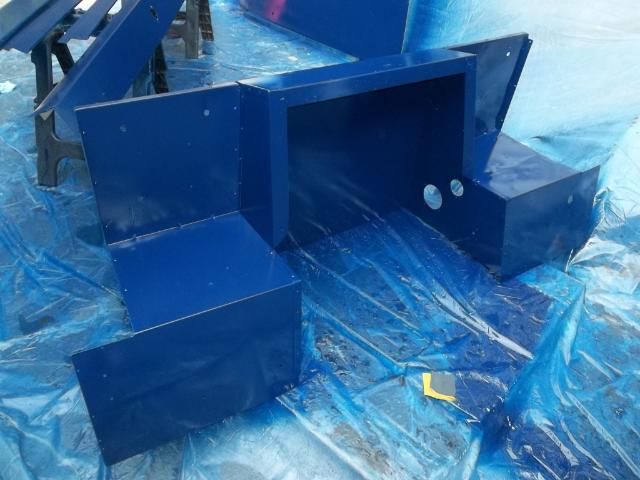
GA's the man for the pix, from post #437 in rrumba's thread:
100_0781.jpg


It looks like there is a row of rivet holes along the top of the 2 large flat panels. The edge that's in the bottom left of this pix...

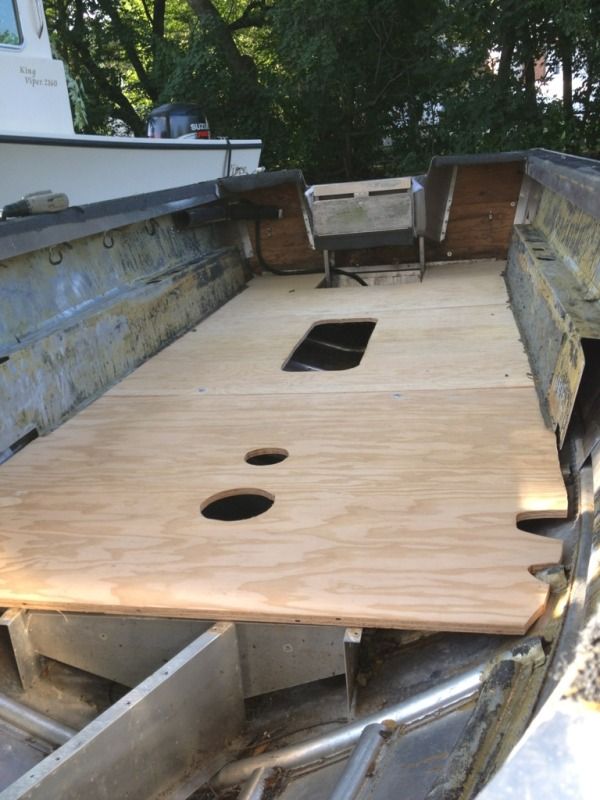
And this is what it looked like during demo:
a5590bec.jpg


I looked at the SC resto thread & missed both of the threads you posted GA, nice work :cool:

You can PM rrumba for sure & ask for any help or info, he's back active @ the forum. Harry's not posted since Sept, so it may take him some time to respond to a PM....
 

GA_Boater

Honorary Moderator Emeritus
Joined
May 24, 2011
Messages
49,038
Re: Time to get started on the starcraft resto.

The Dirty Harry thread, 1st link I got the pic from, removed the splashwell. Maybe read through his thread. Same as the second thread, rrumba's, pulled the splashwell. JB is on the mark with the upper sides toward the gunnel is one piece with the splashwell.
 

SigSaurP229

Commander
Joined
Oct 1, 2008
Messages
2,123
Re: Time to get started on the starcraft resto.

I have seen the HIN number on the boat I just haven't written it down. I didn't really want to cut the transom out if I could avoid it, so far as I can tell without cutting the only way I can figure to do it is to pull the whole rub rail if I do it I am pretty sure I am going to damage it to the point of no return the other option is to cut it about two feet forward, then try to splice it but I am afraid it is going to look like crap.

There is on either side of the splash well three rivets which I have already drilled.
 

GA_Boater

Honorary Moderator Emeritus
Joined
May 24, 2011
Messages
49,038
Re: Time to get started on the starcraft resto.

Actually, Dirty Harry was here in January and rrumba was here about a month ago and we picked on him about the lack of progress pics.
 

GA_Boater

Honorary Moderator Emeritus
Joined
May 24, 2011
Messages
49,038
Re: Time to get started on the starcraft resto.

I have seen the HIN number on the boat I just haven't written it down. I didn't really want to cut the transom out if I could avoid it, so far as I can tell without cutting the only way I can figure to do it is to pull the whole rub rail if I do it I am pretty sure I am going to damage it to the point of no return the other option is to cut it about two feet forward, then try to splice it but I am afraid it is going to look like crap.

There is on either side of the splash well three rivets which I have already drilled.

Don't cut, Sig. Drill rivets and remove what you have to in order to get the S/W loose. I don't know about your SC, but in mine the rub well is held on with screws and nuts. Long screws, too. If you have the same set up, you might be able the remove the screws/nuts to loosen the rub rail without taking the rubber out and enough of them until it clears the top of S/W side piece.
 

jbcurt00

Moderator
Staff member
Joined
Oct 25, 2011
Messages
25,047
Re: Time to get started on the starcraft resto.

The aluminum rubrail will come off in 1 pc per side pretty easy. The vinyl insert is fairly soft in WARM weather so you might crank the heat up early 1 day & leave it to get as warm as possible, and SLOWLY pull it out of the rubrail. A fairly large diameter screwdriver can be used to gently pry up & out on the insert.

You can try a few places to get new insert, but try to get it out & try to reuse it. Many do.

Google:

vinyl rubrail insert

A few:
Taco Marine

Rubrail.com Dock Edging, Bumpers & Rubrails
Wefco
 

SigSaurP229

Commander
Joined
Oct 1, 2008
Messages
2,123
Re: Time to get started on the starcraft resto.

I was able to remove the two shorter pieces of rubrail on the transom with no difficulty, and the only thing holding the trim on was just a few phillips head screws tomorrow I will break out the heat gun fire the wood stove up to 80 and see if we can gently get the rub rail out. You guys have been awesome in helping me thank you both.
 

GA_Boater

Honorary Moderator Emeritus
Joined
May 24, 2011
Messages
49,038
Re: Time to get started on the starcraft resto.

I was able to remove the two shorter pieces of rubrail on the transom with no difficulty, and the only thing holding the trim on was just a few phillips head screws tomorrow I will break out the heat gun fire the wood stove up to 80 and see if we can gently get the rub rail out. You guys have been awesome in helping me thank you both.

Hint, hint. The rub rail rubber shrinks after a few decades of sun/heat. Use a large putty knife pushed down and up between the rubber and the aluminum rail. Start at the aft semi-loose end. I didn't even need heat, well it was 90+ outside so maybe heat helps. Check to see if nut/screws hold the AL rail on.
 

GA_Boater

Honorary Moderator Emeritus
Joined
May 24, 2011
Messages
49,038
Re: Time to get started on the starcraft resto.

One more thing about the rub rail. When I took off the bow end cap (??) I found the rubber was one piece from the stern end cap around the front and back to the other end cap. If you need a little to cheat with under the bow cap is a good place to steal from, maybe 6 in. Just slide it back to rear and stick a screw or rivet in all the ends. I have one rivet in each side under the stern end cap. You may not have the same set-up on a longer boat, I'm only 16'
 

SigSaurP229

Commander
Joined
Oct 1, 2008
Messages
2,123
Re: Time to get started on the starcraft resto.

Hint, hint. The rub rail rubber shrinks after a few decades of sun/heat. Use a large putty knife pushed down and up between the rubber and the aluminum rail. Start at the aft semi-loose end. I didn't even need heat, well it was 90+ outside so maybe heat helps. Check to see if nut/screws hold the AL rail on.

GA your first link got it, it has to happen exactly as I thought. I need to drill the rivets holding the bow piece, then remove the vinyl rubrail insert, then the rest should be a cakewalk.

What was really interesting my corner pieces were riveted in the back but screwed on the sides with phillips head screws, I am unsure how they got them in though because half of the screw head was filled with the original metal not stripped, but like the original screw hadn't been cut right to begin with. I actually had to drill the head of the screw and remove it with vice grips.
 

GA_Boater

Honorary Moderator Emeritus
Joined
May 24, 2011
Messages
49,038
Re: Time to get started on the starcraft resto.

I had rivets in the bow and end caps. I used some large headed stainless screws to put them back on. In fact, the same size screws that held the side panels to the side trays. I think you also have side trays. I didn't see side panels in your piles of mulch. You have to be happy all that stuff is out of the boat.
 

dozerII

Admiral
Joined
Oct 25, 2009
Messages
6,527
Re: Time to get started on the starcraft resto.

Looks like I'm a little late to the party Sig, the guys got you looked after. When pulling out the rub rail check the aluminum track it slides in for flat spots from hitting a dock or other object. If it id creased or flattened it will pinch the flange on the rub rail and hold it tight. If you pull too hard it will tear the flange off and you will be looking for new RR.
 

SigSaurP229

Commander
Joined
Oct 1, 2008
Messages
2,123
Re: Time to get started on the starcraft resto.

Alright Ladies and Gentleman it is time for Thursday's update. My goal is to do 2 hours on the boat everyday, while that is not always possible I try though I work alot slower than some as this is very much a learn as you go experience for me. I am sincerely gratefull for everyone's assistance and my hope is that this thread in the future will not serve as a how to but more so a thread to reference for advice.

Without further delay this is where we started today

20130306_144703_zps6deba6f2.jpg


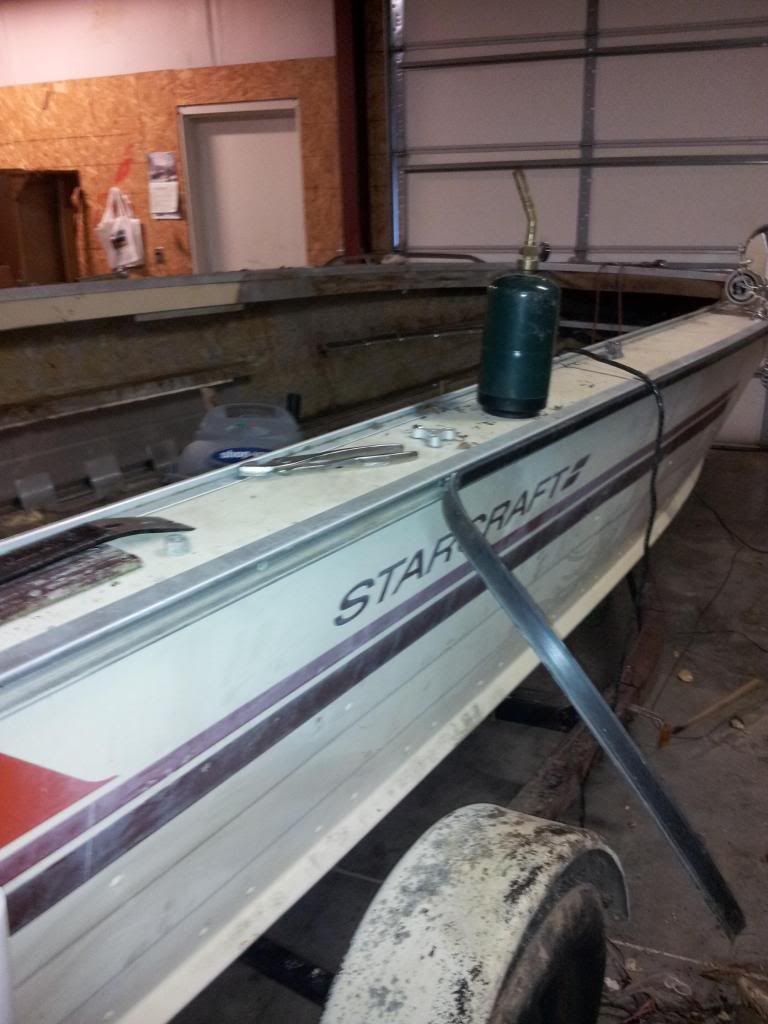
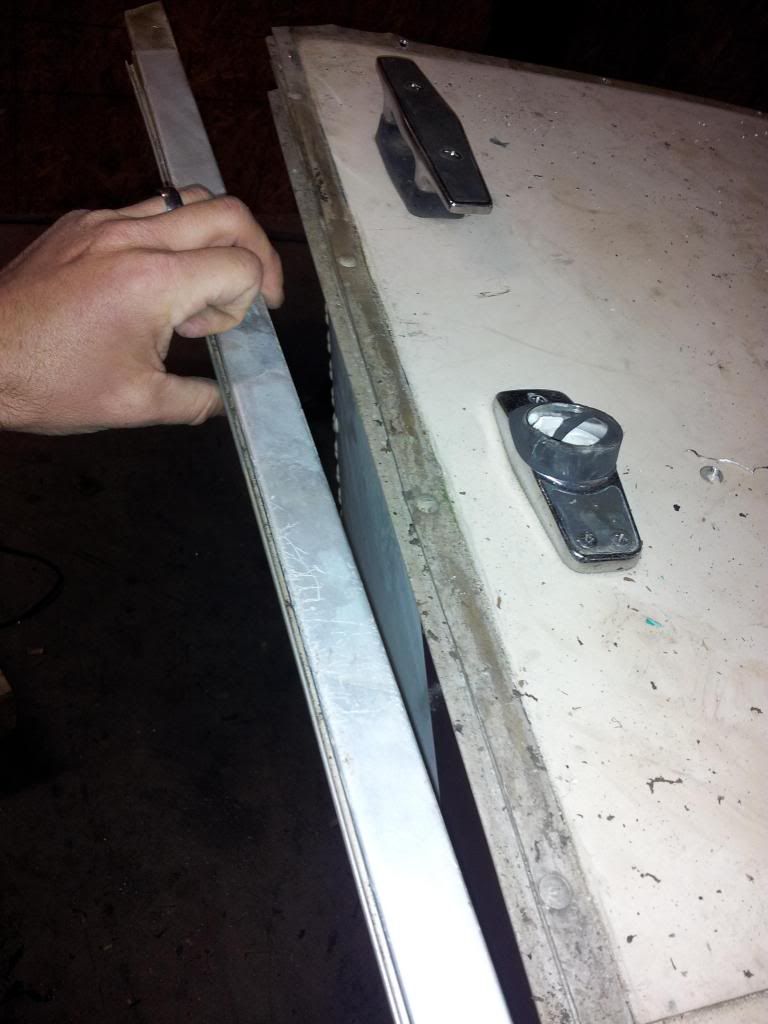
Then after prying and being stubborn I listened to everyone's advice on how to remove the rubrail insert. The key is heat and alot of it just shy of melting the vinyl. As a matter of fact I used a propane torch on it keep it about 6 inches away and DON'T hold it in one spot for to long. Would probably be safer to use a heat gun but I didn't have one. But we got to this.

20130307_124730_zps8a8f5662.jpg


Only loosed about 4 feet of rubrail brackets so that I could loosen it just enough to expose the screws underneath.
20130307_124751_zps1c7ff063.jpg


20130307_124730_zps8a8f5662.jpg


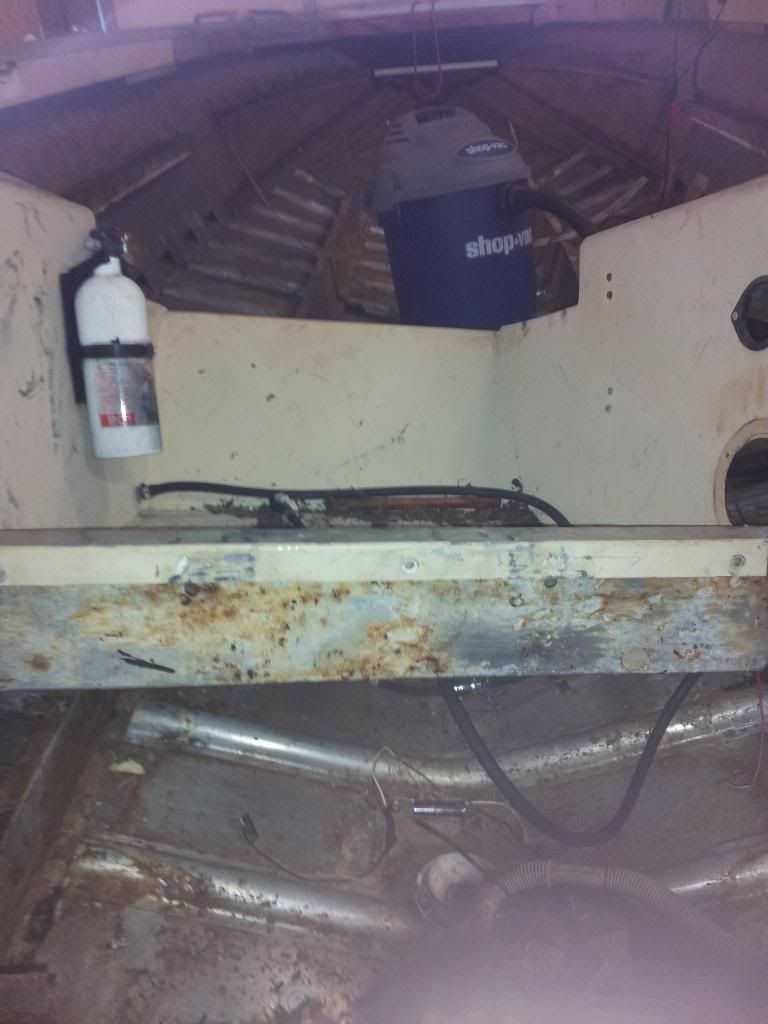
There were 4 rivets on each side I drilled those and presto the splash well was loose but OOOPPPSSSS I forgot something the ****** splashwell drain. Don't forget it or you will never get to this point.

20130307_133938_zpsc00599d2.jpg


More pics coming soon.
 

jbcurt00

Moderator
Staff member
Joined
Oct 25, 2011
Messages
25,047
Re: Time to get started on the starcraft resto.

Great work, even only 1/2 posted :)
 

SigSaurP229

Commander
Joined
Oct 1, 2008
Messages
2,123
Re: Time to get started on the starcraft resto.

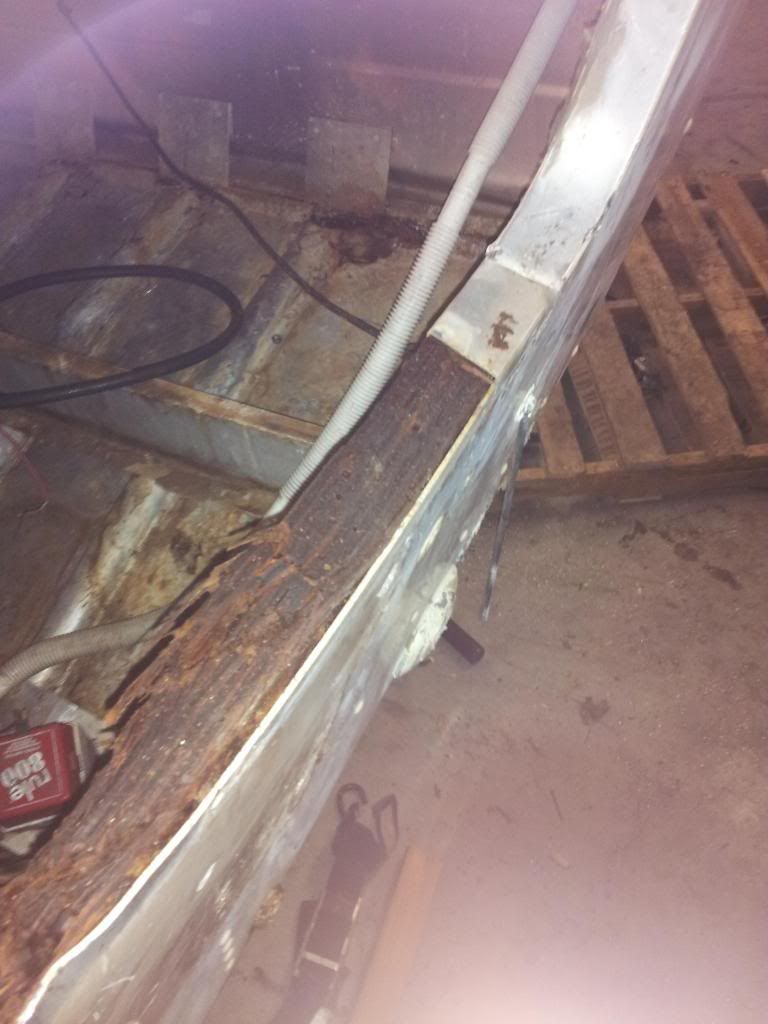
Next we get to deal with this nastiness.

20130307_133931_zps0d36cbc6.jpg


I started removing the trim pieces on the ends those little round head nails are the worst to remove.

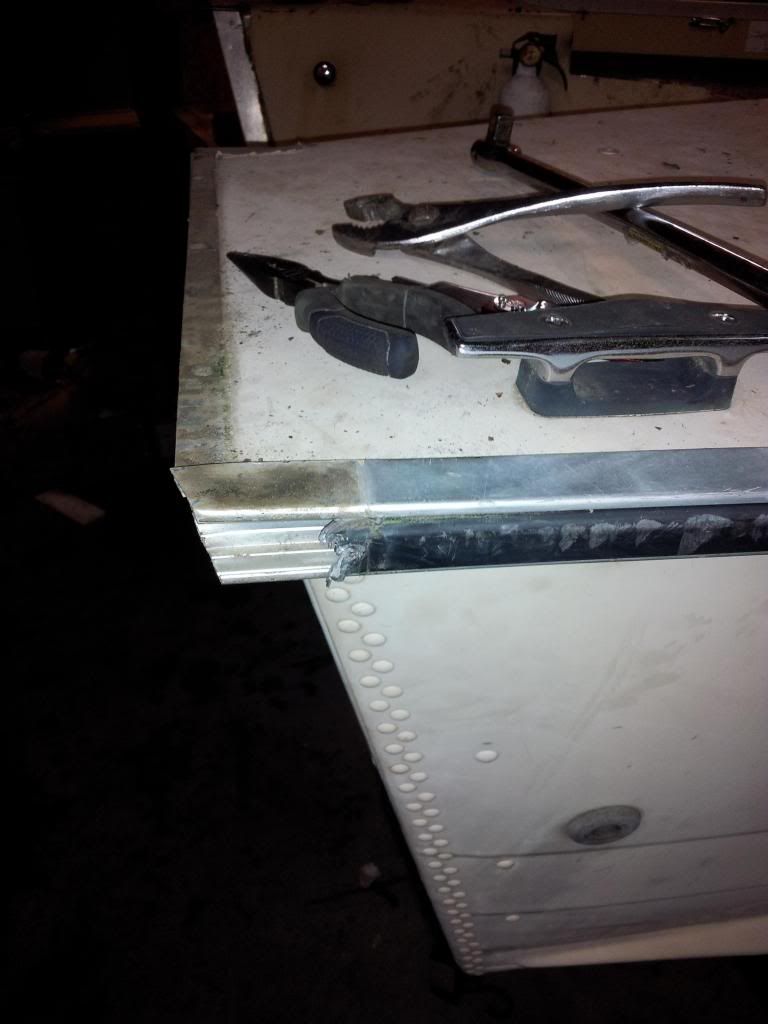
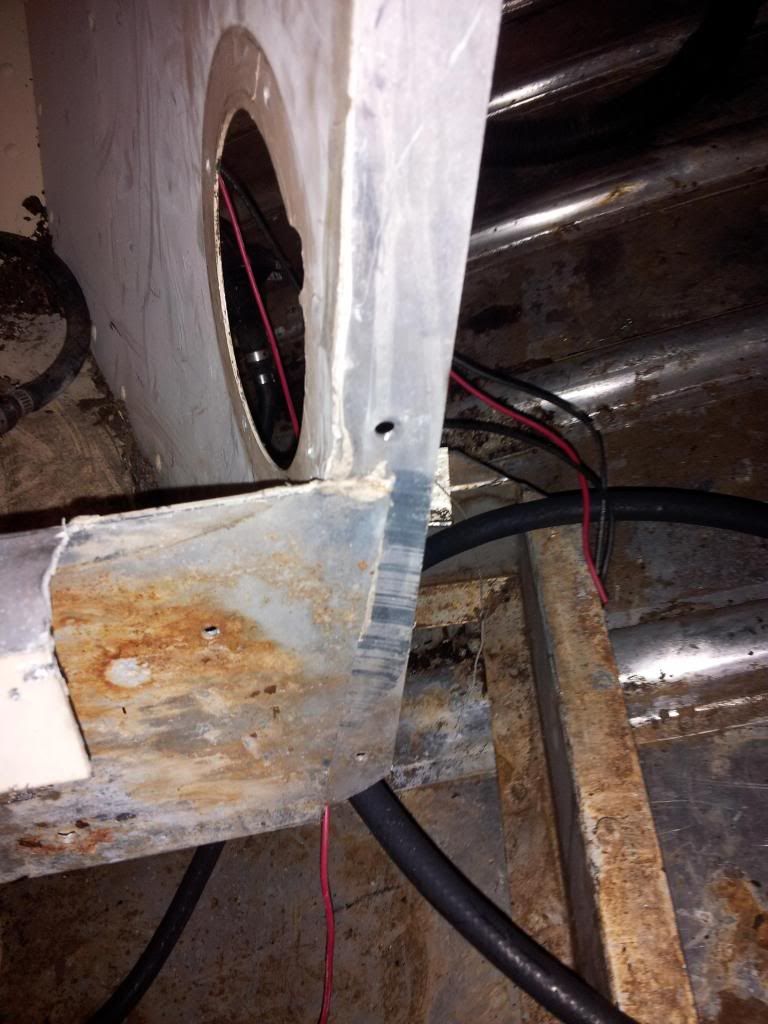
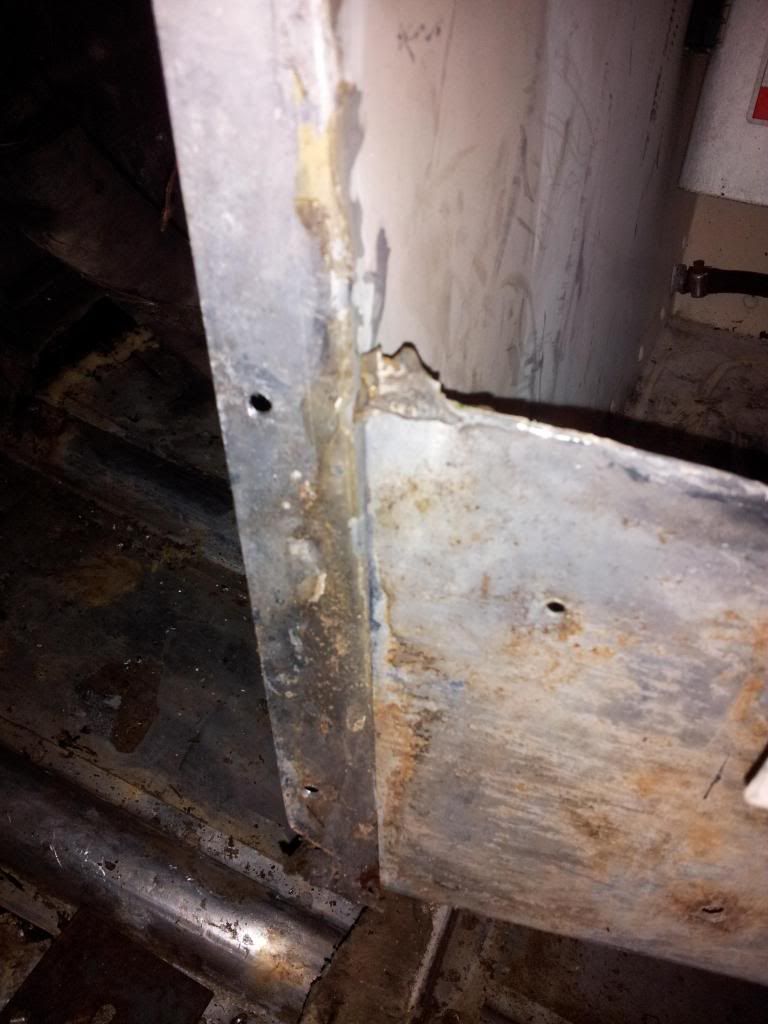
The good news of the day, after removing the splashwell I got to do a little further investigating and found that I don't believe the splashwell is damaged you all please give me your opinion. It appears to me that the lines on the corner are way to smooth to be a break.

20130307_134105_zpse9542a74.jpg


20130307_134112_zps28ec14f6.jpg


I think that the splashwell came that way from the factory and over time it worked loose.
 

dozerII

Admiral
Joined
Oct 25, 2009
Messages
6,527
Re: Time to get started on the starcraft resto.

Sig, that is the hard way to get the rubrail out. If you take the bow and stern caps off, just uncrimp the wnd of the track where the insert is pinched, then put a phillips screw drive one of the rivet holes in the rubber and slide it out the bow or the stern. I just slid mine back in today on the 201 in about 3 minutes.
 

SigSaurP229

Commander
Joined
Oct 1, 2008
Messages
2,123
Re: Time to get started on the starcraft resto.

Sig, that is the hard way to get the rubrail out. If you take the bow and stern caps off, just uncrimp the wnd of the track where the insert is pinched, then put a phillips screw drive one of the rivet holes in the rubber and slide it out the bow or the stern. I just slid mine back in today on the 201 in about 3 minutes.

That was actually my first plan of attack I drilled the rivets for the bow plate and the vinyl was not moving.

Ohh and after you go through all of that the transom is STILL covered by the cap at the ends so you still either have to cut or bend it back enough to get the upper portion of the transom out.
 

dozerII

Admiral
Joined
Oct 25, 2009
Messages
6,527
Re: Time to get started on the starcraft resto.

I chose to bend mine up, ii you bend it as close as youcan to the line where the corner cap was it is easy to straighten and no welding needed.
 

SigSaurP229

Commander
Joined
Oct 1, 2008
Messages
2,123
Re: Time to get started on the starcraft resto.

I chose to bend mine up, ii you bend it as close as youcan to the line where the corner cap was it is easy to straighten and no welding needed.

I like the way you think because that was my plan exactly :)
 
Top