Time to get started on the starcraft resto.

SigSaurP229

Commander
Joined
Oct 1, 2008
Messages
2,123
Re: Time to get started on the starcraft resto.

I think that settles it then. Ga you have just designed my boat so if it goes horribly wrong I am gonna look you up. :lol: No you just confirmed what I already knew I saw that pic and have known since that day I need to do that. Actually what's going to happen is the inner trim for the cap will be bare aluminum the inner portion of the cap will be white vinyl, the inner portion of the hull between the cap and bow seating is going to be grey carpet, and the front bow support board is going to be wrapped in grey vinyl.

Well we know have our plan of action, forget it lets get on with that lazy contest.
 

GA_Boater

Honorary Moderator Emeritus
Joined
May 24, 2011
Messages
49,038
Re: Time to get started on the starcraft resto.

I better pull my pin off the SC map. :eek: Let's put off the lazy contest. I'm too tired after all the the thinkin' and opinionatin'. :lol:
 

Watermann

Starmada Splash of the Year 2014
Joined
Jan 12, 2013
Messages
13,798
Re: Time to get started on the starcraft resto.

That is a great pic of your SS, the paint job looks classy. I enjoy the rebuild process and seeing how your resto is near done. Even though I'm way back in the process on my Chief I find myself looking ahead to the fit and finish. I believe I've decided to go with marine vinyl for the floors. Like you I too have thought about the upholstery vinyl on the sides to cover up bare tin although white paint looks clean too not to mention cheap and easy. Color combos are subject to personal taste and preference. I enjoy contrasting colors, white/navy or silver/black looks great to my eye. Too much gray makes me think of "Haze gray and underway".

I like the way you think outside the box, keep it up!
 

SigSaurP229

Commander
Joined
Oct 1, 2008
Messages
2,123
Re: Time to get started on the starcraft resto.

I better pull my pin off the SC map. :eek: Let's put off the lazy contest. I'm too tired after all the the thinkin' and opinionatin'. :lol:

:sleeping: :laugh:

I appreciate the opinion
 

dozerII

Admiral
Joined
Oct 25, 2009
Messages
6,527
Re: Time to get started on the starcraft resto.

Looking good Sig, I think white is the right choice as well, cooler in the hot sun, well, just plain Kool.
 

SigSaurP229

Commander
Joined
Oct 1, 2008
Messages
2,123
Re: Time to get started on the starcraft resto.

Thanks Watermann i am enjoying watching your chief as well shes gonna be a looker. Its been a fun process and Ive learned alot. Part of the fun for me is trying new things a few times its worked usually its blown up in my face. At this point its mostly finish work.

Thanks for stopping by glenn I appreciate the kind words.
 

jvanhees

Petty Officer 1st Class
Joined
Mar 20, 2013
Messages
284
Re: Time to get started on the starcraft resto.

Great looking SC so far Sig!
 

Rich11304

Petty Officer 2nd Class
Joined
Sep 9, 2010
Messages
189
Re: Time to get started on the starcraft resto.

Wow! Looking great. Another Starcraft rescued from the boat boneyard of North America. Btw, I used the JoAnn vinyl as well with the 50% on Sundays on my 1968 Starcraft Holiday restoration.
 

SigSaurP229

Commander
Joined
Oct 1, 2008
Messages
2,123
Re: Time to get started on the starcraft resto.

Wow! Looking great. Another Starcraft rescued from the boat boneyard of North America. Btw, I used the JoAnn vinyl as well with the 50% on Sundays on my 1968 Starcraft Holiday restoration.

Thanks Rich, I don't know about rescued at this point we are getting there, however I don't think it belongs in a scrap yard anymore.
 

SigSaurP229

Commander
Joined
Oct 1, 2008
Messages
2,123
Re: Time to get started on the starcraft resto.

NEW list for myself

Still have to repair the spark issue on the outboard. Need to check the primer solenoid.

Need to repair or replace the steering stiffer than I like.

Bow
Mount the bow support boards√
mount the front bow piece√
mount the bow light and cleat√
mount the trim pieces√
mount the wood seat base√
vinyl the gunwale√
carpet the inner hull √

consoles
fill the big holes in the port console
wrap in vinyl
mount the glove box
design cut and mount the gauge cluster
Install the trim pieces align and permanently mount the windshield
Install the trim pieces

final assemble the seats need 20 stainless furniture nuts (in progress)
carpet the inner hull √
mount the side boards

Install fuel tank √
wire fuel sender√
inspect and clean pick up tube√
install filler, vent, and primer hoses√

Carpet the seat back supports √
install seat back supports with piano hinges
Assemble rear storage compartment
vinyl the rear storage compartment
cut two corner cup holders and install
final assembly rear stern seats mount with piano hinges (already have) (in process)
Clean and mount aluminum trim pieces

Install rub rail channel
New rubrail
final mount stern light
install splashwell drain
install speedometer tube

Do another trailer restoration

GO BOATING

Ok new list complete please tell me if there any items missing.
As items are completed I am going edit this post and delete them until only one remains I am anticipating about another 5 months work. Which will put me in line for a summer splash. Which would be about 1year and 4 months on the rebuild

Update coming
 
Last edited:

jbcurt00

Moderator
Staff member
Joined
Oct 25, 2011
Messages
25,056
Re: Time to get started on the starcraft resto.

NEW list for myself
Ok new list complete please tell me if there any items missing.
As items are completed I am going edit this post and delete them until only one remains I am anticipating about another 5 months work. Which will put me in line for a summer splash. Which would be about 1year and 4 months on the rebuild

I'd ask you to leave the list intact, for reference by me & others, and mark the items complete in some other way. Please?

Or at least in a different post quote yourself & delete the
script at the beginning & end and it'll leave you the list that you could then delete as you planned.

Thanks
 

GA_Boater

Honorary Moderator Emeritus
Joined
May 24, 2011
Messages
49,038
Re: Time to get started on the starcraft resto.

You can put a check mark √ on the items as completed. The √ is ALT key held down and type 251, the √ appears when the ALT key is released. Just a thought.
 

luv2fish62

Seaman Apprentice
Joined
Jun 10, 2010
Messages
35
Re: Time to get started on the starcraft resto.

Sig great rebuild. My first time going through the post and you have lots of good ideas to apply to my own rebuilds.

One question for you...I need to fab some side consoles but have no dimensions for them, could you provide measurements of yours? I would think the port and stbd would be the same dimensions. Did you use any wood as a backer for the front of the stbd console, as in a backer for the steering wheel?

Thanks for taking the time to create a great reference for others to follow.
 

SigSaurP229

Commander
Joined
Oct 1, 2008
Messages
2,123
Re: Time to get started on the starcraft resto.

Thanks Luv2Fish62 I appreciate the compliment it has been an endeavor, albeit I have enjoyed the process, the thread is as much for me as it is you all as well, seeing the progress helps to keep me motivated. Funny enough I know the measurements off hand, as I just measured them for vinyl.

They are 23and1/8" wide from the inner gunwale to the outer portion of the console they are 25 and 1/4" tall from the floor to the top, and they bottom part (where the glove box installs) is 7 3/4" the upper portion where the windshield mounts is 13 3/8"

I hope that helps that is everything but the jutted out angle on the base.

For todays update.

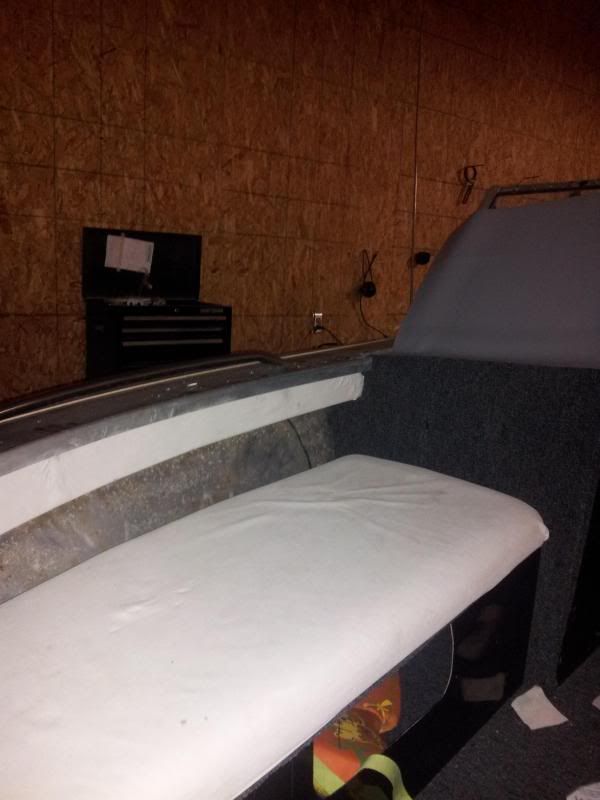
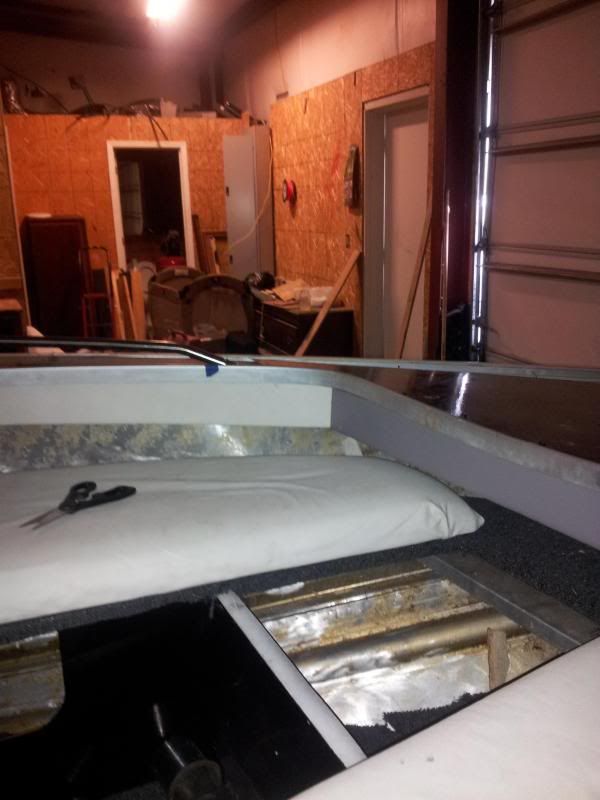
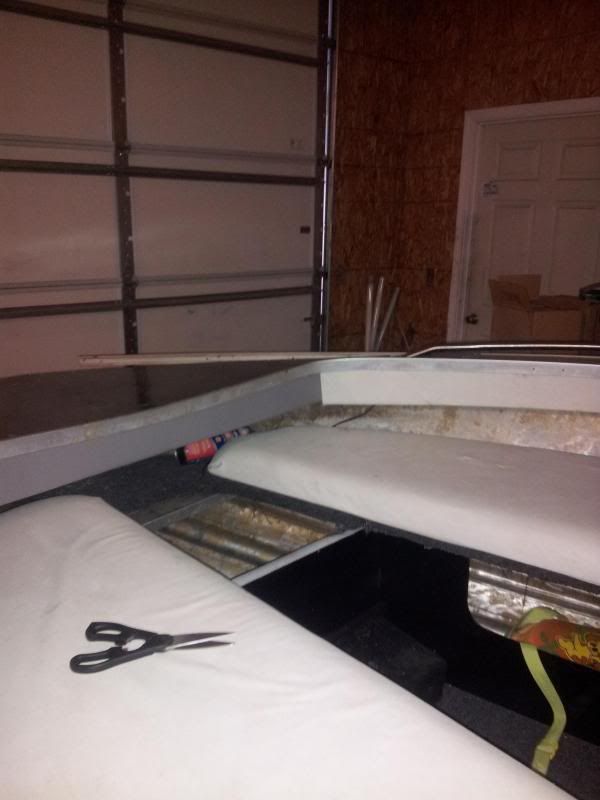
Started by doing this.
1st


2nd


3rd


I think it give a much cleaner look that the way it was from the factory, but the flip side is there is not foam behind it (1/4" foam from the factory wouldn't help anyways).

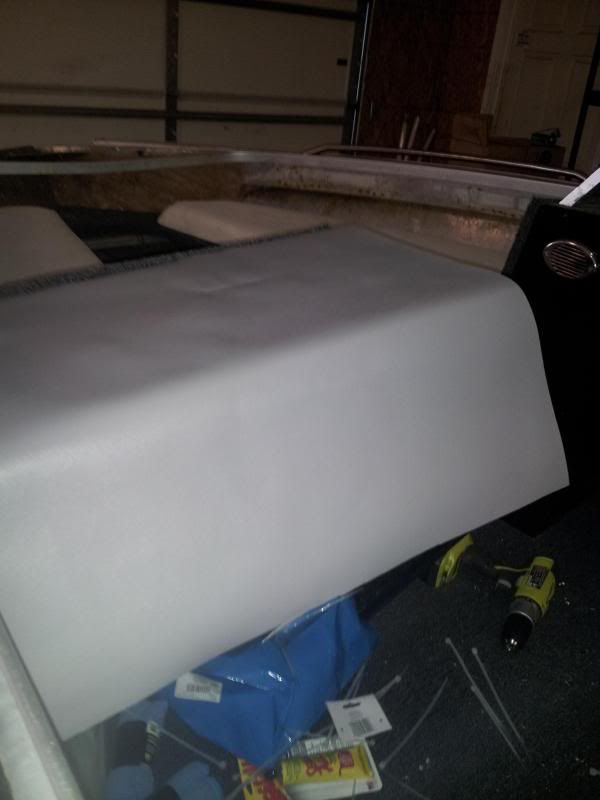
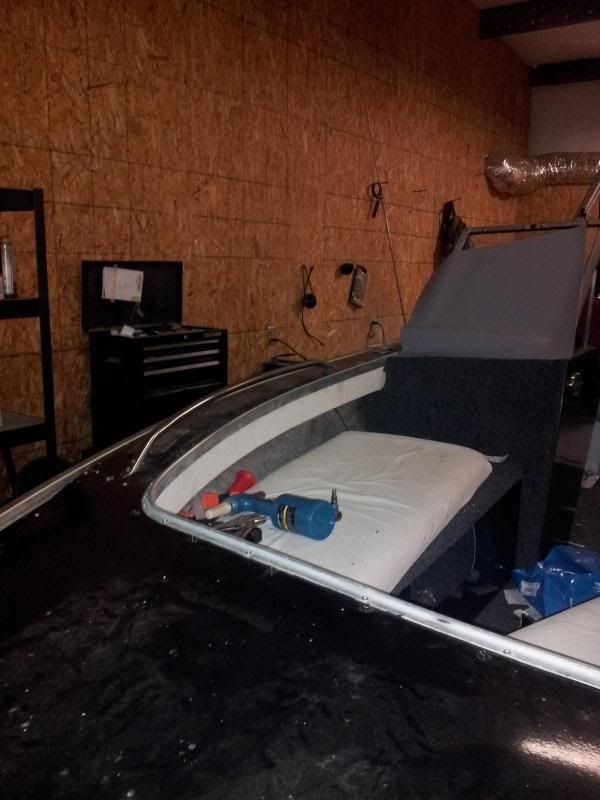
I did the vinyl on the gunwales by drilling all of the rivets, that hold the inner aluminum trim piece into place and removing it, then measuring the the inner gunwale width from the cap to the bottom, then I added 3/4" for the bottom lip on the bottom of the gunwale. I sprayed the Loctite on the back of the vinyl and on the gunwale and rolled the vinyl onto the gunwale. Constantly smoothing with my hand and a large deepwell socket as bubbles would form I would gently peel back the vinyl spray more loctite behind the vinyl and smooth it again. You can see the begining results on the shot that shows the whole gunwale, and the end results on the shots that show where the gunwale meets the bow support board.


It was a constant spray and roll to keep the air bubbles out, this vinyl is REALLY bad to work with couples with the fact that it came from Great Lakes Skipper, I used Loctite adhesive spray if anyone is curious.

This is how the console is going to be wrapped.

 
Last edited:

Watermann

Starmada Splash of the Year 2014
Joined
Jan 12, 2013
Messages
13,798
Re: Time to get started on the starcraft resto.

Your a brave man tackling that job, heck I can't even use cling wrap without getting ticked off... :D
 

SigSaurP229

Commander
Joined
Oct 1, 2008
Messages
2,123
Re: Time to get started on the starcraft resto.

Yeah I accidently shot my self in the face with the loctite adhesive, it was definetly an interesting day.
 

luv2fish62

Seaman Apprentice
Joined
Jun 10, 2010
Messages
35
Re: Time to get started on the starcraft resto.

They are 23and1/8" wide from the inner gunwale to the outer portion of the console they are 25 and 1/4" tall from the floor to the top, and they bottom part (where the glove box installs) is 7 3/4" the upper portion where the windshield mounts is 13 3/8"

Sig thanks for the quick response and the measurements. Could you also tell me the height of the dash (steering wheel piece) and the angle of the dash?

Thanks.
 

SigSaurP229

Commander
Joined
Oct 1, 2008
Messages
2,123
Re: Time to get started on the starcraft resto.

Update,

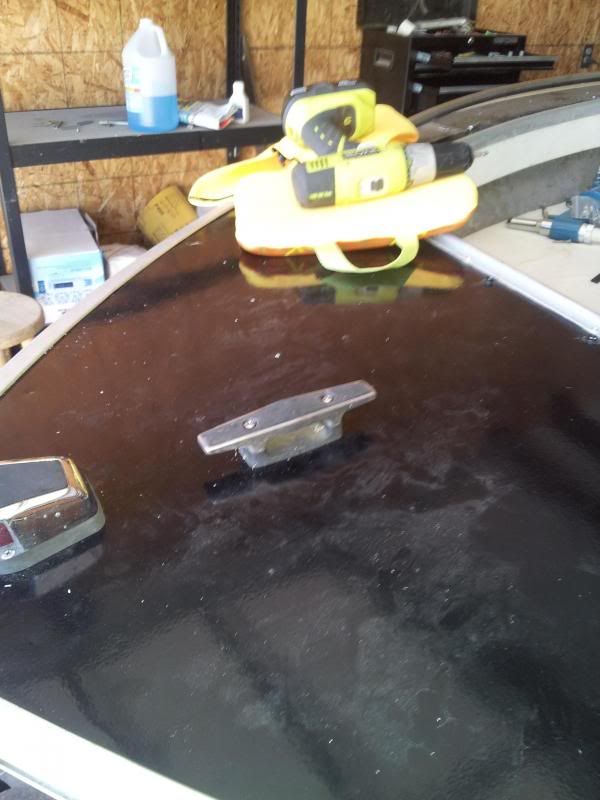
a few more items checked off. Went to Harbor Freight this weekend as they were having one of their "blowout" sales, I spent WAY more than I should have, but since my last little 2ton jack bit the dust when lifting the pontoon I shelled out the $$$ for a 3 ton rapid lift $69 well spent, then I figured I have 50 rivets to set this weekend, so I shelled out another $29 for a pneumatic riveter (worth its weight in gold), of course as you walk down the aisles you see all the other useless junk you just can't live without like a new soldering iron since you broke the tip on yours, bulk stainless steel bolts, precision screwdrivers, centering punch, precision pliers, all designed to part me from my hard earned money, ($142.50) to be exact but what the heck Fastenall wanted $102.50 for just the riveter, and Autozone wanted $129 for the same jack.


It was a pain in the rear getting bow cap to mount back into place for some reason all of the old rivet holes wouldn't line up on both sides, I have a couple of theories as to why,

1. it was extremely cold here earlier this week and it may have contracted and bowed the aluminum while it wasn't fastened to the hull and free to move about.

2. Probably the most likely the bow cap sat on rotten supports for years, and I think that people stepping on and off of it for years probably drew it in towards the middle. More specifically on the Starboard side as that is where things were off a little.


My Solution was to kind of treat it like mounting a tire, or a head and move in a crisscrossing or X pattern using a long sliding bar clamp to draw everything tight and hold it in place until the rivet was set.
 
Last edited:

GA_Boater

Honorary Moderator Emeritus
Joined
May 24, 2011
Messages
49,038
Re: Time to get started on the starcraft resto.

I never get out of any of those places with the ONE thing I went in for. :facepalm: Nice work-around getting the cap back in place and fastened.
 
Top