Sea Nymph Redo?

bonz_d

Vice Admiral
Joined
Apr 22, 2008
Messages
5,276
I'm sure some are familiar with the other posts I've made about this boat but I will link them for those that are not.
http://forums.iboats.com/forum/gene...e-topics/9956461-another-one-followed-me-home
http://forums.iboats.com/forum/boat...ding-and-hull-repair/10009676-jack-plate-help

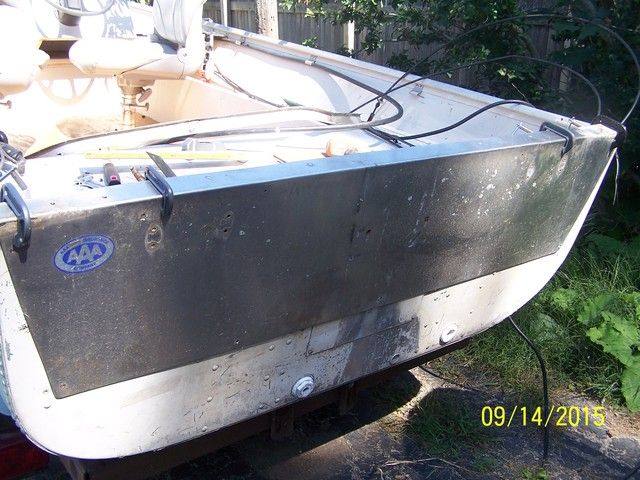
This was supposed to be a quick project to get back on the water and fish for the season while I worked on my Alumacraft. Well it hasn't turned out that way. The issue I'm having is with powering this thing. It is originally a short shaft transom that measures 16" but came with a Mini-Jacker plate on it to allow for a long shaft. Also it came with a Merc control so it must have had a Mercury on it before, duh,. Well I'd found a nice 30hp Johnson long shaft to put on it but this just isn't working out. The Mini-Jacker was still too low so I built up the transom to get it even with the bottom of the hull. This thing now measures 22.5" from the bottom to the top of the mount and it still rides low in the water and is spraying off the sides of the lower unit.

The boat rides well and performs well other than this spray I'm getting. Though it still seams to be a bit slow coming out of the hole. Though it is working OK I'm not impressed with the way it looks and with the engine being this high, besides the spray issue. So I'm conflicted as to what to do with this thing.

So here are my thoughts. Best would be to find a short shaft engine to put on it but I've been watching for one since I got this and there just are none to be had that has a steering tilt tube in it. Next would be to pull the steering console out of it and make it a tiller boat as I can find all sorts of 25 - 35hp short shaft tiller engines. The only thing I find with that is when I first got this home I thru my 9.5hp on it just to give it a float test and it is very uncomfortable with a tiller because of the design of the rear bench seat. The seat is rather wide and quite a bit forward w/o a lot of room to put ones leg behind the seat and into the motor well.

So as always I'm open to any suggestions you all might have.

Last thought I have is that if I convert it to a tiller I'm thinking I may pull the decking back out along with the pedestal seats and rebuild it with the small original live well box that was in it. So if this was you, what would you do?
 

jasoutside

Supreme Mariner
Joined
Dec 20, 2009
Messages
13,269
Hiya Bonz!

So I read through each of your threads and one thing I don't believe has been mentioned yet is weight. Here's why I say that...

Over the summer I picked up a sweet 14' Sea Nymph to run/fish while I finish up one of my other projects. (Just about like you right!)

It wasn't running right at all though. I noticed it was pretty stern heavy. My stern seating is set up just like yours. I ended up removing the seat tops back there to find completely saturated pour in foam. I HATE POUR IN FOAM!:mad-new:

It was a bear to dig it all out but in just those two medium sized compartments I probably pulled about 150# worth of soaked foam. That is a lot of weight for a little boat, especially all sitting at the very stern like that.

On your boat, I see a waterline on one of your forward seats. That tells me your boat sat for quite a while with a pond in it. I'm betting your foam just soaked it up over time and is now heavy and worthless.

Maybe.

It's worth a check anyway, cheers:thumb:
 
Last edited:

bonz_d

Vice Admiral
Joined
Apr 22, 2008
Messages
5,276
I was wondering that same thing yesterday as I was pondering this question. Those water stains do hint at that though I had the hull off the trailer in the yard right after I got it and I don't recall it feeling overly heavy. The foam in the side boxes that are uncovered is dry. Looks like I should get some rivets and pull one side from that seat and investigate.
 

bonz_d

Vice Admiral
Joined
Apr 22, 2008
Messages
5,276
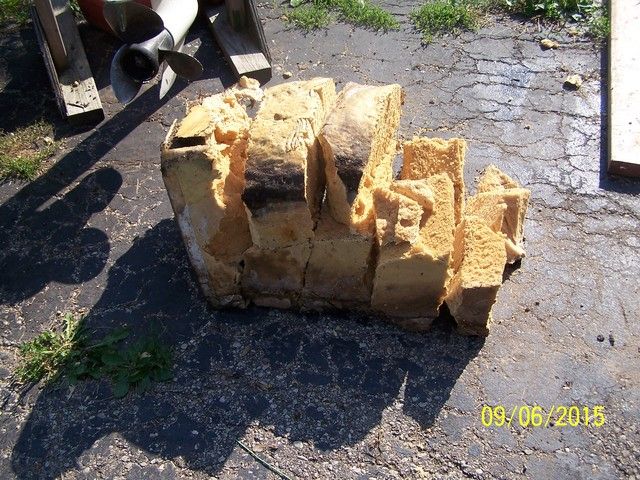
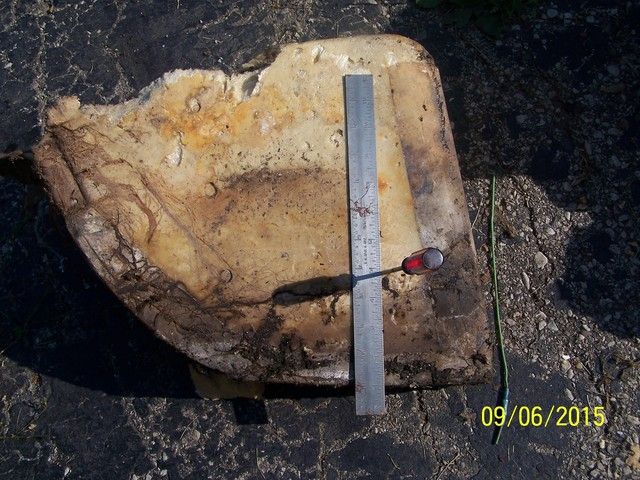
Worst fears are confirmed. Pulled open one side to investigate and sure enough. The bottom 2-3" is saturated. So this being the case I guess the season is about finished for me now. Though I think I will pull all the foam from both side and then give it another trial run to see if this relieves the problem with the spraying. SO now I have 2 full blown projects to complete. I think I will start on this one 1st as it should be the easiest and I can use this one as a Guinea pig to prefect my spray painting technic.

Jas, I watched your video and even though these 2 boats are quite different they are still much the same. I think I see an inherent design flaw with these hulls in that the water in the bilge just does not drain very well. With this one even with the bow raised as high as I can get it there is always water that does not drain. So it sits there and can flow under the flotation box. So I think when I redo this I'm going to figure a way to keep the foam off the bottom so it doesn't become a sponge.
 

jasoutside

Supreme Mariner
Joined
Dec 20, 2009
Messages
13,269
Yup, not surprised. That expanding foam doesn't allow water to drain and ultimately just saturates.

Another major design flaw with Sea Nymph boats is they wrap the transom wood in alum. Really all that does is trap moisture up against the wood and it rots out - faster than a transom (sealed and painted) that is left exposed to dry. Plus it's a huge pain to dig that transom out for replacement.

So I think when I redo this I'm going to figure a way to keep the foam off the bottom so it doesn't become a sponge.

Foam board (pink stuff or DOW board) from your local lumbar yard is the most common method to keep the boat floating, and the water draining. You can check out all sorts of metal boat projects here on iboats who have gone this route.

All the best!
 
Last edited:

bonz_d

Vice Admiral
Joined
Apr 22, 2008
Messages
5,276
I was fortunate with the Lund and for the most part my Alumacraft in that the foam was dry and intact. With the Alumacraft there is a spot that was under the live well that was wet from a broken fitting. Otherwise that one is in good shape.

Doing some quick calculations it looks like I will need 1 4'X8'X2" board for each side. Cost about $55.00 total or one 2gal kit of pour foam for both side @ $78.00 + Shipping.

But for now the 1st thing will be to get the wet foam out and then water test it for performance.
 

bonz_d

Vice Admiral
Joined
Apr 22, 2008
Messages
5,276
Well I got one side cleaned out today. Was able to remove many pcs. in large chunks. Especially what was on the bottom and was quite surprised that even as wet as it was I was expecting much more weight. There were actually puddles of water on the ground where I had thrown the scrap!

Won't be able to work on it tomorrow as I'll be busy putting new flooring down inside the house.

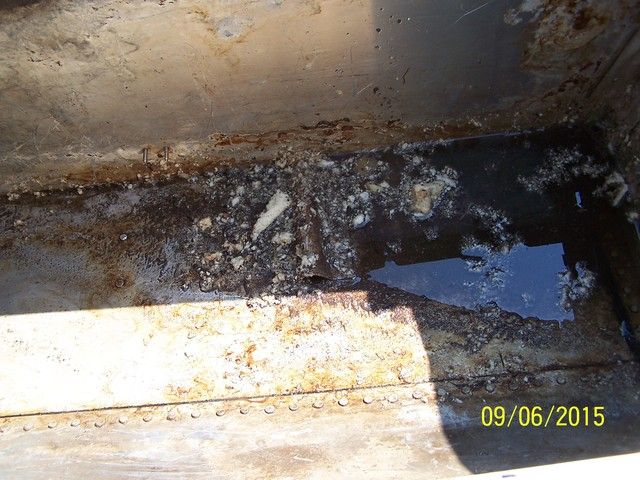
For now I'm trying to figure out how I'm going to redo this w/o going all the way to the bottom again with the foam. With the location of the drain in the transom even with the bow up there is always water that is trapped and doesn't drain. About 1" deep. This water can get under the flotation box. Will try to post a few pictures tomorrow if I can get a chance.
 

bonz_d

Vice Admiral
Joined
Apr 22, 2008
Messages
5,276
So I was bale to remove the other side seat cover and get all the foam out this morning before I had to retreat from the heat. Hosed out the 2 compartments and noticed right away how well they retained water. So this only makes me more inclined to figure a way to raise the foam and keep it off the bottom.


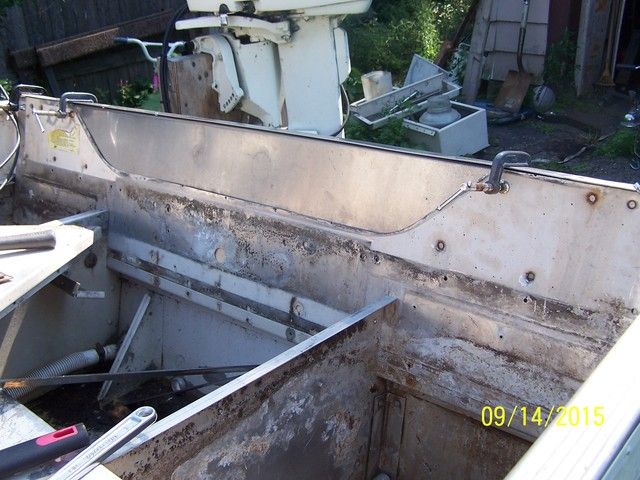
The picture of the foam with the screwdriver stuck in it is to show how high the foam was saturated. The other shows the water that was trapped inside the compartment after I hosed it down and was able to drain for 20 minutes. The brown stuff you see is remnants of the foam that is still stuck to the aluminum.
 
G

Guest

Guest
Bonz:

Sea Nymphs are great boats! I've owned a couple and they are well built. But I never had a problem with poured in (wet) foam on these boats, the foam in my boat is under the bench seats and gravity keeps the water out of them.. (But don't get me started with 13 Whalers (!). You could replace it with "Block" foam and cut it to shape, then coat it with something that wouldn't dissolve it to prevent water absorption. My 1994 Sea Nymph 14'R (see below) has a short transom (16"), I run a 25 Evinrude with a Boyesen Reed Box and a 10" x 15" Ballistic propeller. She runs alongside boats twice her size all day and people are amazed how fast she is. Just know you're working on a well built boat. Best of Luck and Godspeed!
20150525_093903.jpeg
 
Last edited:

bonz_d

Vice Admiral
Joined
Apr 22, 2008
Messages
5,276
Not suggesting they aren't well built hulls, just that in this model there seems to be a design flaw in that it has very poor water drainage.

Still haven't gotten a chance to get it out on the water since I removed the foam. Was going to try it today but as usual weather has interfered. Have had thunder storms passing thru all day.
 

bonz_d

Vice Admiral
Joined
Apr 22, 2008
Messages
5,276
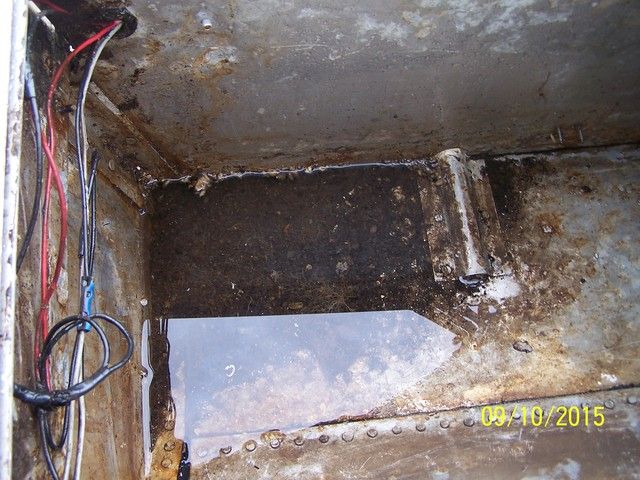
Noticed today after a good rain last night that there is an inch of water in the stern that did not drain. The boat is sitting on a slight incline so most of the water in on that side and inside what would be the compartment for the foam.

Would love to hear ideas or suggestions on how to keep the new foam off the bottom and out of the water that will collect in that area.
 

bonz_d

Vice Admiral
Joined
Apr 22, 2008
Messages
5,276
Plane E; Another setback. Looks like with the aluminum covers for the flotation boxes and the Splashwell removed a lot of the structural support for the transom is also removed so there will be no way to test run this now that the wet foam is out so I suppose I might as well open it all up and remove the transom board and replace that as well.

Sure was a short season for me! Still no luck in locating a short shaft engine for this.
 

bonz_d

Vice Admiral
Joined
Apr 22, 2008
Messages
5,276
Got the transom opened up last night, it is one pcs of 1.25" plywood and looks intact. Found some soft spots on the top edge but all appears dry. Still need to remove some rivets and then try to pull it out.
 

bonz_d

Vice Admiral
Joined
Apr 22, 2008
Messages
5,276
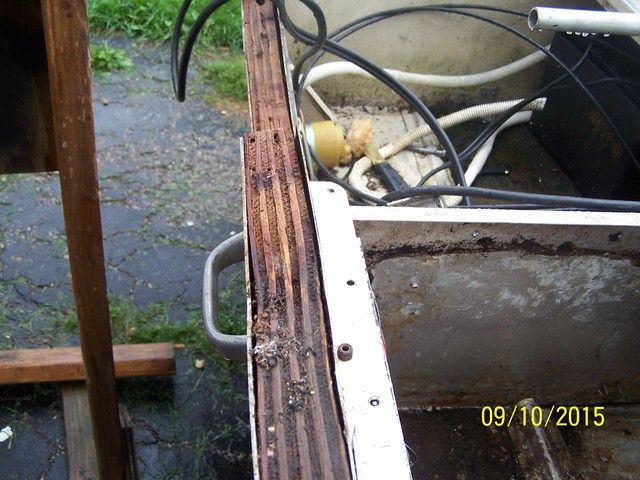
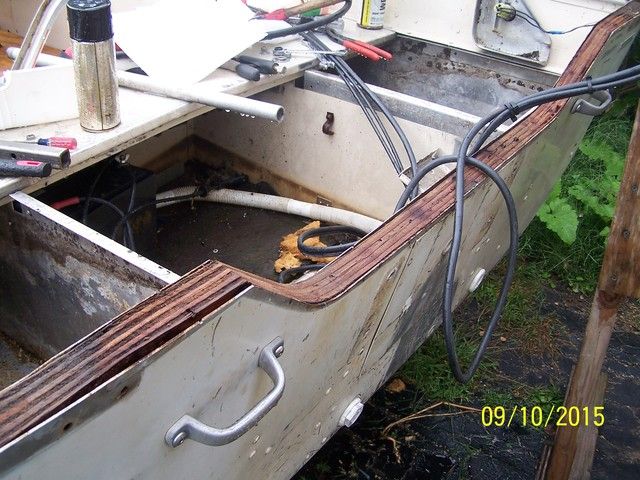
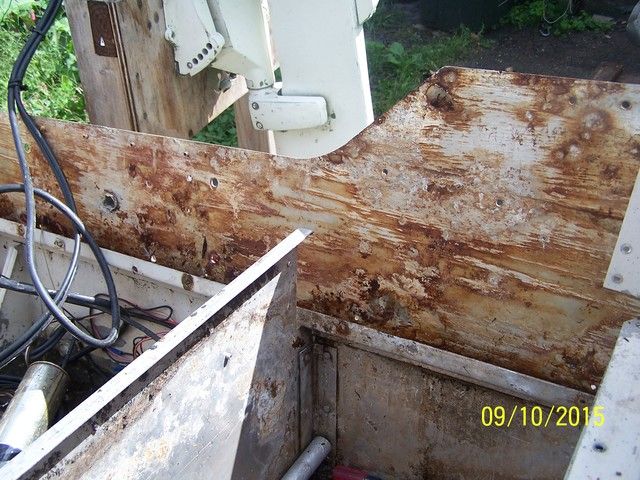
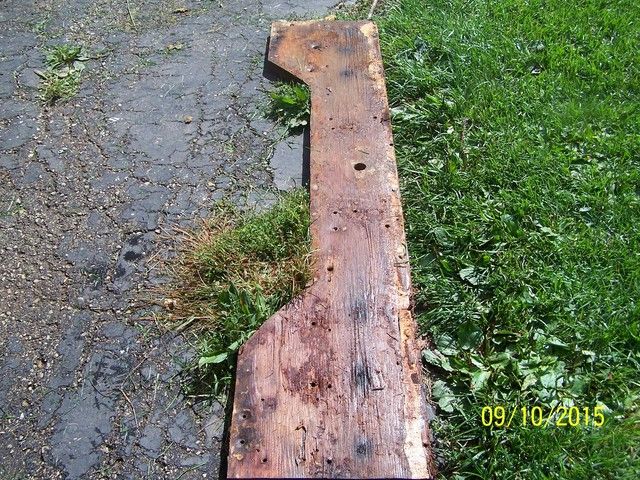
Finally stopped raining again. Was able to remove the transom board this afternoon. Got it out in one pcs. The wood wasn't wet but it is soft in spots and starting to delaminate. Once again can see many design flaws in the way this was done. For one there were rivets and screws everywhere going thru the inside sheet of aluminum and nothing was sealed.

Now I need to determine if I'm going to steal some of the ply I have for the work on the Alumacraft or if I should just go buy a sheet of 5/8" ply to rebuild this. All I have on hand is some 3/4" and 1/2" which will also get me to 1.25". Then to decide if I want to cut it back down to a 16" transom or extend it up 5" to a 21". If I extent it then I'll have to figure out what I should use to cover and close up the transom that will be exposed.

Again this 1st picture is the fresh water that collected from this recent rain and is just sitting there and will not drain.


64osby

Admiral
Joined
Jul 28, 2009
Messages
6,816
Looks like the right move pulling that out.:eagerness:

Need to find a way to allow for drainage to the bilge.

Is the panel riveted to the bottom of the hull?

Do you have a Dremel tool?
 

bonz_d

Vice Admiral
Joined
Apr 22, 2008
Messages
5,276
Yes it is riveted and the water will flow around and under as it is not sealed. What you see is the water that gets trapped and will not exit thru the drain. Also the boat is tilted to one side presently and if I tilted it the other direction it would all flow to the other side. So because of the position and height of the drain I don't think there is much I can do about keeping all the water out w/o a sponge. LOL.

For now my thought is to try and do this with a void under the foam so that the foam is not sitting in any residual water that might get in the boat.

Plan for tomorrow is to strip it all out and start washing down the interior then cutting plywood and fitting it. Then while building the new transom trying to get the interior painted. Just hope the weather co-operates!
 

bonz_d

Vice Admiral
Joined
Apr 22, 2008
Messages
5,276
Weather did not co-operate yesterday at all, rained off and on.

I did get the plywood rough cut and am gluing it up now. Now have a question maybe someone can answer.

Much of the bracketing and panels were riveted together inside the boat and on the transom. So the wood had to be drilled to apply these rivets. The rivets were not structural but just used to fasten the 2 pcs together. They were all pop rivets, there was also no type of sealant used on these. Should I use rivets again or ss screws? Pros and cons of either?
 

Woodonglass

Supreme Mariner
Joined
Dec 29, 2009
Messages
25,927
That looks like some nice fabrication, IMHO!!! But of course, I know absolutely NOTHING about Tin Can Boats!!!!:eek::D;):tongue-new::eyebrows:
 
Top