Rehab SportCraft 222 1983 deep V hull cuddy walkaround

kcassells

Fleet Admiral
Joined
Oct 16, 2012
Messages
8,720
So I bought new teak woods and will use to make a form. I've read to burn the edges to probably remove the oils then glue up. It's an exterior use. They will be butt jointed with dowels and glued. Then finished to shape and oiled and attached. I will be using EEEpppoooxxxyyy.
Any insight appreciated.
 

zool

Captain
Joined
Aug 19, 2012
Messages
3,432
So I bought new teak woods and will use to make a form. I've read to burn the edges to probably remove the oils then glue up. It's an exterior use. They will be butt jointed with dowels and glued. Then finished to shape and oiled and attached. I will be using EEEpppoooxxxyyy.
Any insight appreciated.
what r u making? a form?.....probably have to scroll back lol
 

kcassells

Fleet Admiral
Joined
Oct 16, 2012
Messages
8,720
what r u making? a form?.....probably have to scroll back lol
Nah not really a form. Its a shape curvature on the exterior to be applied over the fiberglass. Decorative only. So the lengths of wood will be bound together as 1 pc.
Then I'll make a simple template of the area to apply the wood. Has some mild curves etc to follow. So the block od wood gets cut to fit is all.
No scrolling necessary. Something I've been digesting for awhile is all.
All it is is just following a line on the boat and overlaying in teak.
 

zool

Captain
Joined
Aug 19, 2012
Messages
3,432
Nah not really a form. Its a shape curvature on the exterior to be applied over the fiberglass. Decorative only. So the lengths of wood will be bound together as 1 pc.
Then I'll make a simple template of the area to apply the wood. Has some mild curves etc to follow. So the block od wood gets cut to fit is all.
No scrolling necessary. Something I've been digesting for awhile is all.
All it is is just following a line on the boat and overlaying in teak.
so its non structural....dowels and epoxy is more than enough to join the pieces......how u gonna attach it to the hull?

.sounds like something else to maintain to me.
 

kcassells

Fleet Admiral
Joined
Oct 16, 2012
Messages
8,720
Just got some feedback;
2 approaches
Mine is joined with a glue called resorcancal, not sure how to spell it...I just looked did up, it is spelled. " resorcinol"

Other method;
I always love an opportunity to show off my work and help someone else! Over the years I have made countless joints in boatbuilding projects using teak, mahogany and ipe using epoxy in scarf joints, some with the addition of dowels and splines. So far, 100% success. Using Acetone to wash the joint helps a lot to increase the bond strength of the adhesive but using the best possible joint structure is even more important. The more surface area of the glue joint the better, the more structure unsupported by the glue even mo better. The picture below is a dry run model showing the two joints I was planning to make in an Ipe handrail. In real life, each joint would be about 4ft apart. The right angle joint used four dowels, two in the top, two in the bottom of the rail. The angled joint used a spline. Both did well in my testing of the model below as well as the real thing that has been in service this past year and a half. Both are, essentially, butt joints so they needed dowels or splines to reduce the glue joint stresses.

Be careful in selecting the dowel or spline material. It needs to be made in the same material or of something even more durable. In your case, make the dowels from teak or spline them in teak with the grain going in the direction of the load. I made my own dowel in ipe for the corner joint and my own ipe spline for the spline joint.

Some people will likely suggest watering down your epoxy with acetone to help it soak in. This really does not prove out well in testing which I have done and is likely why West Systems does not recommend it. Mixing epoxy with acetone will help penetration but it also reduces the ultimate mechanical strength properties of the epoxy.

Make a solid mechanically strong joint, prep the surface with acetone, let it dry, slather on the epoxy full strength.
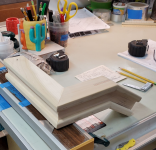

1626999398840.png
 

kcassells

Fleet Admiral
Joined
Oct 16, 2012
Messages
8,720
so its non structural....dowels and epoxy is more than enough to join the pieces......how u gonna attach it to the hull?

.sounds like something else to maintain to me.
Yea it is something else to maintain. Really not alot though. Just accent....

probably screw, recess and dowel button thingy to conceal or not. Just leave screw exposed.
 

kcassells

Fleet Admiral
Joined
Oct 16, 2012
Messages
8,720
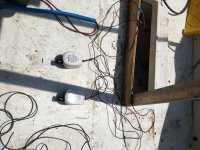
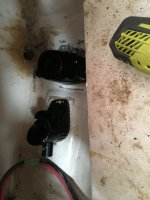
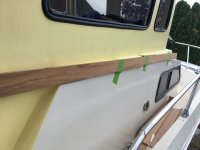
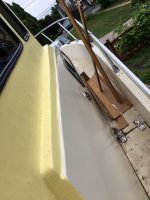
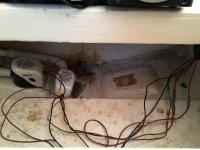
So finally decided to place the bilge pumps. This had me in a thought pattern for awhile. But done it is. Also here is where I am placing the teak I bought. Pcs. cut to fit to follow curve .etc.....
Rainy day here today but nice and cool ta boot. Almost like fall is here a month early.


Attachments

  • bile 2 21.JPG
    bile 2 21.JPG
    2.1 MB · Views: 11
  • bilg e 111.JPG
    bilg e 111.JPG
    225.1 KB · Views: 10
  • Bilge 1.JPG
    Bilge 1.JPG
    269.4 KB · Views: 10
  • diagram.JPG
    diagram.JPG
    148.4 KB · Views: 13
  • wood 1.JPG
    wood 1.JPG
    201.5 KB · Views: 12
  • wood 2.JPG
    wood 2.JPG
    270.5 KB · Views: 11

kcassells

Fleet Admiral
Joined
Oct 16, 2012
Messages
8,720
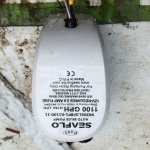
I like these pumps. Reading specs says water level to @ 1.9 to 2" for float. I also like the idea of not another electrical device/float to activate the pump.
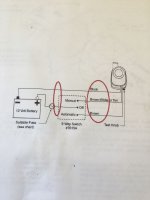
They are easy to remove and are wired to let you do a manual test, turn on to pump and leave in an active position. Seaway makes a matching switch for this so hey.
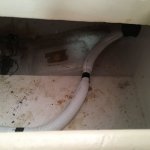
I eneded up using the cheap pump hose for drainage cause the other stuff is priced like gold. Too ridiculous, like fuel hose etc. So I finished pulling that and the wires to sem degree. Still will clean up the loose ends in the bilge in regards to wiring.
When we install {plumbers that is} sump pumps residential or commercial with or without check valves we drill a small hole in the outlet hose by the pump. MFG's also have this built into commercial pumps. This allows the excess to drain out and reduce head pressure which can kill a pump. The little thats left is below the flood level and in the case of a boat can be let out of the bilge drain plug for this application. . Just an FYI.
The alternative is to make a trap just prior to the exit which in alot of cases physically can't be achieved due to space constrictions etc.. Opinions welcolmed.
I made the pads prior for optional equiptment in the bilge. The pad to the left with the circle in the middle will accept a thru hull fitting for a pump/washdown to livewell.
The second pump I attached with 5200 onto the sanded hull witha spacer of 1/2" plastic exterior molding stuff. . Felt tight today.
 

Attachments

  • 82 2.JPG
    82 2.JPG
    211.5 KB · Views: 11
  • 82.JPG
    82.JPG
    255.2 KB · Views: 11
  • 823.JPG
    823.JPG
    231.6 KB · Views: 11
Last edited:

zool

Captain
Joined
Aug 19, 2012
Messages
3,432
I ordered the Seaflo auto pump too, only the 750gph model for the CM, along with the fused dash 3 way rocker switch..hope they keep working, needed the small footprint. Im gonna use the 3/4 china hose too :D
 

kcassells

Fleet Admiral
Joined
Oct 16, 2012
Messages
8,720
I ordered the Seaflo auto pump too, only the 750gph model for the CM, along with the fused dash 3 way rocker switch..hope they keep working, needed the small footprint. Im gonna use the 3/4 china hose too :D
LOL China hose. You da Man. Yea I dig the 3 way switch. Do I still need to fuse it at the panel. Alittle confused as usual. Looks like I do.
 

zool

Captain
Joined
Aug 19, 2012
Messages
3,432
You shouldnt need any additional fuses, it should be wired directly to the battery, before any battery switches if u have one. That way, no matter what, as long as the battery has juice, the pump will work. The built in fuse is inline between the positive battery terminal, and the switch.
 

kcassells

Fleet Admiral
Joined
Oct 16, 2012
Messages
8,720
You shouldnt need any additional fuses, it should be wired directly to the battery, before any battery switches if u have one. That way, no matter what, as long as the battery has juice, the pump will work. The built in fuse is inline between the positive battery terminal, and the switch.
Yup thanks for the confirmation.
 

kcassells

Fleet Admiral
Joined
Oct 16, 2012
Messages
8,720
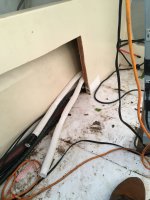
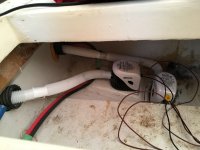
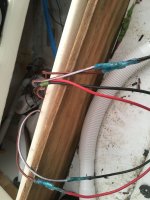
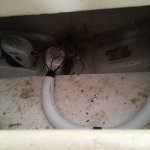
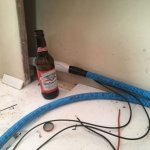
I had some left over bilge pump hose and split it to take up the basket nest of wires for the bilge pumps.
No biggy just some pics.
 

Attachments

  • wires 1 .JPG
    wires 1 .JPG
    245.4 KB · Views: 5
  • wires 2.JPG
    wires 2.JPG
    213.9 KB · Views: 6
  • wires 3.JPG
    wires 3.JPG
    195.1 KB · Views: 6
  • wires 4.JPG
    wires 4.JPG
    194.9 KB · Views: 6

kcassells

Fleet Admiral
Joined
Oct 16, 2012
Messages
8,720
What to you think?

38 Clifford Alley​

1628453401481.png


1628453443352.png

1628453469301.png

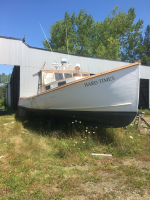
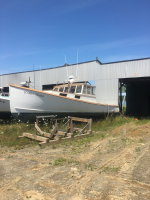
Needs alot of work. Wood hull
kcassells said:
Why would anyone buy this boat for 10000? Put on land how long ago to rot?
Because that engine and gear is worth around 10K.
If you can’t say anything nice…..
 

kcassells

Fleet Admiral
Joined
Oct 16, 2012
Messages
8,720
Nah...thats where they pull up the tuna and cages related fishing yum yums.
It protects the side of the boat from the hydraulic lift.
 
Top