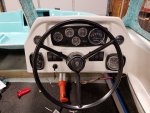
Project Fuggly - No Longer Fuggly And Splashed!!!!!!

GA_Boater

Honorary Moderator Emeritus
Joined
May 24, 2011
Messages
49,038
Arch - After you edit the raw footage like Foose and Coddington do/did, the oopses all disappear. :smile:

Are you going to run the steering and control cables the same way or is there already a set of hangers?
 

archbuilder

Vice Admiral
Joined
Sep 12, 2009
Messages
5,697
Pcola, no rhyme or reason, I just ran with colors that made sense to me....not that they make any sense! I think red and black are pretty standard, the other I just came up with!

GA I should have clarified that. The steering, shift / throttle cables and factory wiring harnesses are in the factory hangers. I also ran my 4ga hot and ground wire for the forward fuse block in them. With all that they were getting full, so I decided to try out adding the conduit. The nice thing about Fuggly vs Miss Morgan, is there is a lot of room. Miss Morgan is a bit dainty ( as she should be) and everything is tight. I'm not even sure if this conduit would fit under Miss Morgan's gunnel lol!
 

GA_Boater

Honorary Moderator Emeritus
Joined
May 24, 2011
Messages
49,038
OK, Arch. Didn't want to hear a Aw Shucks when running the rest of the cable/s. LOL
 

Pcolafisher

Petty Officer 2nd Class
Joined
Jun 26, 2013
Messages
188
Arch,
I was hoping you were using the sample wiring diagram tha was posted with ABYC compliant color-coding. There was a really good one posted a couple years ago, but I lost it with the Photobucket disaster. Cheers
 

archbuilder

Vice Admiral
Joined
Sep 12, 2009
Messages
5,697
No just more or less doing what I did on Miss Morgan. It seemed to work well there, so why not keep it the same.
 

GA_Boater

Honorary Moderator Emeritus
Joined
May 24, 2011
Messages
49,038
Labeling the wires as you have done is more important than using the "proper color". Color fades over the years and then you start asking yourself if the wire is red or faded orange and is the wire white with a brown stripe or black stripe.
 

archbuilder

Vice Admiral
Joined
Sep 12, 2009
Messages
5,697
I'm actually going to redo the labeling once things are installed, trying something new out, be interesting to see how it goes. Ga is right on the color, I had to do some guessing on the Mercruiser wiring harness.
 

archbuilder

Vice Admiral
Joined
Sep 12, 2009
Messages
5,697
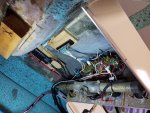
I installed the conduit chase tonight under the gunnel and pulled the wiring harness. Now its a matter of getting things hooked up on both ends.

20180619_193647.jpg20180619_193657.jpg
 

CaptNewbie

Seaman Apprentice
Joined
May 29, 2018
Messages
41
It's taken a few but finally read from start to finish and I must say, truly magnificent craftsmanship archbuilder. Extremely late to the show but, permission to come aboard sir?

​​​ I love this place. All of yous guys make this restoration stuff look super easy. I know it is far from being easy but every time I get on here I'm absolutely amazed. Keep up the awesome work.
 

buxmj

Petty Officer 1st Class
Joined
Jun 9, 2018
Messages
294
Ditto what CaptNewbie said above, so many great projects and people on this site, including this one of course. Great work and inspiration. Do you rename the thread when it is far from fuggly?
 

bajaunderground

Lieutenant
Joined
Apr 18, 2008
Messages
1,401
Been awhile since I've been on here...Looking real good Arch! Your attention to detail is to be commended. Soon you'll be rewarded with the 2nd nicest boat on the lake (Miss Morgan being #1, of course).

Cheers!
 

Teamster

Lieutenant Commander
Joined
Nov 8, 2010
Messages
1,923
I have been working on the wiring, nothing to exciting to see yet, mostly planning. I did spend a good part of today laying out the dash and sorting out the clearances with the steering rack


It is naturally right in the sweet spot for gauges and switches. After a lot of measuring I got everything laid out on the template. This is chipboard, about 1/16" thick, works great for stuff like this.


I was worried about the switches, seems like cutting those holes are the hardest since they are square. Turns out the depth gauge on the upper left proved to be the pain. There were some air pockets in the layup and they chipped out when I drilled the hole/ That is really irritating at this point....if I would have only drilled the gauges and switches before paint. I've been pondering having a fiend turn some bezels to hide it....I don't think a paint fix will look very good at this point without a lot of effort. So I'm going to ponder that tonight. I need to get screws for the speedo, right lower hole and a ignition switch with a longer shaft, left lower.
Monster Marine might have a bezel or trim ring to hide that, and dress it up a bit??
 

archbuilder

Vice Admiral
Joined
Sep 12, 2009
Messages
5,697
Thanks teamser, that was kind of what I was thinking. I thought I would have to get them turned. I didn't realize anyone made them.

Thanks Baja, I like having #1 and #2 lol!
 

archbuilder

Vice Admiral
Joined
Sep 12, 2009
Messages
5,697
I spent way more time today studying wiring diagrams than I wanted to. I also installed all the gauges for the final time. Between about 6 wiring diagrams I think I have all of the factory wiring harness and ignition hooked up correctly. I also hooked up power, lighting and grounds to the speedo, fuel, and depth gauges. I still need to hook up the wiring harness I made, but that should go quickly since there is no learning curve. After that it is hook up everything on the aft end and install the final devices, bow light, stern light, blower, bilge pump, etc.

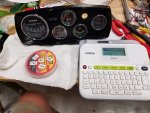
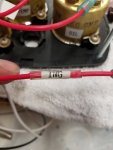
I am using a label maker with "weather resistant tape" to label things. The factory wiring harness had termials on it, so I just taped the labels on at 90 degrees. On the new wiring harness I will put the label on parallel and put clear heat shrink on it. I skipped doing this on thing that are obvious under the dash.
20180623_085625.jpg20180623_110158.jpg
I also labeled the bottoms of the gauges so that when I was under the dash I didn't have to think about what the gauge was.

20180623_085856.jpg
20180623_224153.jpg

20180623_224039.jpg The bus is for all of the lights, navigation and instrument lights. Its amazing how many there are. I kind of wish I did the same thing with the ignition circuit, with a relay. Oh well maybe next time, I am just running with it on this one.
 
Top