Project Fuggly - No Longer Fuggly And Splashed!!!!!!

archbuilder

Vice Admiral
Joined
Sep 12, 2009
Messages
5,697
Thanks for all the nice complements! Sam, I almost want to build another one now....because I have some ideas on improving things! My OCD kicks in on occasion :D

Micky, I like the conduits, but I hate trying to pull wire in them later. That is why I ran a bunch of spare wires in the conduit from the dash to the engine compartment......it occurred to me last night I forgot to run speaker wire :facepalm:.....oh well maybe that will go down the other gunnel!

So after rigging a funnel that would fit in the TINY, hard to get to fill port, my Dad and I bled the tilt / trim. To my surprise, everything seems to be working nicely. I haven't checked the gauge yet (still need to power it up. But I'm just happy the pump / valve body seem to be working! So that is a major milestone, I can start to see the light at the end of the tunnel now!
 

mickyryan

Rear Admiral
Joined
Apr 18, 2016
Messages
4,214
you know what i use? it will probably make you laugh but i use trimmer cord weed eater cord as my pull cords it works great and never breaks :) i find it strong enough to use as a fish tape and a pull:) eitherway boat looks great love the color and its no longer a ugly duckling but a pretty swan :)
 

archbuilder

Vice Admiral
Joined
Sep 12, 2009
Messages
5,697
Micky, never thought of using weedeater string but I bet it works well.

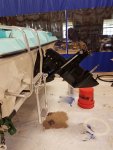
Here is the proof the tilt/trim is up and going.

20180729_153716.jpg
This afternoon I got the wire run and conduit installed for the bow light. The wires are terminated on the dash end, but I still need to install the bow light. you can see the conduit at the bottom of the pic heading forward.

20180729_153113.jpg
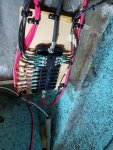
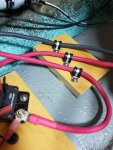
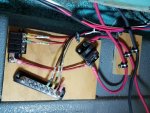
I also installed some strain relief clamps for the primary power and ground wire that will go to the new fuse blocks and forward ground bus. This block is right next to the battery. Power goes through the main circuit breaker you see on the bottom of the pic.

20180729_154752.jpg
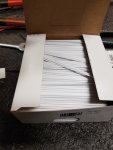
I had to order some new disposable gloves the other day, I get them from Uline. I decided to also pick up some of their plastic coated wire ties, I used some on Miss Morgan and kind of like them for bundling the smaller wires. I have been using some that came with packaging up under the dash. They work nicely when you are adding wires to a bundle as you go. They allow you to untie and retie the wires without having to cut the tile like a zip tie. I still have them under Miss Morgans dash 8 years later. Makes adding wire or trouble shooting a lot easier.

20180729_153816.jpg
And lastly the funnel and 3 concentric piecs of tubing that I used to get the oil in the trim pump.

20180729_141557.jpg
 

Pcolafisher

Petty Officer 2nd Class
Joined
Jun 26, 2013
Messages
188
Arch, your wiring work is looking better than most professionals. I may be experiencing a mental block, but, what are SP SW1 and SP SW2? All I can think of is sump pump instead of bilge pump.
Cheers
 

archbuilder

Vice Admiral
Joined
Sep 12, 2009
Messages
5,697
Pcola, Those are spares. I will probably use one for a radio master switch and who knows what with the other one. Just like to add in some future capacity.
 

mickyryan

Rear Admiral
Joined
Apr 18, 2016
Messages
4,214
yeah she needs a giant 52 inch led light spreader for night fishing:) rear lead and underwater led , that's 3 spots i just took up for ya :)
 

Woodonglass

Supreme Mariner
Joined
Dec 29, 2009
Messages
25,927
Thought I'd pass this along for all the Neat Freaks, Like Arch:D:faint2:


.
See the source image
 

archbuilder

Vice Admiral
Joined
Sep 12, 2009
Messages
5,697
Wood that is the Roadkill wire plug separator method, lol! David Friburger has a very good tutorial on the method :D

Kcasstles, Hadn't thought about pex, good idea!
 

SkaterRace

Senior Chief Petty Officer
Joined
Mar 20, 2016
Messages
792
Wood in the custom computer world we have what are called cable combs, things make everything look SO nice. I do like the zip tie method though, way more practical than rubber or plastic combs due to the different sized wiring. Now if it was all the same gauge wiring a nice comb would be amazing.
 

Woodonglass

Supreme Mariner
Joined
Dec 29, 2009
Messages
25,927
SR, I was a PC tech for several years and know what you're saying. I just ran across the zip tie method and thought it was a Great Workaround. Being a C.O.B. I'm always looking at things "On the Cheap!!"
 

archbuilder

Vice Admiral
Joined
Sep 12, 2009
Messages
5,697
I'll have to look up wiring combs, sound interesting. Tonight I wanted to get the fuel tank and pump plumed.....long story that turned into working on wrapping up the aft wiring when I started to hook up the fuel pump. I did make a big dent in that, and should be able to wrap it up tomorrow. I think I should have the wiring mostly complete this weekend and the fuel system hooked up. I have the glass guy scheduled to put in the windshields and side windows next week. Still have a lot of odds and ends to wrap up, but getting close!
 

archbuilder

Vice Admiral
Joined
Sep 12, 2009
Messages
5,697
I worked on the wiring and fuel system today. Oddly I spent a lot of time moving around wires, figuring out how to route the fuel sending wires, and hoses. I also took the fuel pump out after I sorted out the fuel line routing and put in the fitting for the (hopefully) final time.

I spent a couple of hours at the end of the day trying to figure out the vents and bilge blower! Actually having most everything else in place was helpful......more or less it eliminated a lot of things I thought about. I don't think there is a great solution, but I think I came up with one that is workable. I want to sleep on it, then if it still looks good order a couple of things tomorrow and pull the trigger on drilling some holes! One other nice thing about the solution, is I can now keep trucking on the fuel system and wrap up the last of the electrical.

Speaking of holes, I think I finalized the fuel vent and bilge pump port locations also.

I finished up terminating all of the circuit wires at the aft fuse and buss panels today.

Click image for larger version  Name:	20180804_184110.jpg Views:	1 Size:	650.7 KB ID:	10628700
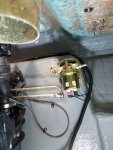
Here is the reinstalled (hopefully) for the last time fuel pump.

Click image for larger version  Name:	20180804_184022.jpg Views:	1 Size:	582.9 KB ID:	10628701

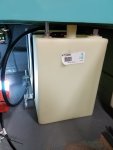
And the mocked up tank. Getting the clamps for the wiring / hoses in place, along with the hold down straps is going to be fun!

Click image for larger version  Name:	20180804_184032.jpg Views:	1 Size:	445.2 KB ID:	10628702
 

archbuilder

Vice Admiral
Joined
Sep 12, 2009
Messages
5,697
Almost got the fuel tank in today. I started out by installing the line from the fuel pump to the carb. Next I drilled and installed the vent in the upper transom. At this point i realized that the vent hose needed to go thru the old vertical section of the rear deck that I left in place. At lunch I found some 1" PVC and made a busing to protect the pipe. After that I cut and fit the pipe to a brass 90 that will hook it up to the tank.

I then drilled the old section again and added a grommet to run the sending unit wires. I decided to add a clamp, for the wires, to the bottom of the deck, between the transom and grommet. I put 5 minute epoxy on a block with a wire clamp on it, and secured it in place with hot glue till the epoxy set up....this is when I burned 2 fingers on the left hand......so I retreated to the house while the glue dried and put ice on the two fingers......felt similar to running over them with a forklift........

After 45 minutes I ran the wire thru the clamp and grommet. I carefully assembled the supply hose, vent hose, wiring, rear clamp and front clamp in a per-determined sequence.....amazing what a pain this is to put in! The only missing piece of the puzzle was the filler neck hose....

I am using the USCG approved filler neck hose. This is a reinforced rubber hose that has a stainless steel wire ran through it, similar in flexibility as a 12" concrete pipe.....carefully measured and cut it to length....tried installing it......re-cut it shorter to the correct lenght.....went to try it again, lacerated finger on other hand with previously mentioned USCG razor sharp stainless steel wire.......wiped blood off of boat and applied a shop bandage (Blue shop paper towel and masking tape) mainly to keep blood off of the boat......tried installing the filler neck hose, got it on the tank....tried installing the deck fill, but couldn't get it on. I pulled it off and realized that the ball chain that secured the filler plug to the filler neck got wedged between the neck and the USCG approved filler hose! In the process broke the chain. So I came to the house and ordered pizza....I'll try again tomorrow night!

20180805_185721.jpg
 

sphelps

Supreme Mariner
Joined
Nov 16, 2011
Messages
11,462
Battle scars ! LOL !
‘Burnt fingers wrapped around an ice cold one sounds like the medicine needed !
 

archbuilder

Vice Admiral
Joined
Sep 12, 2009
Messages
5,697
They feel fine now Sam, but that hot glue must have been 400 degrees lol! And I used some of that "medicine"!
 

GA_Boater

Honorary Moderator Emeritus
Joined
May 24, 2011
Messages
49,038
So I came to the house and ordered pizza

The only thing right about the day! :blue: Hope the pizza didn't require a knife :eek: or fork :eek: to eat.

When Fugly is splashed and you have a :D on your face, all this will be forgotten, Arch. Except when you see the scars!
 
Top