New Journey

ShoestringMariner

Lieutenant Commander
Joined
Apr 18, 2015
Messages
1,593
My though was to apply the Gluvit on the inside, hoping it creeps into the seams more than the Coat-it did, then run a bead of 5200 along the bow seam on the outside of the hull. My hull is unpainted below the strakes and where the leak is occurring, so any Coat-it on the outside would be very visible.
Can you invert the boat or roll it up to one side? G-Flex flows on to and floods seams beautifully with a syringe and heat gun.
 

MNhunter1

Lieutenant Junior Grade
Joined
May 12, 2014
Messages
1,053
Can you invert the boat or roll it up to one side? G-Flex flows on to and floods seams beautifully with a syringe and heat gun.
Yeah, was looking at that too as I don’t necessarily need a whole serving of Gluvit. Not sure which would be the better option.
 

SHSU

Lieutenant Junior+Starmada Splash Of The Year 2019
Joined
Mar 8, 2017
Messages
1,724
With the warmer weather, I was able to get the hose back out and conduct a leak check. Only leak I have is a slow drip from the bow seam. Inside seam and rivets already have Coat-it applied. Not sure if I should just try to apply some Gluvit (seems to flow a bit better than the Coat-it) with a syringe into the seam as an additional layer, or get out the rivet gun and hit the rivets before adding the Gluvit. Assuming any hammering on the rivets now will likely break any bond/seal of the existing Coat-it.

Would have been nice to not have any leaks, but the drip is pretty minor and unsure of what the results will be once in the water with the pressure pushing on the outside of the hull vs the inside with the leak test. Also though about running a bead of 5200 up the seam from the outside.

Any suggestions on best attack?

I have read you can fill with water and then put a couple drops of food coloring in. Watch where it goes and it should show you where the leak is coming from. Again I haven't tried this method myself, but if you wanted to try a more targeted approach then just doing the entire seam.

SHSU
 

MNhunter1

Lieutenant Junior Grade
Joined
May 12, 2014
Messages
1,053
Just been working on some littles as I await the extended delivery delay on my Gluvit. Had a few set backs with an unfortunate kidney stone, a family vacation, and now a few days of turkey hunting, but with the weather warming, hoping to make some more progress.

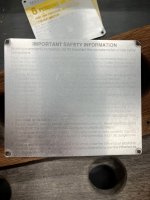
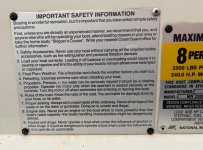
Looking at freshening up my ID plates and have one that I can't quite read entirely. Does anyone have a similar "safety information" plate? Looking to transcribe it in order to get a new decal made, but some of it is too far gone.

Safety Information Plate.jpg
 

renns

Petty Officer 1st Class
Joined
Dec 20, 2017
Messages
316
Is there anything that can be done to restore the original to enhance the contrast? Not sure if a clear coat of some type might help?
 

MNhunter1

Lieutenant Junior Grade
Joined
May 12, 2014
Messages
1,053
Is there anything that can be done to restore the original to enhance the contrast? Not sure if a clear coat of some type might help?
I'm just going to get some reproduction decals made to slap over them.
 

renns

Petty Officer 1st Class
Joined
Dec 20, 2017
Messages
316
Looking good! Did you get the kids to sign and date it first, to make a 'time capsule' to surprise the restoration crew starting in 2070?
 

SHSU

Lieutenant Junior+Starmada Splash Of The Year 2019
Joined
Mar 8, 2017
Messages
1,724
Looking good! Did you get the kids to sign and date it first, to make a 'time capsule' to surprise the restoration crew starting in 2070?

Now you tell me..... That would have been a great idea to do with my daughter.

SHSU
 

SHSU

Lieutenant Junior+Starmada Splash Of The Year 2019
Joined
Mar 8, 2017
Messages
1,724
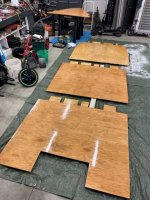
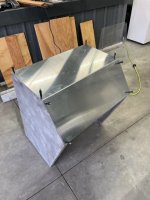
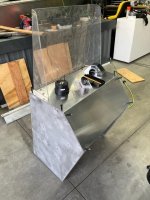
Nothing like a clean template

SHSU
 

SHSU

Lieutenant Junior+Starmada Splash Of The Year 2019
Joined
Mar 8, 2017
Messages
1,724
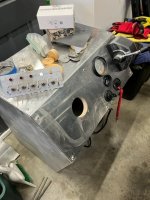
I wish I had that much space on mine!!!

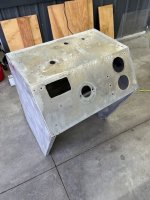
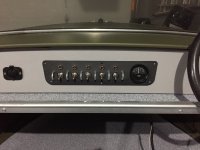
Where are you putting that switch panel? It looks SWEET!!!

SHSU
 

Mikesta

Petty Officer 3rd Class
Joined
Mar 15, 2018
Messages
86
did you make the window for the console? if so could you explain how and materials used
 

MNhunter1

Lieutenant Junior Grade
Joined
May 12, 2014
Messages
1,053
Been a busy summer and the MR180 has, for the most part, just been collecting dust in the garage. I had a little moment of panic the other day when I was looking at the kids' football schedules, the upcoming hunting season, what I have left to do with my retaining wall and landscape project, and realized I'm running out of decent weather/time to get some paint laid down before the weather turns.

My intentions of finishing up this build over the summer were sidetracked by other projects, so now I'm looking at another winter build. Things will come together quickly once the paint is down and the deck installed, but I really need to paint before the cold sets in.

I know I had asked before about idle time between vinegar wash/acid etch and paint, with the recommendation to be as soon as possible. I have another question regarding the vinegar wash and rinse. I had a nice pressure washer that just recently took a dump. Is a washdown with the standard hose enough to follow up the vinegar etch on the bare aluminum, or should I really try to hit it with a pressure washer. I'm probably over think this, but I'd assume the water is meant to neutralize the acid moreso than it is intended to rinse.

Current plan:

Hit all bare aluminum to be painted with a 220 grit on the orbital
Rinse
Vinegar wash
Rinse
Acetone wipe down
Paint (using both Aluma Hawk and Duralux paint formulated for bare aluminum/no need for primer)

I guess my biggest question is - standard hose pressure enough for rinsing, or do I need to replace my pressure washer sooner rather than later?
 
Top