New Journey

DCampbell

Seaman
Joined
Aug 16, 2018
Messages
73
Congrats on the Buck !! I'm a big bowhunter myself ! I took all my boys as well . 6 boys , lol. never know where it will take you. my Son has some videos on Whitetail Adrenaline. I became friends with Andre Diquisto , and Ended up taking him and his wife out on saginaw bay on one of my restos! Great guy ! I would have loved getting that buck at 10 or 20 , lol

edit. Great job on teaching him to wear safety harness ! My Son fell climbing out of his stand getting out last year, broke some ribs and bruised him up pretty bad. ended up walking out 3 miles . took him hours.
 

MNhunter1

Ensign
Joined
May 12, 2014
Messages
967
I have officially completed the removal of all paint from every last piece of this build. It's a good feeling to put away the stripper and know that tedious and somewhat messy task is behind me. From the outside/inside hull, splashwell, aft side panels, aft splashwell panels, side supports, bow deck supports, helm seat, center console, and livewell...it's all completed. Almost makes me not want to lay down any new paint:)
 

MNhunter1

Ensign
Joined
May 12, 2014
Messages
967
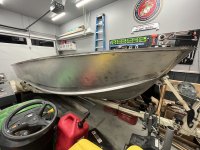
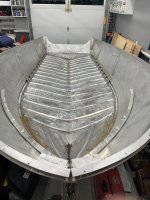
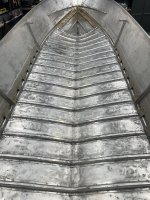
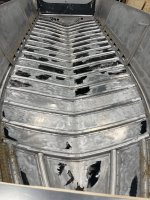
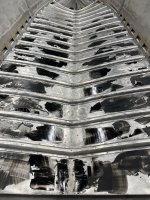
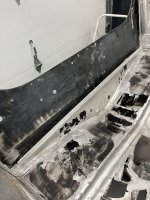
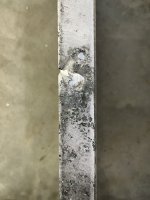
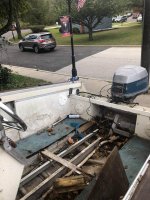
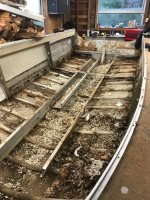
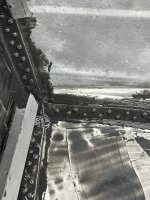
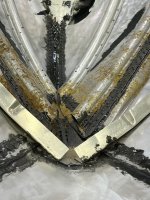
Had some nice(er) weather last week with temps above freezing, so I pulled the hull out onto the driveway, gave her a nice vinegar bath, and rinsed her with the pressure washer. Now hovering around 0 degrees here in MN, so she's back in the garage with the heat up to 65 waiitng for the 1st round of Marine-Tex to cure. Buttered over the pitting on the inside splashwell skin, filled any holes I won't be re-using, and filled in the pitting inside the hull from the saturated factory pour-in foam. The PO had done a previous redeck from a "qualified" marine shop, but it appears they used pressure treated ply for their materials. Where the front bow piece edge met the hull, there was significant surface pitting on both sides, and a small pinhole through the hull that will get a new solid rivet punched through. Also pretty significant corrosion on the tops of the floor braces/stringers where the decking was attached, more like from the self-tapping hardware that was used. That will all be getting addressed with the Marine-tex as well. Only found one other pin hole that made it all the way through the hull. The rest of the pitting appears to be pretty minimal surface pitting that is all getting skimmed with Marine-tex before I hit the seams and rivets with Coat-it.

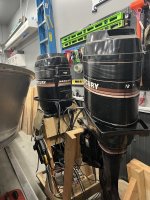
Also managed to transfer the primary 115hp Tower of Power from one somewhat questionable stand to the more robust stand that I had built for the original motor. Much more comfortable with it now and gained a little space back with the removal of the extra stand.

Pics were before Marine-tex, but hadn't posted in awhile and wanted to get something out there for the mob. Waiting on a second batch of Marine-tex to show up so I can finish the job and move on to the Coat-it.

Couple of questions:

1) Will Marine-tex on the stringers hold the rivets for attaching the decking, or should I add another piece of aluminum?

2) I've seen some inside hulls painted with Coal tar epoxy. Any benefit on using something like this to completely seal over the Marine-tex and Coat-it, or is it a wasted effort/expense? I do not plan to ever re-do this hull down the road, just want to do my due diligence in sealing everything up. I never had the corrosion/pitting issues to deal with on my previous builds.

Happy New Year everyone!!
 

classiccat

"Captain" + Starmada Splash Of The Year 2020
Joined
Dec 20, 2010
Messages
3,405
good progress!
I've never worked with coal tar epoxy however I'm in the camp of coating aluminum with anything below the waterline (interior or exterior) is a recipe for corrosion in the long term. if you don't have perfect adhesion, it eventually delaminates and will trap water against the hull. I'd fill in the pits (so water doesn't pool up in them) and call it a day.
 

MNhunter1

Ensign
Joined
May 12, 2014
Messages
967
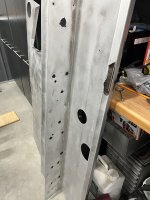
Cranked the garage heat to 65 and 28oz of Marine-Tex later…hull pitting and transom skin skimmed, all extra transom holes filled, extra holes in splashwell filled, side gunnels, and all interior side panels and supports addressed for unneeded screw holes. The clean hull looked so much nicer, but this will all be unseen or sanded down and painted over in the end. I have a clean sheet of aluminum to slap over the transom skin as well.
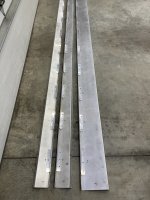
Picked up some 1”x1” aluminum angle to double up the tops of the three hull stringers rather than trying to fill in the corroded screw holes. I’ll solid rivet them through the sides of each stringer to provide good metal to rivet the deck into.
Still need to lay down the Coat-it on the inside seams and rivets, but debating between doing it now, or after I get the new transom in and gunnels back on to reduce any flexing of the hull. Not sure if it will really matter much/flex much that low on the hull??
Have some sanding ahead of me, but glad to have this step out of the way.
8E94CA87-3AD6-4BAF-B54A-F98FB82E7248.jpegD9F9E3AB-F94A-4D91-A146-61C32EBD4C80.jpeg36BE515C-C6E9-4DC7-8007-C2785D289D80.jpegEA386209-DAB3-4F0B-A7A3-ECF6C46F2A2D.jpegC2443AB9-2468-4AE6-96B5-043B4D5A5131.jpeg
 

SHSU

Lieutenant Junior+Starmada Splash Of The Year 2019
Joined
Mar 8, 2017
Messages
1,658
Looking good and remember when I was at that point.

As for the coat-it, I wouldn't worry about it to much. If you are getting the much flex to break it, I think you have other areas of concern/damage.

SHSU
 

MNhunter1

Ensign
Joined
May 12, 2014
Messages
967
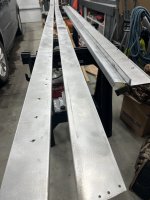
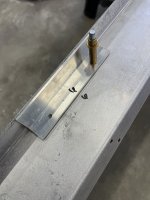
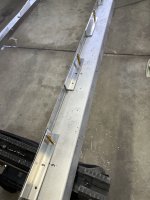
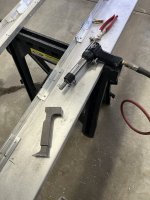
Made some glitter in the garage and hammered some solids today. Reinforced the stringers with some 1/8” angle to ensure a solid base to secure the deck to. The old holes/mounting points were pretty well corroded. Much better now. 6” sections at every mounting point. Fortunately, the corrosion was only on the tops and the lower holes/metal is all in great shape for riveting back to the hull. Breaking in the rivet gun was an added bonus to get a little practice in before addressing any of the more critical rivets on the hull.
645CE4DF-7DF2-4092-A178-E1B3A6CA0376.jpegFD649A94-095D-4255-948E-F9D44AD7980B.jpeg4096B374-D21E-40F8-B6FB-21DB95B3390F.jpegA985F694-C2B7-41D4-8829-41FB779A5EF9.jpeg982FBFD3-89F4-4DC1-A2A2-3686D5074180.jpeg
 

SHSU

Lieutenant Junior+Starmada Splash Of The Year 2019
Joined
Mar 8, 2017
Messages
1,658
Those are some good looking tails (y)

SHSU
 

ShoestringMariner

Lieutenant Commander
Joined
Apr 18, 2015
Messages
1,560
Made some glitter in the garage and hammered some solids today. Reinforced the stringers with some 1/8” angle to ensure a solid base to secure the deck to. The old holes/mounting points were pretty well corroded. Much better now. 6” sections at every mounting point. Fortunately, the corrosion was only on the tops and the lower holes/metal is all in great shape for riveting back to the hull. Breaking in the rivet gun was an added bonus to get a little practice in before addressing any of the more critical rivets on the hull.
View attachment 355040View attachment 355041View attachment 355042View attachment 355043View attachment 355044
This is a great idea. My boat has been down a few times for the looks of the holes. I think I’ll sister up some light angle myself. Thanks for the idea
 

MNhunter1

Ensign
Joined
May 12, 2014
Messages
967
Anyone have a picture of an MR180 or other center console that uses the aluminum tray between the stringers to run the steering and controls from the helm to the motor? Looking to see how it is mounted between the center and starboard stringer. I apparently removed mine without snapping a photo to assist with putting it all back together 😁
Mystery solved - That top lip is deceiving as one would think it sat on top of one of the stringers, but based on the attached photos, it appears the short side of the tray is riveted at the inside base of the starboard stringer. This would support the holes I did locate along the lower edge of the short side. I'll just need to see how they line up. Strange the tall side just tends to float, but it looks like it may have attached to those thin metal strips that ran between the deck seams.photo322806.jpgMR160.jpg
 

MNhunter1

Ensign
Joined
May 12, 2014
Messages
967
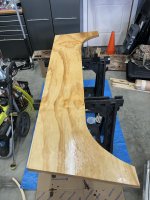
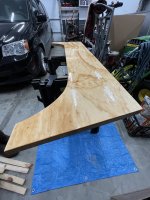
Just a little epoxy work today. US Composite on the transom and Coat-it on the hull seams. Have another 2lb can of Coat-it, but the can is still a bit cold from sitting in the mailbox overnight. Figure I’ll let it warm up and hit the rest of the rivets tomorrow.

AC40122A-85AA-4224-A6F1-4F16EF01587F.jpeg98C8D117-F788-47FD-BC30-DCF56285F858.jpeg0FB8EC0E-9B9E-4F71-A237-E8F623993CB1.jpeg
 

MNhunter1

Ensign
Joined
May 12, 2014
Messages
967
Just ‘cause I know you all like pictures of stuff drying…

8C55A59E-0ED9-4751-83A2-96C96EC1DA29.jpeg

3rd coat of epoxy on side one. Will flip in the morning, knock off the drip numbs with the orbital sander, and get 3 coats on side two before the day is over. Was tempted to crack open the 2nd can of Coat-it and finish off the hull tonight, but figured I better give it some more time to get up to room temperature. Instructions state not to apply below 65 degrees with a minimum surface temp of 50. I have the Coat-it siting in the 69 degree house and the garage is set at 65 degrees. Should be good to go for tomorrow after work.
 

classiccat

"Captain" + Starmada Splash Of The Year 2020
Joined
Dec 20, 2010
Messages
3,405
@MNhunter1 Are you adding glass to that epoxy? I highly recommend it to avoid grain checking.
 

MNhunter1

Ensign
Joined
May 12, 2014
Messages
967
@MNhunter1 Are you adding glass to that epoxy? I highly recommend it to avoid grain checking.
No glass, just 3 coats of epoxy per side and I'll topcoat the minimally exposed side with Krylon Fusion paint. The transom on these MR180's are pretty well covered, so aside from any penetration at the thru-bolts, it's pretty well protected. There's just a small section at the knee brace below the splashwell that isn't completely covered by aluminum. If it lasts anywhere near what the uncoated original one did, I'll be happy.
 
Top