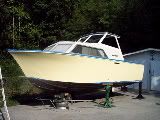
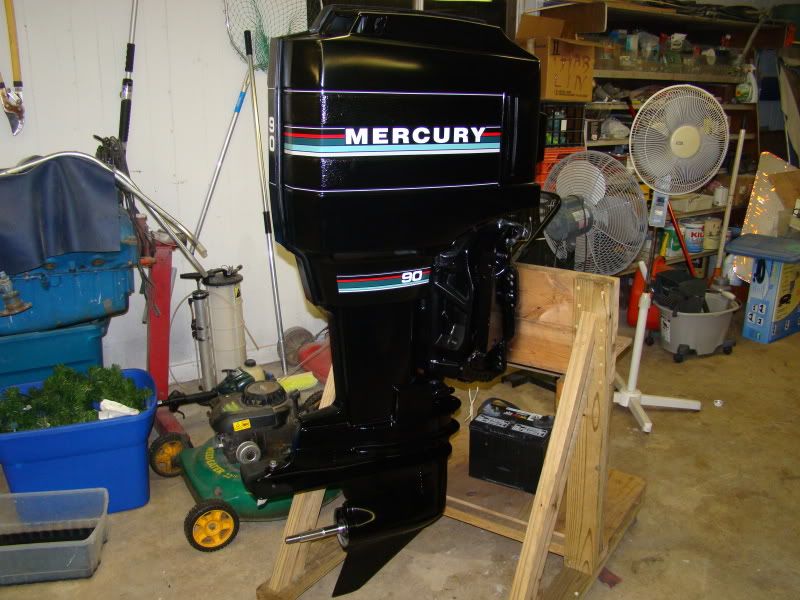
Re: My tri-hull transom replacement w/ pics
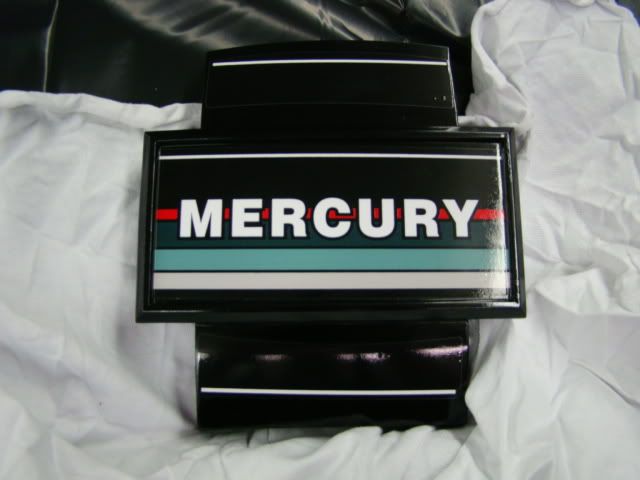
So I decided to go ahead and repaint the outboard. I first decided against doing it but I got over my laziness and pulled it back off the boat. Most of the original finish was still there. The paint was intact but dull and faded. The original decals were also a mess. After inquiring with my friends here, I located a company that made replacment decals because the originals were no longer available from Mercury. I found an original factory set, but they were very expensive. Sure I would have liked to have them but the bottom line is that this boat is far from factory at this point. The aftermarket stickers are very similar to factory with some very minor differences.
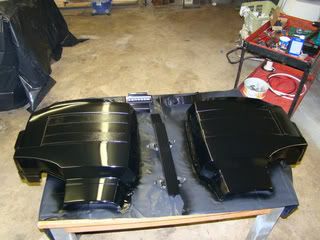
My first move was to start the prep by removing any parts that would facilitate masking and the parts that I would paint seperate from the engine.

The engine was reletively clean but degreasing was still in order. I started by cleaning everything with Purple Power degreaser. After years of use you can guess how much mixing oil was all over. Next I pulled the lower case apart and replaced the water pump impeller. Turned out the old impellor was in good shape, but there was no way of knowing without pulling it. I sure did not want to pull it after the paint job.
After getting things clean I cleaned the parts to be painted again with laquer thinner. This may be an unnecessary step but I was unsure about what residue may be left by the cleaner. Next....sanding. Did I ever mention I hate sanding?
I used 230 grit paper and lightly sanded everything until it was dull. This also removed and factory defects and generally smoothed up the surface without removing paint.
Next I used my cheap HB heat gun to remove the old decals. I like to use heat guns for this, I my experince its the best method to get old decals off. The trick is not to use too much heat. Start to peel an edge and only apply enough heat to keep removing. Too little heat and the sticker will stretch apart, too much heat and it melts it. I have tried sanding, decal removal sprays and scraping. Trust me, heat is best.
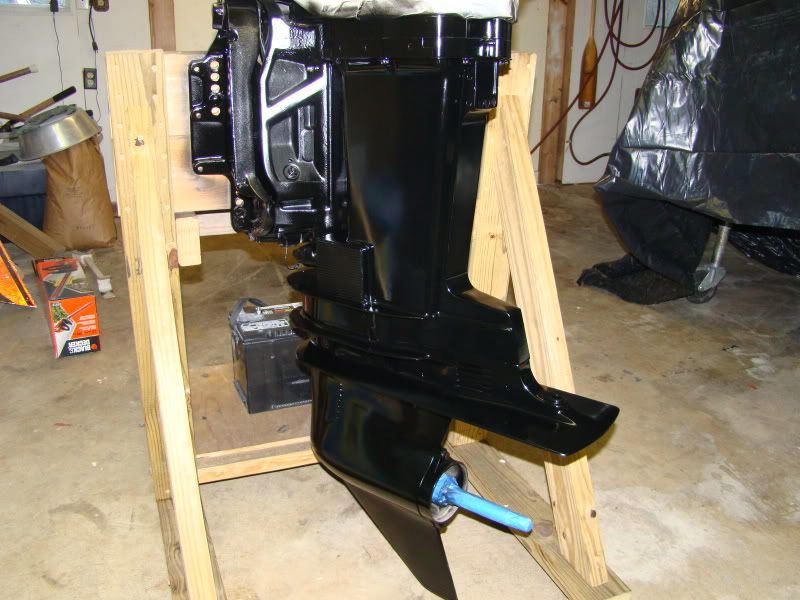
I tilted the engine up to expose the portion under the mount so I could get good coverage over all the exposed areas that I wanted to paint. I taped the shock and tilt rams carefully to prevent any paint from getting on them. *Be careful to garuntee no paint is left on any part of a hydrlic ram that can enter the cylinder. Paint left on the rams surface can damage the packing in the cylinders and cause them to leak.*
Now it came time for paint. I used Moeller Marine outboard spray paint out of the can in Mercury Phantom Black.

You paint guys may be shaking your heads about this choice. I am not looking for show quality here and I have had good luck using rattle cans in the past. Before doing any spraying I did some cleaning around the shop and I was sure the boat was covered. I think overspray on the boat would kill me at this point.

I painted the smaller pieces first to get some practice using the paint. If I screw them up at least they are small and easy to sand off later. This paint sprays like any other rattle can I have ever used. Careful thin coats are best.
To be continued.


") It's all coming clear now!!
It's all coming clear now!!