My tri-hull transom replacement w/ pics

Status
Not open for further replies.

drewpster

Commander
Joined
Oct 17, 2006
Messages
2,059
Re: My tri-hull transom replacement w/ pics

Epoxy is expensive, but it bonds much better than polyester. If you go with epoxy you wont need as much fiberglass or as many layers. Any woven cloth would work, it depends on how much thickness you need. Go with the heavier weight if you need more bulk. I would go with the lightest your are comfortable with.

Polyester is also good and half the price. On a deck I would use 1.5oz CSM and 18 oz woven roving.

If you go with epoxy forget the CSM and use cloth.

Epoxy and poly have different processes. Make sure you know how to use the one you go with.
 

1970Thunderbird

Petty Officer 2nd Class
Joined
Dec 24, 2009
Messages
111
Re: My tri-hull transom replacement w/ pics

I've heard that epoxy is the way to go. That's what I'll do. I don't really think I need the bulk, but I want this to be a really strong deck, one that'll last another 20 yrs or so. So, maybe 6oz?

Never worked with either before. I know epoxy is exothermic and gets hot and you have to work it quickly, in small batches. My uncle is big into boat repair and he gave me some solid pointers.
 

redfury

Commander
Joined
Jul 16, 2006
Messages
2,655
Re: My tri-hull transom replacement w/ pics

Regarding the stringers: how are they attached to the hull? Glued? If so, what type? Do you then screw the plywood decking to the stringers, or attach in another fashion. The transom seems very solid to me, so I'm reluctant to go drilling into it.

I'm good with my hands, so I'll take on any task, but I feel way over my head on this one. Never even seen it done.

You'll figure out how it's done if you are there for when it is undone. ;)
 

Mickla

Recruit
Joined
Apr 23, 2010
Messages
4
Re: My tri-hull transom replacement w/ pics

Drewpster, how did you get that last bit of fiberglass deck off that creates that lip all the way around?
 

jcsercsa

Captain
Joined
May 21, 2007
Messages
3,401
Re: My tri-hull transom replacement w/ pics

Epoxy is expensive, but it bonds much better than polyester. If you go with epoxy you wont need as much fiberglass or as many layers. Any woven cloth would work, it depends on how much thickness you need. Go with the heavier weight if you need more bulk. I would go with the lightest your are comfortable with.

Polyester is also good and half the price. On a deck I would use 1.5oz CSM and 18 oz woven roving.

If you go with epoxy forget the CSM and use cloth.

Epoxy and poly have different processes. Make sure you know how to use the one you go with.

Also if your using poly you have to forum a mechanical bond, meaning you have to ruff it up more so it will stick !! where epoxy is chemical bond !!

Keep up the good work drewpster !! John
 

drewpster

Commander
Joined
Oct 17, 2006
Messages
2,059
Re: My tri-hull transom replacement w/ pics

Drewpster, how did you get that last bit of fiberglass deck off that creates that lip all the way around?

With a grinder. It is best to start cutting the deck out away from the hull side. In fact, I would start near the middle and work my way out to the hull side on tri-hulls. It can be difficult to tell where the wood core of the deck and the hull bottom meet. You run the risk of cutting in to the bottom instead of the deck. My deck actually rests down in to the deadrise of the hull. I had to make a repair to the hull bottom because I cut through it!:mad:
Yes, it sucked.

I used a grinder with a cut-off wheel until I got close. I then switched to a flapper disk and ground off the lip.
 

Mickla

Recruit
Joined
Apr 23, 2010
Messages
4
Re: My tri-hull transom replacement w/ pics

Awesome! I already have the deck cut out and was left with a large lip to thick for normal sanding. I actually went out a bought a grinder today and reduce the lip a lot. I will be going back tomorrow for the flapper disk. Thanks for the insite.
 

drewpster

Commander
Joined
Oct 17, 2006
Messages
2,059
Re: My tri-hull transom replacement w/ pics

You can also get a flexible backing pad for sanding disks. The 36 grit disks cut very well. (be careful)
The flappers give a little more control in my opinion and they tend to take a round profile once you start using them. Once they are broken in, it is a little easier to avoid cutting too deep.
 

drewpster

Commander
Joined
Oct 17, 2006
Messages
2,059
Re: My tri-hull transom replacement w/ pics

I know you guys have heard this before, but I think I am about to get some primer on this boat. Time has become a precious commodity around here so progress has been slow. However I have made some. The boat is now back on its top. My wife was out of town with the camera the day I flipped it so no pictures. Lets just say it was a strain on my heart. This thing is much heavier than it was when I flipped it when it was bare. I have the equipment to do it, but the first time flipping it this heavy was still a heart racer. Now that I know what to do next time (see signature below) I will take some pictures on the next flipping.
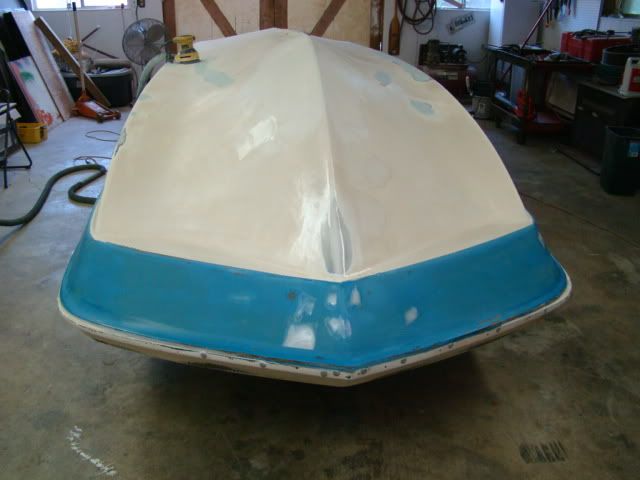
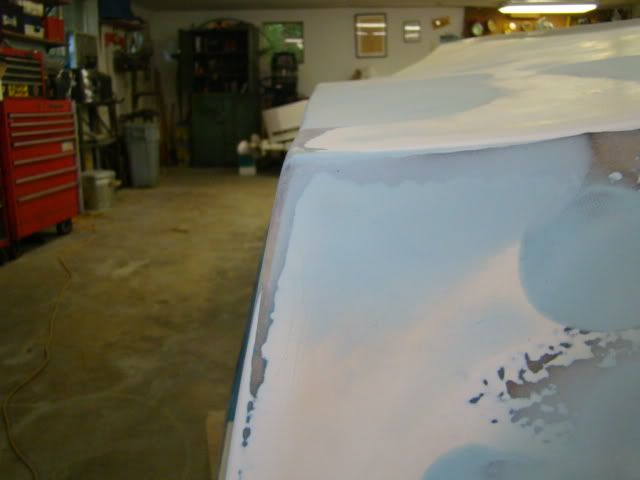
The bottom needed quite a bit of work. I started some fairing back when it was cleaned out, but more was needed.

DSC06425.jpg


Its close, real close. All the prep work and sanding is basically done. I had to make and install a new backing block for the bow eye. Install the stern eyes for the flip and then remove them all to finish the fairing. I still need to glass in the support for the bow deck that attaches the upper forward deck to the lower one. I did some filling along the cap seam at each corner of the bow where there was some misfit of the cap to the hull. I used a peanut butter mix using epoxy, cabosil, and glass bubbles to keep the filler water tight.

I also had some major work to do on the corners at the rear of the boat. the corners were basically missing. Years of wear made these areas very thin. When I did the inside I backed these corners with filler and cloth to give me something to build on when I moved to the outside. I used strips of roving and epoxy to build out the corners and shaped them with a grinder to give them their final shape. I then covered each corner with a layer of light cloth to keep them strong. It will take at least another 30 years to wear through them again.

DSC06428.jpg


Well at this point I am looking forward to primer and paint. Once that is done and cured, back on the trailer it goes! Then finish the paint topside.

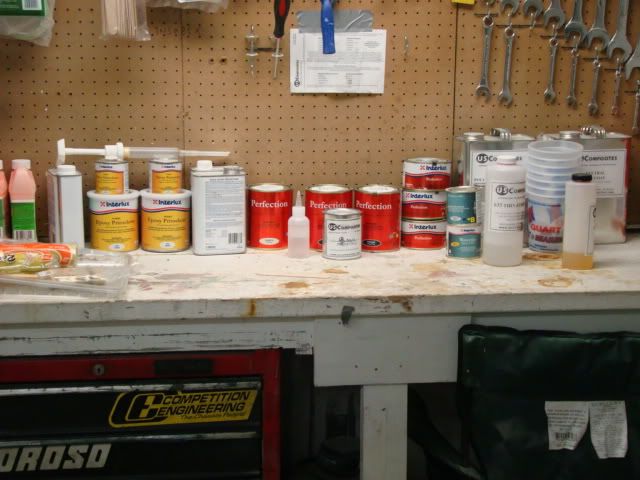
I think I have enough stuff to get started.

DSC06430.jpg
 

tallcanadian

Captain
Joined
Sep 7, 2006
Messages
3,245
Re: My tri-hull transom replacement w/ pics

Your doing great. All this hard work will pay off, I promise.
 

drewpster

Commander
Joined
Oct 17, 2006
Messages
2,059
Re: My tri-hull transom replacement w/ pics

Today I am back in the shop doing the last of the blocking. If all goes as planned, she be in primer by morning! Then bottom paint tomorrow? (lets hope)
 

drewpster

Commander
Joined
Oct 17, 2006
Messages
2,059
Re: My tri-hull transom replacement w/ pics

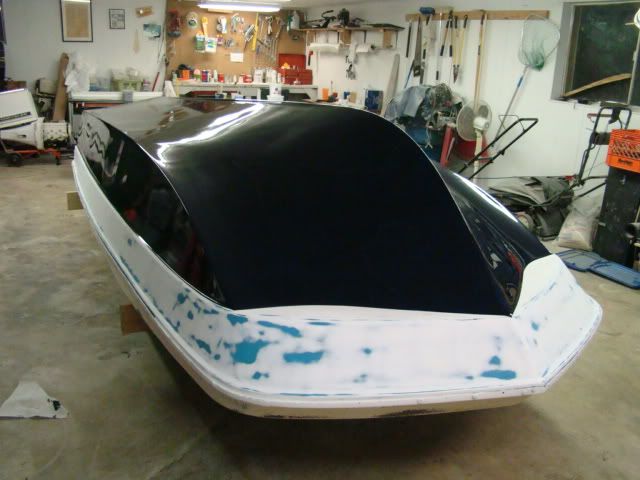
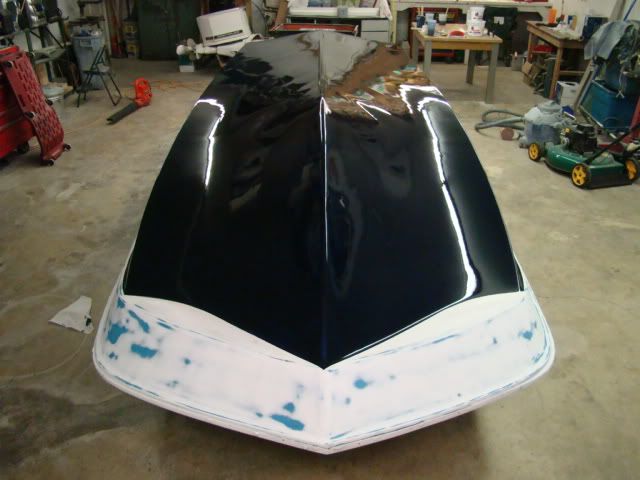
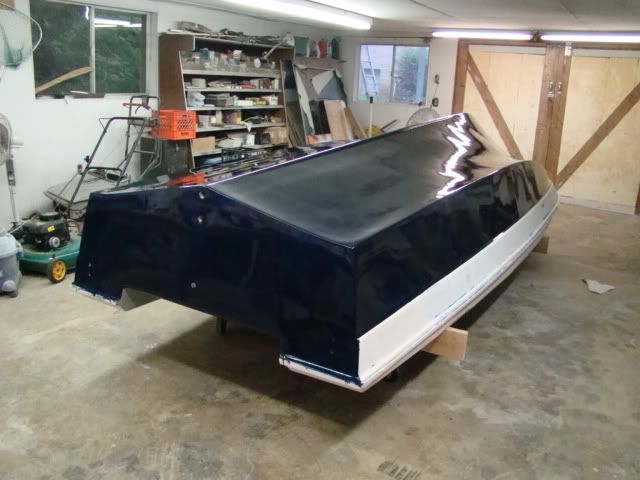
Finally! Im not sure what happened, but I think some paint got on my tri-hull!

DSC06459.jpg


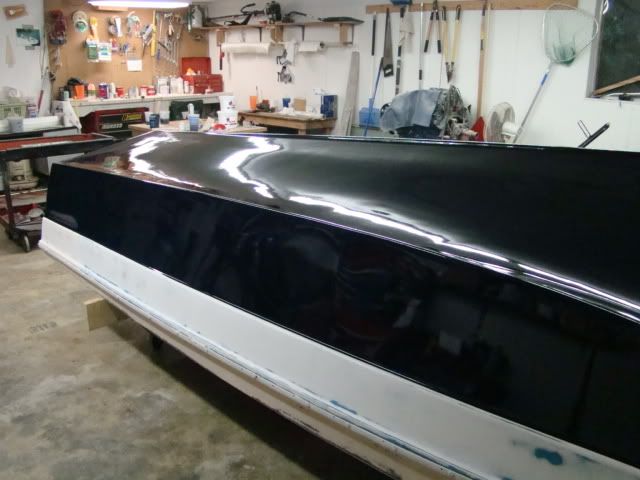
It looks black in the picture but it is really Flag blue. Very Dark. My wife made my mind up for me on the color. I was reluctant for obvious reasons. I wanted to a challenge and here it is.

DSC06465.jpg


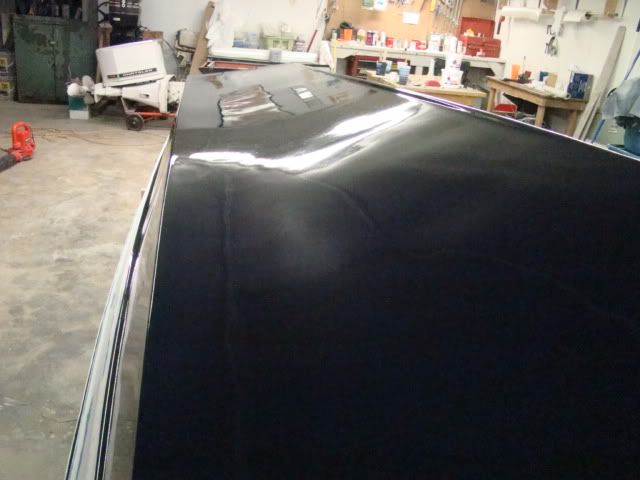
I spent allot of time on the prep for this one and it is still not perfect. There are highs and lows all over it. I knew there would be. But if you think this is rippled you should have seen it before.

DSC06466.jpg


There are some problems in this first coat. I will fix them on the next one. The thin spots show as a faded candy looking blue and there is tons of dust in it.

DSC06464.jpg
 

tallcanadian

Captain
Joined
Sep 7, 2006
Messages
3,245
Re: My tri-hull transom replacement w/ pics

Shut up! LOL. I'm doing my tri hull flag blue. Wow. Tomorrow will be my first coat. Did you spray yours? It looks great.
 

drewpster

Commander
Joined
Oct 17, 2006
Messages
2,059
Re: My tri-hull transom replacement w/ pics

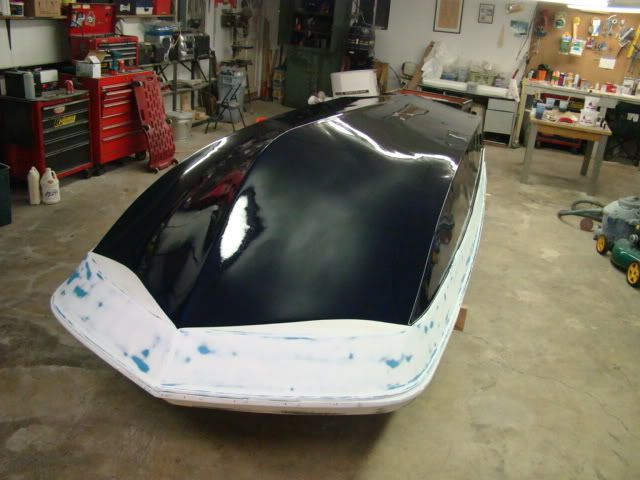
In this shot you can really see the dust. I was not as concerned with it this go-around because I knew this dark color was going to need at least two coats. Man! Crazy shine! This was taken about an hour after it was applied.
pretty happy.

DSC06467.jpg


The portion you see here in white primer (sanded) will get a cream color. I am sure it will be more forgiving.

DSC06464.jpg


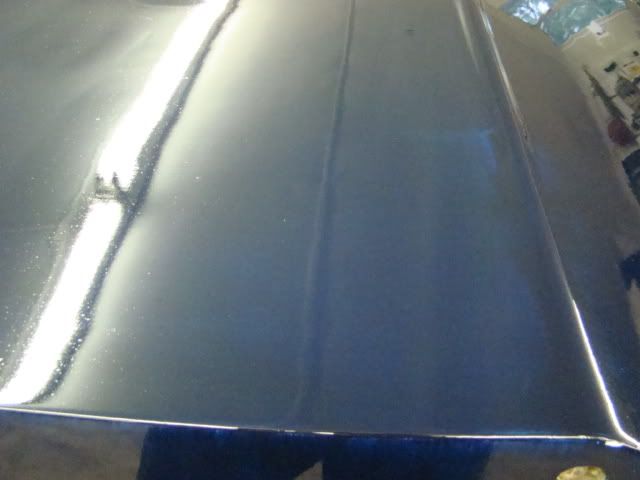
Here you can see some thin spots. With this paint it is best to keep moving. The first coat is not going to be right, the next one will cover these spots.

DSC06462.jpg


The transom turned out great. Flat as it can be. All that long board work paid off here.

DSC06461.jpg


I was advised by many folks not to put this dark a color on this old boat. They were wrong, we love it, ripples and all. I guess I could have worked all of them out with a few more months of filling and sanding. .....NOT! :p

DSC06460.jpg


I will let this cure until the weekend. Then I will get this coat wet sanded and roll on another. I know a few body guys that are eating their words about now. "you cant get a roll on paint to lay flat" Wrong again.
In all, a very good day.

drewp
 

ezmobee

Supreme Mariner
Joined
Mar 26, 2007
Messages
23,767
Re: My tri-hull transom replacement w/ pics

Just a tip.....you will NEVER see the bottom again like you are now. So only sweat the small stuff on the sides.
 

drewpster

Commander
Joined
Oct 17, 2006
Messages
2,059
Re: My tri-hull transom replacement w/ pics

Shut up! LOL. I'm doing my tri hull flag blue. Wow. Tomorrow will be my first coat. Did you spray yours? It looks great.

You and my wife have good taste stretch! I roll/ tipped this. Its a pretty finicky process, but I don?t have a good compressor. Aside from that I think you need a spacesuit to shoot Perfection paint. I prefer my brain damage to come from other, more leisurely pursuits.
 

drewpster

Commander
Joined
Oct 17, 2006
Messages
2,059
Re: My tri-hull transom replacement w/ pics

Just a tip.....you will NEVER see the bottom again like you are now. So only sweat the small stuff on the sides.

True enough. I am curious also to see how perfection holds up to the trailer. We are getting roller bunks to help a little, but I bet it gets beat up pretty quick. Especially with my driving! Thanks for the compliments all. Aside from rigging, this is my favorite part of the job. I used to hate painting, turns out its the prep work that really sucks.:p
 

BobsGlasstream

Commander
Joined
Sep 11, 2009
Messages
2,128
Re: My tri-hull transom replacement w/ pics

Hey drewpster,
I really like your color choice. The Flag Blue should look great. My wife would say that the imperfections adds character. Don't worry about the small stuff.
Bob
 

seamorewaterVIP

Petty Officer 2nd Class
Joined
Jan 6, 2010
Messages
184
Re: My tri-hull transom replacement w/ pics

wow second coat is going to be spectacular!!! progress is slow but man what a shine. even new boats have ripples.:)
 
Status
Not open for further replies.
Top