My tri-hull transom replacement w/ pics

Status
Not open for further replies.

drewpster

Commander
Joined
Oct 17, 2006
Messages
2,059
Re: My tri-hull transom replacement w/ pics

It is a 4"x 1" aluminum and a real life saver. Keep some Acetone near by to clean it out. If had to do over I would buy a smaller diameter to go with it. Maybe 1/2". The one inch works great but I had some tighter corners that I had to use a chip brush to dab the bubbles out. The brush worked fine, but it would have gone quicker with a slightly smaller grooved roller.

BTW aint' that fiberglass dust a Joy! :mad:
 

Josh P

Petty Officer 1st Class
Joined
Aug 26, 2009
Messages
328
Re: My tri-hull transom replacement w/ pics

thanks. yes it is so much of a joy that i planned on grinding over the winter... well that didn't happen. let me ask you this, i will be painting my hull what do you reccommend for filling small dings and holes above and below the waterline. i am painting the bottom with easypoxy (its a trailer boat) and i might do the sides with the same or brightsides. But im flipping the hull to do the bottom while its empty thanks again you've been a big help and motivator. Josh
 

SnowHunter

Petty Officer 1st Class
Joined
Apr 4, 2010
Messages
285
Re: My tri-hull transom replacement w/ pics

Drewp, this thread is a lifesaver!!! You've done a terrific job on the boat! The painstaking details have really helped me with getting the whole process figured out, and a better idea of what I'll need to do to get things goin. Keep at it!!! :)
 

drewpster

Commander
Joined
Oct 17, 2006
Messages
2,059
Re: My tri-hull transom replacement w/ pics

i will be painting my hull what do you reccommend for filling small dings and holes above and below the waterline.

Any repairs you do that penetrate in to the underlying layers will need to be initially built back up using resin and glass to maintain strength in the areas you grind. Any holes you have larger than 1/4" should be ground out and repaired using glass and resin. I have filled holes smaller than 1/4" by grinding a taper down to the hole just a bit and filling it with epoxy filler alone with no problems.
At the top layer, to fair everything back flush, I like to use an epoxy based fairing compound. Epoxy base is far less likely to pop out or crack over time if you keep the thickness of the compound to less than 1/8". Anything deeper than that should be built up with glass and resin before fairing the top layer. You can make your own using resin, cabosil and microballoons, or, you can use a pre-mixed product.
I like Interlux Watertite filler. You can also use it to fill small holes. On large areas, like the complete inside of my hull, I make my own. There are also other products on the market like Quickfair that you can use. I like watertite on the outside of the hull.
 

TimmySRX

Cadet
Joined
Mar 25, 2010
Messages
9
Re: My tri-hull transom replacement w/ pics

Okay a couple of newbie questions if you have the time to answer. I am at the point where I want to start tabbing in a new deck to a 91 Rinker 186 Captiva. So here are a couple of glassing questions I have before I start the tabbing work.
1) Between the deck flooring and the side of the hull there is a slight gap from where I cut the old decking out(small lip from original glass), would you try and remove that glass completely and smooth the transition, or try and fill that gap with PB then tab in with lets say CSM?
2) When tabbing the deck to the side of the hull should I try to use one continuous strip fore and aft of the length of the deck then progressively layer wider strips of CSM overlapping an inch or so in say 3 layers. Could one use the CSM tape to accomplish this?

Maybe you could help me by elaborating a little on the exact process you used to tab the deck to the hull.
I have a pretty good idea of what I want to do, I just want to understand better the detail involved in your process as your from the pics looks really nice. I was hoping to stay way from the roving if possible.

Last question, the underside of the decking, how did you finish that off, a layer of resin and glass, sealed in some manner I suspect, just haven't decided how I want to seal the bottom.

Oh and by the way the work you did looks awesome. I just wish I had that much drive to do that kind of work.

Thanks,
 

Josh P

Petty Officer 1st Class
Joined
Aug 26, 2009
Messages
328
Re: My tri-hull transom replacement w/ pics

Any repairs you do that penetrate in to the underlying layers will need to be initially built back up using resin and glass to maintain strength in the areas you grind. Any holes you have larger than 1/4" should be ground out and repaired using glass and resin. I have filled holes smaller than 1/4" by grinding a taper down to the hole just a bit and filling it with epoxy filler alone with no problems.
At the top layer, to fair everything back flush, I like to use an epoxy based fairing compound. Epoxy base is far less likely to pop out or crack over time if you keep the thickness of the compound to less than 1/8". Anything deeper than that should be built up with glass and resin before fairing the top layer. You can make your own using resin, cabosil and microballoons, or, you can use a pre-mixed product.
I like Interlux Watertite filler. You can also use it to fill small holes. On large areas, like the complete inside of my hull, I make my own. There are also other products on the market like Quickfair that you can use. I like watertite on the outside of the hull.

would you know if epoxy based filler is compatibile with easypoxy? by chance thats my concern thanks again.
 

Chuck Gibson

Petty Officer 2nd Class
Joined
Apr 13, 2005
Messages
123
Re: My tri-hull transom replacement w/ pics

What's happnin'? Where did you go? We need an update!
 

drewpster

Commander
Joined
Oct 17, 2006
Messages
2,059
Re: My tri-hull transom replacement w/ pics

Oh, I'm still here....just been a little busy. I have made some progress though. I will update this evening, if time allows. Thanks for looking in.
 

drewpster

Commander
Joined
Oct 17, 2006
Messages
2,059
Re: My tri-hull transom replacement w/ pics

would you know if epoxy based filler is compatibile with easypoxy? by chance thats my concern thanks again.

Yes, it will work just fine. You may want to use some high build primer just to get everything perfectly smooth and to help with color coverage.
 

Darren Nemeth

Chief Petty Officer
Joined
Dec 25, 2007
Messages
561
Re: My tri-hull transom replacement w/ pics

would you know if epoxy based filler is compatibile with easypoxy? by chance thats my concern thanks again.

I asked the same in an email to Petit regarding Marine Tex and was told the two work well. Just sand the Marine Tex and the primer will sitck
 

Josh P

Petty Officer 1st Class
Joined
Aug 26, 2009
Messages
328
Re: My tri-hull transom replacement w/ pics

ok thanks guys drewpster no intentions on hi jacking... thanks for all your help will be watching you finish her up soon.. and motivating me thanks for all the info in this thread.. Josh
 

drewpster

Commander
Joined
Oct 17, 2006
Messages
2,059
Re: My tri-hull transom replacement w/ pics

No problem Josh. I want people to ask questions, that's why I have the thread. When/ If I ever make the "Completed Projects" thread, I will be editing this one anyway.
Now, if anyone goes off on a tangent about baking cookies or politics, I may have to put my foot down.:D
 

SnowHunter

Petty Officer 1st Class
Joined
Apr 4, 2010
Messages
285
Re: My tri-hull transom replacement w/ pics

No problem Josh. I want people to ask questions, that's why I have the thread. When/ If I ever make the "Completed Projects" thread, I will be editing this one anyway.
Now, if anyone goes off on a tangent about baking cookies or politics, I may have to put my foot down.:D

Whatchu got against bakin cookies? huh?


:D

This thread has been VERY helpful!!! Really appreciate ya takin the time and posting the details!!! :)
 

drewpster

Commander
Joined
Oct 17, 2006
Messages
2,059
Re: My tri-hull transom replacement w/ pics

Well some stuff is getting done finally.
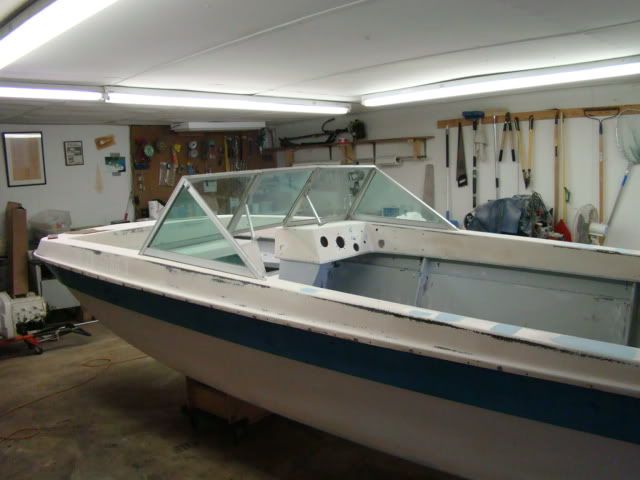
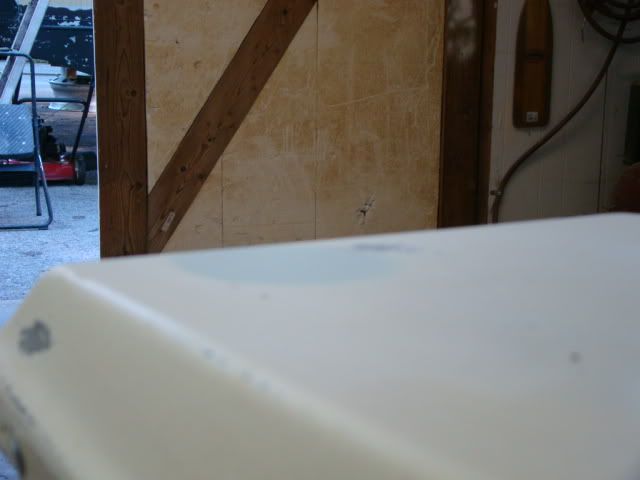
I set the windshield in place to get the dash boxes positioned so that the "walk through" door would work properly.

DSC06296.jpg

Its a pretty tight tolerance so I wanted to make sure they were in the right place.

I have been filling holes all over the place. This thing is Swiss cheese. Over the years people have mounted just about everything to this boat. Normally holes are filled from the inside surface. This allows for a minimum of cosmetic work on the outside gelcoated surface. The process is the same whether the grinding gets done from the inside or the outside. I'm doing them from the outside because I am painting, and I wont have to deal with access problems I would have working from inside the hull.

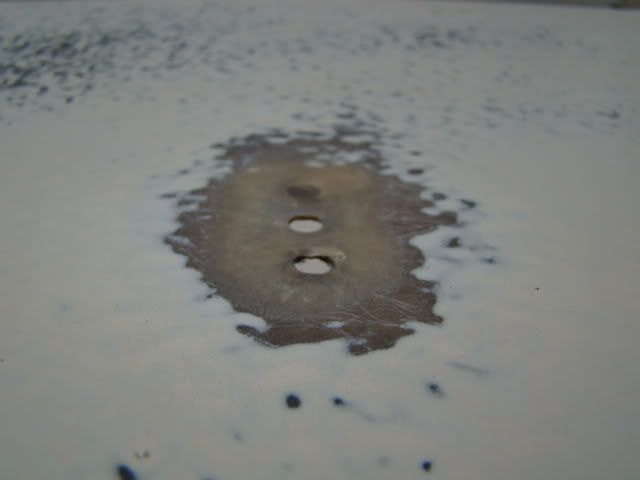
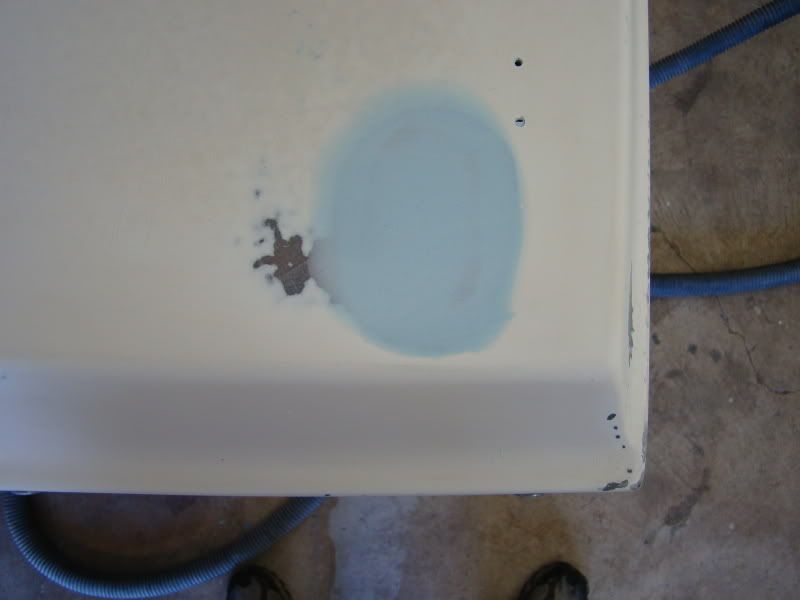
Here is a prime example of what NOT to do when filling holes.

DSC06314.jpg


These holes were filled by simply backing them with a piece of wood and pouring polyester resin in to them. (I know because I did it about five years ago) As you can see the resin has broken loose and dropped down in to the holes exposing them. The resin shrank as it cured and is falling out.

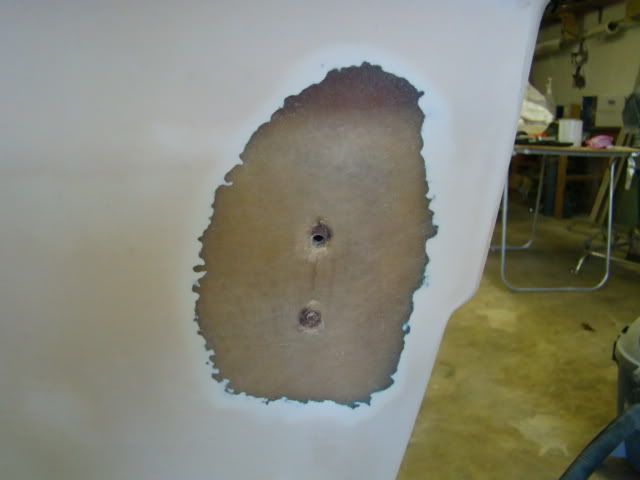
To start I grind a perimeter around the holes that tapers down in to the hole forming a shallow funnel shape. These holes are small enough that there is no need to go too deep. The idea is to replace enough glass to maintain strength and to expose enough surface area so that the resin has a strong bond.

DSC06310.jpg


This is probably a little overkill for those holes. I just wanted to insure that I have a good bond. I am using polyester resin to glass these holes up.

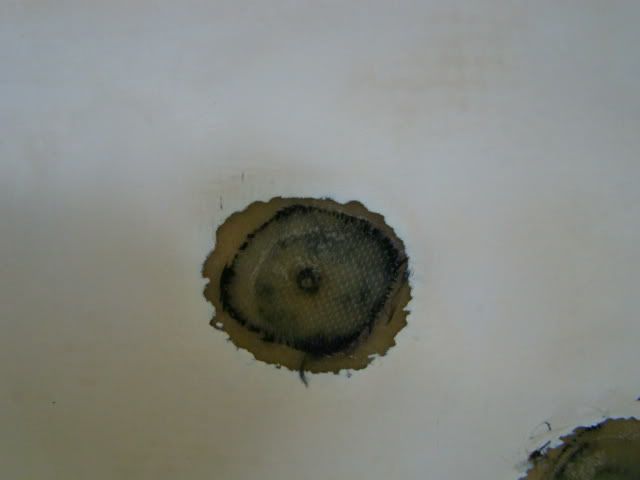
Next I cut some fiberglass circles using 1.5oz. csm and some light weight surfboard cloth. I started with a small button to cover and fill the hole itself. i then covered that with progressively larger circles until the "funnel" is filled with resin and cloth to just below flush to the finished surface.

DSC06311.jpg

I topped off the repair using the tightly woven surfboard cloth to make a relatively smooth surface to minimize grinding when I finish it. I used this hole as the example because the other two are going to need some dowels to fill them.
 

drewpster

Commander
Joined
Oct 17, 2006
Messages
2,059
Re: My tri-hull transom replacement w/ pics

After a little clean up with a sander and some solvent I coated the glassed holes with filler. The filler here on the gunnels (yet another of a million holes) is Interlux Watertite. I used a soft plastic spreader (bondo scraper) to coat the area overfilling it slightly.

DSC06312.jpg


After allowing the filler to cure I started the sanding by using my orbital to sand around the perimeter of each hole. The idea is to bring the surrounding area back down flush while avoiding the center of the filler. I do not use a power sander to "block" the area completely flush. It is very difficult to get the area flat using a power sander. The larger the area, the more difficult it is. It works better to do the final sanding by hand using a flat block.

DSC06307.jpg

In this picture you can see a slight high spot just to the left of the filler. When this area is painted you will never know a cleat was once mounted here.
 

drewpster

Commander
Joined
Oct 17, 2006
Messages
2,059
Re: My tri-hull transom replacement w/ pics

Here is another shot of the filled holes where the cleat was. I had to fill these because I am not using the original cleats. The new ones are going to have a different footprint.

DSC06308.jpg


I also got my brass drain holes for the transom and the splashwell. The next challenge is to come up with a tool to flair them in to place. (when the time comes)
DSC06303.jpg


I ordered three because I am sure to screw it up. Maybe I should have ordered four.:rolleyes: There are tools available to do it correctly. But I cannot see spending the money on a tool I am going to use once.
The walls of these drains are pretty thin.

DSC06305.jpg

I am also going to need some 5200 to seal them up.

I am going to be taking a vacation from work in two weeks. I hope to have this thing ready for paint by then. Wish me luck/ time!
 

BobsGlasstream

Commander
Joined
Sep 11, 2009
Messages
2,128
Re: My tri-hull transom replacement w/ pics

drewpster,
OK, Good luck. :D
Vacation sounds good too. I'm taking a couple days off next week but going to see my second granddaughter turn 3. No boat work then.
Once again good luck with the plan.
Bob
 

tallcanadian

Captain
Joined
Sep 7, 2006
Messages
3,245
Re: My tri-hull transom replacement w/ pics

That filler looks great. Smooths everything out. I didn't know that Interlux made a filler. Good to know. Boat looks great. Awesome tri hull.
 

tinkeringwackyone

Chief Petty Officer
Joined
May 2, 2008
Messages
415
Re: My tri-hull transom replacement w/ pics

looking good drewpster. slowly but surely, I have found that out, any progress is good progress.:)
 

jcsercsa

Captain
Joined
May 21, 2007
Messages
3,401
Re: My tri-hull transom replacement w/ pics

Yep your getting there drewpster, hit that tube with alot of the pl, you still thinking the blue for paint ?? John
 
Status
Not open for further replies.
Top